Tag

CoffeeMate

Browsing

BakedPaneerKababs_Featured2
I
ts raining cats and dogs as Monsoon is here in full swing. One tends to get carried away with the pleasant weather and feel like indulging in fried pakodas or tikkis or something sinful accompanied with a hot cup of tea. I am one of you , guilty of indulgence. The other day I came across this baked kebab recipe. It was worth every effort as it seemed promising, keeping all those extra calories at bay πŸ™‚

BakedPaneerKababs_Featured3
The Kebabs were not only easy to put together but also delicious and barely brushed with oil. Finally I found a guilt free monsoon friendly snack. Try it..you will thank me πŸ˜›

Directions:
1. In a bowl add crumbled paneer and boiled sweet corn kernels. *


DSC02360


DSC02361


2. Add bread crumbs** and freshly chopped coriander leaves.


DSC02362


DSC02363


3. Add to this grated carrots and chopped green chilies. 


DSC02364


DSC02367


4. Mix this with a spoon and add turmeric powder and salt.


DSC02365


DSC02366


5. Also add amchur and red chili powder.


DSC02368


DSC02369


6. Also add some Kasuri Methi  and some raisins.


DSC02370


DSC02371


7. Combine everything well. 

DSC02372

8. Take small portion in your palms and make patties with the mixture.

DSC02373
9. Place half cashew on top and press a little.

DSC02374
10. Place them on a baking sheet lined with parchment paper or aluminium foil. Cling wrap them and refrigerate for 25-30 mins. In the mean while preheat the oven on 180 degree for 10 minutes and brush the top of kababs with oil.

DSC02375
11. Bake them in centre rack for 25-30 minutes until the crust is golden brown. Serve hot with Pudina Chutney or Palak Dhaniya Chutney.

Try other Monsoon Special Snack: Arbi Ke Patton Ke Patode, Sabudana Tikki, Healthy Kachalu Chaat.

BakedPaneerKababs_Featured1

[yumprint-recipe id=’155′]


I first ate Arbi Ke Patte Ke Patode when my friend brought this in office during lunch. I relished its taste so much that the memory stayed fresh in my mind in spite of all these years. Then the other day my maid asked me if I use colocassia leaves or arbi k patte for cooking. I felt overwhelmed on hearing this and said yes yes!! She brought me some the next day from someone’s abandoned farm (my meaner self says I don’t mind ;))

I called my friend and quickly asked her the recipe. I planned to make this for evening snacks. My husband seemed not so excited and the idea sounded weird to him. Its a normal phenomena with him, things he hasn’t tried he doesn’t trust. When I finished making them he couldn’t stop eating them. Infact my little boy also ate couple of them. What a bliss it was πŸ™‚

They are made in many ways in different part of India and known by various names. In Maharashtra its known as Alu Wadi, in Gujarat it is known as Patra, in North India it is known as Arbi Ke Patore or Patode.

Directions:

1. Select the softest and youngest leaves, they taste the best. I had no option of selecting.. you see beggars are not choosers πŸ˜› Cut the central stem and remove the hard membranes using a knife.


DSC01473


DSC01474


DSC01487


2. Wash them thoroughly and pat dry with a kitchen towel. Set aside.

DSC01475
3. In a bowl add besan or chickpea flour. Also add salt and red chili powder.


DSC01476


DSC01477


DSC01478


4. Also add Coriander powder, Amchur and Cumin Powder.


DSC01479


DSC01480


DSC01481


5. Add Ginger Garlic paste.

DSC01482
6. Add a little water and make a paste. Do not add all water at once, add little by little and keep stirring to make a lump free batter. The batter should not be thick nor runny. Just right.

7. Place one leaf on a flat surface. The glossy and smooth part facing down. Spread the batter generously on top .

DSC01489
8. Place another leaf on top of it and keep doing this for 5-6 times. If you have large leaves you can stop after placing 4 leaves.

DSC01490
9. Fold the ends from both sides as depicted in the picture.

DSC01491
10. Now start rolling them from one end. Keep applying the batter in the inner side also.


DSC01492


DSC01493


DSC01494


11. Now repeat this with another set of leaves. And keep them ready to be steamed. Heat water in a vessel.

DSC01495

12. I placed the rolls on my dhokla stand. But you can use a wire mesh or steel plate with holes too. 

DSC01496

13. Cover with a lid and let it steam for 15 minutes on high heat.

DSC01497
14. Once steamed they will look like this with all the batter steamed and non sticky.

DSC01498
15. Let them cool down and come to room temperature. Now cut them into slices using a sharp knife. If you try cutting them while still hot they might break.

DSC01499
16. Heat oil in a wok or kadhai. and fry them for a minute on both sides till crisp and brown. The browner the crispier.


DSC01501


DSC01500


17. Remove them on a paper towel to absorb extra oil.

DSC01502
18. Sprinkle some chat masala on it and serve hot with lemon wedges and mint chutney

You can try other snacks such as Roasted Rosemary Garlic Potatoes, Sabudana Wada, Healthy Kachalu Chaat.
Other Chutneys you can club with these snacks are Pudina Chutney, Coriander Spinach Chutney, Coriander Chutney without Onion Garlic.

[whohit]ArbiKPatore[/whohit]

[yumprint-recipe id=’132′]

Bublici_Russian Bagels
Some time back I had posted recipe of Classic Russian Borsch on my blog. I had also mentioned how my husband was fond of Bubliki, a Russian style Bagel during his early years in Russia. I wanted to make this bagel bread for him to unite him to his favourite childhood snack.

Bublici_Russian Bagels
I looked for recipes over the net and found that there is largely no basic difference between Bubliki and American Bagel. They are both made with boiled dough. Just that the Bubliki has much larger holes than bagels. Mine also ended up looking like American Bagels. Bubliki are also considered to be more denser and much chewier than bagels. But my husband enjoyed them to the fullest. I do not claim this to be an authentic recipe. But its much closer to the real one πŸ˜‰

Directions:

1. Take All Purpose Flour in a bowl and make well in the center.

DSC07692
2. Add Sugar and Instant yeast.


DSC07694


DSC07695


3. Pour Milk in the well.

DSC07696
4. Close the well by flicking flour on the surface of the milk.  Let it sit for one hour.

DSC07698
5. After an hour of resting add salt and butter.


DSC07699


DSC07701


6. Combine everything and knead into a soft dough. It should take good 15 minutes. The softness of bagels depends on this.

DSC07702
7. Cover the kneaded dough with a cling wrap and let it rest for 2 hours.

DSC07703

8. After two hours bring the dough on a non- floured surface and deflate. Knead again for 5 minutes.


DSC07704


DSC07705


9. Divide the dough into 10 equal size using a pastry scrapper or sharp knife.


DSC07707


DSC07708


10. Roll each part into seam less balls. Cover these balls under a lint free kitchen towel.


DSC07709


DSC07710


11. Poke a hole in each piece by pinching it through the middle with your thumb and first finger and then poke your finger through the hole and gently stretch out each piece from the center so that it is a circle.


DSC07711


DSC07712


DSC07713


12. The holes have to be made 4 cm in diameter because they have a tendency to stretch back and close. Therefore, they need to be stretched and placed on a slightly floured kitchen towel for 30 minutes before proceeding further. Do not forget to cover them from top.


DSC07714


DSC07716


13. In the meanwhile preheat your oven to 220 Degree C. (Learn more about Oven temperatures and Conversions).  Line a baking sheet with Oddy Uniwraps parchment paper. Also boil water in a large wide vessel. Place the bagels in water for thirty seconds. Do not over crowd the vessel.  


DSC07717


DSC07718


DSC05503


14. Remove them with  slotted spoon on a wire rack to drip off extra water. I placed them directly on the baking sheet lined with parchment paper and they got stuck on baking. I don’t want you to commit the same mistake.

DSC07719

15. Once the extra water is dripped off, place them on the parchment paper lined baking sheet and glaze them with eggwash and sprinkle them with poppy seeds and Sesame seeds. I made two batches one with either one of them.


DSC07720


DSC07721


DSC07722


16. Bake them in oven for 25-30 minutes or until you see them golden brown in colour. Cool them completely before indulging. Apply some butter and enjoy with your favourite cup of coffee or tea.

Other Russian Recipe you can try is Borsch, Russian Beetroot Soup.

You may also like to try : Whole Wheat Sandwich BreadChinese Black Sesame Steamed BunsCherry Focaccia Bread with Rosemary and Sea SaltRosemary Garlic Focaccia Bread, Cinnamon Raisin BreadBeetroot Bread with Garlic and ThymeHoney Oats BreadDomino’s Garlic Breadsticks.

Bublici_Russian Bagels

[yumprint-recipe id=’128′]

PumpkinRolls_Featured1
Honestly, my love for Pumpkin was never sudden. Infact I always considered pumpkin as a vegetable to make Indian cuisines or my Grandmother’s delicious Kaddu ka Halwa . Until Mexico happened and that is were I discovered that pumpkin is more than we think it to be. My respect for pumpkin grew overnight as I  started experimenting with Pumpkin Puree. I learnt to make this Puree at home which made it a ready to make ingredient which can be used to make Pumpkin Rolls, Pumpkin Muffins, Pumpkin Bread and much much more.

In the west Pumpkins are symbolic to Halloween, a famous festival to remember saints, martyrs and all departed souls. Pumpkin is used to make feasts and even used for carving. The warmth of Pumpkin Puree along with spices makes the winter cozy and comfortable. So how are you celebrating your halloween. Treat or Trick? πŸ˜‰ 

Directions:

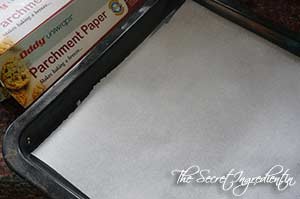
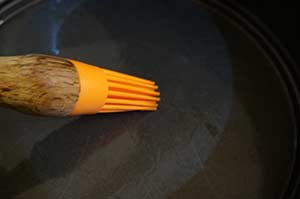
1. Line a Large rectangular baking tray with Parchment Paper  and brush it with Vegetable Oil . Set aside. Pre heat the Oven to 375 Degree Fahrenheit. Learn more about Oven Temperatures and Conversions

PumpkinRolls1
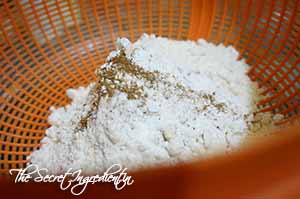
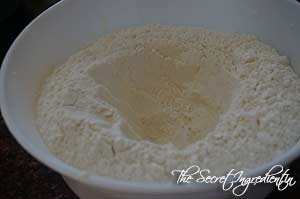
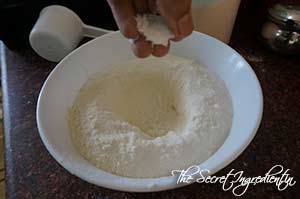
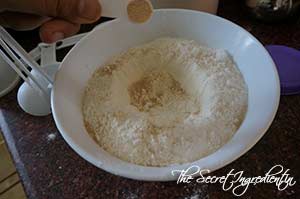
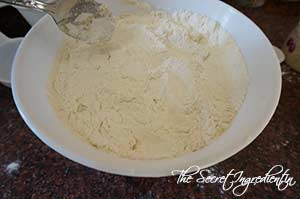
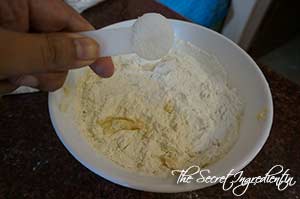
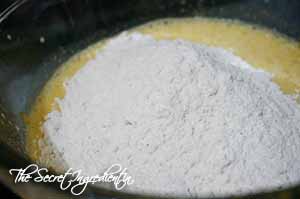
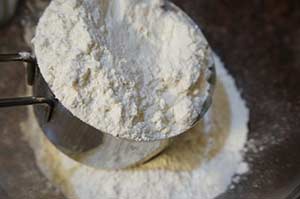
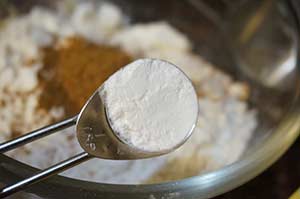
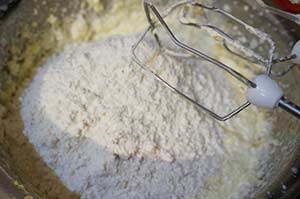
2. Sift All Purpose Flour, Salt, Baking Powder and Pumpkin Pie Spice (Learn to make homemade Pumpkin Pie Spice) using a sifter, so that the flour becomes lump free.

PumpkinRolls2

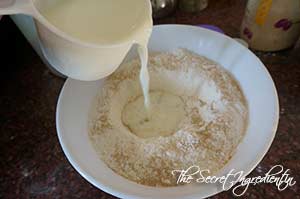
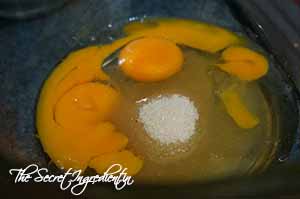
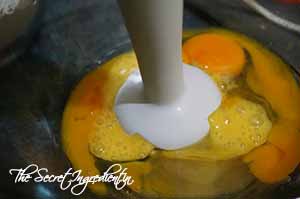
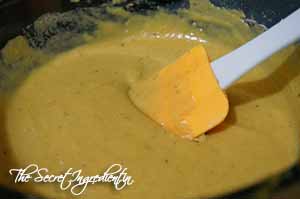
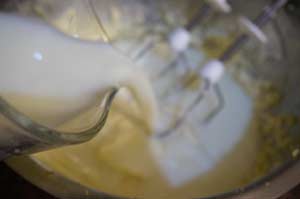
3. In  a large bowl whisk together eggs and sugar so that the mixture becomes thick and pale in colour.


PumpkinRolls3


PumpkinRolls4


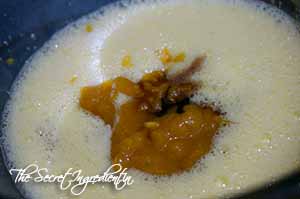
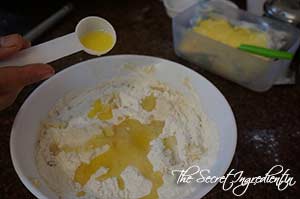
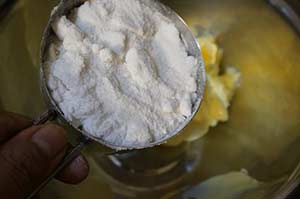
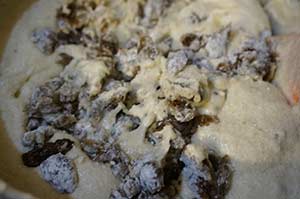
4. Add in Pumpkin Puree and Vanilla essence together to the egg mixture and combine together. You can make Pumpkin Puree at home or you can use canned pumpkin puree.

PumpkinRolls5

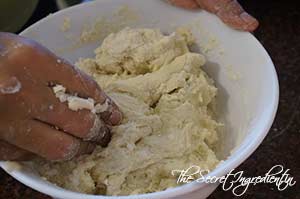
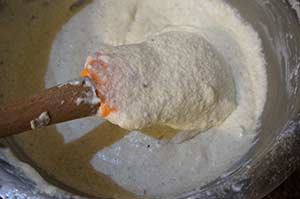
5. Add the sifted flour mixture to it and combine to get an even batter. Do not over mix.


PumpkinRolls6


PumpkinRolls7


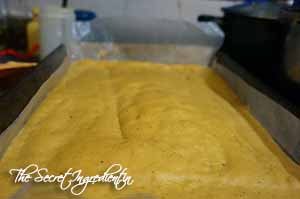
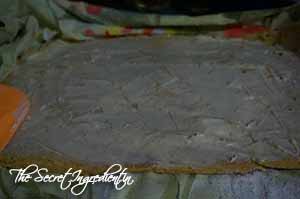
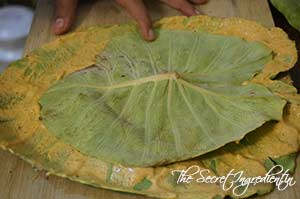
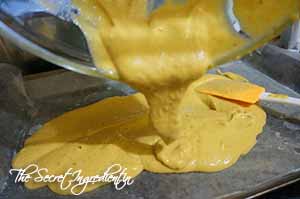
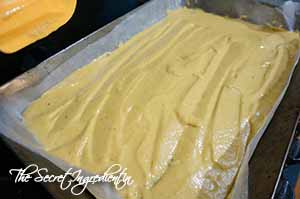
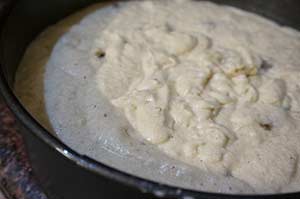
6. Spread the batter on the baking sheet lined with Baking Sheet. I have used Oddy Uniwraps Parchment Paper, because it makes baking a breeze. It ensures the cake bakes perfectly without sticking to the paper or tray and makes cleaning hassle free.You can use spatula to evenly spread the batter.


PumpkinRolls8


PumpkinRolls9


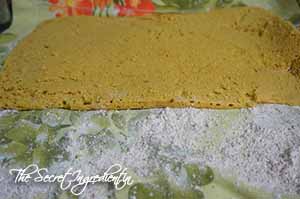
7. Bake it in preheated oven for 12 to 14 minutes or until the cake has cooked thoroughly.Let it cool for 5-7 minutes.

PumpkinRolls10

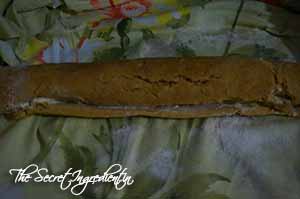
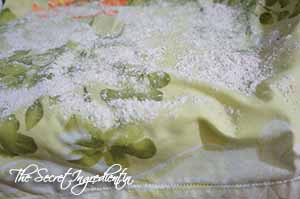
8. On your counter spread a kitchen towel and dust it with Confectioner’s Sugar generously. Remove the cake from the baking tray along with parchment paper and place on kitchen towel with parchment paper facing upwards and cake downwards. Now carefully remove the parchment paper.


PumpkinRolls12


PumpkinRolls13


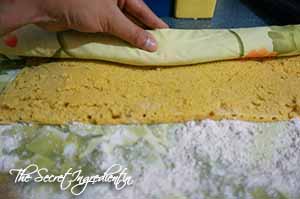
9. Roll up the cake along with towel into a jelly roll starting from the shorter side. Let it cool completely for an hour or so.


PumpkinRolls14


PumpkinRolls15


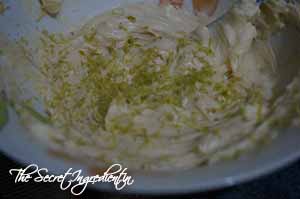
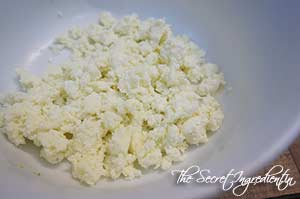
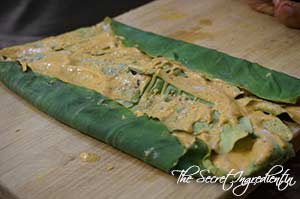
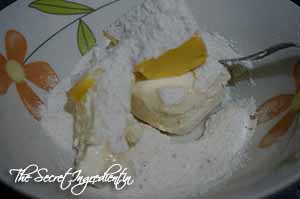
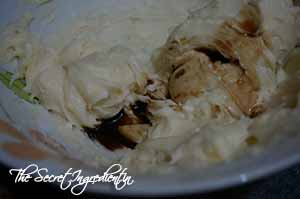
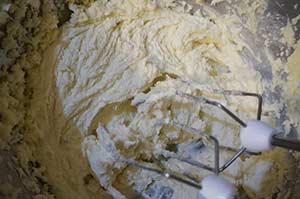
10. Now for the filling you need butter and cream cheese at room temperature. Cream them together using a whisk. Add to it confectioner’s sugar or powdered sugar and little vanilla essence.


PumpkinRolls16


PumpkinRolls17


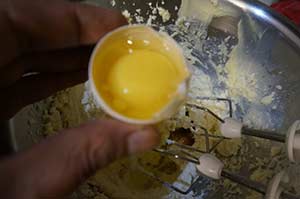
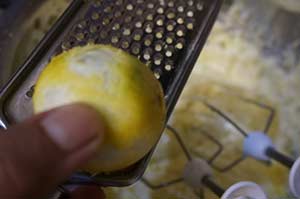
11. Add zest of orange or clementine to it and mix.

PumpkinRolls18

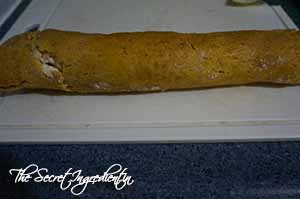
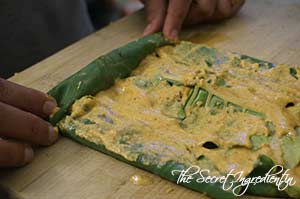
12. Now unroll the cake and spread the cheese filling on top using a spatula.

PumpkinRolls19

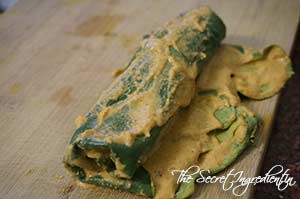
13. Now roll the cake again but this time without the towel. Try not to crack the cake. But if you get cracks never mind. πŸ™‚

PumpkinRolls20

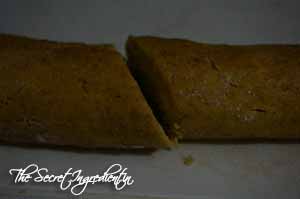
14. Wrap this with the kitchen towel from top and let it set in refrigerator for couple of hours. You can even do it over night. 

PumpkinRolls22

15. After refrigeration for several hours unwrap the cake roll on a tray .

PumpkinRolls23

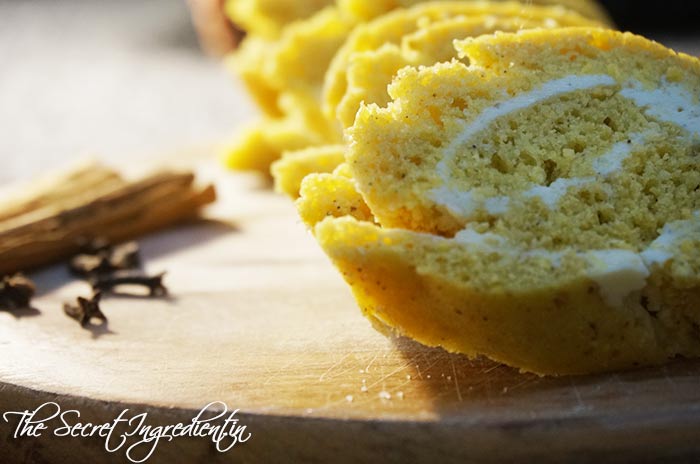
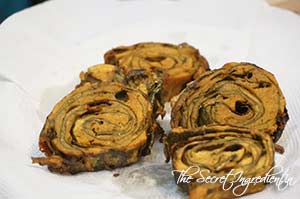
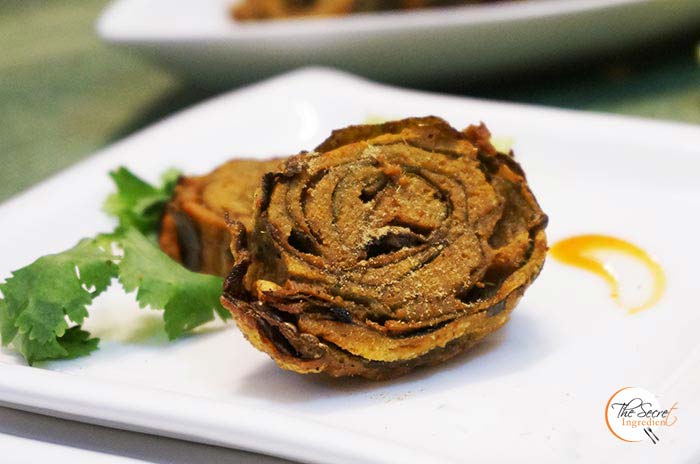
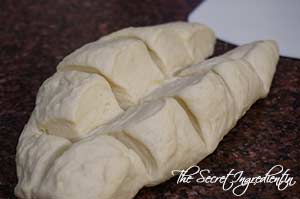
16. Cut it diagonally into half from the center.

PumpkinRolls24
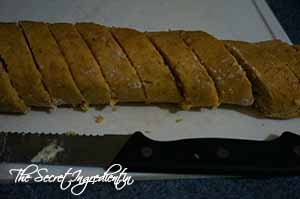
17. Keep slicing it on an angle into smaller pieces.

PumpkinRolls25
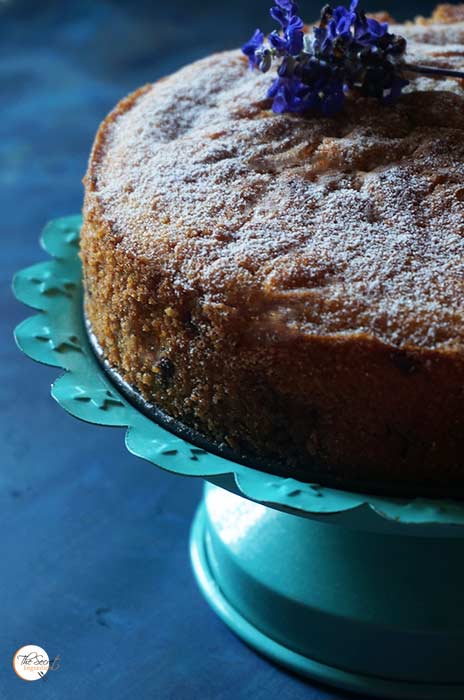
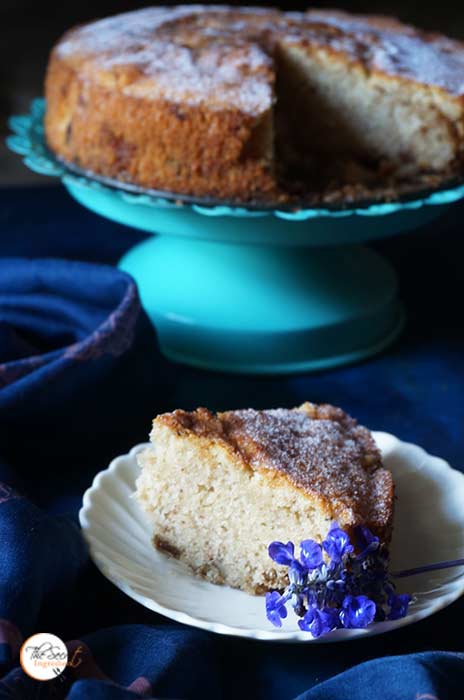
18. Serve with your favourite cup of Coffee or simply like that.

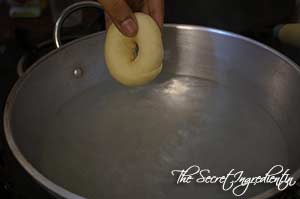
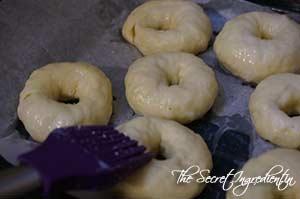
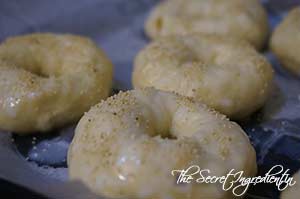
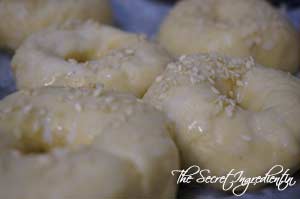
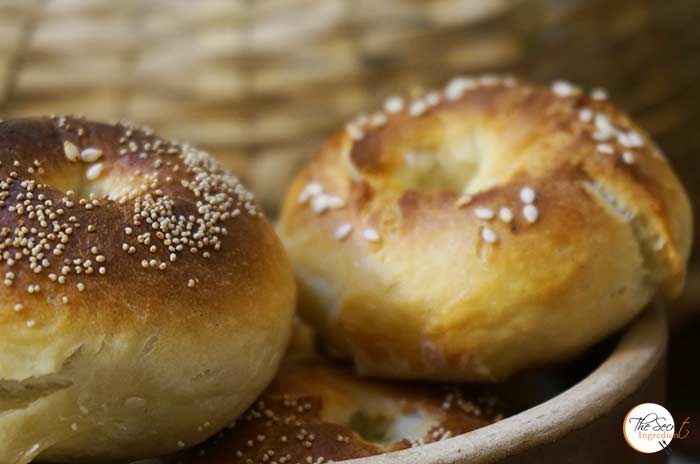
Other things you can try with Pumpkin are: Pumpkin ka Halwa, Pumpkin Puree Buns.

PumpkinRolls_Featured2
[whohit]PumpkinRolls[/whohit]

[yumprint-recipe id=’67’] 

Spiced Raisin Coffee Cake

I always say baking is so therapeutic . I love to bake whenever I am low or I am happy or I have nothing else to do. I always wanted to learn baking but there was no one in my family who had prior experience in baking. So I started searching internet and after a lot of hit and trials I can say I can bake a perfect cake once in a while πŸ˜› Sharing this recipe of Spiced Raisin Coffee Cake with you which surprisingly came out so well.

Spiced Raisin Coffee Cake
Update: Last I had made this Spiced Raisin Coffee cake when I had just started blogging. I hadn’t posted step by step pictures of the recipe but since then the taste of the cake and this thought had been haunting me. Yesterday when I had some family people visiting us I took the opportunity to bake this for dessert. It certainly was loved. The flavour of Pumpkin Pie Spice, lemon zest and vanilla made everything very aromatic and divine. The texture of the cake was absolutely gorgeous and the credit goes to inclusion of organic eggs from Eggee. They are the best quality eggs I have come across. If you like in Delhi, NCR get yourself a pack and try them out!

Directions :

1. Preheat your oven to 350 degrees, (Know more about Oven Temperature and Conversions) grease a 8 inches Springform with non stick cooking spray. You can buy this spring foam pan from our online store The Gourmet Shop.

2. In a large bowl, add All Purpose Flour, Baking Powder and Pumpkin Pie Spice. You can make your own pumpkin pie spice. Get the recipe here. Mix everything and set aside.


3. In a small bowl, mix raisins with about Β½ cup of the dry ingredients and toss well until all the raisins are covered in the flour mixture, set aside.

4. In a large bowl, cream together the butter and sugar for about 1 minute. 


5. Whisk in eggs, vanilla and lemon zest 


6.Add milk and buttermilk and mix everything until it’s a nice smooth batter. You can make Buttermilk at home. Just follow this simple recipe.

7. Add the dry ingredients and mix until all the dry ingredients are moistened but not over mixed.


8. Fold the raisins mixture in the batter, pour batter into the prepared pan making sure to smoothen out the top.


9.In a small bowl, mix add castor sugar and brown sugar.  Add chopped walnut and cinnamon powder . 


10. Also add cold butter cubes and mix it with your fingers or a fork until its has sand like texture.


11. Spread it evenly over the cake and bake for 30 to 35 minutes or until a toothpick inserted in the center comes out clean.

12.Let cool for about 15 minutes before slicing and serving.

Other Naked Coffee Cakes you can try are: Eggless Black Grape Cake with Strawberry Jam GlazeFestive Orange Blueberry Pound Cake Peach Upside Down CakeVanilla & Pomegranate CakeVegan Chocolate Banana Cake , Lemon Cake with Lemon Glaze ,Chocolate Vanilla Marble Cake,  Eggless Orange Cake with Candied Orange Peel Filling Surprise Heart Inside Cake, Eggless Almond Vanilla Cake.

Spiced Raisin Coffee Cake

[yumprint-recipe id=’3′]