Tag

Traditional Recipes

Browsing


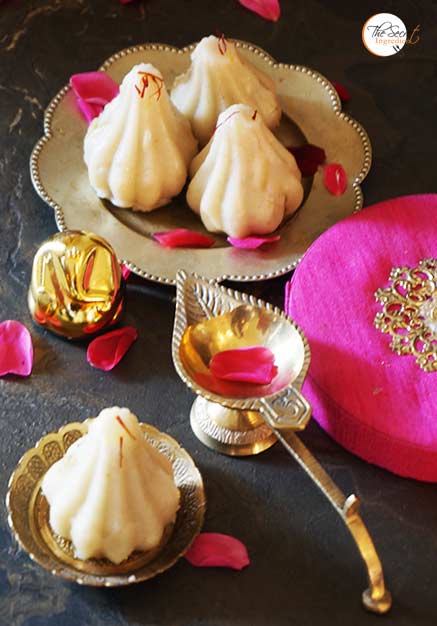
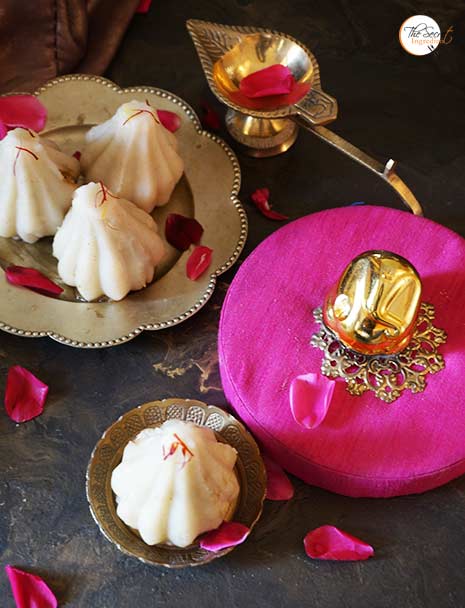
Ganesh Chaturthi is a Hindu festival celebrated with a lot of sentiments in India. It’s also known as Vinayak Chaturdashi. This festival is to celebrate the birth of Lord Ganesha, the elephant headed God who is the son of Lord Shiva and Goddess Parvati. Ukadiche Modak or Steamed Rice Flour Dumplings with Coconut and jaggery is made as an offering to Lord Ganesha. Its believed that these modaks are God’s absolute favourite.


To be honest I had never tasted ukadiche modak in my life before because I live in the northern part of the country and this festival is predominately celebrated in the southern states. Therefore, at the outset of the festivity I decided this is the best occasion to try this new recipe and also to please the God on his birthday. Not to mention I will also get a chance to taste the so raved about modaks. To shape the modaks requires great deal of skill. Its like shaping momos. tibetan dumplings with gluten free rice dough. I chose the easier path (smart me!) I used a modak mould which makes swanky modaks with lesser efforts. How cool it is ! 😉 Before, I go gaga over my crippled skills I will take you to the recipe so that you can even try and enjoy the festivity.

Directions:
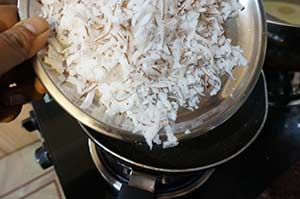
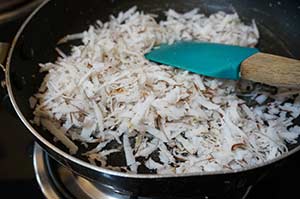
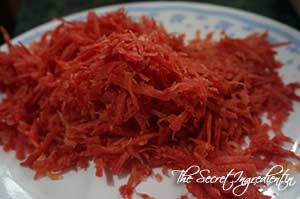
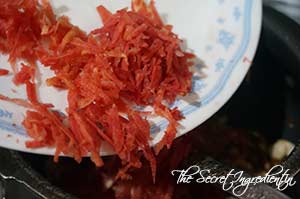
1. For the filling of modak grate fresh coconut and roast in a pan on a medium flame.


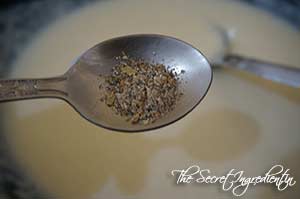
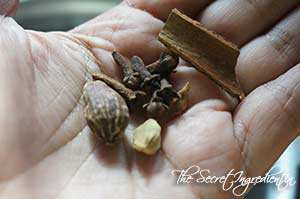
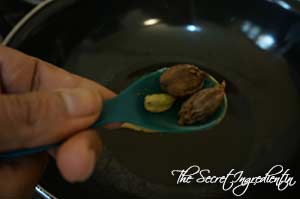
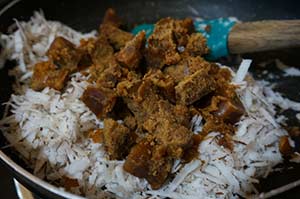
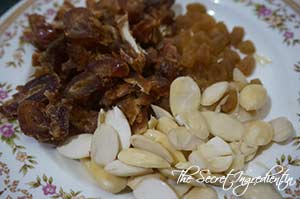
2. After the coconut has roasted a bit add chunks of jaggery. Also add cardamom powder and mix well.


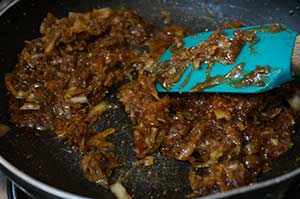
3. Keep tossing the filling till jaggery has melted and the mixture has come together. The filling will still be sticky because jaggery is still hot. It will become crumbly and less sticky after it has come to room temperature. Therefore, set aside and let it come to room temperature.

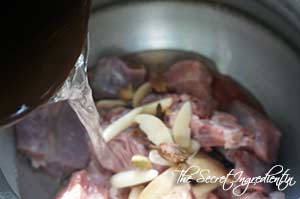
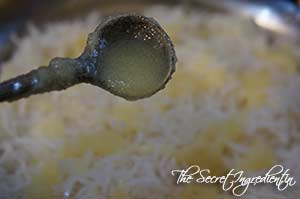
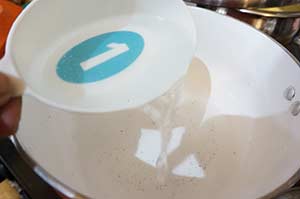
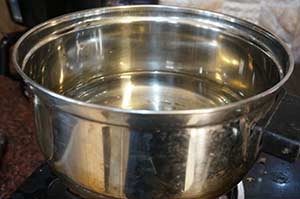
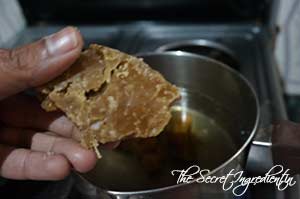
4. For the dumpling or the outer covering boil water in a pan. Add ghee.


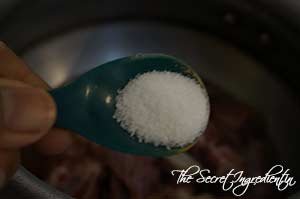
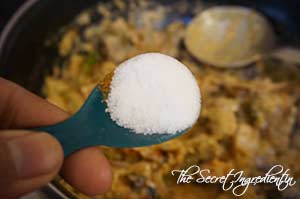
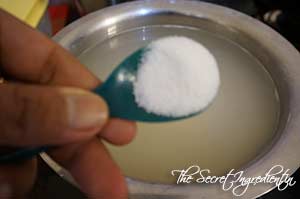
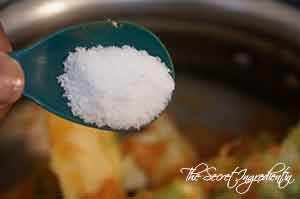
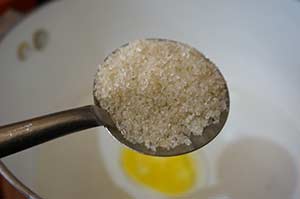
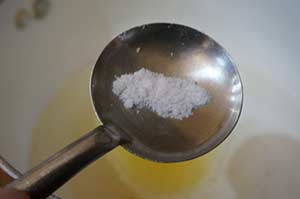
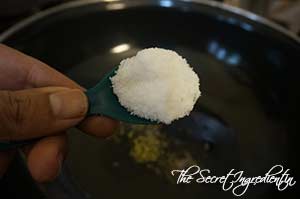
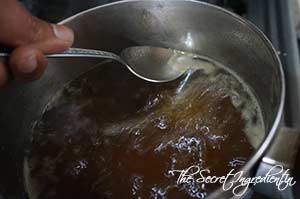
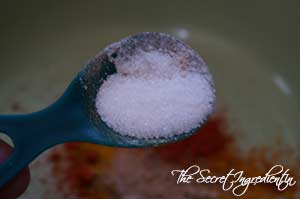
5. Add sugar and salt and combine and give the liquid a boil.


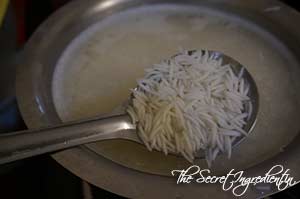
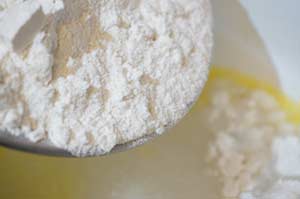
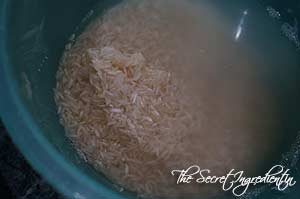
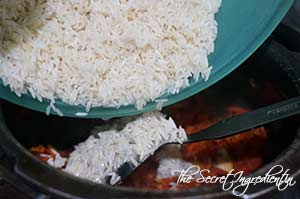
6. Add rice flour and combine. The flour will absorb all liquid.


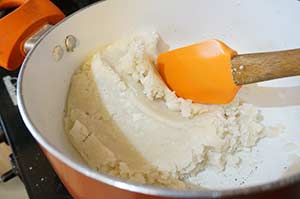
7. Cover the pan with a lid and let it simmer on low flame for 3-4 minutes.


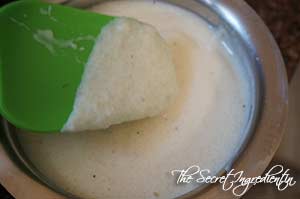
8. Now turn the flame off and let the dough cool down a bit. Apply little ghee on your hands. While its still warm knead it together to bring everything together.


9. Cover with a damp kitchen towel till further use.


10. Apply ghee on the modak mould, both sides.


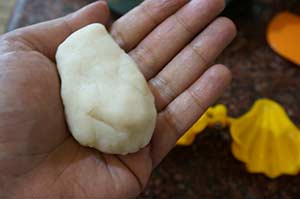
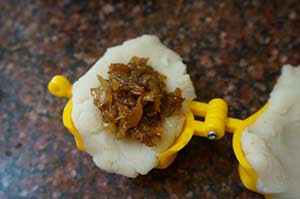
11.Take a small portion of dough and apply on one side of the mould. Make sure its a thin layer. Repeat the same for the other side.


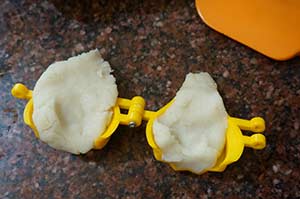
12. Take the coconut jaggery filling and add a little, say half a spoon. Do not over fill it for it will leak out at the time of steaming.

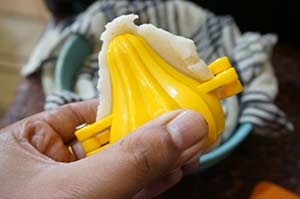
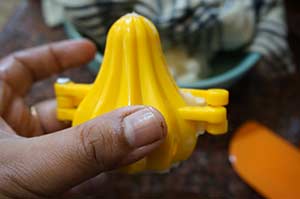
13. Now close the mould and you will notice the extra dough will ooze out. Remove that. Also add a bit of dough on the base of mould to skirt the filling. I missed taking picture of this step. I hope you understood.


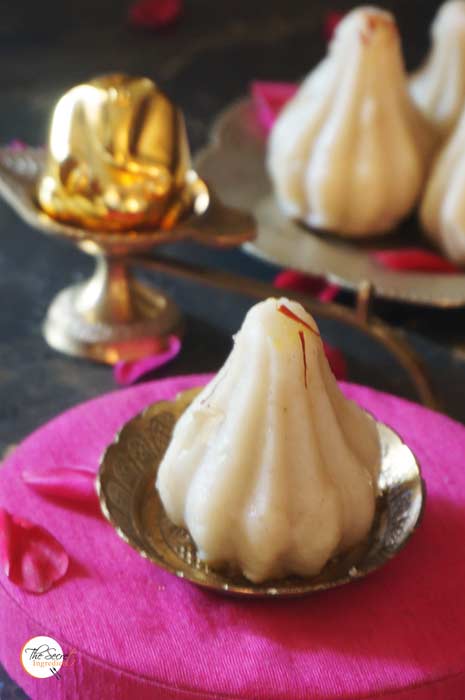
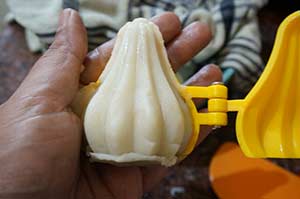
14. Carefully open the mould and tada you have a beautiful looking modak. 


15.Shape rest of the modaks and place them in a tray covered with a damp kitchen towel till we steam them.


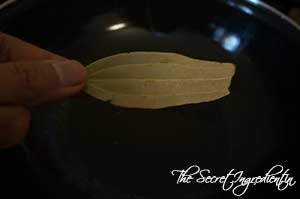
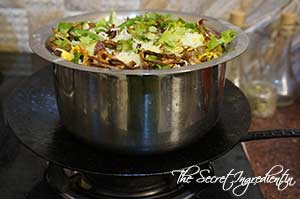
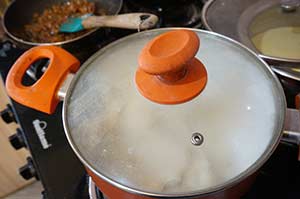
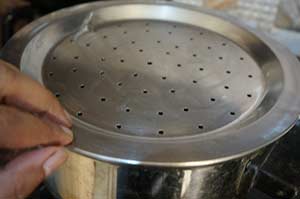
16. For the steaming part, place a steamer with water on the flame. Cover it with a slotted tray greased with ghee. If you have a banana leaf  you can top the tray with a banana leaf for it will prevent it from sticking to the base. Cover with lid and let the steam develop. 


17. When you notice the steam escaping the steamer, Open the lid and place modaks on the tray. Cover with a lid and let it steam for 20-25 minutes.


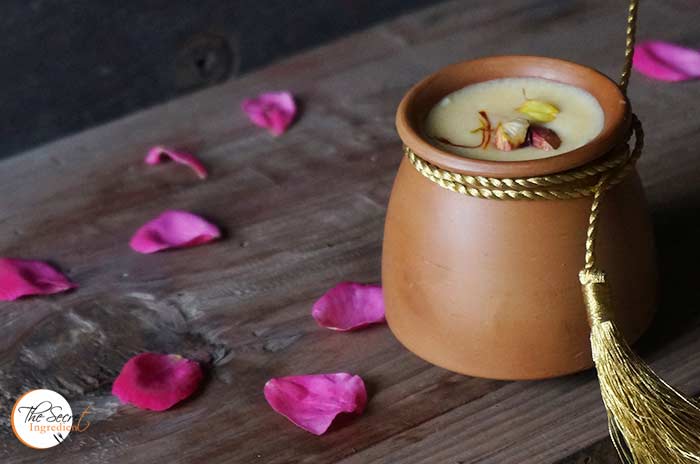
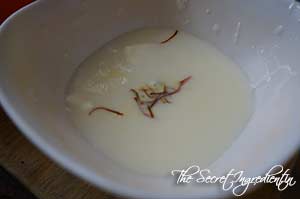
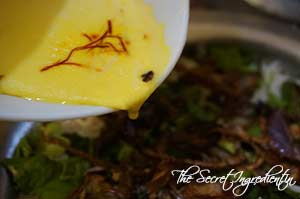
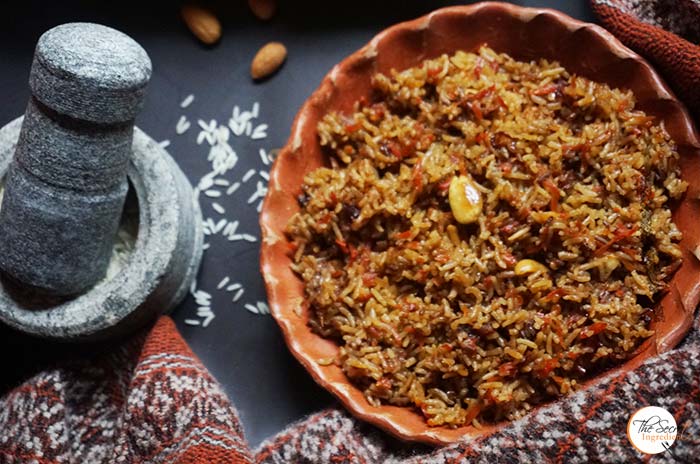
18.Once steamed you can garnish it with saffron and offer it our dear Lord Ganesha. He will bring prosperity in our lives and will bless us. 

Wishing you all a Happy Ganesh Chaturthi.

Other festive recipes you can try are: Kadda Prashad, Besan Rava Laddoo, Gurr Gajar Ke Meethey Chawal, Gajar Ka Halwa, Kaddu Ka Halwa, Kesari Seviyan, Khajoor Ki Kheer, Makhane Ki Kheer , Mango Saffron Phirni, Paneer Ki Kheer , Rasgulla , Sabudana Kheer, Swang Ke Chawal Ka Halwa, Sooji Halwa, Swang Ke Chawal Ka Halwa, Ragi & Khus Khus Ladoos.

Every year my father sends us raw green mangoes from his yard. They are in abundance and which means I get to try so many different recipes. But honestly I find this as an excuse. I clearly enjoy trying out new ways to utilize these green raw beauties. Last year I tried Kaccha Aam Aur Lehsun ChutneyFresh Turmeric Pickle with Green Mangoes Raw Mango RiceAam Ka PannaRaw Mango Chutney with Mint and Coriander,   Instant Raw Mango Pickle South Indian Style. And this year I am going even more crazy. I wanna make every possible recipe on the planet with Raw mangoes 😛 This Aam ki Launji is the first thing I tried. Its my Mother in laws recipe and is native to Uttar Pradesh state of India. The Launji or Chunky Mango Chutney turned out gorgeous! Although I am allergic to Fennel seeds but I went steady and added them anyways not thinking of the consequences. Fortunately I am alive and kicking as yet. 😛 


If you are looking for Mango Chunda which is similar Sweet and sour Raw Mango Chutney from Gujarat, you must try this recipe. I have already made Punjabi Style  Raw Mango Pickle which is my mommy’s recipe. I will be posting it soon. I have also made Dal with Raw Mangoes. It was lip smacking. I will be sharing that also in the next few days. If you have any recipe with raw mangoes let me know I will try them out and post on my blog space giving due credit to you.

Directions:
1. Wash and peel raw firm mangoes and cut them into long slices. You can even grate them but this will change the texture and the cooking time will vary.


2. In a wok add some oil and heat it up.

3. Add Nigella Seeds, Fennel Seeds and Asafoetida.


4. Add salt, Turmeric Powder and Red Chilli powder.


5. Add Mango slices to the spice mix and toss everything together.


6. Add water to the wok cover with a lid and let the mangoes cook down a little. They should become al dente and not mush.


7. Once it has cooked up a little, add jaggery to it. I have added crumbles jaggery so that it mixes evenly. You can cook little longer till the launji becomes thick in texture.


8. Transfer it to a jar on getting to room temperature. Keep it refrigerated and stays for more than a week.

Other Raw Mango Recipe you can try are: Kaccha Aam Aur Lehsun ChutneyFresh Turmeric Pickle with Green Mangoes Raw Mango RiceAam Ka PannaRaw Mango Chutney with Mint and CorianderKhatti Meethi Kacchey Aam Ki Chutney Instant Raw Mango Pickle South Indian Style

[whohit]AamkiLaunji[/whohit]

[yumprint-recipe id=’278′]

GurrGajarChawal_Featured3

I know I have been showing up after a while. When I am home with my family I dont get time to blog. Life is all busy with socializing, shopping, yapping, some baking workshop and lazying around. Last week I spent on the beaches of Goa and when I returned to Delhi it was freezing cold. The next day was Makar Sankranti which is the First Day of Hindu Calender. This day is widely celebrated in India with different names in different parts of the country like Pongal, Lohri, Bihu etc. Its believed to be the coldest day of winters when the cold is at its peak. Therefore, foods which keep your body warm are eaten and distributed with friends and family which included, sesame seeds, dates, jaggery, ground nuts and other dry fruits. 

GurrGajarChawal_Featured2
I was home after many days and I was itchy to make something festive. So I decided to make this rice pudding with Jaggery, Dates and Carrots. Its my mother’s recipe and I have grown old on this. This is a keeper for winters. Its a wholesome meal  I had also made Tilkoot which is Pounded Sesame Seeds and Jaggery Balls couple of years back . Its a traditional recipe from Uttar Pradesh.


Directions:

1. Soak Rice in Water for an hour or so.

DSC00310
2. Wash and Grate Carrots and keep aside.

DSC00311
3.Blanch Almonds and remove their skin and cut them into halves. Also deseed and chop some dates. You can also add raisins and cashews if you like.

DSC00320
4. For the syrup, in a pan heat water and when it comes to a boil add jaggery. Keep stirring and let the jaggery melt in water.


DSC00313


DSC00316


4. Add a spoonful of milk and a scum will form on top. Spoon out the scum and throw it away. That’s the impurity in jaggery which we don’t want to add to the rice. Turn the flame off and keep the syrup aside.


DSC00317


DSC00318


DSC00319


5. In a pressure pan add ghee and when ghee melts add cumin seeds. 


DSC00322


DSC00323


6.Let them crackle that is when you add grated carrots to the pan and saute in ghee for a minute.

DSC00325
7. Add the dried nuts which we had chopped earlier.

DSC00324
8. Add Soaked rice without the water.

DSC00326
9. Lastly add the jaggery syrup and close with the lid. Pressure cook for 3-4 whistles or until the rice is cooked.

DSC00327
10. When the steam escapes fluff up with a fork and serve hot. Enjoy the winter bounty. 

You can even try Tilkoot for Makar Sankranti.

Other Rice recipes you can try are: Rice Pudding with Mango & SaffronMushroom BiryaniRaw Mango RiceSpicy Mint RiceItalian Arborio Rice with MushroomsKathal Ki BiryaniSouth Indian style Curd RiceBombay Biryani

GurrGajarChawal_Featured1[whohit]GurrGajarRice[/whohit]

[yumprint-recipe id=’267′]

baigan-bhaja

Since the starting of the year when I got my air fryer I have been trying recipes giving them a new healthy avatar. I made Malai KoftaKamal Kakdi Kay Koftay Plantain & Potato Kebabs and many other things in this amazing gadget. It has changed the way we eat. The things I avoided because they were fried and greasy have come back in our life but now with a healthy makeover. Making this decisions not only keeps our weight in control but also gives us the pleasure of eating everything (almost) without feeling guilty. 

baigan-bhaja

Recently, I was thinking about making Begun Bhaja which are deliciously crispy Aubergine Slices which are marinated in spices and then deep fried. This recipe hails from Bengal which is known for its cuisine and culture. I love traditional recipes and dont wanna twist and turn them much. I followed the same recipe however I changed the way you cook it, I air fried them to make them guilt free. They were still crispy and delicious. If you are thinking to change your lifestyle do invest in an airfryer and make healthy choices, because you are what you eat 🙂

Directions:
1. Take a big sized Aubergine or Eggplant. The bigger the size the bigger will be the slices. Wash it and pat dry.

dsc09125
2. Cut it into thin slices about 1 cm thick and soak them in salted water for about 20-25 minutes. We soak the eggplant slices because sometimes the eggplants can be bitter and this will ensure they loose their bitterness. 


dsc09126


dsc09132


3. In the meanwhile in a bowl add Red Chili Powder and turmeric powder.


dsc09127


dsc09128


4. Also add garam masala, amchur powder.


dsc09129


dsc09130


5. Also season it with salt and add chana masala. yes that does the trick!


dsc09133


dsc09134


6. Pat dry the soaked pieces of eggplants and rub the dry spice mix on them on both the sides.


dsc09135


dsc09136


7. Place them in the bowl and sprinkle some lemon juice on them. Let them marinate for 10 minutes. 

dsc09137
8. Preheat your airfryer for 10 minutes on 180 degrees.

dsc09140
9. In a flat plate take some chickpea flour or besan and coat the marinated eggplant with flour on both sides. You can dust the extra.


dsc09141


dsc09142


10. Once the air fryer is preheated add a few slices on the wire rack of the basket and brush with some mustard oil. Let it air fry for 15-18 minutes. Flip it half way and brush the other side also with oil and continue to cook till you see them golden brown and crisp. Follow the same with rest of the slices.

dsc09145
11. Serve hot with dal and roti or you can just eat it like a snack with your drinks 🙂 

Other Eggplant recipes you can try are: Baingan Ka Bhartha Bharwan BainganBaingan Ka RaitaBaigan Ka Salan

baiganbhaja_featured3[whohit]BainganBhaja[/whohit]

[yumprint-recipe id=’255′] 

MangoPhirni_Featured1

Mangoes are an integral part of every Indian. With the wide variety of blissful mangoes available all across the nation, we are almost under its spell throughout the season. You can make desserts, chutneys, main courses, drinks or devour them as it is. My father is a die hard fan of Mangoes and his diabetes hasn’t made any difference to his love for mangoes. He has his meals only for the reason that he can enjoy mango after that 😉 . 

MangoPhirni_Featured2

This season I played a lot with fresh and ripe mangoes. I made Mango Tart, Spiced Mango Lassi, Mango and Bean Salad, Coconut Milk Mango Pudding and A Mango Chamomile Iced Tea, which I am yet to post. But making this mango phirni was the most delicious thing I have done the entire season. It was a delight with everyone who got to taste this. You must not wait longer to try this, for mangoes are about to bid us goodbye for the season.

Directions:

1. In a bowl add some rice and soak it in water for half and hour.


DSC07052


DSC07053


2. Drain the water and add rice to the blender and make a coarse paste.


DSC07056


DSC07057


3. Add one fourth cup water to the rice paste to dilute and set aside.

DSC07058

4. In a thick bottom vessel add milk and bring it to a boil. 

DSC07060

5. Once the milk has boiled slowly add the rice paste and keep stirring so that no lump is formed. This is very crucial step so whisking is highly recommended. Combine with milk and let it simmer till everything has thickened and reduced.

DSC07061

6. The milk will acquire porridge like consistency.

DSC07063

7. At this stage add condensed milk and cardamom powder. Cook a few minutes more and blend everything well. Turn the flame off and let it come to room temperature. Refrigerate for at least an hour.


DSC07064


DSC07065


DSC07066


8. Scoop out the pulp of ripe mangoes and blend them into a smooth puree.


DSC07055


DSC07059


9. Add this Mango puree to the milk custard and combine well.

DSC07067

10. Add saffron strands and slithered almonds and pistachios and combine well. 


DSC07068


DSC07069


11. You can transfer them to individual serving bowls or clay pots and refrigerate further till chill. Serve with additional saffron strands and pistachios.

Other Mango Recipes you can try are: Spiced Mango LassiRaw Mango Garlic Spicy ChutneyMango Tart with Vanilla Pastry Cream Fresh Turmeric Pickle with Green MangoesRaw Mango RiceFresh Mexican Black Bean & Mango SaladPlum Mango PunchAam Ka PannaRaw Mango Chutney with Mint and CorianderKhatti Meethi Kacchey Aam Ki ChutneyKacchey Aam Ka AchaarCoconut Milk Mango Pudding.

Other traditional Indian Desserts you can try:  Apple LapsiKadda Prashad, Paneer Ki KheerGram Flour Semolina BallsKaddu Ka HalwaGajar Ka HalwaKesari SeviyanMakhane Ki KheerSooji Halwa , Swang Ke Chawal Ka HalwaSwang Ke Chawal Ki Phirni.

MangoPhirni_Featured3

[whohit]MangoPhirni[/whohit]

[yumprint-recipe id=’232′]

BombayBiryani_Featured4
Biryani is a mixed rice dish from Indian Subcontinent. It can be made with Meat, chicken, lentils, vegetables and the list is unending. The traditional recipes of Biryani are specific to regions based on the spices, ingredients and texture of the dish. Mughlai, Awadhi, Hyderabadi, Kashmiri, Thalassery, Calcutta and many many more. Biryani means patience and a lot of work. It requires huge deal of Ingredients and slow and patient cooking which enriches the taste of Biryani and makes it so heavenly. I have always been a person who likes quick less intricate dishes. given the fact my little one needs my devoted time and attention.But when Anisa Arif, the owner of Zaiqa- The Spice Store sent me her special spices I was smitten. I had heard so much about the spice blends she creates that I decided to do the Bombay Biryani and put my laziness at bay.

BombayBiryani_Zaiqa
The next help was from Shaheen Ali,  the Food Blogger from Spoon Fork and Food. She helped me at every step with tinniest of details with making a perfect Bombay Biryani. I am naive when it comes to mutton. I have made very few recipes in the past using Mutton.  I have improvised on Shaheen’s recipe of Chicken Bombay Biryani and made this Muttom Bombay Biryani.  It was a lot of effort but at the end the results were phenomenal. The special Zaiqa Bombay Biryani Masala made a huge difference in enhancing the taste of the dish.

BombayBiryani_Featured2
On my research I found out how this Biryani is different from the others. The origin of this Biryani is from Bombay (Mumbai) as the name suggests. It has a slight sweetness to it, which comes from dried plums. The Zaiqa Bombay Biryani Masala has dried plums as one of the key ingredients. Also many claim this biryani is incomplete without fried chunks of potatoes. I have tried to incorporate both and I can say this tasted simply delicious.

Directions:
1. Wash and soak long grain rice in water for at least an hour. Set aside.

DSC06468
2. In a pressure pan add pieces of mutton along with garlic cloves and peeled ginger pieces.


DSC06459


DSC06460


3. Also add Black Cardamom, Green Cardamom, Cinnamon Stick and Cloves in the pan. Add little water and salt and pressure cook it for half an hour till its soft and cooked. The cooking time of mutton can vary on the variety, so this can take longer or even lesser. So kindly adjust. Once cooked set aside and do not drain the broth. Reserve it with the spices.


DSC06462


DSC06464


DSC06465


4. In the meanwhile add little saffron to hot milk and set aside.

DSC06467
5. Chop Onions in lengthwise slices and slit some green chillies. 

DSC06466
6. In a wok add some ghee and add bay leaf, Black Cardamom & Green Cardamom.


DSC06469


DSC06470


DSC06471


7. Also add some cloves, Cinnamon Stick and Cumin seeds.


DSC06472


DSC06473


DSC06474


8. Add nutmeg or Jaiphal powder, mace or javitri and black peppercorns.


DSC06475


DSC06476


DSC06477


9. Also add Anise star, Ginger Garlic Paste and slit chilies.


DSC06478


DSC06479


DSC06480


10. Roast the spices till everything becomes fragrant. Add Onion slices and also saute them until they have acquired slight colour. Also add some fresh torn Mint leaves. At this stage you can even add grated coconut. I dint.


DSC06481


DSC06482


DSC06483


11. Now add curd to the wok and add Zaiqa Bombay Biryani Masala. Mix everything well. Turn the flame on low for you dont want it to stick to the bottom of pan.


DSC06484


DSC06485


DSC06486


12. This is how your gravy looks.  Now add Boiled Mutton pieces to the gravy and combine.


DSC06491


DSC06492


13. Season with salt and let it cook until the ghee has separated from the masala. Your akhni or Curd based spicy Gravy is ready for the biryani. It will be brown in colour. Set aside. 


DSC06493


DSC06497


14. Add sliced onions to hot oil and fry them till they become brown and crispy. Collect them on a absorbing paper to take off excess oil. These crispy fried onions are known as Brista. Reserve them for assembling the biryani.


DSC06498


DSC06500


DSC06501


15. Wash, peel some baby potatoes and cut them into equal size half pieces. And also fry them in the oil and set aside.


DSC06499


DSC06502


DSC06505


16. For the rice add soaked rice to a vessel and add water to it along with salt & few drops of oil.


DSC06487


DSC06488


DSC06489


17. Also add juice of lemon and par boil them. Drain them in a colander 


DSC06490


DSC06494


DSC06495


18.Spread them on a plastic tray to remove moisture. Set aside.

DSC06496

19. In order to assemble the biryani spread little curd in the bottom of a thick bottomed vessel so that nothing sticks. Now spread the Mutton akhni all over on top of the curd. Sprinkle some Mint and Coriander Leaves on top of the akhni.


DSC06504


DSC06506


20. Now spread a layer of Rice on top of the Mutton. Spread Ghee all over specially the corners. Also sprinkle Kewra water.


DSC06507


DSC06508


21. Add another layer of Mint and Coriander Leaves also some green slit chillies. Top it up with Fried Onions and Fried Cashews if you like.


DSC06509


DSC06510


22. Pour on top the saffron milk we had reserved, specially around corners so that it seeps well. Insert Fried potatoes in the rice. Place the vessel on top of a tawa or skillet and place them on stove. This will save biryani from direct heat and getting burnt.


DSC06511


DSC06512


DSC06513


23. Line the lip of the vessel with dough to ensure the lid sticks to it and rice can steam cook or Dum cook. It also ensure the flavours stay intact and do not escape. Let it 


DSC06514


DSC06515


24. Cook the biryani on dum for 30-40 mins on low flame. Serve hot with Raita of your choice.

You can also try Kathal ki Biryani and Mushroom Pilaf for vegetarian versions of Biryani. Other Rice dishes you can try are: Andhra Style Mango Rice South Indian style Curd RiceSpicy Mint Rice.

You can choose from the following Raitas: Anaar Aloo ka Raita Greek Kulfa RaitaBaingan Ka Raita  Bathua Ka Raita

BombayBiryani_Featured1

[whohit]BombayBiryani[/whohit]

[yumprint-recipe id=’225′]


Gobhi or Cauliflower is the most versatile vegetable after potatoes and found in almost all across the globe. In winters it is available in abundance in India. One gets tired of eating Aloo Gobhi or Cauliflower cooked with Potatoes so a variation is always welcome. Few days back I had posted recipe of Gobhi Manchurian. which is an indo-chinese way of cooking this nutritious vegetable. The interesting thing to note is that not only the cauliflower florets are used in cooking but the central stem holding the florets also makes such an amazing dish. My mother makes it and its absolutely delightful.Its one of my favourite dishes and I insist that you must try it in thick winters. Its also known as Vegetarians meat. 

gobhidanthal_featured4

You have to reserve and collect the stems or danthals when you cook cauliflower. The softer the stems the better the dish tastes. You can keep the danthals or stems in the fridge for two weeks and cook once you have enough danthals to get started. The other option is you can ask your local vegetable vendor to give you the stems. They will be happy to give away to you.

Directions:

1. You need atleast two full pods of Garlic for this. Peel the skin and keep the garlic cloves aside.

DSC09357


2. In a blender add garlic, green chilies, ginger and tomatoes and make a fine paste. Keep aside.


DSC09358


DSC09359


DSC09360


3. Remove the florets and take the central stem of the cauliflower. You can also use the hard shoots,ensure they are fresh. Wash them rigorously to remove all dirt.

DSC09361


4. Cut the danthals into half or if they are big cut them into fours lengthwise.

DSC09362
5. Put some mustard oil in the pressure pan. Wait till the oil starts to smoke out.

DSC09363
6. Put the tomato puree.

DSC09364
7. Also add the danthals and combine them with the puree.


DSC09367


DSC09368


 8. Add salt, turmeric powder and red chili powder.


DSC09369


DSC09370


DSC09371


 9. Also add garam masala and combine.


DSC09372


DSC09373


 10. Close the lid and cook for 6-7 whistles or till it becomes soft and tender.

DSC09374

 11. Garnish with Green coriander leaves.

DSC09375

Serve hot with Rotis and enjoy the most amazing vegetarian meat. Do not forget to remove the hard stems like bone 😉

You can even try other dishes from Punjabi Cuisine like Besan Kaddhi Pakore, Bharwan Karela, Dal Makhni, Langar Wali Dal and Dum Aloo.

[whohit]Danthal[/whohit]


[yumprint-recipe id=’98’]