Author

anshu

Browsing


BasilPesto_Featured3

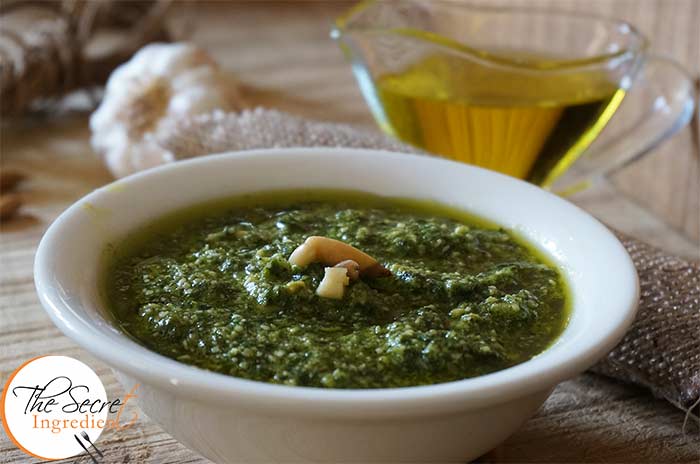
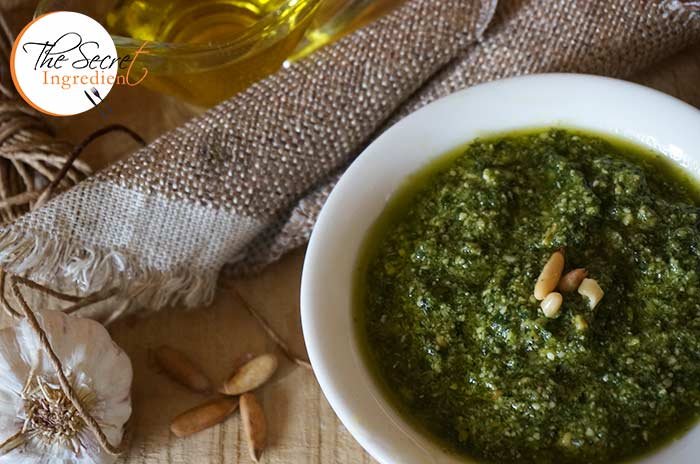
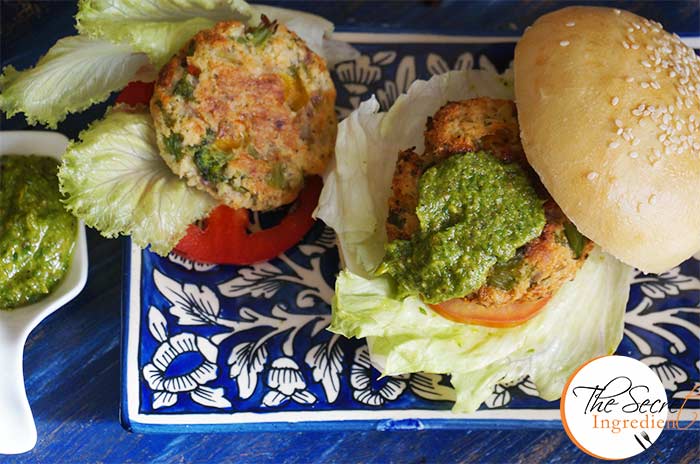
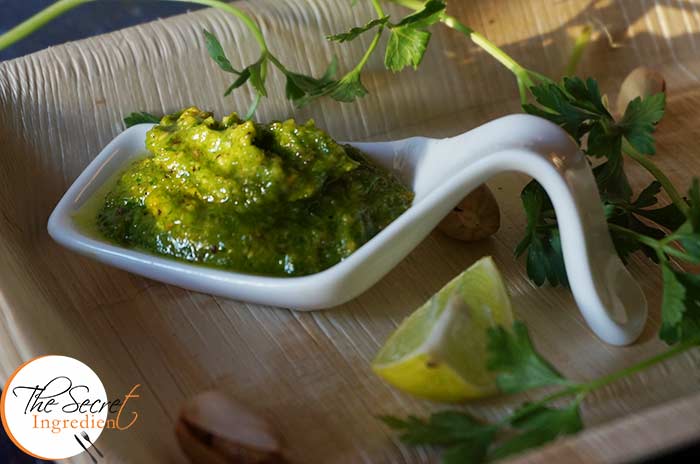
Authentic Italian Pesto needs no prelude. If you have pesto in your pantry I can assure you, you can do so many things with it. It makes fabulous pasta dishes, makes a delicious marinade for your meats, a lip smacking filling for the Bread and the list is endless. Last time I made a huge batch of pesto and it was devoured by my husband simply by smearing on bread. I saved (read hid) a little for the Chicken Pesto Pasta with Sundried Tomatoes . I shall soon be sharing its recipe.

BasilPesto_Featured1
The essential thing about the pesto is that each and every ingredient in this recipes plays a very crucial role. So please choose good quality ingredients which makes a huge difference in the taste. Other than this its not rocket science to make this salsa. Simply put the ingredients in blender and blitz.

Directions:
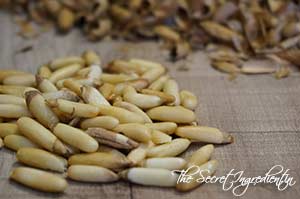
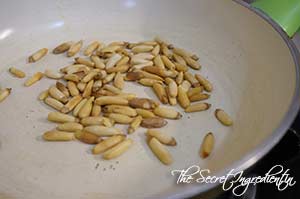
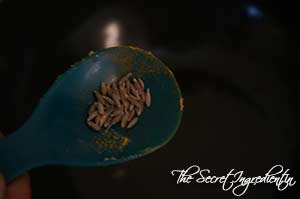
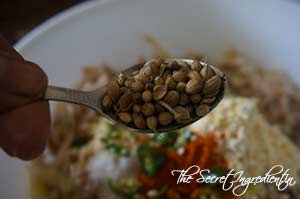
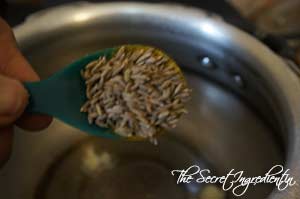
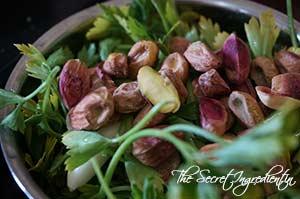
1. Remove the pine nuts from the shell and toast them on a pan on a medium low flame, till they become slightly golden in colour. Do not burn them. Set them aside to cool down.


DSC05205


DSC05206


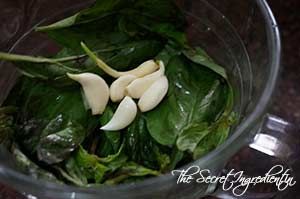
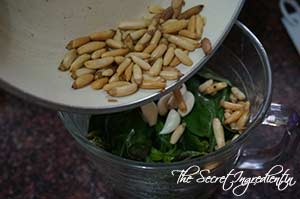
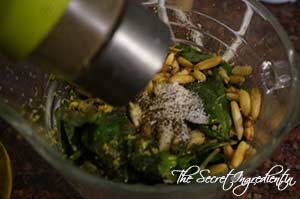
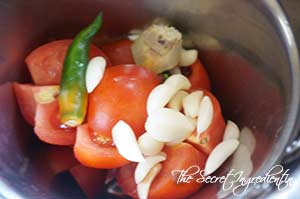
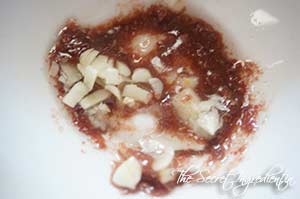
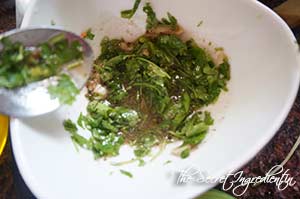
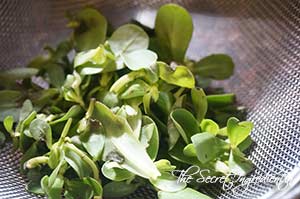
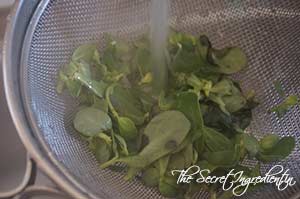
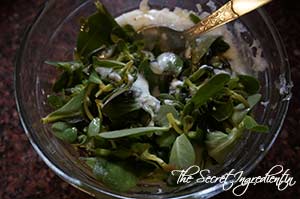
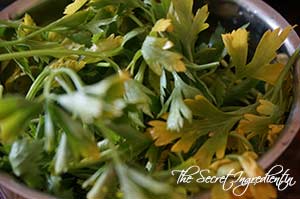
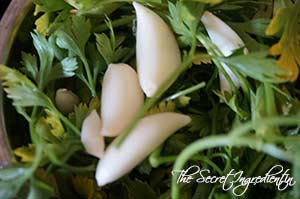
2. In a chutney grinder add fresh basil leaves, thoroughly washed and separated from stems. Also add garlic cloves.

DSC05207


3. Add toasted pine nuts.

DSC05208


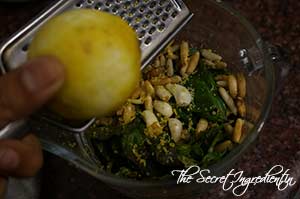
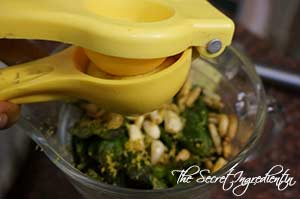
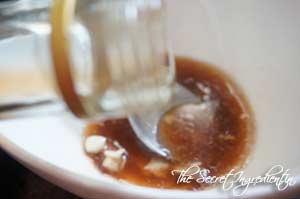
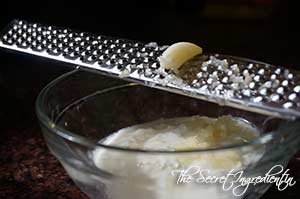
4. Add zest of a lemon and then cut it and squeeze in its juice.


DSC05213


DSC05214


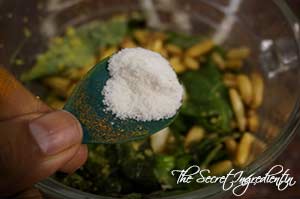
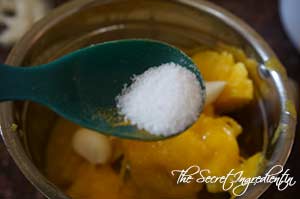
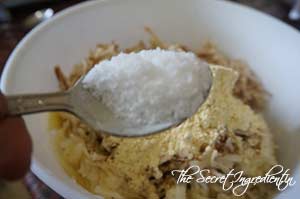
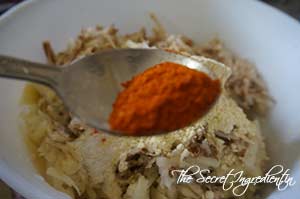
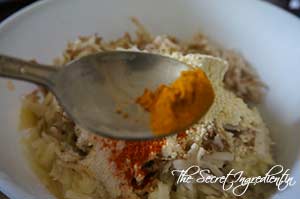
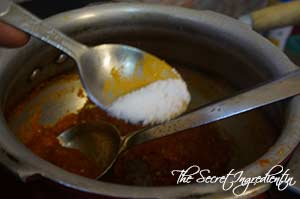
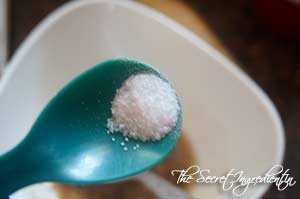
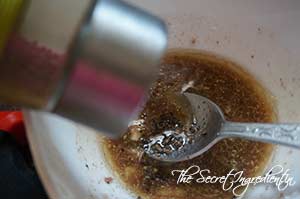
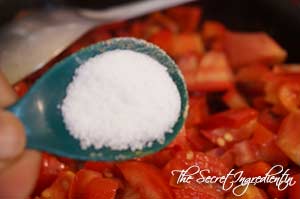
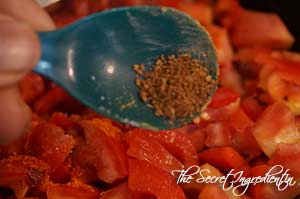
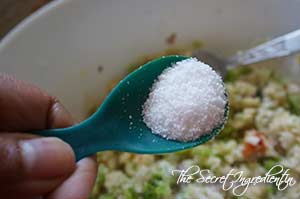
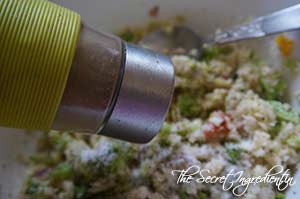
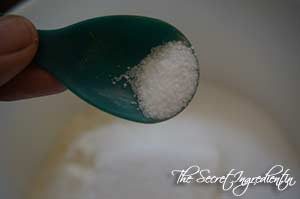
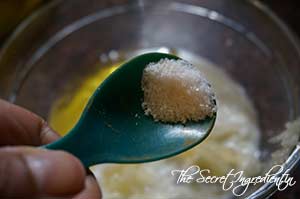
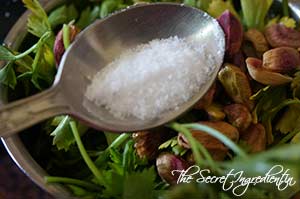
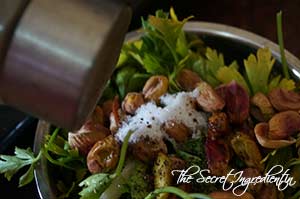
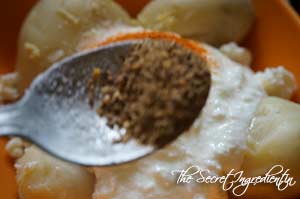
5. Season with Salt and freshly ground Black pepper.


DSC05215


DSC05216


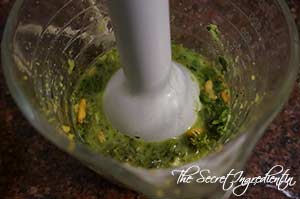
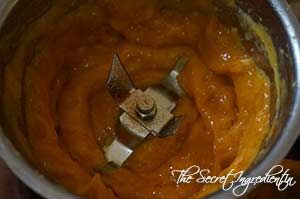
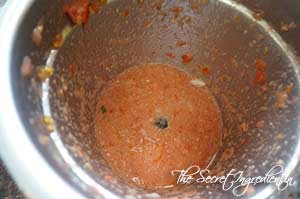
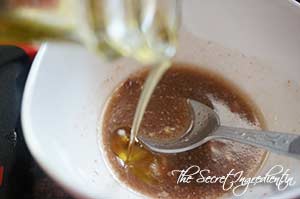
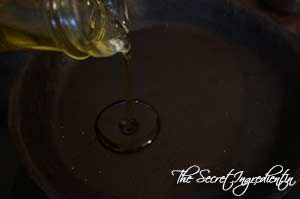
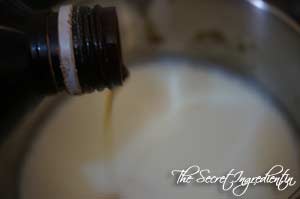
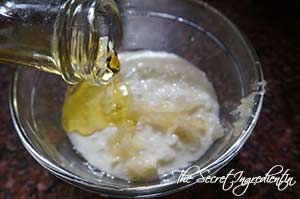
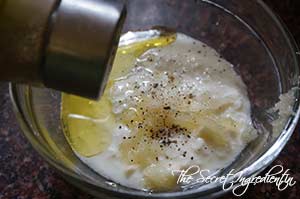
6. Add Extra Virgin Olive Oil and blend together into a creamy paste. If the blending gets difficult add more olive oil.


TDSC05217


DSC05218


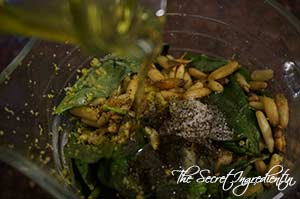
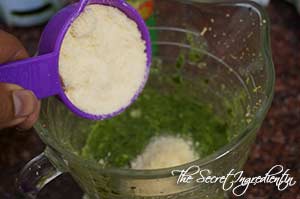
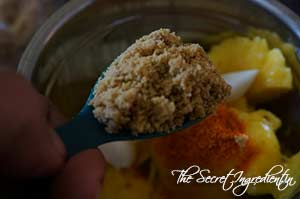
7.  Now add grated Parmesan Cheese to the pesto blend and combine.
DSC05219

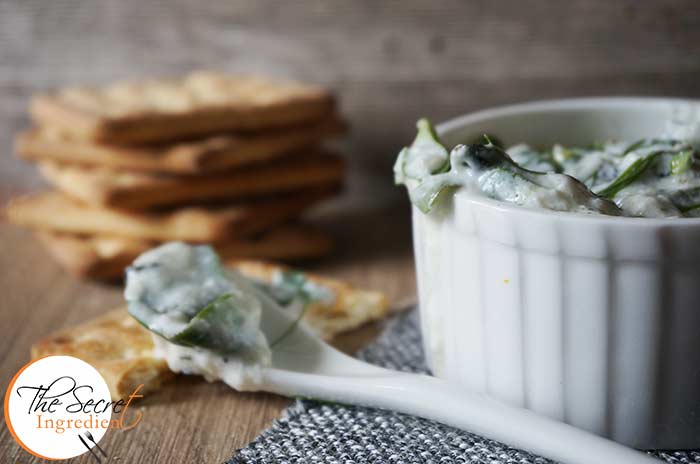
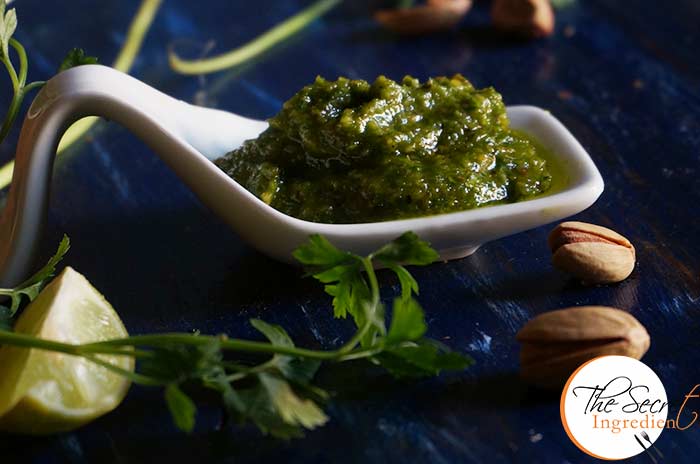
8. Your pesto is ready to be used. You can transfer it to a glass jar to store in refrigerator and top it up a little Olive oil so that the moisture stays intact and it doesn’t come in contact with air. This will increase its shelf life.

You can make Chicken Pesto Pasta with this.You can also try Parsley Pistachio Pesto for a new variation.

Other Salsas and Chutney you can try on the Secret Ingredient are: Argentine Chimichurri SalsaSweet and Sour Raw Mango ChutneyPudina ChutneyGreek Purslane Yogurt DipRaw Mango Chutney with Mint and Coriander.

BasilPesto_Featured2[whohit]BasilPesto[/whohit]

[yumprint-recipe id=’216′]

MangoGarlicChutney_Featured1

My Love for Mango is growing with my age. Its not just the ripe pulpy mangoes which makes my heart  skip a beat but also the green mangoes which are ideal for making pickles and chutneys. I have a lot of green mango recipes on my blog like the Instant Raw Mango Pickle, Sweet and Sour Raw Mango Chutney, Mint and Raw Mango Spicy Chutney, Raw Mango Rice  and the refreshing Aam Ka Panna. Looks like I am not going to stop here I will keep adding more to this inexhaustive list. The other day I saw Bijal, my facebook friend posted a recipe of Raw Mango and Garlic Chutney and since then it was haunting me to try it down. I am happy I did it for it had the most intricate flavours. The Sweetness of Mangoes, the strong flavour of Garlic and the Hotness of Chillies. It made a beautiful melody of distinct flavours.

MangoGarlicChutney_Featured3

Its fairly easy and takes no time to put it together. You can use it as a side dish for your everyday meal but at the same time use it as a dip for your nachos and even top it on your patties in a burger. It gives that kick and takes your dish to another level of deliciousness.

Directions:

1.  Peel and chop some green raw mangoes and put them in a blender or chutney grinder. I had a little ripe mangoes, they had turned pale yellow but were still quite sour.

DSC06002
2. Add few cloves of peeled garlic to the grinder.

DSC06003
3. Throw in some salt, red chilli powder and jaggery powder to balance the acidity.


DSC06004


DSC06005


DSC06006


4. Blend it together into a smooth paste.

DSC06007
5. In a pan add some oil and when it gets hot add some cumin seeds and asafoetida.


DSC06008


TDSC06009


DSC06010


6. Pour the blended mango into the pan and cook for a minute or so or until the raw smell of garlic diminishes from the chutney. 

DSC06011
7. You are ready to serve your chutney. Let it cool down and place it in a jar or bottle an refrigerate until use.

Other Chutneys you can try on The Secret Ingredient are: Spinach Coriander Salsa| Phalahari ChutneyGreen Ber Ki ChutneyCoconut Chutney Fresh Plum Spiced Chutney Coriander Chutney without Onion Garlic

MangoGarlicChutney_Featured4[whohit]MangoGarlicChutney[/whohit]

[yumprint-recipe id=’215′]

BhainKofta_Featured2
Lotus Stem is edible and is used in Cuisines of China Japan and even India. In Hindi we call it Kamal Kakdi and even Bhein. It is not a very Popular vegetable but I have been eating this since a little kid as my mother make sit very often. But on the other hand my in laws have no taste for this. My mother makes this with Potatoes as a curry and also makes small dumplings by grating them and mixing with chickpea flours. Those dumpling are then deep friend and added to the gravy. 

BhainKofta_Featured6
As a little girl I used to eat those dumplings as soon as she finished them frying. Such glorious days they were when you never had to worry about those calories. But you know what I still popped a few dumplings in my mouth when I made them for this post. Fortunately this time they were air fried and I wasn’t feeling guilty about it.

Directions:
1.  Foremost thing, selecting the right lotus stem requires bit of a skill. Firstly, they should be fresh and tender and the colour should be as whitish as possible, the stale ones turn black. Secondly, the stems should be closed from both the ends. If you find them open on one end or broken or bruised from centre, it might be holding a lot of grit and cleaning it will be crazy. Wash and scrape off the skin of lotus stem and cut the ends. Wash again after cutting the sides. You can even use the frozen ones you get at Asian markets. Thaw them before use.


DSC05643


DSC05644


DSC05645


2. Grate the lotus stem in a bowl. Also grate two potatoes with it.


DSC05646


DSC05647


3. Add to the grated vegetables some chickpea flour and  salt.


DSC05648


DSC05649


4. Also add red chili powder, turmeric powder and Anardana or dry Pomegranate powder (not in pictures).


DSC05650


DSC05651


5.  Add chopped green chilies and Coriander seeds.


DSC05652


DSC05654


6. Mix everything with your hands so that it starts to stick together You are looking for a thick batter like consistency. You can add a tsp of besan to make the batter thicker. You don’t need water as the lotus stem and potatoes will have enough water to bind it together.

DSC05655

7. Make small balls, smaller than golf sized balls. Place them on a tray.


DSC05656


DSC05659


8. Preheat your Air Fryer on 200 degree celsius for 10 minutes. Or you can heat oil in wok if you want them oil fried.

DSC05657
8. Place them in the bucket of the Air fryer and brush with oil from top.  Air fry them for 18-20 minutes or till golden brown. You can change sides in half time. You can always deep fry them in oil if you dont care about the calories, I will not judge you 😛 I tried doing both to see the difference in taste. They both were fabulous.


DSC05660


DSC05662


9. Place them on a tray lined with absorbent Paper which will absorb all the extra oil from the koftas and make them more crispier.

DSC05665
10. For the gravy place tomatoes, ginger garlic and red chilies in a blender and make a smooth puree.


DSC05671


DSC05674


11. In a wok or pressure pan add Ghee or clarified butter. Add Cumin seeds and let them crackle.


DSC05672


DSC05673


12.  Add tomato puree and salt.


DSC05675


DSC05677


13. Add turmeric powder and red chilli powder and let it reduce till you see ghee separating the masala.


DSC05676


DSC05678


DSC05679


14. Soak Cashews in water for an hour and grind them into smooth paste. Add the paste to the masala and combine.


DSC05681


DSC05682


15. Add little water and let it simmer for 5 minutes till the gravy is thickened. 

DSC05680

16. Add koftas and continue to simmer or another 5 minutes or till the koftas have absorbed some of the gravy.

DSC05683

17. Finish with Garam Masala, Fresh Cream and Fresh Coriander Leaves.

DSC05685

18. Serve hot with Roti, Naan or Parantha.

Other recipes from my Mother’s kitchen you can try are: Aloo Methi Punjabi Style, Bharwan Tinda, Stuffed Karela, Kadhi Chawal, Touri Vadi.

BhainKofta_Featured1[whohit]KamalKakdiKKoftey[/whohit]

[yumprint-recipe id=’214′]

RoastedBellPepper&WhiteBeanSalad_Featured3

The mercury is rising all across the nation and the effect has started to be felt even on our hills. The parched summer gives the appetite a toss and all you can think of eating is Summer Salads and drink cool smoothies and drinks. I have already made my favourite Mexican Mango & Black Bean Salad yesterday and also tried Couscous and Chickpea Salad last week.

RoastedBellPepper&WhiteBeanSalad_Featured4

 So which means it was time for me to try out something new. I had some Black eyed peas or as we call them lobia in Hindi in my pantry. No one in my home is fond of lobia. I tried to use it in my salad for that protein power and paired it with charred red bell peppers. The most delightful was its dressing. I had canned Anchovies  in Oil and I added it to the Red Wine Vinegar and tossed it on my bean salad. The pungent and strong flavour it added to my salad was amazing. If you are a vegetarian or do not eat fish then I would say you can easily skip adding this to your salad. Rest everything remains the same.

Directions:

1. In a bowl soak lobia or Black eyed peas in water for an hour. Add water and pressure boil it for  15 minutes until al dente. Make sure its not mush. Alternatively you can use canned Black eyed peas.


DSC06240


DSC06241


DSC06242


3. Take red Bell Peppers and Char them and peel its skin. and cut into large chunks and set aside. Learn how to roast Red Bell Peppers in Oven and peel its skin.

DSC06243

3. In a bowl add canned anchovy, without the oil and mix with minced garlic. 


DSC06244


DSC06245


4. Add red wine Vinegar and Olive oil.


DSC06246


DSC06247


5. Season with Salt and Pepper.


DSC06249


DSC06248


6. Add Chopped Fresh Coriander Leaves. You could even add parsley instead of Coriander. It will give different yet a fabulous taste.

DSC06250

7. Add boiled and drained Black eyed peas to the Vinaigrette and combine.


DSC06251


DSC06252


8. For the assembly, place the roasted pieces of Bell pepper on the platter and spoon the top with the black eyes peas in the vinaigrette. You can throw in any greens to balance the flavour. I used a few leaves of iceberg lettuce and a few leaves of Fenugreek or methi. I know Fenugreek sounds weird but it totally balanced out the sweetness of Peppers. Last but not the least a generous sprinkle of Parmesan Cheese.

Other Salads you can try are: Grilled Chicken Salad Couscous Salad with Chickpeas in Lemon Olive Oil VinaigretteFresh Mexican Black Bean and Mango SaladSautéed Red Bell Pepper and Olive Pasta SaladSundried Tomato Pasta Salad

RoastedBellPepper&WhiteBeanSalad_Featured6[whohit]RaostedRedPeppers&BeanSalad[/whohit]

[yumprint-recipe id=’213′]

Shakshuka_Featured7

And then it happened! I have been meaning to try this recipe for such a long time, that it is crazy. Sometimes I dont have Red Bell Peppers, sometimes I am running out of fresh Parsley and then sometimes I am just pure lazy. This glorious day in my lifetime I had everything I needed to make Shakshuka or Shakshouka. First let me talk a little about what Shakshuka is. No No its not a Gujarati dish. Do not confuse Shaak for Veggies . Shakshuka is a Jewish Libyan recipe of Eggs with Red Bell Pepper, Tomatoes and Cumin. My sources (read Wikipedia) say, it was  believed to have originated in Libya, North Africa by the Jews. Wikipedia says, Shakshouka is a staple of Tunisian, Libyan, Algerian, Moroccan, and Egyptian cuisines, traditionally served in a cast iron pan or tajine with bread to mop up the sauce. It is also popular in Israel, where it was introduced by Tunisian Jews and Maghrebi Jews, hundreds of thousands of whom immigrated to Israel during the 1950s. 

Shakshuka_Featured5

That’s about its history, let me talk about its present. Its the most delightful, filling and balanced egg breakfast you can think of. I have plenty of other eggs for breakfast recipe on my blog including Italian Frittata, Wrapped French ToastMexican Casserole Eggs and soon coming Polenta with Eggs. But this one wins the race. Ever since I made it the first time I have been doing this every weekend. This seems to have been my husband’s favourite currently. 

But remember to use fresh eggs because they make a huge difference in the taste. I have used Eggs by Eggee. They deliver the best, freshest eggs handsdown. If you are really an egg lover like me and my family, you will fall in love with Eggee. 

Directions:
1. Chop some Onions finely and garlic.


DSC06064


DSC06067


2. Also chop some tomatoes and Red Bell Pepper and set aside.


DSC06066


DSC06065


3. In a cast iron Skillet or a normal pan, pour some Olive oil. You can always buy your Cast Iron Skillet at our Online Store The Gourmet Shop, cheaper than anywhere else on the web and we ship pan India 🙂

DSC06068

4. Add Red Bell Pepper, Onions and garlic and saute them, till they turn a little soft but hold its crunch.


DSC06069


DSC06070


5. Add tomato Puree and combine.

DSC06071

6. Add chopped tomatoes to the skillet.

DSC06072
7. Season with Salt, Paprika and Cumin Powder. 


DSC06073


DSC06074


DSC06075


8. Add Water to the skillet and cover the skillet with a lid and let it sit on low flame till the tomato goes all gooey.


DSC06076


DSC06077


DSC06078


9. Make little cavities in your skillet with the help of spoon and crack Eggee eggs into them. Cover the skillet again for next 5-6 minutes for the egg whites to set. 


DSC06079


DSC06080


10. Sprinkle some freshly chopped Parsley leaves on top and serve with bread to dig into that yummy sauce.

Other Breakfast Recipe with Eggs you can try out are:Apple & Cinnamon Pan CakesBlueberry Buttermilk Pan CakesMexican Casserole EggsItalian Frittata with Mushrooms and SpinachWrapped French Toast

If you are looking for Vegetarian Breakfast Options you may try: Eggless Walnut Pan CakesQuick Rava IdliRava Pizza BreadShahi PohaSoya Veggie Vermicelli.

Shakshuka_Featured2

[yumprint-recipe id=’212′]

BroccoliPatties_Featured5

Its been a while that I have fried anything in my wok. I either air fry stuff or bake them to perfection. I guess eliminating fried food from my life has helped me lose weight and I actually feel good about it. Some time back I had posted Baked Paneer and Corn Kebabs, they were immensely loved by you all and also by my family. So the other day I had Broccoli florets and I wasn’t in a mood for Cream of Broccoli Soup. I decided to make baked croquettes with Broccoli with an addition on egg and bread crumbs. What I thought would turn out an average dish came out an amazing recipe.

BroccoliPatties_Featured4

We tugged it under a burger bun and smeared some Parsley Pistachio Pesto over it and enjoyed our lunch in comfort. It was the best broccoli recipe I have ever made. If you have Broccoli Naah! people in your family, surprise them with this amazing dish.

Directions:

1. Take one head Broccoli and cut it into florets. Wash well under running water.


DSC05824


DSC05825


DSC05826


2. In a large pot add some water and bring it to a boil. Add salt to it.

DSC05827

3. In a wire mesh submerge Broccoli florets in water for  seven to nine minutes or until they are blanched al dente. Don’t let them go mush.


DSC05828


DSC05829


4. Drain the broccoli and place them on a kitchen towel and squeeze out all the water. Give broccoli a coarse chop under the knife and set aside.


DSC05830


DSC05832

DSC05836


5. Chop Onions and Garlic and set aside.

DSC05833
6. In a pan add little oil and add chopped onions and garlic. Oh I had some chopped red and yellow bell pepper I added them too for colour. But its optional. Saute them until they are slightly cooked.


DSC05834


DSC05835


7. In a bowl mix Broccoli, eggs, onions and garlic, grated cheese and breadcrumbs.

DSC05837

8. Add salt and pepper to the mix and combine.


DSC05838


DSC05839


9. Line a tray with Parchment Paper and preheat the oven* to 200 degree Celsius.(Learn more about Oven temperatures and Conversions). Take a little dough in your hands and shape them into patties.

DSC05841

10. Place them on baking sheet and brush them with oil.

DSC05842

11. Bake in the oven for 15 minutes. Flip and bake for another 15 minutes or until browned and crispy.

DSC05843
12. Tug them inside a burger bun and top it with Parsley Pistachio Pesto and enjoy hot. You can also line the burger with veggies and cheese.

Other Broccoli dishes you can try are: Healthy Broccoli PastaRoasted Broccoli with Garlic and Lemon & Cream of Broccoli Soup with Chives 

Other Croquettes and Kebabs you can try here are: Baked Paneer Corn Kababs Tapioca CroquetteVeg Shami KababAirfried Yogurt & Cottage Cheese Kebabs for Fasting.

BroccoliPatties_Featured2[whohit]BroccoliCroquettes[/whohit]

[yumprint-recipe id=’211′]

MangoTart_Featured2

The summers are here and so are mangoes which brings a big smile on my face 🙂 I was looking to make some mango dessert. Last year I had made Coconut Milk Mango Pudding and it was a hit. But when this season I spotted Mangoes in market I had my mind started thinking what crazy thing I can do with the King of Fruits. The plan got a shape as I reached home and after an hour it was executed to perfection. Yes yes I am giving modesty a little break for a while 😉

MangoTart_Featured3

I barely clicked the pictures hurriedly as it was getting dark and after half an hour there were no traces of the tart as my husband ate the entire tart for dinner and you are asking me to be modest 😉 You must must try this. Oh I also made another similar thing with Mangos and Vanilla and this time it was in the form of a Cake. It was for a client and it was one of the best cakes i have done till date. 

Directions:

1. For the pie crust, in a bowl add All Purpose Flour, Salt and Castor Sugar. Combine together.


DSC06401


DSC06402


DSC06403


2. Add cold butter cubes and mix with your finger tips or fork till you get a coarse mixture.


DSC06404


DSC06405


3. Keep kneading till everything comes together in a dough mass. No adding water please. Refrigerate the dough for 15 minutes so that it becomes easy to roll.

DSC06406
4. Grease your pie  pan with oil or butter.

DSC06407

4.  Place a sheet of Parchment Paper on your kitchen counter and roll the dough on top of it with rolling pin. Parchment paper helps you to lift the rolled dough easily. If the pastry sheet tears, put it back in the refrigerator for a little more time. 

DSC06410

5. Place the rolled sheet on the greased pie sheet carefully and set it with your fingers. Remove the extra trimmings. If you see a little portion of pastry has teared you can patch it up with a small piece of trimming. Extra trimmings can be used to make smaller tartlets. Place the pie pan in freezer for 15 minutes, till then preheat the oven on 210 degree Celsius (Learn about Oven Temperatures and Conversions)


DSC06411


DSC06412


6. Prick the pie pan with fork all over. Bake it in preheated oven for 15-18 minutes on 210 degree C till you see it has golden colour. Set aside to cool. Once its cold, gently remove it from the pie mould and set aside.


DSC06416


DSC06417


DSC06420


7. For the custard dressing, whisk together eggs and caster sugar. If you are looking for eggless Custard check notes below.


DSC06388


DSC06392


8. Sieve in Corn Cornflour and All purpose Flour and whisk well.


DSC06391


DSC06390


DSC06393


9. Add milk in a saucepan and put it on stove. Add Vanilla Essence*. When the milk just starts to boil that is when you notice some bubbles on the sides, turn the flame off.


DSC06394


DSC06395


10. At this stage add the whisked eggs mixture little by little to the milk. Make sure you keep whisking continuously or else the eggs will get cooked and the mixture will curdle.

DSC06396

11. Put the saucepan back on flame on medium slow and bring it to a simmer. Keep whisking for another 30 seconds till it starts to thicken.

DSC06399

12. Immediately transfer the custard in a bowl and cover with cling wrap. Make sure the cling wrap touches the cream. This will prevent a skin formation on the cream. Let the custard come to room temperature and then place it in refrigerator to cool down.

DSC06400
13. After 15-20 minutes of cooling down whisk it again to remove any lump.

DSC06419
14. Spread the custard on the prepared pie crust. Even it with spatula.

DSC06421
15. Now for the top mango garnish, peel the skin and cut it into half, removing the seed. Then further cut halves into thin slices.


DSC06413


DSC06414


DSC06415


16. Arrange the mango slices on top, starting in the outside circle and then taking it inwards to mimic flower petals.

DSC06423

17. If you like you can add pomegranate seeds for the centre of the flower. Serve as it is or cover with cling wrap to serve later.

Other Fruit based bakes you can try here are: Apple Raisins Streusel Bread,  Blueberry BarsCoconut Chocolate CookiesPersimmon Rum Cake,  Eggless Orange Cake with Candied Orange Peel FillingPapaya Chocolate MuffinsVegan Chocolate Banana CakeWhole Wheat Vegan Banana Bread with Melon Seeds . Cherry Rosemary & Sea Salt Focaccia BreadItalian Focaccia Bread with Strawberries.

MangoTart_Featured1[whohit]MangoTart[/whohit]

[yumprint-recipe id=’210′]

PurslaneDip_Featured4

I had a Turkish employer in Mexico, the Studio me and my husband worked for. He introduced us to this Purslane Dip when he invited us for dinner at his place. I looked at the leaves and exclaimed “Kulfa!” It was native to my motherland. You dont know the feeling when you find something or someone from your country. I am glad my mother had made me try this vegetable so I instantly recognised it. But unlike Indians they dont make a saag with this. Instead they eat it like a dip with breads or crackers. The idea was new for me and all I can say it was a delicious idea.  

PurslaneDip3

Last time when I visited INA Market I found Kulfa. I instantly bought it. When I reached home I decided to make this dip. Oh it was healthy and so refreshing. If yo can lay your hands on kulfa do spare a little bunch for this different yet tasty dip. You can pull this together in minutes and doesn’t require any cooking.

Directions:

1. Separate the leaves of purslane from the stems.

DSC05738
2. Run it thorughly under water and check for any grit.Coarsely chop them. Set aside.

DSC05739

3. Whisk thick creamy Yogurt in a bowl. You can use Greek yogurt or hung curd. Grate garlic into the yogurt.

DSC05740

4. Add Olive Oil.

DSC05741

5. Season it with Salt and Pepper.


DSC05742


DSC05743


6. Add washed leaves of purslane to the yogurt and combine well.

DSC05744
7. Chill it in the refrigerator and serve with Crackers or Bread of your choice.

Other Raita or yogurt based dishes you can try are : Bathua ka Raita, Aloo Anaar ka Raita, Baigan ka Raita.

PurslaneDip_Featured2[whohit]PurslaneDip[/whohit]
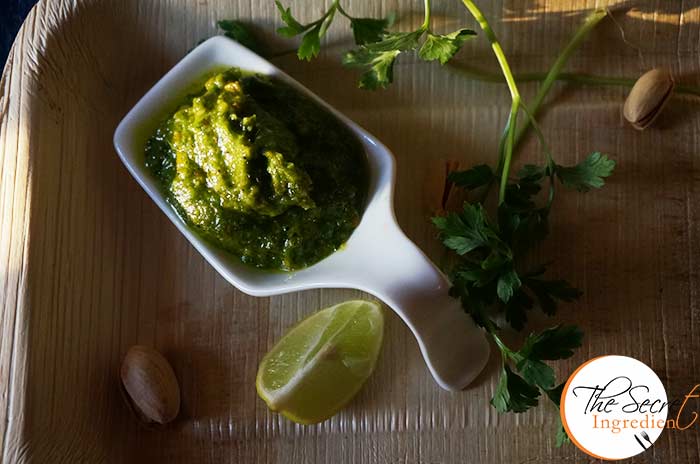
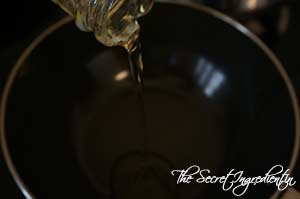
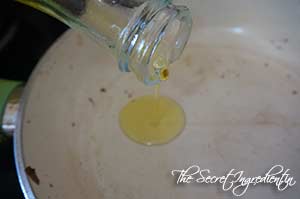
[yumprint-recipe id=’209′]

ParsleyPesto_Featured1
Last week we baked some beautiful buns and decided to make some burgers for dinner. I decided to make Broccoli Patties for the burger but then I thought I dont have any sauce to go with it. I dont like (read “hate”) ketchup. Then something struck me, I had a lot of Parsley which was on the verge of turning yellow. I decided to make a pesto with it.

ParsleyPesto_Featured4

With a handful ingredients the parsley pesto came out delicious and went very well with the Broccoli Patties Burger. You can use this as a marinade for your meat or simply as a dip for your croquettes. Its a versatile dip with a sharp flavour which you wouldn’t like to miss. Its a close kin to Argentine Chimichurri but still has its own unique flavour.

Directions:

1.  Separate the leaves of parsley from the stem and wash them thoroughly for any grit. Put them in a chutney blender.

DSC05844

 
2. Add Garlic Cloves.

DSC05845
3. Add salted Pistachios without the shell to the blender.

DSC058464. Add Olive oil.

DSC05848
5. Season with Salt and Pepper and add juice of lemon (not in pictures).


DSC05849


DSC05850


6. Blend together into a smooth paste. If you feel its not blending easily you may add a little more olive oil. Your Parsley Pesto with Pistachio is ready.

Other Salsas and Chutney you can try here are: Fresh Plum Spiced ChutneyArgentine Chimichurri SalsaCoconut ChutneyGuacamoleIndian Plum & Mint Dip Sweet and Sour Raw Mango ChutneyPudina ChutneySpinach Coriander Salsa| Phalahari ChutneyCoriander Chutney without Onion GarlicRaw Mango Chutney with Mint and CorianderSzechuan Sauce 

ParsleyPesto_Featured2
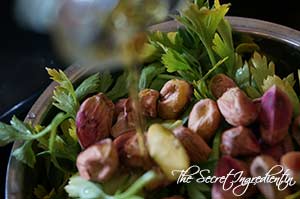
[whohit]ParsleyPesto[/whohit]

[yumprint-recipe id=’208′]


VratWaleDahiKebab_Featured1
Ever since my husband gifted me this Air fryer I cant stop trying recipes which I had earlier put in abeyance for I never wanted to eat fried food. This Navratri I was very excited because a lot of fasting food is fried and I gotta a chance to try variety of dishes in air fryer. Yesterday when I noticed my facebook friend Geeta di had posted the Dahi Paneer Kebabs for Vrat or Fasting, I could not control myself and made these in a jiffy. They were so delicious that my boys (Fully grown as well as my little kid) ate them tastefully.

VratWaleDahiKebab_Featured2
The taste was enhanced by the fact that they were healthy. I used half a teaspoon of oil for 9 kebabs, which isn’t bad at all. Ishall be posting more of my trial in my new Airfyer <3 Oh man! I am loving this.. 

Directions:

1. Wash and Boil some potatoes and peel off their skin. Place them in a mixing bowl.

DSC06153
2. Add crumbled paneer or Cottage Cheese to it.

DSC06154
3. Add Chopped Green Chillies and Grated Ginger.


DSC06155


DSC06156


4. Add Plain Thick Yogurt. You can even use hung curd. I had a creamy thick curd which wasnt runny, so I used that.

DSC06157
5. Add salt, red Chilli Powder and Garam Masala.


DSC06158


DSC06159


DSC06160


6. Add chopped Coriander leaves.

DSC06161
7. Add Singhara flour or also known as Water Chestnut Flour and combine everything well.


DSC06162


DSC06163


8. Take small portions and shape them into patties and place them all on a plate.


DSC06164


DSC06166


9. In the meanwhile preheat your Air Fryer to 180 degrees for 10 minutes.

DSC06165
10. Place the kebabs into the basket of air fryer and brush them with little oil on top.

DSC06167
11. Air fry them for 15-18 minutes till you get a golden colour on top. If you wish you can brush them with more oil in half time. I did not. Serve them hot with Phalahari Chutney

Other Navratri recipes you can try are:  Sabudada KhichdiSwang ke Chawal ki KhichdiSabudana Tikki Khajoor Til Ke LaddooArbi Masala CurryGajar Ka HalwaMakhane Ki KheerRasgullaSwang Ke Chawal Ka HalwaSwang Ke Chawal Ki PhirniAnaar Aloo ka RaitaPalak Dhaniya ChutneyCoriander Chutney without Onion Garlic, Vrat Ki Roti.

VratWaleDahiKebab_Featured3[whohit]DahiKebabForVrat][/whohit]

[yumprint-recipe id=’207′]