Tag

BreadLoaf

Browsing

EgglessBananaBread_Featured1

Every once in a while we have dying, over ripe bananas and do not know what to do with them. The easiest is to throw them away but that would not be wise thing to do. These overripe bananas get sweeter as they age and become more nutritious. I combined them with whole wheat flour and hand husked melon seeds. It made a divine, delicious bread.

EgglessBananaBread_Featured2

I made them two weeks back when my in laws and parents visited us in the hills. Since they are vegetarians I had to make this bread without eggs. Inspite of no eggs the bread came out super moist because it had these delicious over ripe bananas.

Directions:

1. Peel bananas and cut them into slices.


DSC00124


DSC00125


 3. Add sugar and mash them using a potato masher or you can even use a fork. 

DSC00126

4. The bananas should be well mashed leaving no chunks of bananas. It should be of pourable consistency.


DSC00127


DSC00128


5. Add oil and give it a good mix with spatula.


DSC00129


DSC00130


6. Add cinnamon powder and nutmeg powder for a little spiciness and aroma.


DSC00131


DSC00132


7. Add vanilla extract.

DSC00133

8. Add baking powder and baking soda and combine everything evenly.


DSC00134


DSC00135


9. Sift  whole wheat flour using a wired mesh or sieve and add little by little. Combine till everything is moist.


DSC00136


DSC00137


10. Add melon seeds and fold gently using a spatula.

DSC00138

11. Brush a bread pan with oil or butter and dust with some flour. Preheat the oven to 180 degree Celsius (Learn more about Oven Temperatures and Conversions).


DSC00139


DSC00140


12. Pour the batter into the pan and gently level from top.

DSC00141


13. Bake in the preheated oven for 30-40 minutes in medium rack until the toothpick inserted comes out clean.

DSC00142

14. Cool it completely before slicing it . Serve with your favourite cup of tea or coffee.

You can even try Apple Raisins Streusel Bread, Garlic Rosemary Focaccia Bread and Dominos Style Garlic Breadsticks

EgglessBananaBread_Featured3
[whohit]BananaBreadWithMelon[/whohit]


[yumprint-recipe id=’115′]

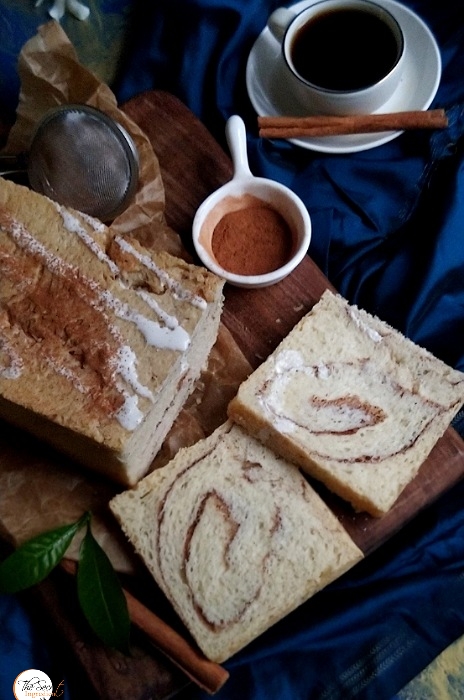
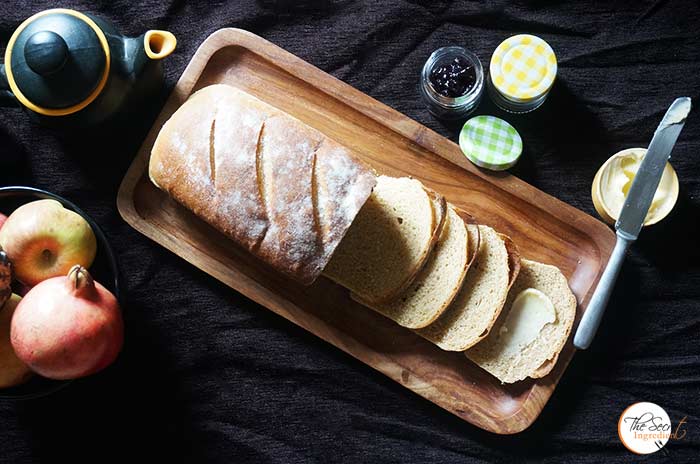
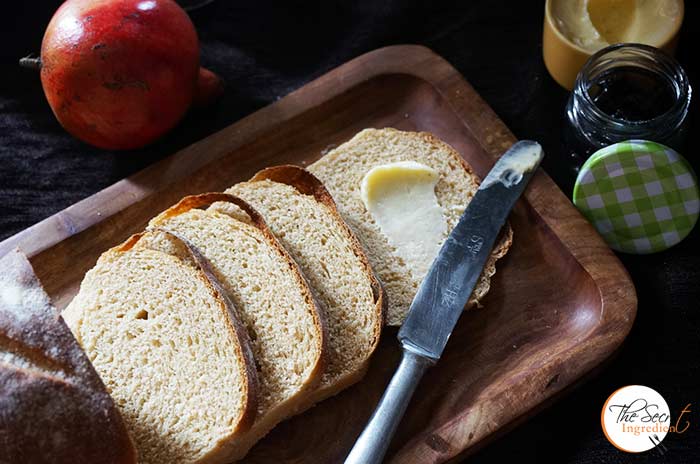
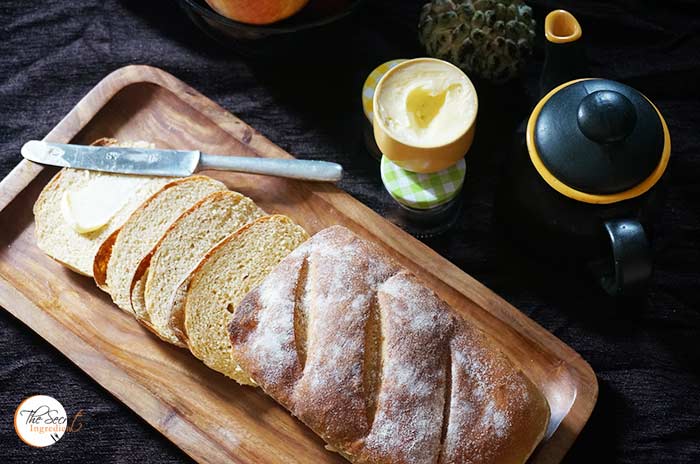
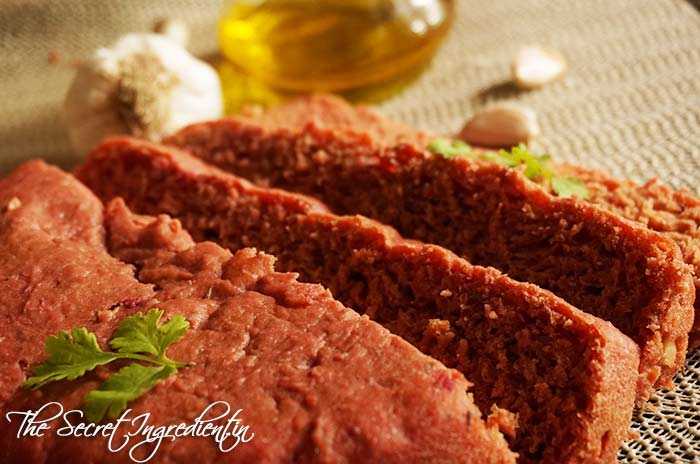
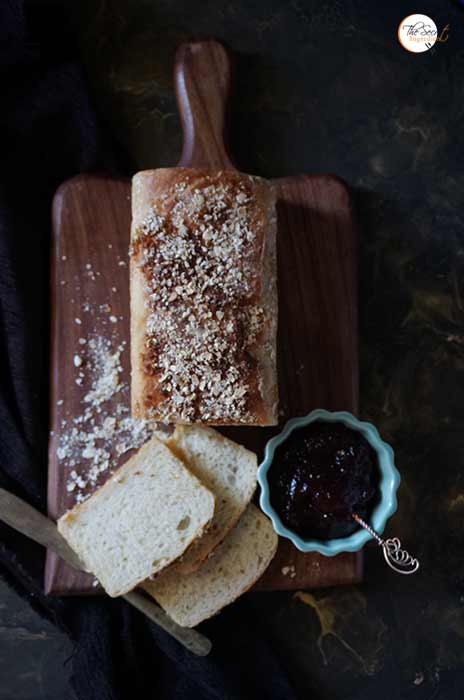
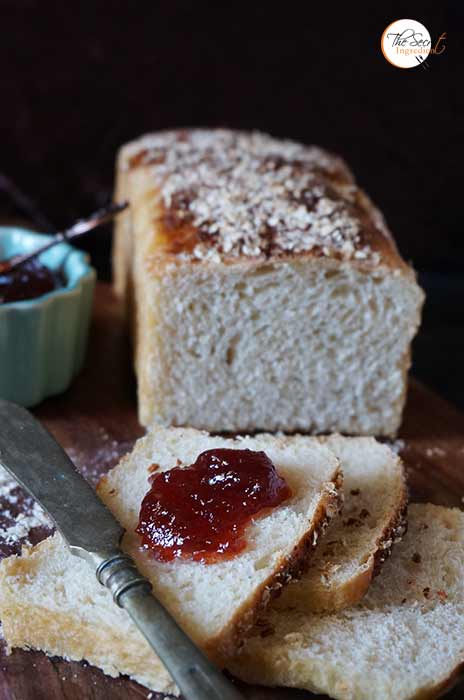
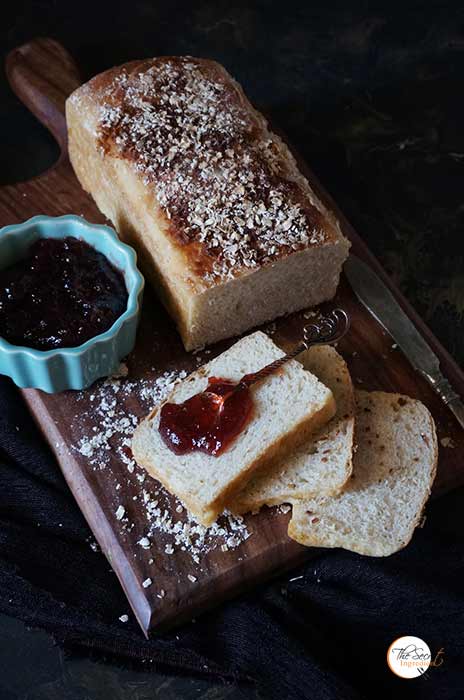
Its such a proud feeling for me when I say this is the best bread I have baked till date. Its so soft and moist, has a perfect crust and a tender crumb. The thing which makes it so amazing is the inside layering with Cinnamon Sugar and Raisins. While I was baking the fragrance of this bread took me back in Mexico’s LeCaroz Panaderia or Bakery. I cant stop talking about this bread. You have to try to believe me . 

You know what!! I just went back in kitchen to grab myself a slice of this bread. I was literally salivating writing description of this moist cinnamony bread. 

I baked this bread before in Mexico for the first time and at that time I was a new baker. Ever since then I have matured and improved my skills. Today looking at this bread has made me realise that my patience and hard work has paid off. Behind this success story are numerous unsuccessful trials but I thank them which made me learn more.

Directions:

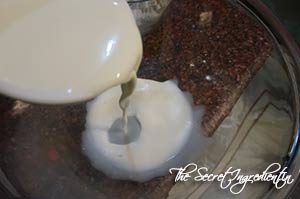
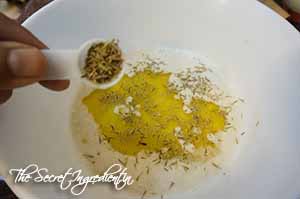
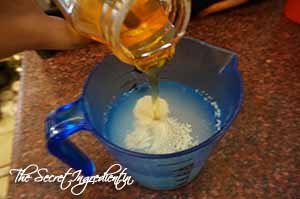
1. In a Small bowl or measuring jar take lukewarm water. It should not be very hot and neither cold. The test is you should be able to insert your finger comfortably without burning. Add melted vegetable shortening into it. See notes to know more about Vegetable Shortening.

DSC00583

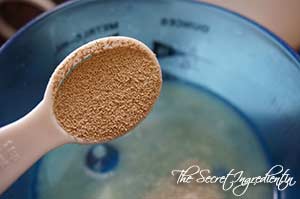
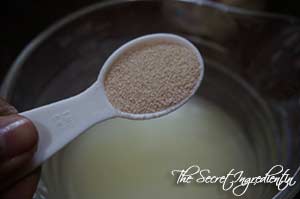
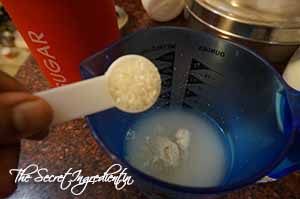
2. Add yeast. You can use either instant yeast or dry active yeast. Both will work just fine. I am using instant yeast for this bread.

DSC00584


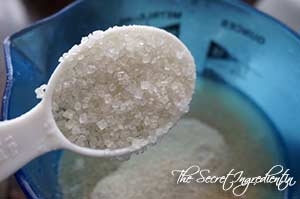
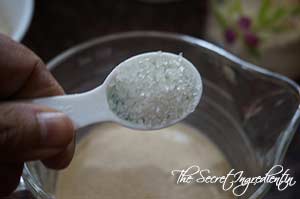
3. Add sugar to the lukewarm water. And let it rest for 5-8 minutes so that the yeast activates. 

DSC00585

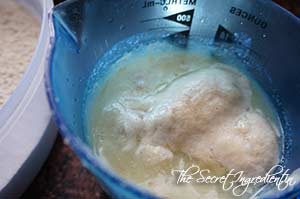
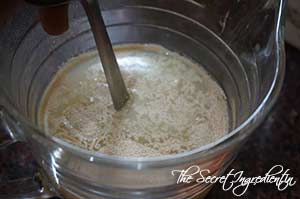
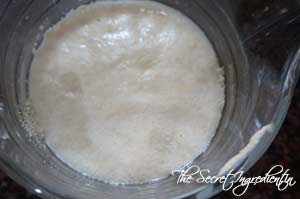
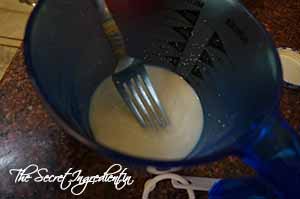
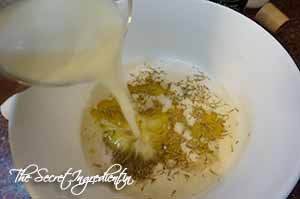
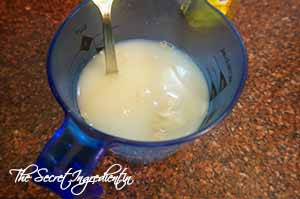
4. The water will turn milky and frothy. This is a sign of yeast activation. If it doesn’t turn milky and frothy you know there is something wrong with your yeast.

DSC00591

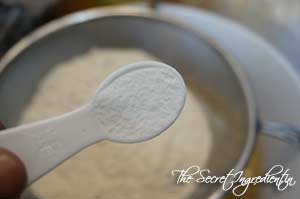
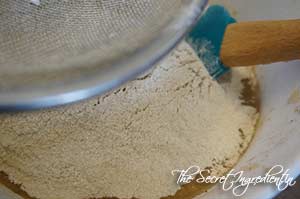
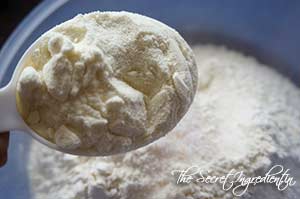
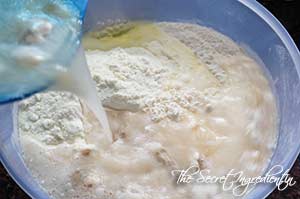
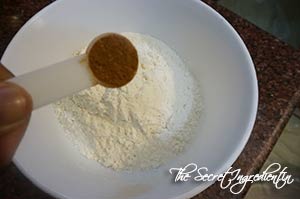
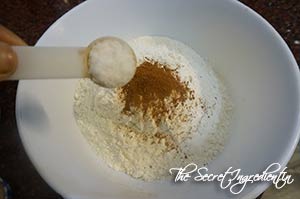
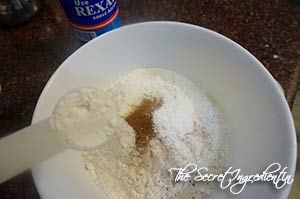
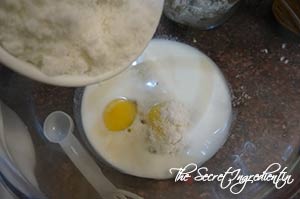
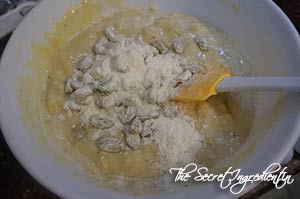
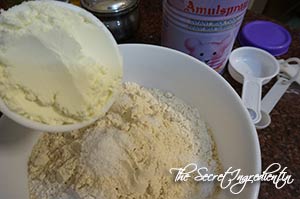
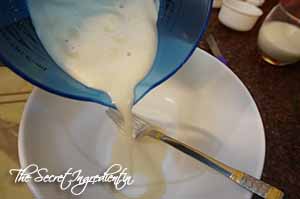
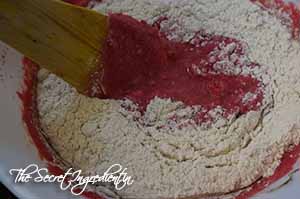
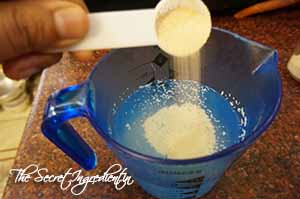
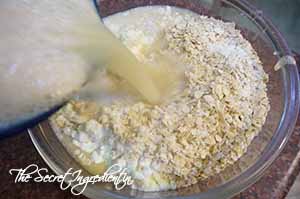
5. In a very large bowl add All purpose Flour.

DSC00586

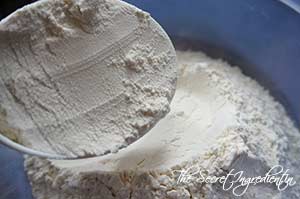
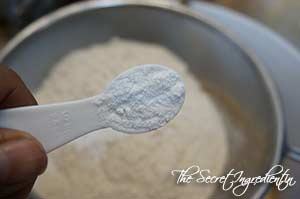
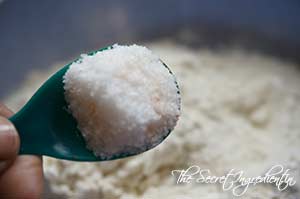
6. Add to it salt and Milk Powder.


DSC00587


DSC00588


 7. Break in an egg.

DSC00589


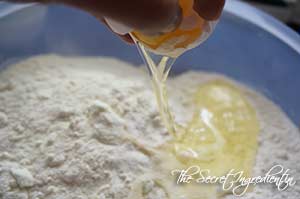
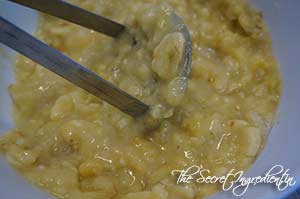
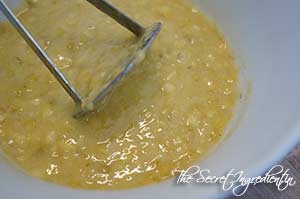
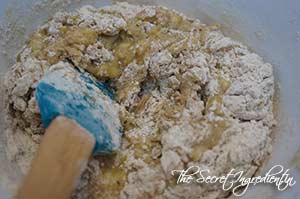
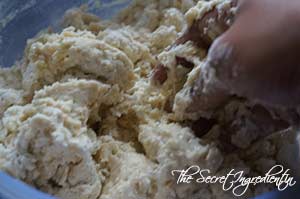
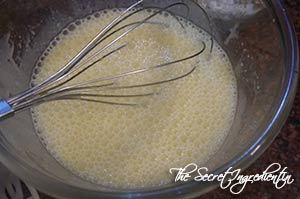
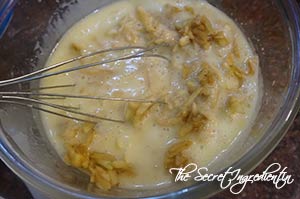
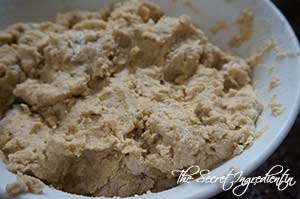
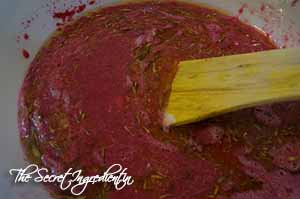
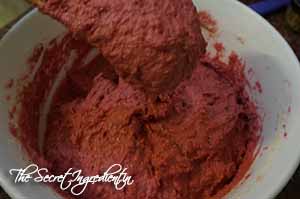
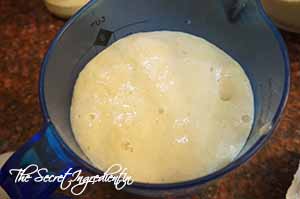
8. Add the yeasty water to the dry mixture little by little and knead using your hand.


DSC00592


DSC00593


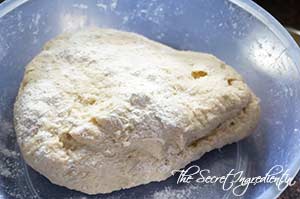
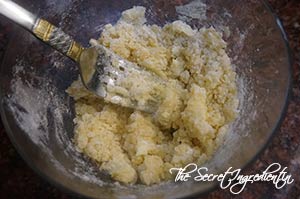
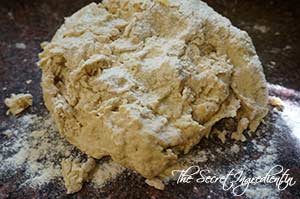
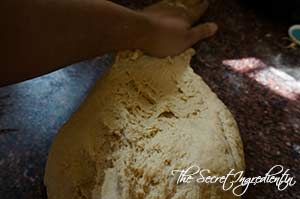
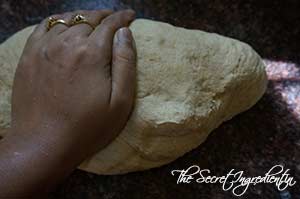
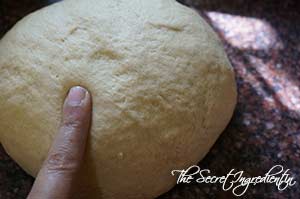
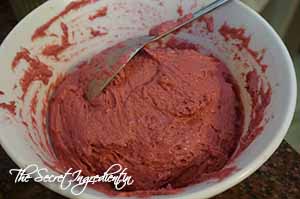
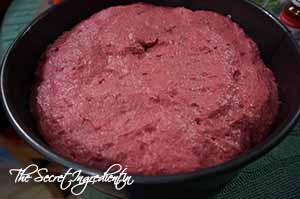
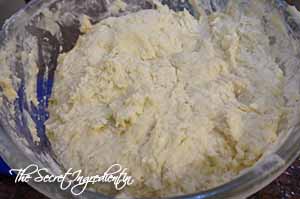
 9. When the entire dough comes together take it on a slightly floured counter top and knead rigorously.  I prefer to do it in the bowl itself. The dough should become soft and supple. You can sprinkle little dry flour to make it non sticky.


DSC00594


DSC00595


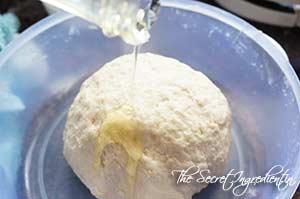
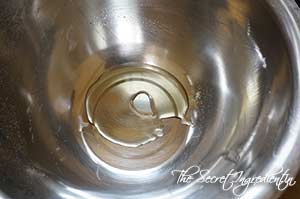
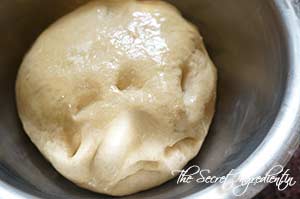
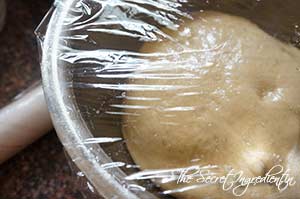
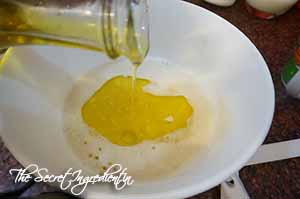
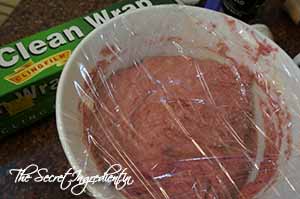
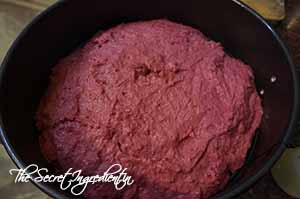
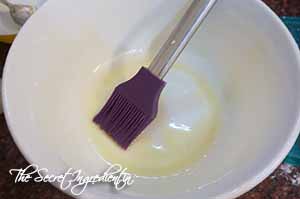
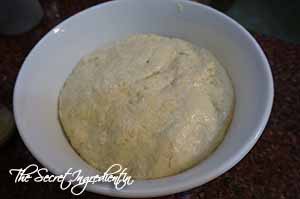
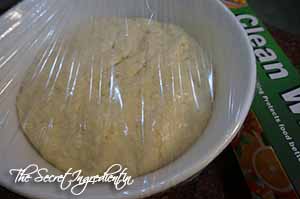
 10. Form a dough ball and place it in a greased large bowl. Also sprinkle the dough with some oil so that it doesn’t turn dry from top. Cover with a cling wrap or lint free kitchen towel or even a lid.


DSC00596


DSC00622


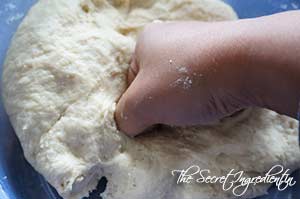
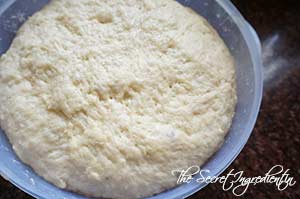
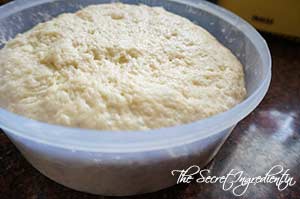
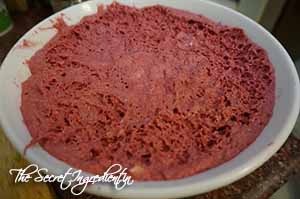
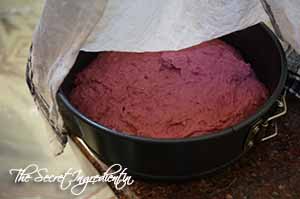
 11, Keep it in a warm dry place for atleast an hour and a half or even two. The proofing depends on the temperature of the place. It proofed soo well for me.


DSC00620


DSC00621


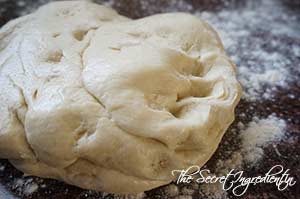
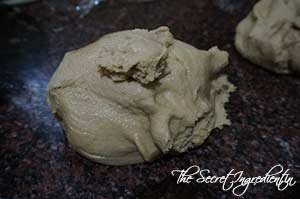
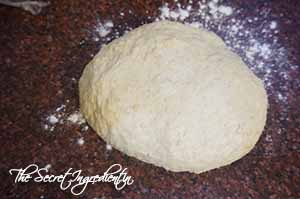
 12. Punch it down using your fists and knead again for another five minutes before we roll it into a bread. Bring it on a slightly floured counter.


DSC00623


DSC00624


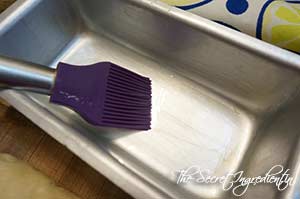
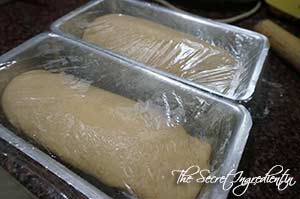
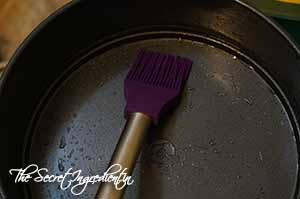
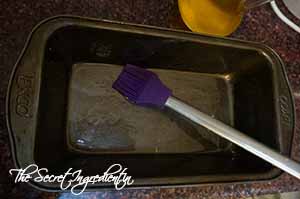
13. Grease a 9×10 bread load with some butter or oil and set aside. 

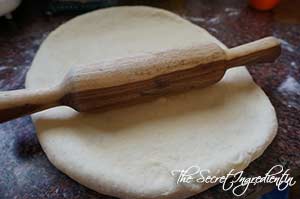
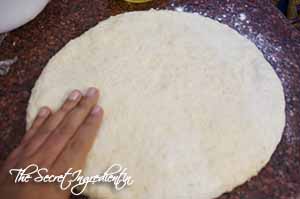
 14. Using a roller pin roll it into a rectangle which should be 10 inches wide and 20 inches in length . 

DSC00625


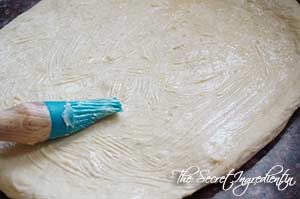
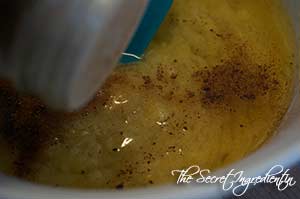
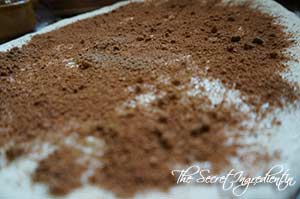
15. Smear the surface with butter.

DSC00626


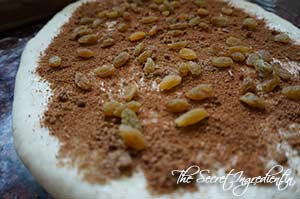
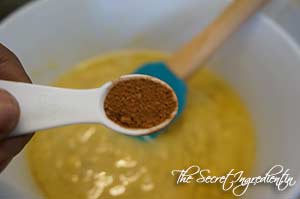
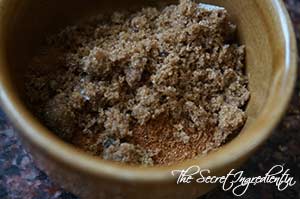
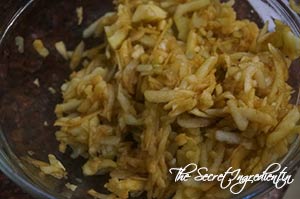
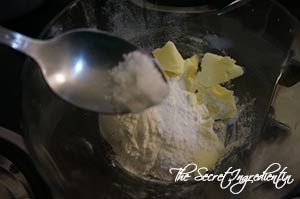
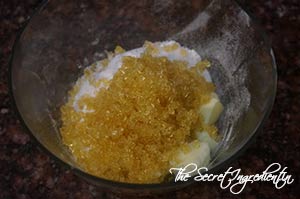
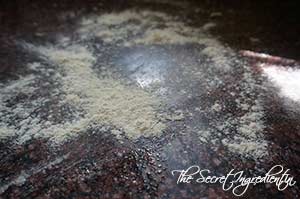
 16. Make a mix of Cinnamon Powder and Sugar. You can use any sugar powder, I used raw brown sugar. Sprinkle it over the butter.


DSC00617


DSC00627


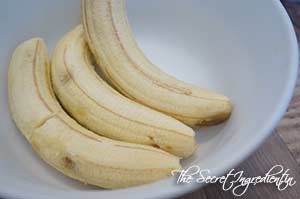
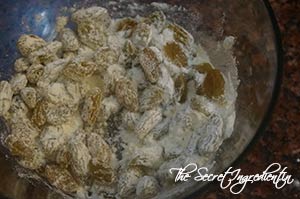
 17. Also spread out raisins.

DSC00628

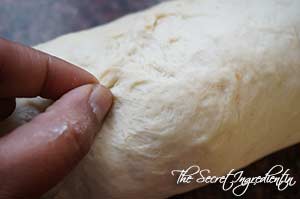
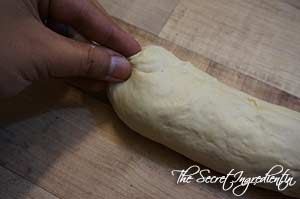
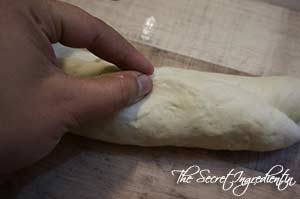
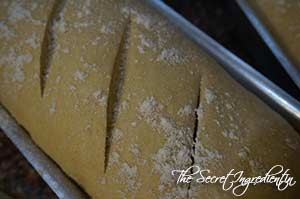
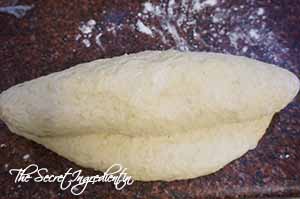
 18. Now start rolling it from one end. Preferably the shortest in the far end. Make sure you roll them as tightly as possible.

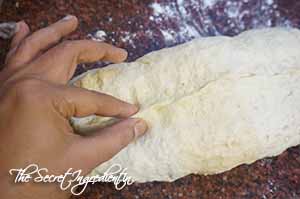
 19. After it has rolled, pinch the seam to lock it.

DSC00631

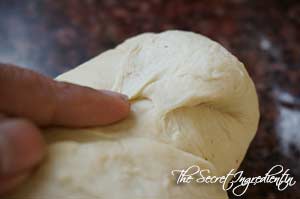
 20. Fold the sides in and pinch again to seal it.

DSC00632

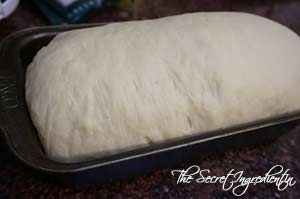
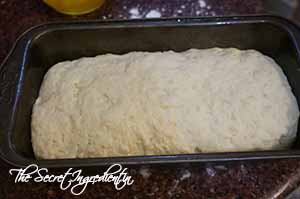
21. Place it in the greased bread pan, seam side down.

DSC00633

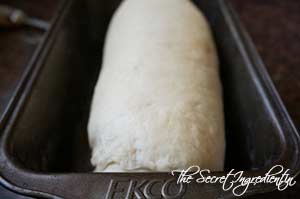
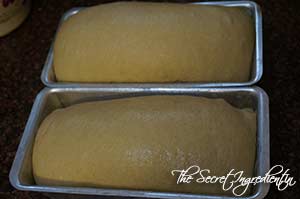
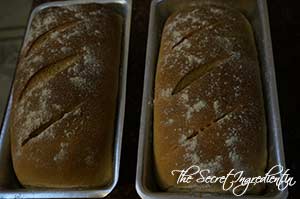
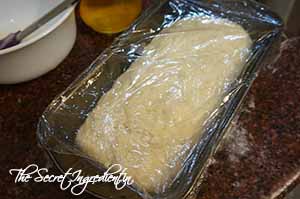
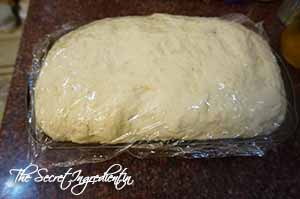
22. Cover with a lint free kitchen towel and let it proof for the second time. This should take another hour or so. Keep it in a dry warm place.

DSC00634

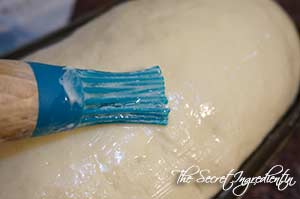
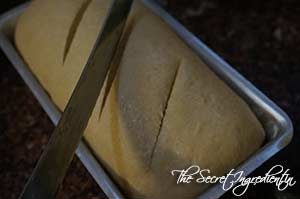
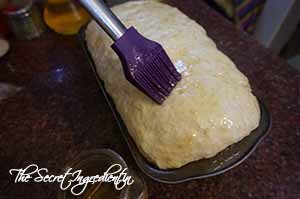
23. After it has risen, brush it with egg wash. Be gentle do not deflate  the bread. Preheat the oven for 10 minutes on 180 degree Celsius (Learn more about Oven temperatures and Conversions).


DSC00635


TDSC00636


DSC00637


 24. Place it in the preheated oven and bake for 40 minutes. Changing sides in half time. If the top of the bread starts getting too dark too quickly cover it with Aluminium Foil.

DSC00639

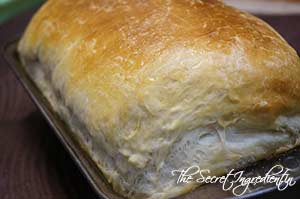
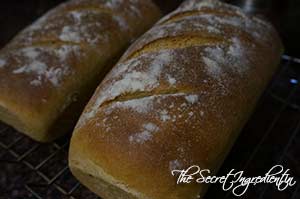
25. Let the bread cool down completely before slicing it, otherwise the bread with crumble. Serve with your favourite cup of coffee.

Other bread recipes you can try are: Italian Focaccia Bread with Strawberries , Rosemary Garlic Focaccia Bread, Garlic Cheesy Bread, Dominos Style Garlic Bread Sticks, Honey Oats Bread, Cinnamon Raisins Bread. Whole Wheat Sandwich Bread, Beetroot Bread.

 Sending this to YeastSpotting

[yumprint-recipe id=’114′]

AppleBread_Featured1

When apples are in abundance you look haywire for some interesting apple recipes. This is in continuation to my post of Apple Cinnamon Pancakes. I made this very delicious cake with streusel or crumple topping. It gives this bread such an amazing texture. The bread has a lovely flavour of fresh apples and raisins. You can have a slice with your warm cup of Coffee or tea. Its perfect when you invite some friends over for an evening tea or serve it for dessert at dinner table with a scoop of Vanilla Ice cream.

Directions:

1. In a bowl combine All Purpose Flour, Cinnamon Powder,baking powder and Salt.


DSC07080


DSC07081


DSC07082


2. In a small bowl add raisins and 1/4 cup of Flour mix and toss them together. Set aside.

DSC07084


3. In another bowl add milk and eggs.


DSC07085


DSC07086


4. Add Vanilla Extract, Orange Zest and Sugar.


DSC07087


DSC07088


5. Add Oil and whisk everything together to form a frothy mixture.


DSC07089


DSC07090


6. Peel, core and grate apples and add to the wet ingredients.


DSC07091


DSC07092


7. Add dry ingredients to the wet ingredients and fold them using a spatula until every thing is moist. Also add the raisins and combine.

DSC07093

8. Preheat the oven on 350 degree Fahrenheit (Learn more about Oven temperatures and conversions). Grease a 9×5 loaf pan and line it with Oddy Uniwrap Parchment paper. Pour the batter into the pan and keep aside.

DSC04629


9. For the streusel or crumble in a bowl add cold butter cubes, all purpose flour salt and sugar. Using your finger tips or a fork combine them to form a crumbly mix.


DSC07095


DSC07096


DSC07097


10. Sprinkle the crumble on top of the bread batter evenly leaving no space.

DSC07098


11. Bake it in oven for an hour or until the toothpick inserted comes out clean without any wet batter. Let it cool down completely before slicing. Enjoy!

You can even try our Persimmon Rum Cake, Spiced Raisin Bread and Pumpkin Cake Rolls.

[whohit]AppleBread[/whohit]

AppleBread_Featured-2


[yumprint-recipe id=’97’]

wholewheatsandwichbread_featured1

I tried my hands numerous times to bake a perfect bread. After a lot of hit and trial I finally figured out what goes into that perfect loaf of bread. Since then I have been experimenting with new recipes and have stopped buying bread from market. Its been half a year now and I oo don’t miss eating that crappy bread.

A lot of people say that they just cant get the bread right, the dough never rises. Its because the yeast is either expired or the temperature of water is not perfect for yeast to rise. Always check the colour of your yeast it should be whitish and not brown in colour. If its brown it means it is of no use, simply throw it in the bin. If you want to under yeast better you must read “All you ever wanted to know about yeast“. I have started using instant yeast which can be mixed with the dry flour and kneaded into a dough, leaving no room for any error. You can buy Instant yeast from our online store The Gourmet Shop

wholewheatsandwichbread_featured3


I had earlier posted a  recipe of White Sandwich bread which come out beautiful. But lately, I have tried to cut All Purpose Flour from my daily life, therefore eating Whole Wheat bread is always a better open. But to make a whole wheat bread is a little different. If you are using whole wheat flour or atta the bread comes out dense and bulky. The reason being that unlike All Purpose Flour Whole wheat flour doesn’t have that much gluten which is essential for making a airy light bread.  Therefore, if you add additional gluten to the flour while kneading the bread will come out just amazing.

Directions:

1. In a bowl add wheat flour and salt.

DSC07265
2. Also add milk powder, Gluten and oil. If you dont know what vital gluten looks like, its just like any other flour. You can always buy at our Online store.

4.  In a container take some lukewarm water. It should neither be hot nor cold, just hot enough to comfortably put your finger into it. The right temperature of the water is very important for yeast to activate. Put yeast into it. Along with yeast add some sugar.


dsc09017


dsc09018


5. Give it a gentle stir with a fork and let the mixture sit and activate for 10 minutes or until you see some bubbles on top and mixture has become frothy and milky.


dsc09020


dsc09022


6. Add the proofed yeast to the flour little by little and mix till it comes together. You dont have to knead at this stage. Just mix it with hands or even a wooden spatula. Let this sit for 10-15 minutes. This is known as autolyze. 


dsc09024


dsc09025


7. After 10-15 minutes dust your counter with some flour and place your dough on it and start to stretch and knead. This kneading is different than kneading a dough for roti. You have to knead for 10-15 minutes in order to gluten to develop. Read more about Bread baking techniques in “Basic Steps to Bake a Perfect Bread


dsc09026


dsc09027


dsc09029


8. How would you know if you have kneaded the dough properly. Give it a finger test. Make a ball of dough and slightly poke with your finger if you see it bounces back it means its ready to be proofed. Remember the bounce will be very slight and if it doesn’t happen you need more kneading time. Start again and check with your finger.


dsc09030


dsc09031


9. Transfer the dough to a greased bowl. Cover with a kitchen towel or cling wrap. Turn the dough upside bowl so that it is also coated with a layer of oil. The size of the bowl should be big because on proofing the dough will become double in size and there should be ample room for it in the bowl. Let it sit for an hour or so to double up in size. The time of proofing depends on the temperature of the kitchen. If the weather is cold it might take longer and if its hot the dough will rise quickly so time it accordingly.


dsc09032


dsc09033


dsc09034


10. Punch it down and deflate the dough. Knead for another 5-7 minutes. Divide the dough into two.

dsc09035


11. Grease two bread pan with oil and dust with some flour. I have used  two 8 inch rectangular bread mould

DSC02566


12. Roll half dough into a circle using a roller pin.

DSC02565

13. Take one end and roll it together . Fold in the sides and pinch the seam.


DSC02567


DSC02568


DSC02569


14. Place the rolled dough in the baking pans with seam side down. Cover the dough loosely with a towel or cling wrap and let it rest again for 30 minutes or till it rises again. The dough will reach the lip of the pan that’s when you have to bake it. Preheat the oven to 180 degree Celsius for 10 minutes. (Learn more about Oven temperatures and Conversions)


dsc09036


dsc09037


15.  If you wish you can score the bread with a sharp knife. You can choose to brush the top gently with milk wash or egg wash. This time I chose to just dust it with flour for a rustic look.


dsc09038


dsc09039


16. Bake it in the center rack of your preheated oven for 35-40 minute. Change sides half way for even cooking. If you feel your bread is browning too fast tent it with aluminium foil and continue to bake.

dsc09040
17. Remove from the tin after 5 minutes you have removed them from the oven or else the bottom with become soggy.  Let the bread cool down completely on a wire wrack before slicing it.

dsc09041

18. Smear some butter and enjoy the delicious home made whole wheat bread.

You can also try Honey Oats Bread, Rosemary Garlic Foccacia Bread, Domino’s style Garlic BreadsticksVegetarian homemade PizzaRussian Bublici,  Chinese Black Sesame Steamed BunsCherry Focaccia Bread with Rosemary and Sea Salt, Cinnamon Raisin BreadBeetroot Bread with Garlic and Thyme.


Sending this Bread to YeastSpotting

 [whohit]WholeWheatBread[/whohit]

[yumprint-recipe id=’86’]


BeetGarlicThymeBread_Featured1
I had been meaning to make Borsch, a classic Russian soup with chukandar or beetroot for a very long time and in my pursuit to cook it I bought more beetroots than I actually needed. I had to do something with them as they were sitting in the fridge for a week now. And to my good fortune I found this recipe of Beetroot bread with Garlic and Thyme. The beautiful pink colour of the bread caught my attention and it was decided then and there as to what is going to be the fate of my beetroots.

Baking this bread was a no mess business, as it required no kneading. All you have to do is simply mix it well with a spoon and let the batter sit to rise. After I baked the bread I realised that the bread was not only beautiful but very yummy and very healthy .

Directions:

1. Wash and peel Beetroots. Cut them roughly into pieces.


BeetGarlicThymeBread1


BeetGarlicThymeBread2


2. Put the beetroot pieces in a pressure pan along with a cup of water and cook for 2 whistles or 5-7 minutes or till they become a little soft. Put the flame off and let them cook in pressure and open the lid once the pressure has released.

BeetGarlicThymeBread3

3. Let the beetroots cool down for some time. Reserve the water and put them in a mixer to make a smooth paste. Use couple of table spoons of water if needed. Set aside. I use the beetroot water to make roti dough. It brings an amazing colour to the dough and makes the rotis more nutritious.


BeetGarlicThymeBread4


BeetGarlicThymeBread5


BeetGarlicThymeBread6


4. In a container take some lukewarm water. It should neither be hot nor cold, just hot enough to comfortably put your finger into it . The right temperature of the water is very important for yeast to activate. Put yeast into it.

BeetGarlicThymeBread7

5. Add some sugar along with yeast.

BeetGarlicThymeBread8

6. Give it a gentle stir with a fork and let it stand and activate for 5-7 minutes.

BeetGarlicThymeBread9

7. Pour the activated yeast mixture in a large bowl.

BeetGarlicThymeBread11


8. Chop some garlic and put it in the bowl.


BeetGarlicThymeBread10


BeetGarlicThymeBread12


9. Put olive oil.

BeetGarlicThymeBread13

10.  Add fresh chopped thyme or dried thyme. I used dried thyme. 

BeetGarlicThymeBread14

11. Add buttermilk. Learn how to make Instant buttermilk at home.

BeetGarlicThymeBread15

12. Add the beetroot puree and salt to the mixture. Give it a gentle stir to combine everything together.


BeetGarlicThymeBread16


BeetGarlicThymeBread17


13.  Add flour and give it a stir with a spoon or spatula that everything comes together in the form of a very sticky dough. Oh did you look at that beautiful pink color! Give it a moment to admire 😛


BeetGarlicThymeBread18


BeetGarlicThymeBread19


BeetGarlicThymeBread21


14. Cover the bowl with a cling wrap and let it rest in some warm place to double up in volume. It can take somewhere 1 and a half hour to two and a half hours.

BeetGarlicThymeBread22

15. After the dough has risen and doubled in volume. Deflate it again using wet hands. I used the same spoon because my dough was very sticky. Yes I did panic but the result was spectacular.


BeetGarlicThymeBread26


BeetGarlicThymeBread27


16. Grease a baking pan and pour the mixture into it. I used a a round spring form pan 7-Inch in diameter and 3-Inch deep with 6-cup capacity


BeetGarlicThymeBread25


BeetGarlicThymeBread28


17. Cover the pan with a wet kitchen towel and let it rest again to rise and double up for another half an hour or so.


BeetGarlicThymeBread29


BeetGarlicThymeBread30


18. Bake on 180 degree Celsius for 20 to 30 minutes on a preheated oven . Learn more about Oven temperatures and Conversions. Let the bread cool down completely on a wire rack before slicing it.

You can even try our Honey Oats Bread, Garlic Rosemary Focaccia Bread or Domino’s Garlic Breadsticks.

BeetGarlicThymeBread_Featured2
[whohit]BeetrootBread[/whohit]

[yumprint-recipe id=’55’]

Baking a perfect bread was always my dream endeavor. With this recipe that dream has been accomplished. My household does not buy any commercial bread now. The home made bread is not only hygienic but also full of flavour and nutrition. This honey oats bread recipe is a keeper. Its been so many years I have been following this and it has never failed me.

Its no rocket science just follow the recipe and you will have the most beautiful bread loaf ever. I bet you will never go back to the market baked bread ever. I am pairing this with my delicious 3 ingredient Strawberry Jam, which is like the best thing ever.

Directions:

1. In a container take some lukewarm water. It should neither be hot nor cold, just hot enough to comfortably put your finger into it . The right temperature of the water is very important for yeast to activate. Put yeast into it.

HoneyOatsBread1
2. Along with yeast add honey.

HoneyOatsBread2
3. Give it a gentle stir with a fork and let it stand and activate for 5-7 minutes.

HoneyOatsBread3
4. In the meanwhile in a bowl add All purpose Flour, Oats, Salt and Milk Powder.


HoneyOatsBread4


HoneyOatsBread5


5. You know your yeast is activated when you see the mixture all frothy and spot some bubbles on top. Add melted butter.


HoneyOatsBread6


HoneyOatsBread7


6 . Now Add this to the dry ingredients little by little and combine to form a little sticky dough. You can bring it on your counter and knead it for another 5- 7 minutes till it forms a smooth dough. 


HoneyOatsBread8


HoneyOatsBread9


7. Grease a big sized bowl with vegetable oil and place the dough ball into it. Oil the dough top as well so that it does not form a crust.


HoneyOatsBread10

HoneyOatsBread11

8. Cover the bowl with a plastic wrap or a wet kitchen towel.

HoneyOatsBread12

9. Place the bowl undisturbed to rise in a warm place for atleast an hour and a half preferably in an unplugged microwave. The dough should double up in volume.

HoneyOatsBread13

HoneyOatsBread15

10. After the dough has proofed up. Remove it from the bowl, sprinkle some flour and place it on your counter top and knead for couple of minutes.

HoneyOatsBread16
11. Roll the dough with your finger tips to form a not so perfect circle and start folding from one end.

12. Fold it from from other end as well and pinch to seal the ends.


HoneyOatsBread19

HoneyOatsBread21

13. Grease a 9×5 inches bread pan and carefully place the folded dough into it, seam side down.


HoneyOatsBread14


HoneyOatsBread22


14. Cover it loosely with a cling wrap or wet kitchen towel and let it stand for another one hour till it doubles up once again.


HoneyOatsBread23


HoneyOatsBread24


15. Now without deflating the risen dough, brush honey generously on the top face of the bread.

HoneyOatsBread26

16. Sprinkle some oats on top.

HoneyOatsBread27

17. Let the bread bake for 40 minutes or so or until the bread turns golden brown in colour on preheated oven on 350 F (Learn about Oven Temperatures and Conversions). See the notes if the bread starts getting more darker colour. Let it cool completely on wire rack before slicing it.

Other bread recipes you can try : White Sandwich BreadVegetarian homemade PizzaRussian BubliciWhole Wheat Sandwich BreadChinese Black Sesame Steamed BunsCherry Focaccia Bread with Rosemary and Sea SaltRosemary Garlic Focaccia BreadCinnamon Raisin BreadBeetroot Bread with Garlic and ThymeHoney Oats Bread, Domino’s Garlic Breadsticks.


Sending to YeastSpotting

[yumprint-recipe id=’46’]