Tag

IndianSummers

Browsing

 PetheyKiSabzi_Featured4

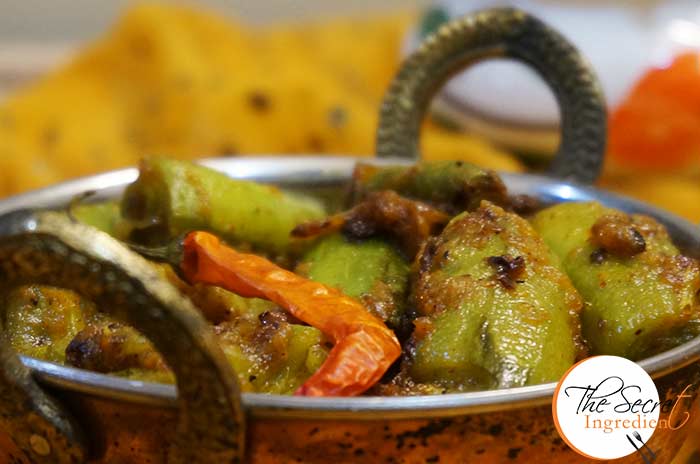
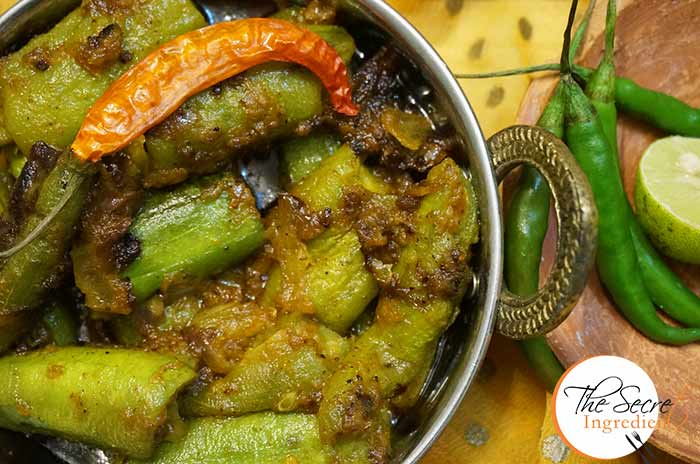
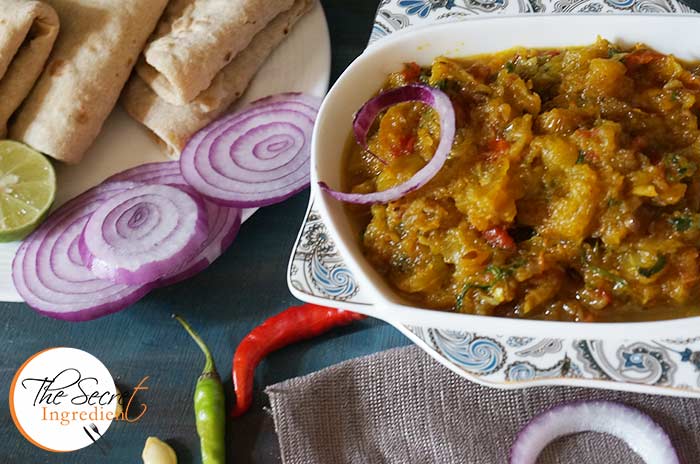
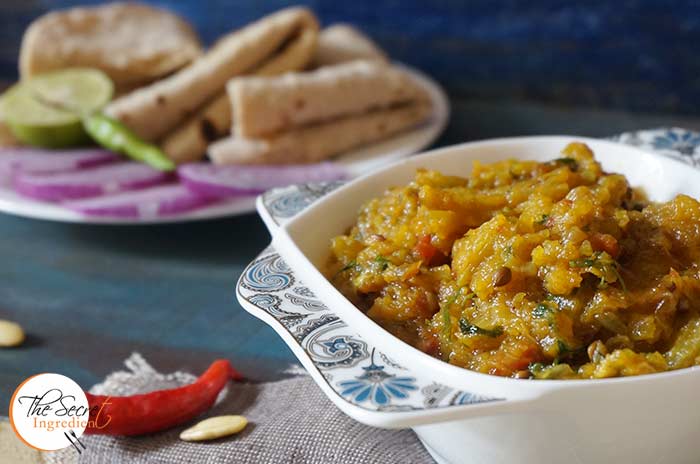
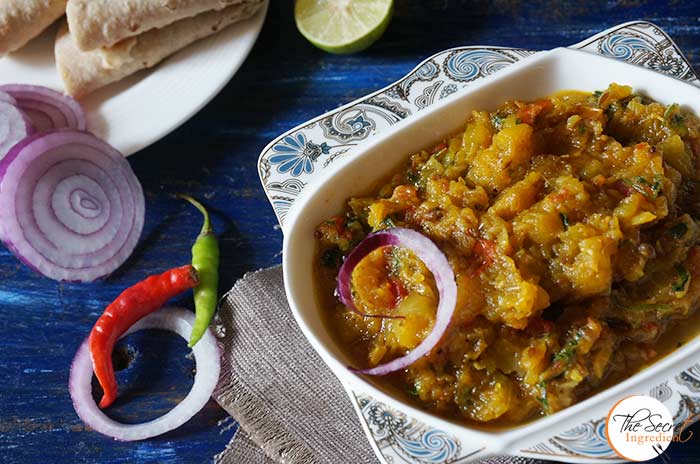
Everyone has his/her own comfort food. After eating it all you can think about is love, deliciousness and indulgence. It may not be fancy schmancy but the simplicity of that dish connects you to the higher self. My Soul food is my mother’s Pethey ki Sabzi or Punjabi style Pumpkin. This recipe makes this humble vegetable the most desired one. 

PetheyKiSabzi_Featured5

Back when I was a little girl I never liked any of these vegetables . By ‘these’ I mean any of these from the gourd and squashes family. As I grew up and was married away I realised that this is the kind of food I have grown on and is an integral part of my life. I started longing for pethey ki sabzi, bharwan karela, bharwan tinda, kaddhi chawal and more. This ignited the spark in me to learn these recipes from my mommy. I am glad my mommy taught me all of these and I can play  the role of perfect mommy for my sonny boy. For me growing on these dishes is a sign of perfect childhood 😉

Directions:
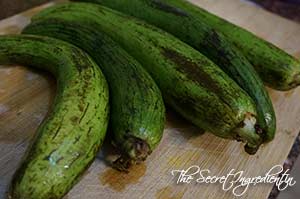
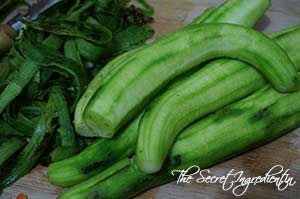
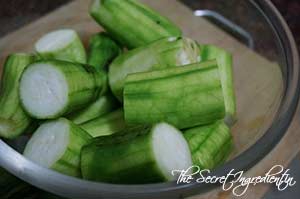
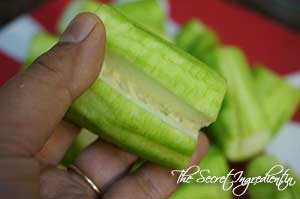
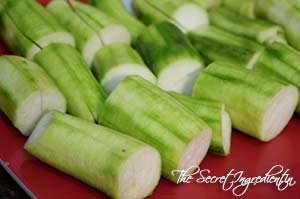
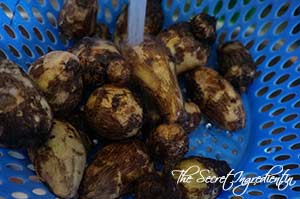
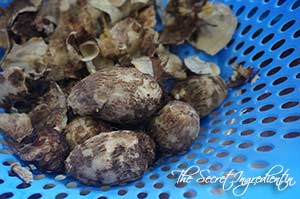
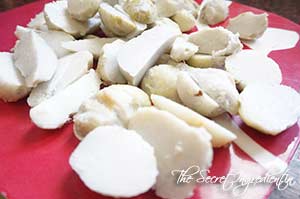
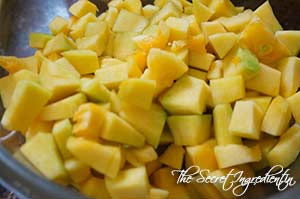
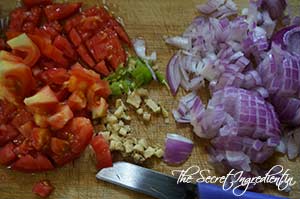
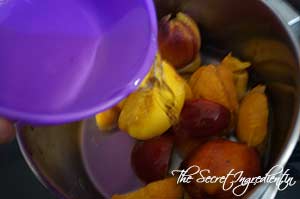
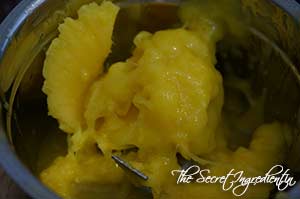
1. You will need a round pumpkin with green skin and yellow inside. remove the seeds and membranes and peel off its skin. Chop it into very small pieces. Set aside.


DSC06787


DSC06788


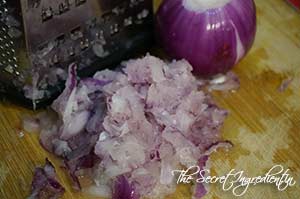
2. Also chop finely some onions, ginger root, green chilies and tomatoes.

DSC06789

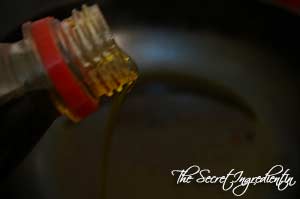
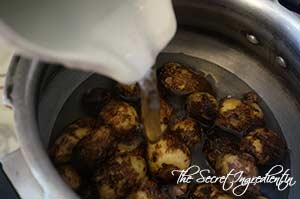
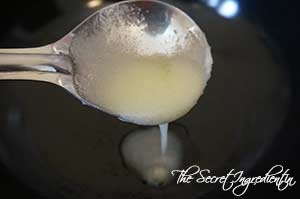
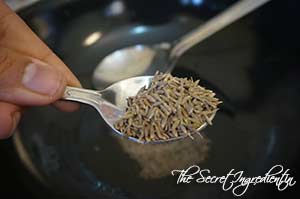
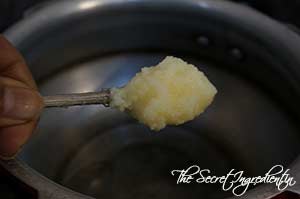
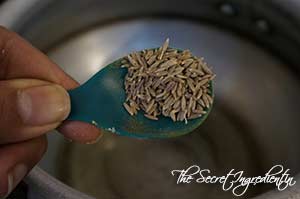
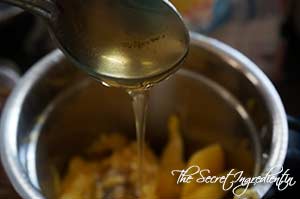
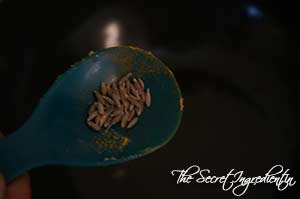
3. In a pressure pan add ghee or clarified butter.* As it melts add cumin seeds till it crackles. 


DSC06790


DSC06791


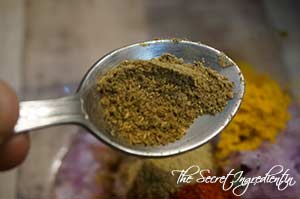
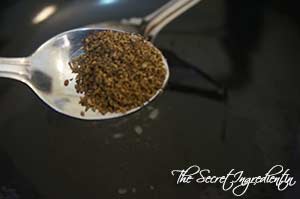
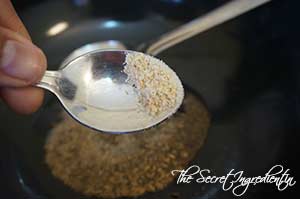
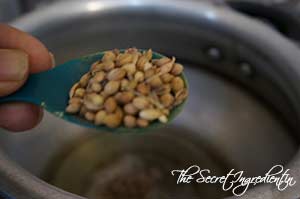
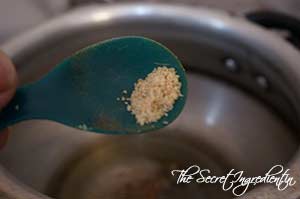
4. Add crushed coriander seeds, asafoetida and fenugreek seeds. Toss them in ghee.


DSC06792


DSC06793


DSC06794


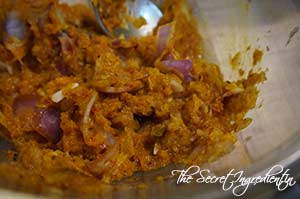
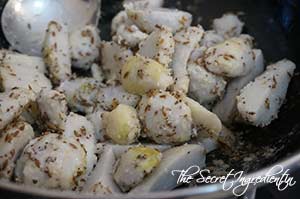
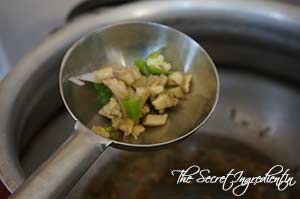
5. Add chopped ginger along with green chilies. Saute them for a few minutes and then add onions to saute.


DSC06795


DSC06796


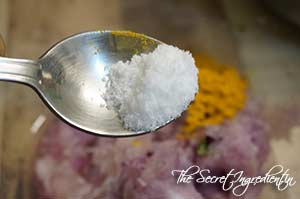
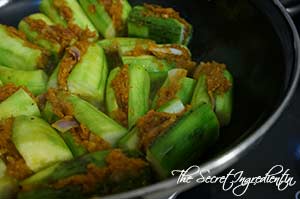
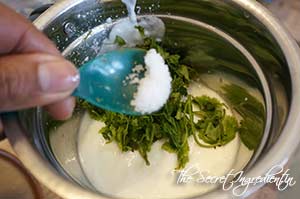
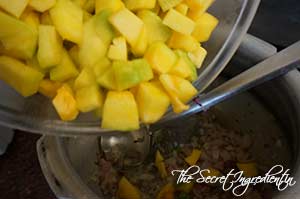
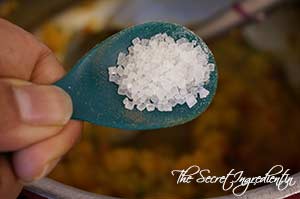
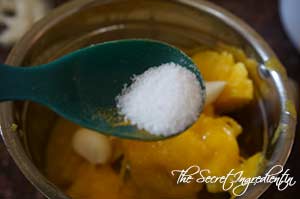
6. When the onions have caremalized add chopped pumpkin. Add salt and combine.


DSC06797


DSC06798


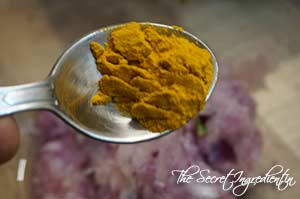
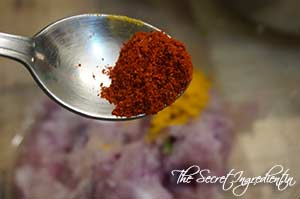
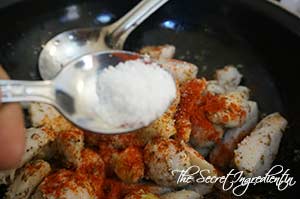
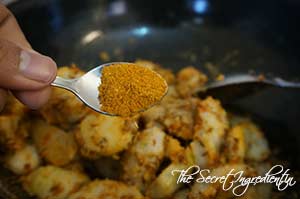
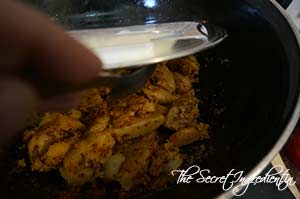
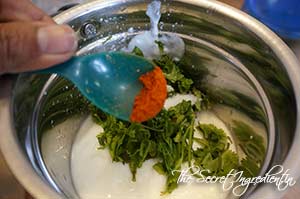
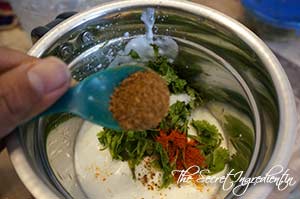
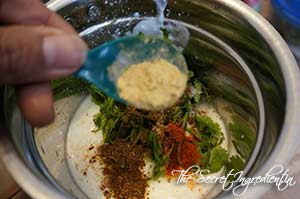
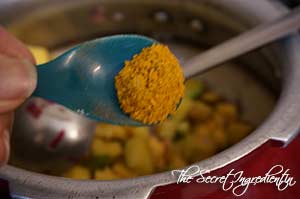
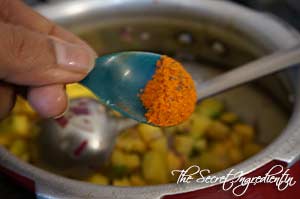
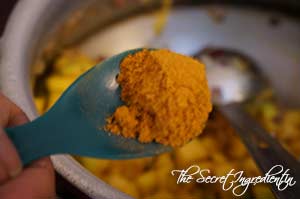
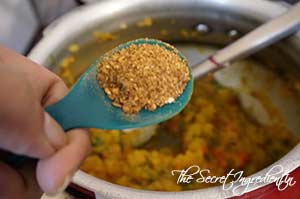
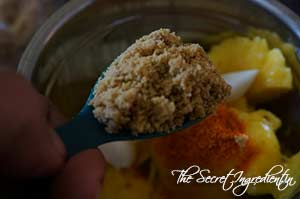
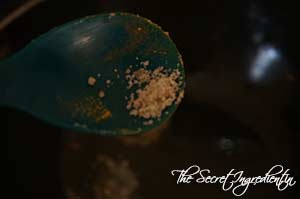
7. Also add, turmeric, red chilli powder and sambhar masala. Yes you read that right. Sambhar masala makes a huge change in taste which you wouldnt like to skip. Coat the spices with pumpkin.


DSC06799


DSC06800


DSC06801


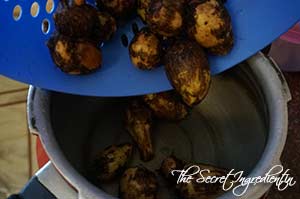
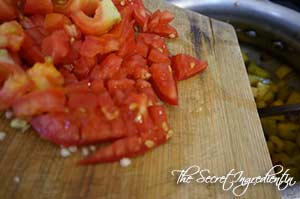
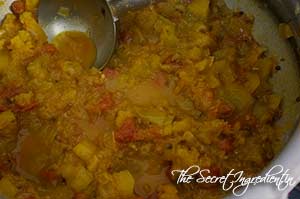
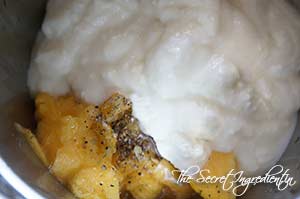
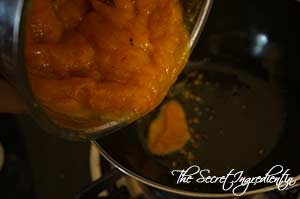
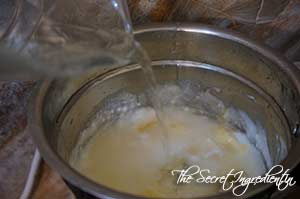
8. Add chopped tomatoes and mix.Close the lid and cook the pumpkin on high flame for one whistle or till when the pressure has reached its maximum. Turn the flame on low and let it cook for another 15 minutes.After that turn the flame off and let it cook in the steam. Do not open the lid. 

DSC06802 

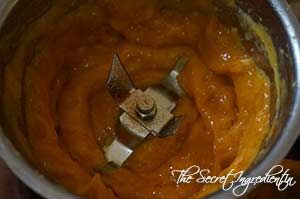
9. After the steam has escaped you will see there will be water in the base of pan. Again turn the flame on let the water evaporate. Slightly mash the pumpkin with the back of spoon.

DSC06803

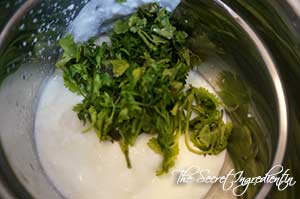
10. Add Freshly chopped coriander.


DSC06804


DSC06805


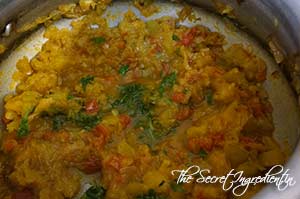
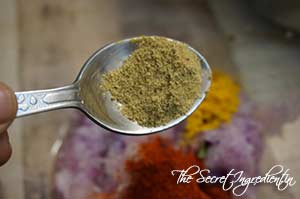
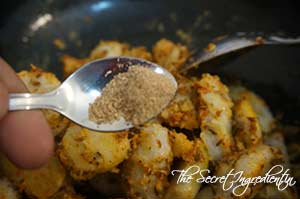
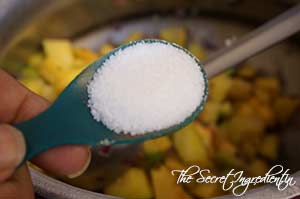
11. Also add garam masala and a little sugar to balance the flavours.


DSC06806


DSC06807


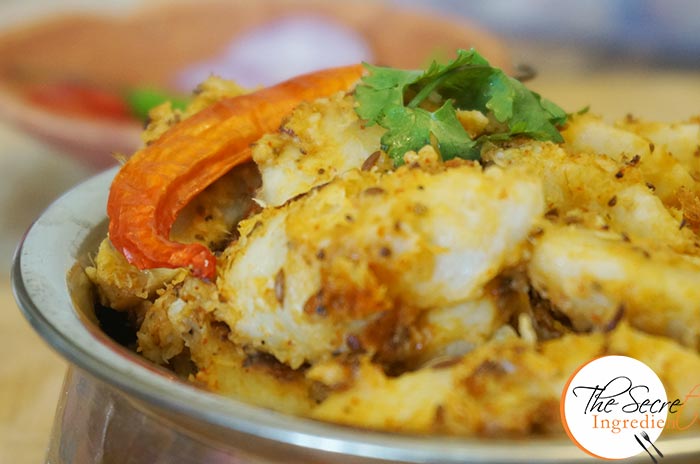
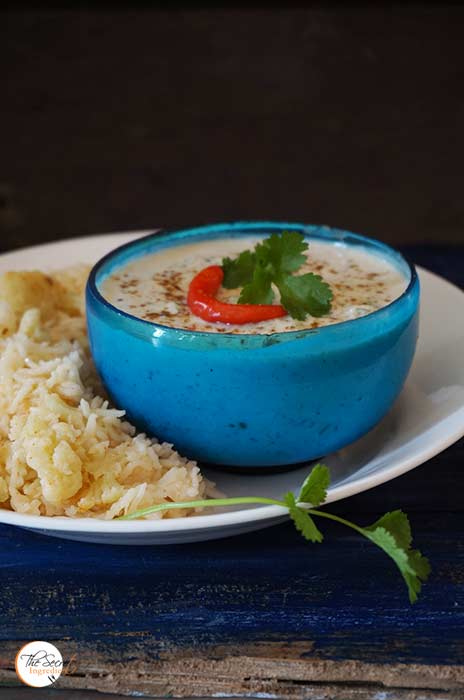
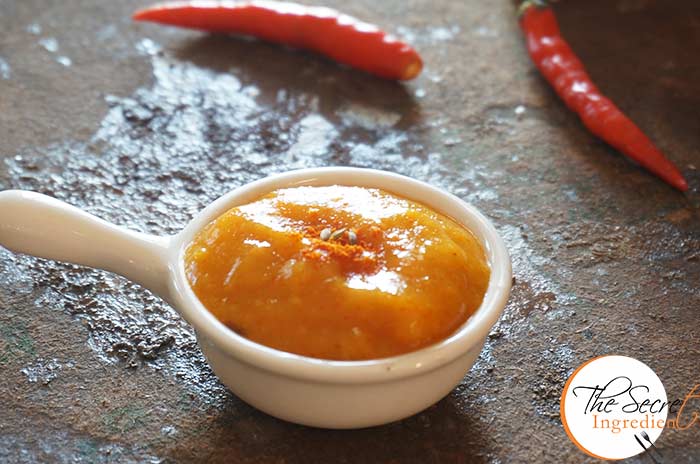
12. Serve hot with Roti or puris. Do not forget to team your meal with raw red onion slices.

Other Punjabi dishes you can try are:Aloo Methi Punjabi Style, Bharwan Tinda, Stuffed Karela, Kadhi Chawal, Touri VadiPunjabi Dal MakhaniPunjabi Style Dum Aloo

PetheyKiSabzi_Featured1

[whohit]PetheyKiSabzi[/whohit]

[yumprint-recipe id=’231′]

PeachLemonade_Featured1

A few weeks back I had posted the recipe of Peach Cobbler and it got tremendous response from you all. I was asked if we could use peaches in any other ways and the best way I knew was to make this refreshing lemonade with these juicy delicious peaches. This lemonade brings out the real taste of peaches and makes it a fabulous quencher for thirst specially in sultry summer weather.

PeachLemonade_Featured3

When I made this lemonade last week my friends were here and they insisted I make another batch for it was one of its kind and made from fresh fruits. You must try this for your family I am sure your kids will love it. You can make this drink ahead of time and will be ideal for your barbeque parties.

Directions:

1. Thoroughly wash fresh peaches cut them into slices. No need to remove its skin. Place these slices in a sauce pan.

DSC06969
2. Add water and sugar and bring it to a boil. 


DSC06970


DSC06971


3. Simmer it for 10 minutes till the peaches have become slightly tender.

DSC06972
4. Let it cool down a bit and put them in a blender along with the water and  blitz it into a smooth puree.


DSC06973


DSC06974


5. Add lemon juice to the puree.
DSC06975

6. Add cold water and Ice cubes and dilute the concoction to your taste. Serve with a slice of Lemon.

Other Summer Drinks you can try : Mango Green Tea LemonadePlum SmoothieAam Ka PannaGinger Papaya Mint SmoothieLitchi LemonadeMusk Melon & Cucumber Smoothie with MintSpiced Mango Lassi, Kafal Ka Sharbat .

PeachLemonade_5

[whohit]PeachLemonade[/whohit]

[yumprint-recipe id=’229′]


This is a tiny story as to how I ended up making Kafal Ka Sharbat. I was unaware of these beauties until I moved to Almora. I often heard kids shouting and yelling and throwing pebbles at a tree in our yard. When I asked my local caretaker what tree it was, he told me it was “kaafal”. I couldn’t understand what he meant for there are plenty of things here which have different names to things. When the season arrived and the tree was laden with these delicious berries I did my search and found these were actually bay berries or as the locals call it ‘Kafal‘ or ‘Kaaphal‘. These berries are wild in nature and native to Central Himalayan region. They have a phenomenal taste which can be compared to ‘Falsa‘, another summer berry fruit from Northern India. It seems somewhere between Mulberry or Shehtoot and Falsa. 


I ended up spending an afternoon capturing them through my lense. They look so pretty and tastes even amazing. I ate a large bowl and let me tell you they are very addictive. Once you start you cant stop. But my husband is not a fruit person. He specially hates small berries with pits. He says it’s a waste of time to eat such tiny miny berries and that too has pits. Well I can’t agree with him in totality. I still wanted him to taste the berries. So I decided to make the sharbat with it. Its similar to Falsa Sharbat and equally refreshing. If you cant lay your hands on Kafal use Falsa. Rest of the recipe remains same.

Directions:

1. Wash kafal under running water and make them grit free.

DSC06851
2. In a blender add some sugar and water. Pulse it to get a clear sugar water.


DSC06852


DSC06853


3. Add washed kafal to the blender and churn for a few seconds, so that the outer skin gets out and the pits remain intact.


DSC06854


DSC06855


4. Pass this  through a sieve and using a spoon scoop out as much pulp stuck to the pits. Discard the pits.


DSC06856


DSC06857


5. Add extra water to dilute and Ice cubes. Add little rock salt and combine.


DSC06858


DSC06859


6. Pour it in serving glasses and enjoy the refreshing drink straight from the Himalayas.

Other Summer Drinks you can try :  Plum SmoothieAam Ka PannaGinger Papaya Mint SmoothieLitchi LemonadeMusk Melon & Cucumber Smoothie with MintSpiced Mango Lassi.

[yumprint-recipe id=’227′]

MangoLassi_Featured4

Mango is known as the king of fruits for its deliciousness and taste. In India we get a lot of varities of Mangoes which have a unique taste and texture. So the entire summers we are literally under the spell of mangoes. You can eat mangoes just like that or add it to  your food, drink it like a beverage, make a pickle with it and even satisfy your sweet craving by making desserts with it.

In the recent past I have added a lot of mango recipes to my blog which fortunately covers all the aspects of this versatile fruit. But then there was something which was missing, it was Mango Lassi. Strangely, it is something I haven’t had ever in my entire life. But my friends outside India keep talking about it. Its funny how a drink associated with Indian food is popular outside India and we Indians are pretty much not acquainted with it. 

MangoLassi_Featured6

So I decided to give it a try. It was so delicious that I began to feel why I never got to try it before 😉 If you are one of those who hasn’t tried mango lassi before, I think its high time you do that before the entire world knows how delicious it is and you are the only one left 😉

Directions:

1. Cut the mango in slices and scoop out the pulp with a spoon. Put all the pulp in a blender.

DSC06675


2. Add green Cardamom Powder.

DSC06676

3. Add Honey.

DSC06677

4. Add Plain Yogurt or curd.

DSC06678 

5. Add ice cubes to the blender and blitz everything together. If you feel the consistency is too thick you can liquefy it by adding little milk.

DSC06679


6. Transfer to serving glasses and garnish with Saffron strands. 

Other Refreshing drinks you can try are:  Plum Mango PunchRaw Mango Drink with Mint and Roasted CuminGinger Papaya Mint SmoothieLitchi LemonadeMusk Melon & Cucumber Smoothie with Mint.

MangoLassi_Featured3

[whohit]MangoLassi[/whohit]

[yumprint-recipe id=’221′]

RoastedBroccoli_Featured2
After months of consistent exercise regime and healthy eating I am ten kilos down. The irony of a Food Blogger is that you have to cook fancy schmancy food which is not always healthy. At the end of the day that ends up in your butt. But the only way to escape is to compensate all those calories with equal amount of exercise. In the past few months I also ended up cooking and baking healthy recipes which makes eating a guilt free experience. Addition of soups and salads in my diet has uplifted by energy level. 

RoastedBroccoli_Featured3

Boiling Vegetables is so underrated and cruel. Roasting them gives them that crisp coat and enhances its flavour. I love to roast vegetables and doing it with my favourite Broccoli makes it top notch delicious. The addition of Garlic to this makes it a lethal combination. You must try it to believe me. If you like a little spicy, pep it up with some red chilli flakes.

Directions:
1. Preheat your Oven to 200 degree Celsius (Learn more about Oven temperatures and Conversion). Cut a Broccoli head into small sized florets. Place them in a colander and wash them thoroughly under running water for any grit. 


DSC06441


DSC06442


2. Chop some cloves of garlic finely and toss them with the broccoli florets.


DSC06444


DSC06445


3. Add a drizzle of Olive oil.

DSC06446
4. Season with Salt & Black Pepper. 


DSC06447


DSC06448


5. Transfer the broccoli in a baking dish and place in a single layer. Sprinkle some Red Chilli Flakes.


DSC06449


DSC06450


10. Bake in the oven for 20-25 minutes until the broccoli is tender. Toss in lemon juice, parmesan cheese, and 1 tablespoon olive oil; serve immediately.

Other Broccoli recipe you can try here are: Healthy Broccoli PastaCream of Broccoli Soup with ChivesBaked Broccoli Cheese Patties.

You can even try Roasted Potatoes with Garlic and Rosemary.

RoastedBroccoli_Featured1

[yumprint-recipe id=’218′] 


MangoGarlicChutney_Featured1

My Love for Mango is growing with my age. Its not just the ripe pulpy mangoes which makes my heart  skip a beat but also the green mangoes which are ideal for making pickles and chutneys. I have a lot of green mango recipes on my blog like the Instant Raw Mango Pickle, Sweet and Sour Raw Mango Chutney, Mint and Raw Mango Spicy Chutney, Raw Mango Rice  and the refreshing Aam Ka Panna. Looks like I am not going to stop here I will keep adding more to this inexhaustive list. The other day I saw Bijal, my facebook friend posted a recipe of Raw Mango and Garlic Chutney and since then it was haunting me to try it down. I am happy I did it for it had the most intricate flavours. The Sweetness of Mangoes, the strong flavour of Garlic and the Hotness of Chillies. It made a beautiful melody of distinct flavours.

MangoGarlicChutney_Featured3

Its fairly easy and takes no time to put it together. You can use it as a side dish for your everyday meal but at the same time use it as a dip for your nachos and even top it on your patties in a burger. It gives that kick and takes your dish to another level of deliciousness.

Directions:

1.  Peel and chop some green raw mangoes and put them in a blender or chutney grinder. I had a little ripe mangoes, they had turned pale yellow but were still quite sour.

DSC06002
2. Add few cloves of peeled garlic to the grinder.

DSC06003
3. Throw in some salt, red chilli powder and jaggery powder to balance the acidity.


DSC06004


DSC06005


DSC06006


4. Blend it together into a smooth paste.

DSC06007
5. In a pan add some oil and when it gets hot add some cumin seeds and asafoetida.


DSC06008


TDSC06009


DSC06010


6. Pour the blended mango into the pan and cook for a minute or so or until the raw smell of garlic diminishes from the chutney. 

DSC06011
7. You are ready to serve your chutney. Let it cool down and place it in a jar or bottle an refrigerate until use.

Other Chutneys you can try on The Secret Ingredient are: Spinach Coriander Salsa| Phalahari ChutneyGreen Ber Ki ChutneyCoconut Chutney Fresh Plum Spiced Chutney Coriander Chutney without Onion Garlic

MangoGarlicChutney_Featured4[whohit]MangoGarlicChutney[/whohit]

[yumprint-recipe id=’215′]

PapayaSmoothie_Featured6
And then comes that unripe and not so sweet papaya! Its a common occuring event when you dont know what to do with that Papaya. Last time I baked them into my delicious Chocolate Papaya Muffins. Despite that I gathered some calories and was feeling guilty about it. Papaya is suppose to be healthy you see!

PapayaSmoothie_Featured5

So this time I blitz it with yogurt and some mint and some honey and some ginger and some lime… yeah yeah!! The choice of ingredients sounds weird. It happened with me also but the result was simply refreshing and guiltfree. What more can you ask from that unappealing Papaya. It simply does serve the purpose it came into existence. Now I am sounding like a spiritual guru! duh! You make this smoothie and dont forget to tell me if you liked it.

Directions:

1. In a blender add pieces of Papaya. Yes over ripe, unripe, sweet, unsweet all will work.

DSC06019
2. Add pieces of Ginger.
DSC06020

3. Add Cubes of Ice.

DSC06021
4. Add plain Yogurt and honey.

DSC06022
5. Add some mint leaves.

DSC06023
6. Add juice of Lemon.

DSC06024
7. And just a little water to help it blend and give it a pourable consistency.

DSC06026
8. Simply blitz this together until smooth and creamy.Pour them in your favourite tall glasses or a s mason jar and enjoy this refreshing drink. Its ideal for the scorching summers.  

Other summer drinks you can try here are: Plum SmoothieAam Ka PannaLitchi Lemonade and Musk Melon & Cucumber Smoothie with Mint .

PapayaSmoothie_Featured2
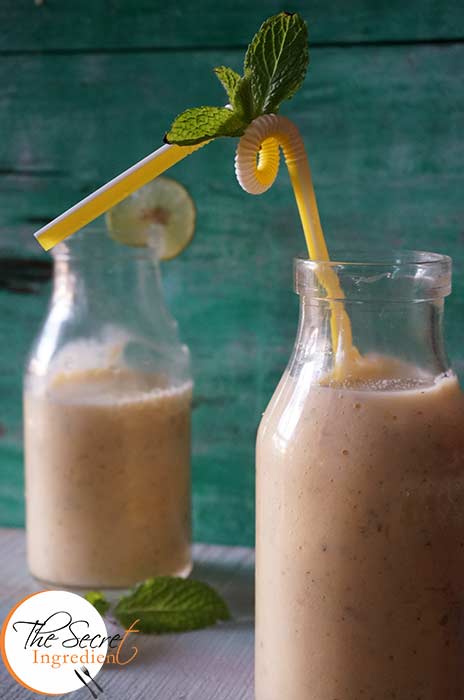
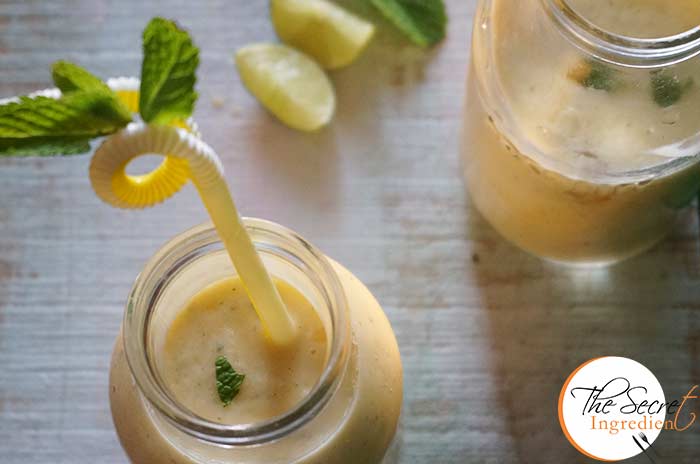
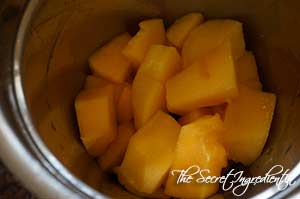
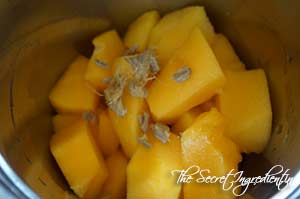
[whohit]PapayaGingerSmoothie[/whohit]

[yumprint-recipe id=’205′]

StuffedTori_Featured4

Mother is your first teacher, friend and a guide. But later in life you meet friends who make your life meaningful and you start learning new things from them. Life was kind on me and made me come across a friend on facebook in one of the Food Groups I am a member of. Sonu and me haven’t met ever but this friendship is beyond seeing each other. It is about the bond we share. This recipe of Stuffed Touri I learnt from her. It is how her mother in law likes it. Oh by the way I also learnt from her Authentic Kaddha Prasad which is already on my blog 🙂

StuffedTori_Featured2

I have always been making touri the way my mommy has taught me, with waddi as we call it in Punjabi. You must try this Touri Waddiyan recipe as well. But Sonu taught me this new version which was as delicious as the other one. This is to add to my series of Stuffed Vegetables I have on my blog. If you are keen to try them, I have Stuffed Baby Brinjals Punjabi Style, Stuffed Bittergourd or Bharwan Karela, Stuffed Apple Gourd or Bhawan Tinda listed here, will be adding more shortly.

Directions:

1. Take fresh smooth gourd, wash and peel its skin.


DSC01582


DSC01583


2. Cut it into three to four pieces.

DSC01584
3. Make a slit in the side but do not cut all the way. The piece should be intact. We are making a cavity for the filling.


DSC01585


DSC01586


4. For the filling. peel the onion skin and grate them using a grater.

DSC01587
5. Add turmeric powder to the grated onion along with salt and red chilli powder.


DSC01588


DSC01589


DSC01590


5. Also add Garam Masala and Chaat Masala.


DSC01591


DSC01592


6. Mix thoroughly and with the help of a spoon stuff each piece of gourd.


DSC01593


DSC01594


7. Now in a pan heat some mustard oil and let it smoke out. Put the flame on low and carefully place the stuffed gourds into it.


DSC01595


DSC01596


8. Keep changing sides and cook them uncovered till they are fully done. Avoid over cooking them. They must be soft but still be able to hold their shape.

DSC01597
9. Serve them hot with chapatis or naans.

Other Summer vegetable dishes you can try are: Touri Waddiyan, Bharwan Karela, Cholai ka Saag, Baingan ka Bhartha

StuffedTori_Featured1[whohit]StuffedTurai[/whohit]

[yumprint-recipe id=’169′]

AjwainiArbi_Featured2
This Ajwaini Arbi is my mother’s recipe and I love it! In Mexico I missed eating Colocasia or Arvi or Abri as it is called. So when I came back I ensured I made this every week in the season. The usual way of making is to simply fry it with some basic spices but then this way of cooking it with carom seeds makes it special and oh so delicious. 

AjwainiArbi_Featured3
A lot of people get rashes or itchiness when they peel colocassia. Undeniably I am one of those. I have tried putting mustard oil before peeling the skin, but that also doesn’t seem to work. So last resort is I have bought latex gloves and wear them. That seems to have worked wonders. Now I can cook my favourite vegetable without scratching like a puppy 😛

In Almora we get plenty of Arbi and also its leaves. This gives me opportunity to try out various versions of this humble root vegetable.I made Arbi Curry Masala specially for Navratri Fasting, as it is without Onion Garlic. I also made Arbi Ke Patton Ke Pattode, which is Colocasia leaves rolled fritters. You must try these they are amazingly lip smacking.

Directions:
1. Wash Arbi and remove all the grit. 

DSC01262
2. Put the Arbi in Pressure pan with some water and  cook for 3 whistles or 5-7 minutes. Make sure the arbi doesn’t get overcooked and retains its shape. It will taste awful if becomes frail.


DSC01263


DSC01264


3. After boiling arbi drain it in a colander and let it cool down to room temperature.

DSC01265
4. Peel the skin off using a knife. The skin will be easy to remove once its boiled.

DSC01266


5. If the pieces are big in size cut them into halves.

DSC01267
6. In a wok heat some ghee or clarified butter. You can use other cooking oil as well. 

DSC01268
7. Add carom seeds or ajwain, cumin seeds and Amchur.


DSC01269


DSC01270


DSC01271


8. Once the seeds begin to crackle add the arbi and toss with the seeds. 

DSC01273 
9. Add salt, red chilli powder and coriander powder and a little turmeric powder.


DSC01274


DSC01275


DSC01276


10. Mix everything together and cover with a plate or lid barely fitting the vegetables. Press down under and let it cook for 5-8 minutes, Then toss again and keep cooking till the arbi is crisp. Keep an eye don’t burn it 🙂

DSC01277
11. Sprinkle with Garam Masala and Chopped Fresh Coriander Leaves. Serve hot with Roti or Tawa Naan.

Other Colocasia or Arbi recipes you can try : Arbi Curry Masala, Arbi Ke Patton Ke Pattode.
You can also try other every day dishes: Aloo Methi, Tori Wadi, Dahi Wala Karela, Methi Matar Malai.

AjwainiArbi_Featured1[whohit]Ajwaini Arbi[/whohit]

[yumprint-recipe id=’165′]


baingankaraita_featured2

Baingan ka Bhartha or Charred Eggplant cooked with spices is a very popular dish from India. But other than this the Charred or stove roasted big Brinjals are used to make this incredible yogurt side dish. This dish was introduced to me by my mother and to her from her inlaws. Its native to Multan erstwhile Indian state and now in Pakistan. Since both the countries share the same culture, language and cuisine a lot of dishes are common. 

baingankaraita_featured3
Its a fairly simple dish you need to simply roast the eggplants and remove its skin. Learn how to roast a brinjal on a stove top. Once the pulp is ready, it will take minutes to put this side dish together. I love this raita and its a common side dish in my native family. Baingan or Eggplant is also known as batau in punjabi belt.

Directions:

1. Take pulp or flesh of Brinjal after being roasted. You can learn to roast them like this. Place the peeled eggplant in a blender.

DSC00188
2. Pour fresh Yogurt or curd on top. Along with Fresh Coriander leaves.


DSC00189


DSC00190


3. Add salt and red chili powder.


DSC00191


DSC00192


4. Also add roasted Cumin powder and ginger powder or saunth.


DSC00193


DSC00194


5. Close the lid of the blender and pulse for 5 -7 seconds until it combines well. Serve as a side dish with Aloo Gobhi, Aloo Methi , Tori Wadiyan and any other dry vegetable dish.

Other Raita dishes you can try on The Secret Ingredient are : Bathua ka Raita, Aloo Anaar ka Raita Purslane Yogurt Dip

You can even try Bharwan Baingan, Baingan Ka Bhartha , Baingan Bhaja and Baingan ka Salan.

baingankaraita_featured1

[whohit]BainganKaRaita[/whohit]

[yumprint-recipe id=’154′]