Author

anshu

Browsing


PeachCobbler_Featured2

As I am writing this very post my following on Facebook is turning 10 k in a short span of 2.5 years. This means I am being followed by 10,000 people just on Facebook. This is a huge milestone for me and shows how much I am appreciated by you all. The journey has been very fulfilling for me, for it gave me opportunity to become a Baker, Photographer, A food stylist, an entrepreneur and friends to so many talented people. I look at this as the golden period of my life 🙂  

PeachCobbler_Featured1

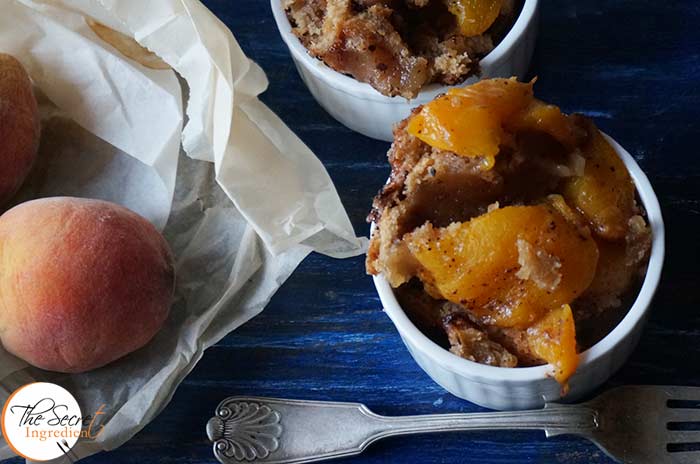
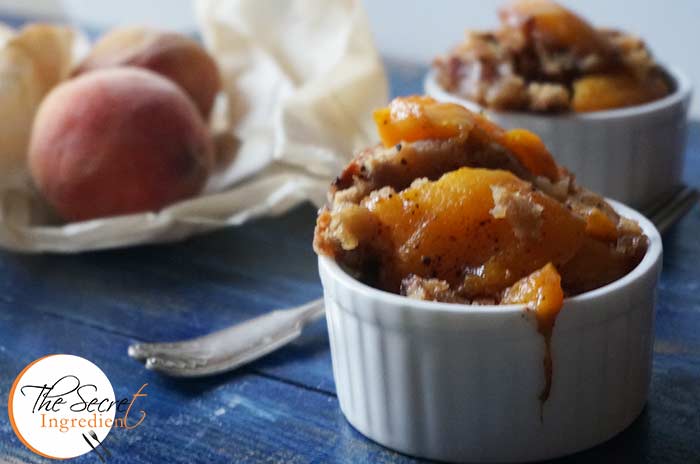
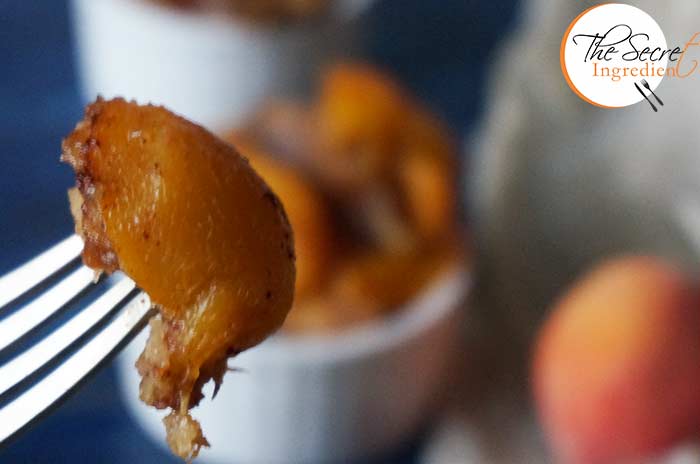
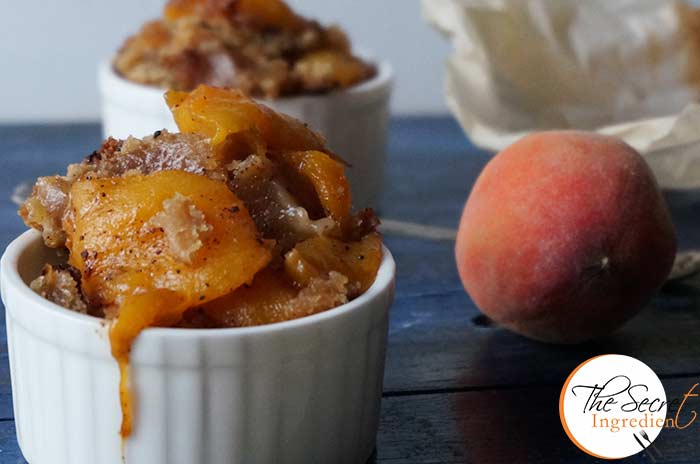
This certainly calls for celebration. What can be a better way to celebrate than to enjoy this milestone with The Classic British Dessert Peach Cobbler. If you haven’t had this before I can sum its taste in one word, LIFE. Yes! It’s like Life, Crispy and Gooey, Hot and Cold (It’s served with a Scoop of Vanilla Ice cream), Sweet and Tart. 

PeachCobbler_Featured5

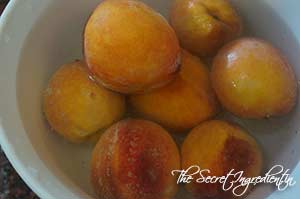
 I live in the hills where we are bestowed with the bounty of nature in the form of fresh fruits and vegetables. Peaches, Plums, Apricots are found in abundance. Therefore its a constant quest to utilise them prudently without wasting them. I had these peaches which needed my attention. I made Peach Lemonade with half of these and the rest I used to make this Cobbler. The taste was impeccable.. it was gone within minutes. Now that’s what you call real celebrations <3

Directions:

1. Thoroughly wash fresh peaches* and peel their skin and pit them. Cut them into slices. Place them in a mixing bowl. In the meanwhile preheat the Oven to 220 Degree Celsius (Learn More about Oven temperatures and Conversions) for ten minutes.


DSC06939


DSC06941


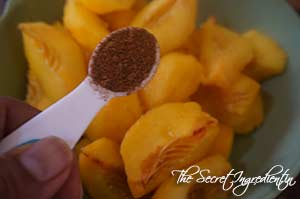
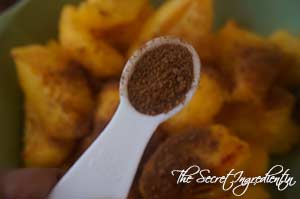
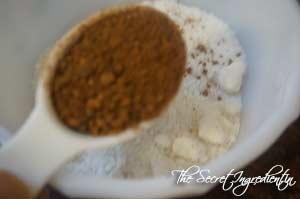
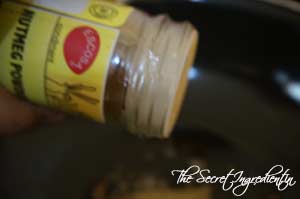
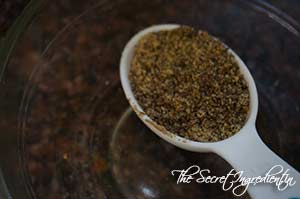
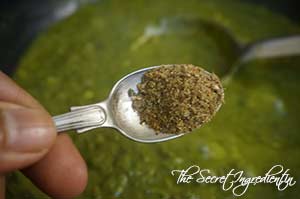
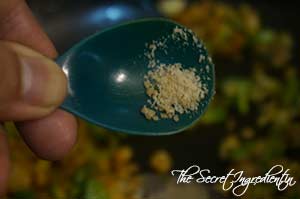
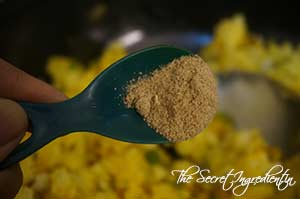
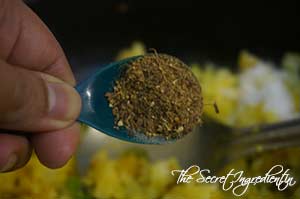
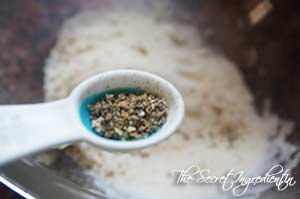
2. Add Cinnamon and Nutmeg Powder.


DSC06942


DSC06943


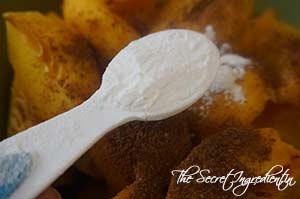
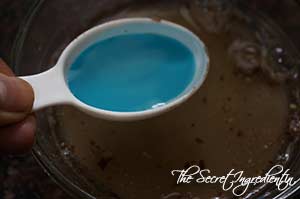
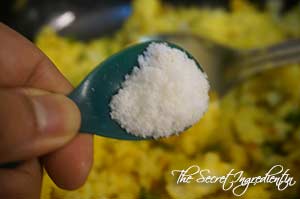
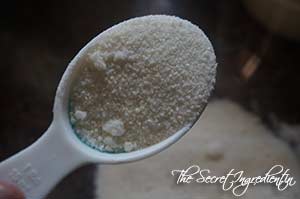
3. Sprinkle some Corn Starch and Lemon juice all over the peaches.


DSC06944


DSC06945


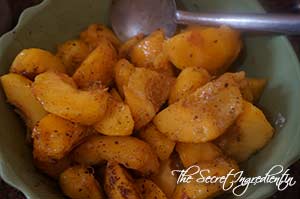
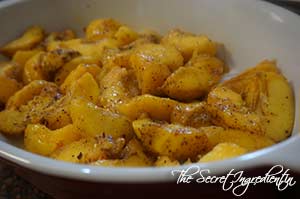
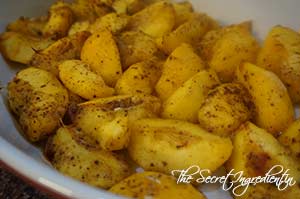
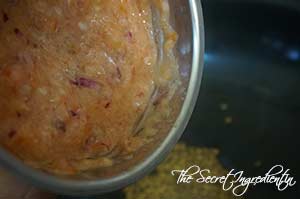
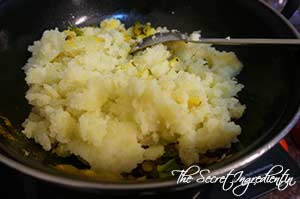
4. Toss the peaches around so that they are well coated with spices and cornstarch. Place them in a non greased baking Tray and bake for 10 minutes.* They will be little soft after ten minutes of baking. 


DSC06946


DSC06947


DSC06954


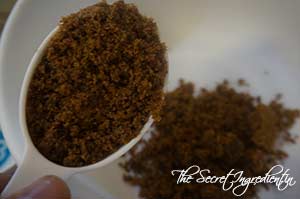
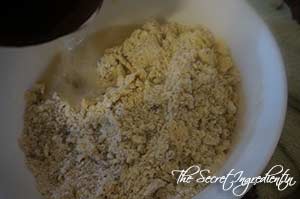
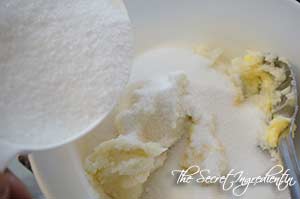
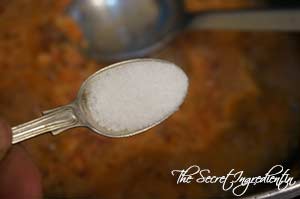
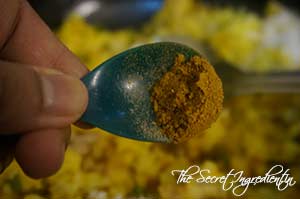
5. Now in an another bowl add brown sugar and white castor sugar along with salt.


DSC06948


DSC06949


DSC06950


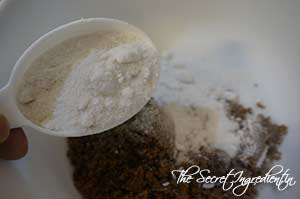
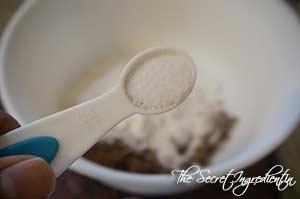
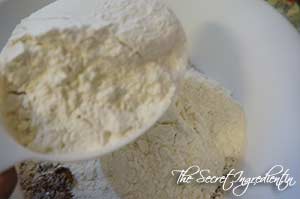
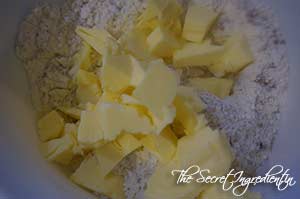
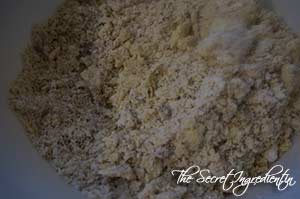
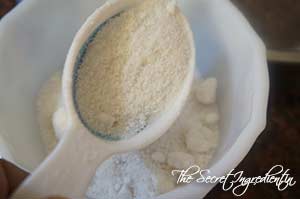
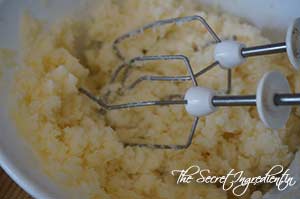
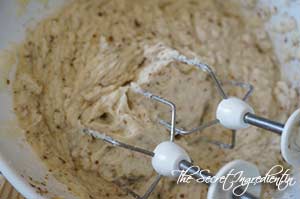
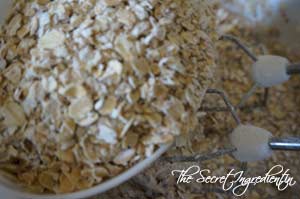
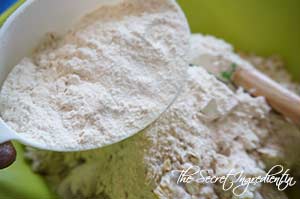
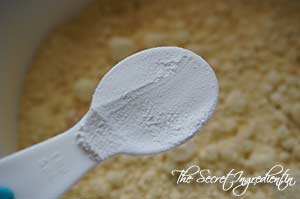
6. Add All Purpose Flour to it. You can even use whole wheat. Add cold butter cubes to the dry ingredients and using your finger tips spread the butter. The mixture will resemble sand.


DSC06951


DSC06952


DSC06953


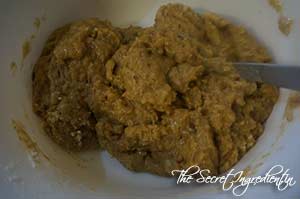
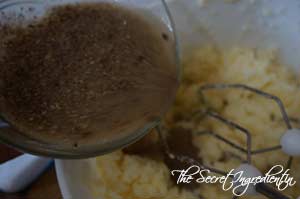
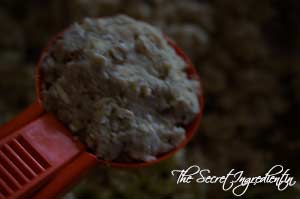
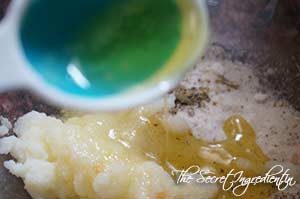
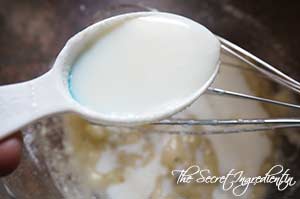
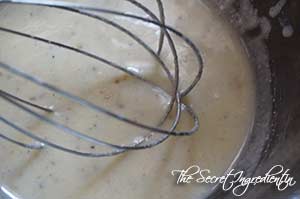
7. Add boiling water to the mixture and combine together until it comes together.


DSC06955


DSC06956


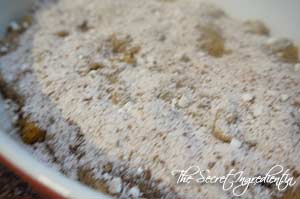
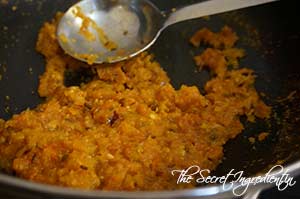
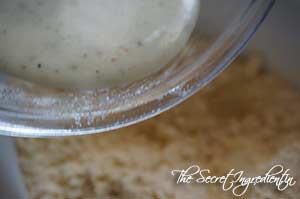
8. Spoon this on top of the baked peaches all over and then spread it all over.


DSC06957


DSC06958


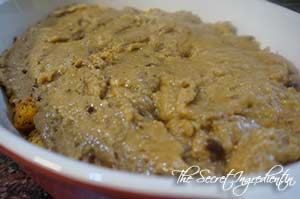
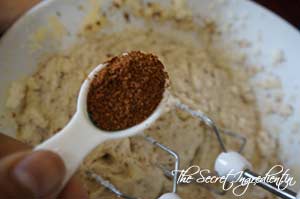
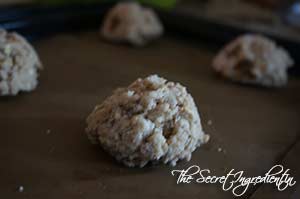
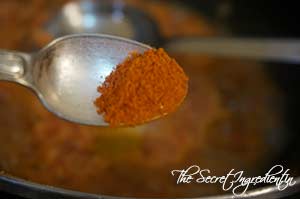
9. In order to give that crispness to the cobbler, mix Castor sugar and cinnamon powder and sprinkle all over the baking tray.


DSC06959


DSC06960


DSC06961


10. Bake it in the preheated oven for 35 minutes or until everything is bubbly and turned caramelised and slight golden. Serve with Vanilla Ice Cream and Don’t forget to say thanks 😛

Other desserts you can try :  Apple LapsiAtta Halwa Gurudwara StyleBasbousaBrigadeirosCoconut MacaroonsCoconut Milk Mango PuddingKesari SeviyaMascarpone Cherry Compote Cheesecake GlassesPaneer Ki KheerTapioca Milk PuddingTapioca Coconut Milk Pudding with Strawberry Preserve

PeachCobbler_Featured3[whohit]PeachCobbler[/whohit]

[yumprint-recipe id=’226′]

BombayBiryani_Featured4
Biryani is a mixed rice dish from Indian Subcontinent. It can be made with Meat, chicken, lentils, vegetables and the list is unending. The traditional recipes of Biryani are specific to regions based on the spices, ingredients and texture of the dish. Mughlai, Awadhi, Hyderabadi, Kashmiri, Thalassery, Calcutta and many many more. Biryani means patience and a lot of work. It requires huge deal of Ingredients and slow and patient cooking which enriches the taste of Biryani and makes it so heavenly. I have always been a person who likes quick less intricate dishes. given the fact my little one needs my devoted time and attention.But when Anisa Arif, the owner of Zaiqa- The Spice Store sent me her special spices I was smitten. I had heard so much about the spice blends she creates that I decided to do the Bombay Biryani and put my laziness at bay.

BombayBiryani_Zaiqa
The next help was from Shaheen Ali,  the Food Blogger from Spoon Fork and Food. She helped me at every step with tinniest of details with making a perfect Bombay Biryani. I am naive when it comes to mutton. I have made very few recipes in the past using Mutton.  I have improvised on Shaheen’s recipe of Chicken Bombay Biryani and made this Muttom Bombay Biryani.  It was a lot of effort but at the end the results were phenomenal. The special Zaiqa Bombay Biryani Masala made a huge difference in enhancing the taste of the dish.

BombayBiryani_Featured2
On my research I found out how this Biryani is different from the others. The origin of this Biryani is from Bombay (Mumbai) as the name suggests. It has a slight sweetness to it, which comes from dried plums. The Zaiqa Bombay Biryani Masala has dried plums as one of the key ingredients. Also many claim this biryani is incomplete without fried chunks of potatoes. I have tried to incorporate both and I can say this tasted simply delicious.

Directions:
1. Wash and soak long grain rice in water for at least an hour. Set aside.

DSC06468
2. In a pressure pan add pieces of mutton along with garlic cloves and peeled ginger pieces.


DSC06459


DSC06460


3. Also add Black Cardamom, Green Cardamom, Cinnamon Stick and Cloves in the pan. Add little water and salt and pressure cook it for half an hour till its soft and cooked. The cooking time of mutton can vary on the variety, so this can take longer or even lesser. So kindly adjust. Once cooked set aside and do not drain the broth. Reserve it with the spices.


DSC06462


DSC06464


DSC06465


4. In the meanwhile add little saffron to hot milk and set aside.

DSC06467
5. Chop Onions in lengthwise slices and slit some green chillies. 

DSC06466
6. In a wok add some ghee and add bay leaf, Black Cardamom & Green Cardamom.


DSC06469


DSC06470


DSC06471


7. Also add some cloves, Cinnamon Stick and Cumin seeds.


DSC06472


DSC06473


DSC06474


8. Add nutmeg or Jaiphal powder, mace or javitri and black peppercorns.


DSC06475


DSC06476


DSC06477


9. Also add Anise star, Ginger Garlic Paste and slit chilies.


DSC06478


DSC06479


DSC06480


10. Roast the spices till everything becomes fragrant. Add Onion slices and also saute them until they have acquired slight colour. Also add some fresh torn Mint leaves. At this stage you can even add grated coconut. I dint.


DSC06481


DSC06482


DSC06483


11. Now add curd to the wok and add Zaiqa Bombay Biryani Masala. Mix everything well. Turn the flame on low for you dont want it to stick to the bottom of pan.


DSC06484


DSC06485


DSC06486


12. This is how your gravy looks.  Now add Boiled Mutton pieces to the gravy and combine.


DSC06491


DSC06492


13. Season with salt and let it cook until the ghee has separated from the masala. Your akhni or Curd based spicy Gravy is ready for the biryani. It will be brown in colour. Set aside. 


DSC06493


DSC06497


14. Add sliced onions to hot oil and fry them till they become brown and crispy. Collect them on a absorbing paper to take off excess oil. These crispy fried onions are known as Brista. Reserve them for assembling the biryani.


DSC06498


DSC06500


DSC06501


15. Wash, peel some baby potatoes and cut them into equal size half pieces. And also fry them in the oil and set aside.


DSC06499


DSC06502


DSC06505


16. For the rice add soaked rice to a vessel and add water to it along with salt & few drops of oil.


DSC06487


DSC06488


DSC06489


17. Also add juice of lemon and par boil them. Drain them in a colander 


DSC06490


DSC06494


DSC06495


18.Spread them on a plastic tray to remove moisture. Set aside.

DSC06496

19. In order to assemble the biryani spread little curd in the bottom of a thick bottomed vessel so that nothing sticks. Now spread the Mutton akhni all over on top of the curd. Sprinkle some Mint and Coriander Leaves on top of the akhni.


DSC06504


DSC06506


20. Now spread a layer of Rice on top of the Mutton. Spread Ghee all over specially the corners. Also sprinkle Kewra water.


DSC06507


DSC06508


21. Add another layer of Mint and Coriander Leaves also some green slit chillies. Top it up with Fried Onions and Fried Cashews if you like.


DSC06509


DSC06510


22. Pour on top the saffron milk we had reserved, specially around corners so that it seeps well. Insert Fried potatoes in the rice. Place the vessel on top of a tawa or skillet and place them on stove. This will save biryani from direct heat and getting burnt.


DSC06511


DSC06512


DSC06513


23. Line the lip of the vessel with dough to ensure the lid sticks to it and rice can steam cook or Dum cook. It also ensure the flavours stay intact and do not escape. Let it 


DSC06514


DSC06515


24. Cook the biryani on dum for 30-40 mins on low flame. Serve hot with Raita of your choice.

You can also try Kathal ki Biryani and Mushroom Pilaf for vegetarian versions of Biryani. Other Rice dishes you can try are: Andhra Style Mango Rice South Indian style Curd RiceSpicy Mint Rice.

You can choose from the following Raitas: Anaar Aloo ka Raita Greek Kulfa RaitaBaingan Ka Raita  Bathua Ka Raita

BombayBiryani_Featured1

[whohit]BombayBiryani[/whohit]

[yumprint-recipe id=’225′]

My husband and me are Subway Lovers. That is our favourite Sandwich place in the whole wide world. Every place I have been outside India I have had sandwiches from Subway. If we have subway in our city we tend to eat three to four times in a week there.  At the end of every meal I grab an Oatmeal Cookie for myself and eat it greedily. They are soo very addictive. I guess that is one reason for me to make a frequent visit there.

The other day I was craving for the Subway Oatmeal Cookie (we dont have a subway in hills bohooo :'( ) So I decided to hunt on the web for a recipe which is as close to Subway’s Oatmeal Cookies. After a few hit and trials and trying a few recipes, I think I hit a jackpot. This recipe from Aarthi’s blog was almost near to what I was looking for. I tweaked it a little to make it just PERFECT. You have to try it but dont blame me later that I dint warn you for they are soo addictive.

Directions:

1. In a bowl add Flax Meal (Learn how to make Flax meal or Flax seed powder at home) and 3 tablespoon water. Let it sit for 5-7 minutes till it becomes gelatinous. You can always replace flax meal with an egg if you are okay with it.


DSC06717


DSC06718


2. In a bowl add Butter (at room temperature) and caster Sugar. Whisk them together until creamy. 


DSC06719


DSC06721


3. Add the gelatinous flax meal and combine.


DSC06722


DSC06723


4. Add Cinnamon Powder, Quick Cooking Oatmeal and baking soda.


DSC06724


DSC06725


DSC06726


5. Also add Whole wheat Flour or atta and Raisins. Combine everything into a dough.


DSC06727


DSC06728


6. Line a baking sheet with Parchment Paper or Silicon Mat. I use Silicon Mat because it can be used again and again and nothing sticks on it. You can order your own silicone cookie mat from our online store, The Gourmet Shop. Scoop out the cookie dough with an ice cream scooper or you can even use a normal spoon and place them on the tray. Ensure to keep 2 inch space between them, as they will spread on baking. 


DSC06729


DSC06730


7. Press each cookie ball with your palm and put them for baking in a preheated oven for 17-18 minutes  on 180 degree Celsius (Learn more about Oven Temperatures and Conversions) until you see them slightly golden. 

DSC06731
8. Take them out of the oven and let them sit on wire rack for ten minutes before indulging. They will crisp up as they come to room temperature.


DSC06732


DSC06733


9. Put them in an airtight cannister and they will stay good for more than a week, if only you can resist not eating them. Enjoy them with a cup of hot coffee or a glass of milk. You know for sure they are better than subway 🙂

Other Cookies you can try here are: Besan & Corn Flakes CookiesWhite Chocolate Chip Cookies , Ragi & Whole Wheat Biscuits, Coconut Chocolate CookiesPeanut Butter Cookies with Chocolate ChipsMelomakarona: Greek Traditional Christmas Cookies and Italian Almond Biscotti.

[whohit]OatmealRaisinCookie[/whohit]


[yumprint-recipe id=’224′]


PalakMushroom_Featured1
My husband loves Palak Paneer and there is nothing else which he fancies more. Whenever we get Spinach he doesn’t let me make anything else. This time when he was away at work and the milk wasn’t sufficient to make Paneer, I tricked him by adding Mushrooms. The combination clicked and he kinda liked it. Infact he said we should do this often. ha! You know sometimes in life you have to take extreme steps to change some people 😛 I guess I took mine… hahahah (evil laugh)

PalakMushroom_Featured3

On a serious note this dish was a pleasant change over the conventional paneer dish. If you are a mushroom lover this will really suit your palette. Infact this inspires me to trick my husband more often now 😉 which promises you more Spinach dishes on my blog soon.

Directions:

1. Separate the spinach stems from the leaves and reserve the leaves in a colander. If you are using the packaged spinach in a bag they come without stems, so you can skip this step.

DSC00838

2. Insert the colander with leaves under the water tap and wash rigorously ensure that there is no dirt. Ensure you wash each leaf, it is a tedious process but by this you will eliminate all the dirt which will effect the taste of your dish.

DSC00878

3.Put the washed leaves in a pot and blanch them for ten minutes with lid on top. If you are using the packaged spinach you will need to put half cup of water to blanch the spinach. Once you see the spinach leaves are no longer firm you must turn the flame off. Keep them aside to cool down a little.


DSC00879


DSC00881


4. After it’s cooled put it in a blender along with garlic, ginger and chillies. Make a smooth paste of it . Keep aside.


DSC06213


DSC06214


5. In a blender add Tomatoes, Ginger, garlic and Onions and make a smooth puree. Set aside.


DSC06215


DSC06216


6. Wash and Chop some Mushrooms.


DSC06210


DSC06211


7. In a wok add some ghee or clarified butter and add the mushroom slices. Saute them till they have shrunk and have acquired little colour. Take them out of the wok and put them in a plate to be used later.


DSC06217


DSC06218


DSC06222


 6. Add a little more ghee to the same wok and add cumin seeds. Wait for them to crackle.


DSC06219


DSC06220


7. Add the tomato puree and combine.

DSC06221
8. Add salt, turmeric powder and red chili powder. 


DSC06223


DSC06224


DSC06225


9. Let the masala be on the medium low flame till the ghee separates out.

DSC06226
10. Add the Spinach Puree and combine. Let it simmer for five eight minutes till it thicken a little bit.


DSC06227


DSC06228


11. Add cream or you can use malai . It helps it give that creamy texture and takes away the bitterness of spinach.

DSC06229
12. Add Kasuri Methi for that restaurant like taste. Garnish with Garam Masala.


DSC06230


DSC06231


12. Add sauteed Mushrooms to the curry and combine. 

DSC06232
13. Serve hot with Roti, Kulcha or Naan.

You can even try the classic Palak Paneer and Palak Dhaniya Chutney.

Other dishes from North India you can try are: Punjabi Dal Makhani, Kadhai Mushroom ,  Langar Wali DalMethi Matar MalaiMushroom Do PyaazaPunjabi Style Dum Aloo.

PalakMushroom_Featured2[whohit]PalakMushroom[/whohit]

[yumprint-recipe id=’223′]

StuffedCapsicum_Featured1

I love to stuff vegetables, its pretty evident from the fact that I have Stuffed Karela, Stuffed Tinda, Stuffed Touri and Stuffed Baingan on my blog. I think its the way Punjabis love to play with spices and vegetables. The stuffing is mostly of spices and or even potatoes. The vegetable which tastes delicious with potato stuffing is Green Capsicum. I loved this hearty dish ever since a kid but it was a hassle to make it and plus it absorbs so much oil from the skillet, so eventually I stopped making it.

StuffedCapsicum_Featured2

Recently when I was watching an Italian Cooking show on tv I saw them chef stuff the red peppers with filling and then baking it in oven. It instantly caught in my mind and I decided to give a healthier twist to the traditional old age recipe. The dish came out perfect from the oven. The capsicums were evenly cooked and did not use a lot of oil. The joy of recreating and re engineering dishes by making them more healthy is different.

Directions:
1. Wash and boil Potatoes and Peel the skin off. Put them in a bowl and mash them using a potato masher. Set aside.


DSC02500


DSC02501


DSC02502


2. Take small sized capsicums of equal sizes and wash them thoroughly. Pat them dry using a kitchen towel.


DSC02503


DSC02504


3. Cut open the top of capsicum horizontally, removing its stem and seeds inside. Set aside.


DSC02505


DSC02506


4.Chop Onions & green Chillies. I also chopped the cap from the capsicum into small pieces (why to waste?). Set aside.

DSC02507
5. In a pan add some ghee or any cooking oil u like. Add cumin seeds and let them crackle. 


DSC02508


DSC02509


6. Add the chopped vegetables to the pan and saute them until cooked. This can take 5-8 minutes.


DSC02510


DSC02511


7. Add turmeric powder, red chilli powder and asafoetida.


DSC02512


DSC02513


DSC02514


8. Add mashed potatoes to the pan and toss them with the vegetables and spices.

DSC02515

9. Season with salt. Also add amchur and combine.


DSC02516


DSC02517


10. Finish with Garam Masala and Channa Masala.


DSC02518


DSC02519


11. Add chopped Coriander leaves and turn the flame off. Set aside the filling.

DSC02520

12. Cut the ends of the capsicum so that it can stand tall. Place them on a baking sheet lined with Parchment Paper. Preheat the oven to 180 degree Celsius. (Learn more about Oven Temperatures and Conversions)


DSC02521


DSC02522


12. Fill each Capsicum with potato filling and brush it with oil.


DSC02524


DSC02525


13. Sprinkle on top some shredded Mozzarella Cheese. Its optional but I like the way it comes out of the oven.

DSC02526
14. Bake it in oven for 25 minutes or until the peppers have cooked all the way and the cheese on top has melted. Serve hot with Roti or Tawa Naan or Kulcha.

You can even try Capsicum Zunka a speciality from Maharashtra.

Other Stuffed vegetable recipes you can try are:  Stuffed Karela, Stuffed Tinda, Stuffed Touri and Stuffed Baingan.

StuffedCapsicum_Featured3

[whohit]Stuffed Capsicum[/whohit]

[yumprint-recipe id=’222′]

MangoLassi_Featured4

Mango is known as the king of fruits for its deliciousness and taste. In India we get a lot of varities of Mangoes which have a unique taste and texture. So the entire summers we are literally under the spell of mangoes. You can eat mangoes just like that or add it to  your food, drink it like a beverage, make a pickle with it and even satisfy your sweet craving by making desserts with it.

In the recent past I have added a lot of mango recipes to my blog which fortunately covers all the aspects of this versatile fruit. But then there was something which was missing, it was Mango Lassi. Strangely, it is something I haven’t had ever in my entire life. But my friends outside India keep talking about it. Its funny how a drink associated with Indian food is popular outside India and we Indians are pretty much not acquainted with it. 

MangoLassi_Featured6

So I decided to give it a try. It was so delicious that I began to feel why I never got to try it before 😉 If you are one of those who hasn’t tried mango lassi before, I think its high time you do that before the entire world knows how delicious it is and you are the only one left 😉

Directions:

1. Cut the mango in slices and scoop out the pulp with a spoon. Put all the pulp in a blender.

DSC06675


2. Add green Cardamom Powder.

DSC06676

3. Add Honey.

DSC06677

4. Add Plain Yogurt or curd.

DSC06678 

5. Add ice cubes to the blender and blitz everything together. If you feel the consistency is too thick you can liquefy it by adding little milk.

DSC06679


6. Transfer to serving glasses and garnish with Saffron strands. 

Other Refreshing drinks you can try are:  Plum Mango PunchRaw Mango Drink with Mint and Roasted CuminGinger Papaya Mint SmoothieLitchi LemonadeMusk Melon & Cucumber Smoothie with Mint.

MangoLassi_Featured3

[whohit]MangoLassi[/whohit]

[yumprint-recipe id=’221′]

BabyCornSatay_Featured1

Last week when I had plenty of Baby corns lying in my refrigerator I wanted to use them differently. Not just adding them to any Thai or Chinese dishes. I looked all over the web, unfortunately there were not  many recipes which excited me. They were the usual Baby Corn Manchurian in hot chili sauce. But then I found this recipe by Lubna Karim, a fellow blogger from Yummy Food. The recipe instantly pleased me. It stood top in all three parameters. It was easy, quick and fairly healthy. These were Baby Corn Satays in Indianised avatars to suit our palettes  

BabyCornSatay_Featured4

Satays are Southeast Asian Dishes with pieces of Grilled Meat on skewers. They are some what close kin of Seekh Kebabs famous all over the world. However, this vegetarian version was totally terrific and perfect for parties.

Directions:

1.  Wash and clean Baby Corns and place them to steam in a steamer filled with water. Close the lid while the baby corns cook through for about 10-15 minutes depending on the thickness of corns. You can also microwave them for 3 minutes till they are blanched. You should be looking at baby corns which are ready to eat but still hold their crunch. 


DSC06650


DSC06651


2. In a bowl add plain Yogurt or curd, corn flour and turmeric powder.


DSC06652


DSC06653


DSC06654


3. Also add red chilli powder, carom seeds or ajwain and garam masala.


DSC06655


DSC06656


DSC06657


4. Also add salt and minced garlic and marinate the blanched baby corn in this. Let the baby corns sit in the marinade for 20 minutes or so.


DSC06658


DSC06659


DSC06660


5. After 20 minutes, pour some oil in a non stick pan.

DSC06661

6. Add the marinated baby corns to the pan along with the marinade. Toss them in the oil till the baby corns have absorbed the marinade and have attained a slight golden colour.


DSC06662


DSC06663


DSC06664


7. Insert the skewers in each piece and serve hot with Mint Chutney or simply ketchup.

Other Party Menu ideas you can try are: Baked Paneer Corn KababsHealthy Kachalu Aloo ChatTangy Mint Potatoes and Veg Shami Kabab.

BabyCornSatay_Featured3[whohit]BabyCornSatay[/whohit]

[yumprint-recipe id=’220′]


BesanCornFlakesCookies_Featured1

I am not a huge fan of Corn flakes, I prefer wheat flakes over Corn. So is the case with my family. I had a packet of Corn flakes feeling abandoned. And when I saw a post of Besan Cornflakes Cookies by Ravneet it triggered a spark and compelled me to try these. It was a rescue mission for the poor corn flakes but later I realised I have to get another packet of corn flakes as the cookies cake out quiet nice. My husband and son ate them all in no time. 

BesanCornFlakesCookies_Featured4

The another fascinating thing about this recipe is that its gluten free. For those who are avoiding gluten for any specific reason can safely indulge in this. I love the way cardamom goes with chickpea flour. It fondly reminds me of Besan Ke Laddoo 🙂 Yum!

Directions:
1. In a blender add corn flakes and grind them into a coarse powder. You can even crush them using a rolling pin, but if you leave big flakes they will fall out and cause trouble in shaping the cookies.


DSC06622


DSC06623


2.  Mix the corn flakes power and besan or chickpea flour in a bowl. Add Baking powder and give a gentle mix to the dry ingredients and set aside.


DSC06624


DSC06625


DSC06633


3. In another bowl add castor sugar and add cardamom powder.


DSC06626


DSC06627


4. Add Ghee or clarified butter to it along with some Olive Oil.


DSC06628


DSC06630


5. Add milk and give the wet ingredients a good whisk until everything is well incorporated.


DSC06631


DSC06632


6. Add wet ingredients to the dry ingredients and knead everything into a paliable dough. If you think you need more milk to get it together you may add a few teaspoons. 


DSC06635


DSC06636


7. Divide the dough and roll into small balls of equal size and place them on a cookie tray lined with Parchment Paper or Silicon Mat. Preheat your oven to 180 degree Celsius for ten minutes.


DSC06637


DSC06638


8. Flatten the dough balls with your palm and place slithered almonds on top of your cookie and press slightly. I used almond flakes.


DSC06639


DSC06640


9. Bake in the middle rack of your oven on 180 degrees (Learn more about Oven temperatures and Conversion) for 12-15 minutes or until you see them slight golden. Remove them from oven and place on a wire rack to cool down for about ten minutes and then dont wait just grab a cookie and indulge 🙂

Other Cookies you can try are: White Chocolate Chip Cookies , Ragi & Whole Wheat Biscuits, Coconut Chocolate CookiesPeanut Butter Cookies with Chocolate Chips Melomakarona: Greek Traditional Christmas Cookies and Italian Almond Biscotti.

BesanCornFlakesCookies_Featured3

[yumprint-recipe id=’219′]

RoastedBroccoli_Featured2
After months of consistent exercise regime and healthy eating I am ten kilos down. The irony of a Food Blogger is that you have to cook fancy schmancy food which is not always healthy. At the end of the day that ends up in your butt. But the only way to escape is to compensate all those calories with equal amount of exercise. In the past few months I also ended up cooking and baking healthy recipes which makes eating a guilt free experience. Addition of soups and salads in my diet has uplifted by energy level. 

RoastedBroccoli_Featured3

Boiling Vegetables is so underrated and cruel. Roasting them gives them that crisp coat and enhances its flavour. I love to roast vegetables and doing it with my favourite Broccoli makes it top notch delicious. The addition of Garlic to this makes it a lethal combination. You must try it to believe me. If you like a little spicy, pep it up with some red chilli flakes.

Directions:
1. Preheat your Oven to 200 degree Celsius (Learn more about Oven temperatures and Conversion). Cut a Broccoli head into small sized florets. Place them in a colander and wash them thoroughly under running water for any grit. 


DSC06441


DSC06442


2. Chop some cloves of garlic finely and toss them with the broccoli florets.


DSC06444


DSC06445


3. Add a drizzle of Olive oil.

DSC06446
4. Season with Salt & Black Pepper. 


DSC06447


DSC06448


5. Transfer the broccoli in a baking dish and place in a single layer. Sprinkle some Red Chilli Flakes.


DSC06449


DSC06450


10. Bake in the oven for 20-25 minutes until the broccoli is tender. Toss in lemon juice, parmesan cheese, and 1 tablespoon olive oil; serve immediately.

Other Broccoli recipe you can try here are: Healthy Broccoli PastaCream of Broccoli Soup with ChivesBaked Broccoli Cheese Patties.

You can even try Roasted Potatoes with Garlic and Rosemary.

RoastedBroccoli_Featured1

[yumprint-recipe id=’218′] 


ChickenPestoPasta_Featured2
When it comes to Pastas, my heart skips a beat. I can eat pasta in any form, any sauce and even boiled 😛 But when you see an authentic Italian pasta on a platter that love transforms into madness. I made Italian Basil Pesto the other day and me and my husband were going gaga over it. We finished more than half the jar by simply smearing it on our breads and eating it. Then I gave an ultimatum to my husband that we are not eating it like this any more and that I needed to make something with this. 

ChickenPestoPasta_Featured1

I had some chicken breast and a jar of sun dried tomatoes. Believe it or not the pasta came together in fifteen minutes. By the time I finished boiling the spaghetti, the chicken was ready. I arranged everything together and served. What an amazing dinner it was. So refreshing, light and still filling. In my unconscious mind I took a small trip to Italy <3

Directions:

1. Boil the pasta of your choice till al dente and set aside. (Learn how to Boil Pasta perfectly). Take out the sundried tomatoes from the jar. And cut them into small bite size pieces. Set aside.


DSC05365


DSC05366


2. Cube the chicken breast. Also mince some garlic and set aside. You can always substitute Chicken with Mushrooms for the vegetarian twist.


DSC05368


DSC05369


3. In a pan add some Olive oil and add minced garlic to the pan and give it a toss.


DSC05370


DSC05371


4. Add Chicken and cook till it has turned white from pink. 


DSC05372


DSC05375


5. Season with Salt and Black pepper. Turn the flame off when it’s cooked.


DSC05376


DSC05374


6. Add the Basil Pesto to the Boiled pasta and also add the chopped sundried tomatoes.


DSC05377


DSC05378


7. Toss them together using a set of forks.

DSC05379

8. Transfer to a serving platter and drizzle some Lemon juice on it. Serve it hot or at room temperature. 

Other Pasta recipes you can try here are:  Avocado Parsley PastaHealthy Broccoli PastaItalian Chicken Meatballs with SpaghettiPasta Alla VodkaSautéed Red Bell Pepper and Olive Pasta SaladSautéed Red Bell Pepper and Olive Pasta SaladSundried Tomato Pasta SaladVegetarian Hakka Noodles

ChickenPestoPasta_Featured4
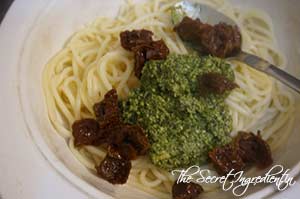
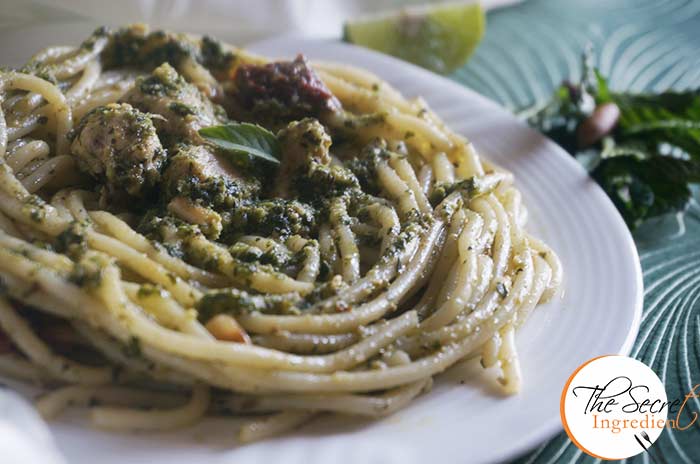
[whohit]chickenPestoPasta[/whohit]

[yumprint-recipe id=’217′]