Author

anshu

Browsing

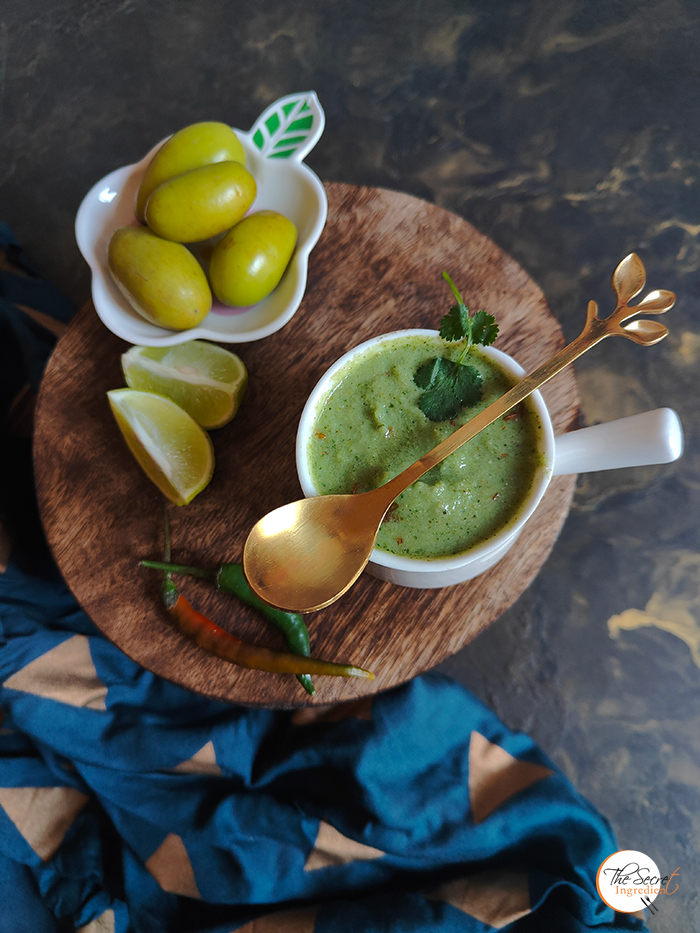
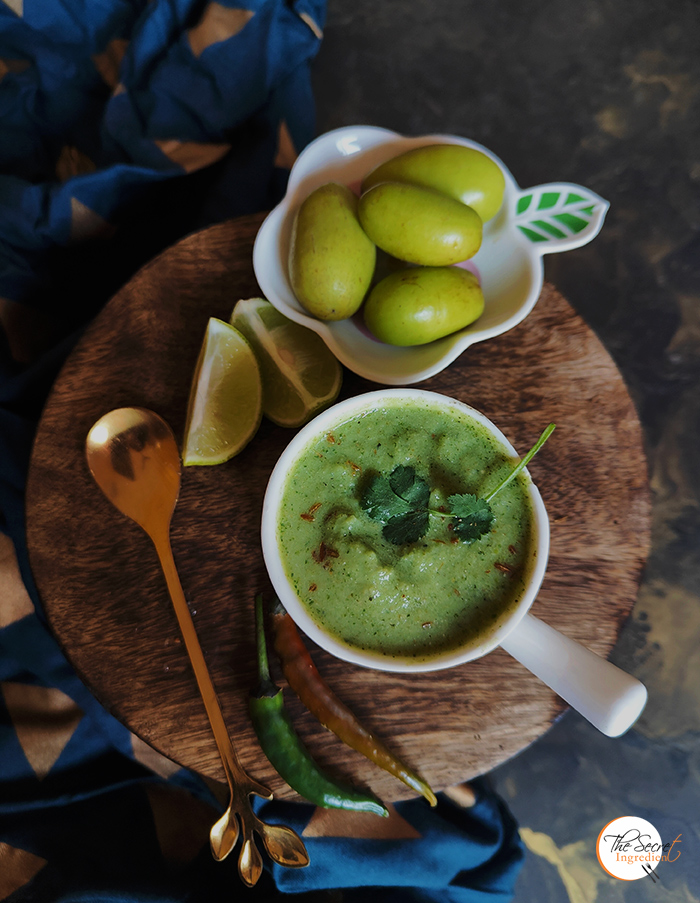
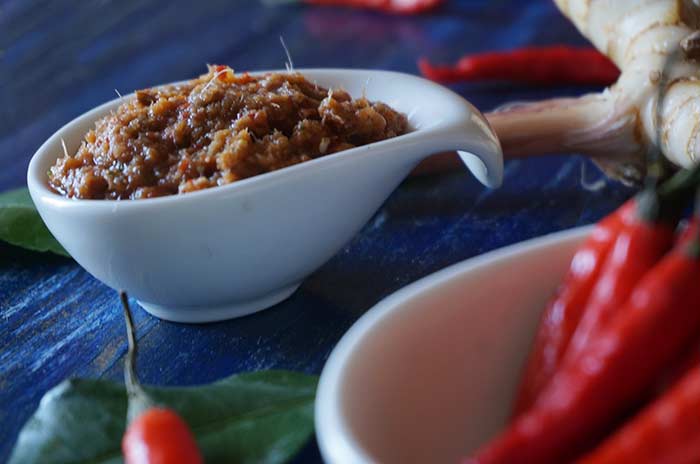
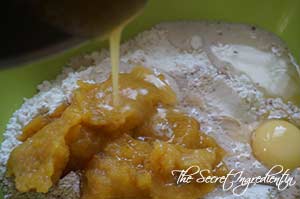
Green Ber ki Chutney I make every year because green ber is usually available at this time of the year. Yesterday was Maha Shivaratri, a Hindu festival  which is celebrated on the fourteenth day of every lunar month or the day before the new moon. It has a special significance for those who are on a spiritual path. A lot of Shaivas, devotees of Shiva observe fast on this day.  Around this time of the year the markets in India are flooded with some interesting fruits and vegetables, like the yellow ripe pumpkin, Cape gooseberry or Rasbhari in Hindi and also Ber or Indian Plum.

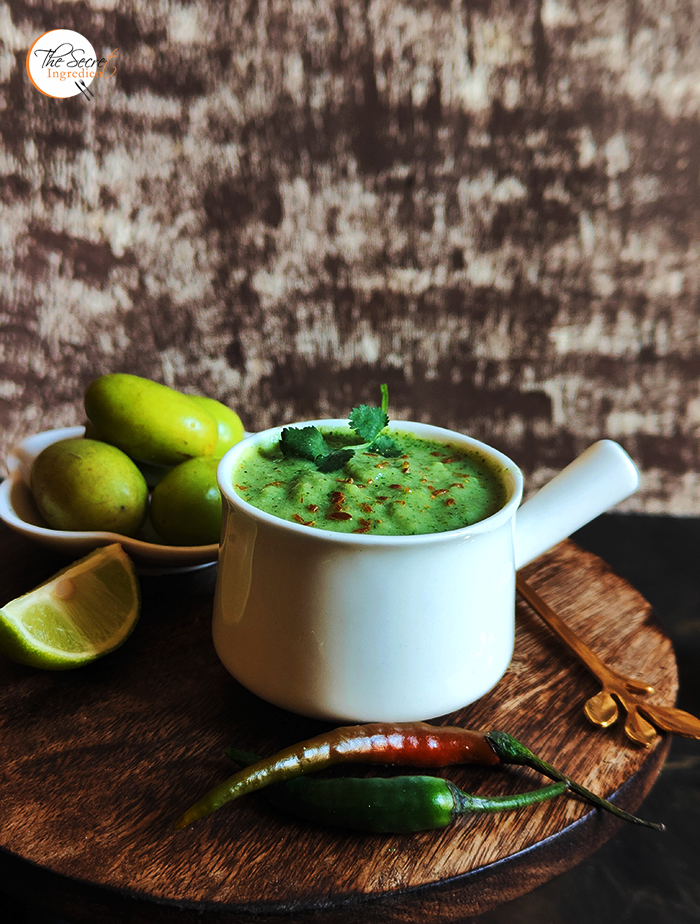
I have always loved eating Ber. It has a very peculiar taste not liked by everyone. This year on shivratri when I saw ber in the market I bought in abundance to munch all day long and tried to make this delicious chutney with mint. This recipe I had seen a while back and had been on my to-do list. I was a little skeptical about its taste but the end result was astonishing. Husband who doesn’t like ber also relished this chutney and asked for multiple servings with Samosa 🙂 Ha! what a happy end to ber.

Directions:
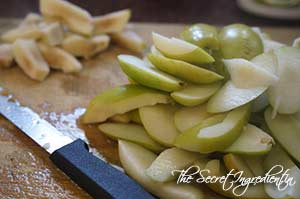
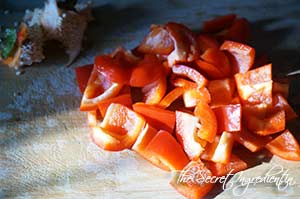
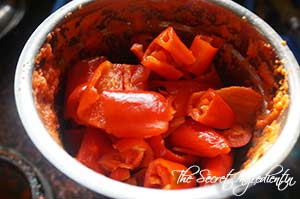
1. Wash and pit or destone the ber and  cut into pieces.

DSC05397

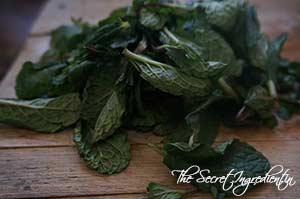
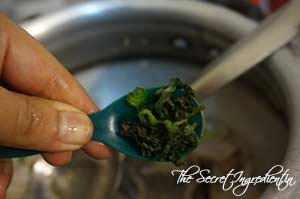
2. Separate the mint leaves from the stem and wash them well.

DSC05398

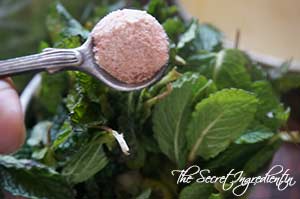
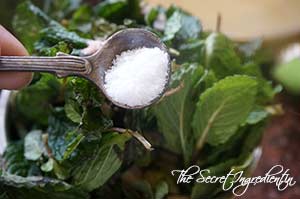
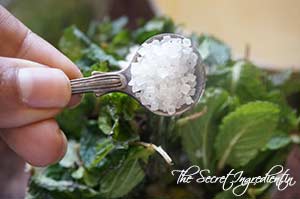
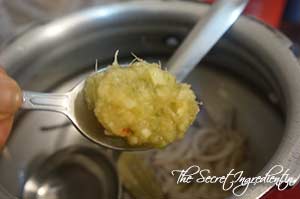
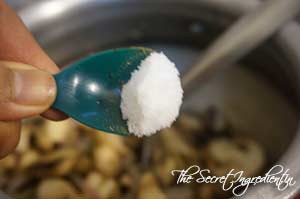
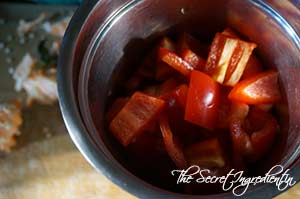
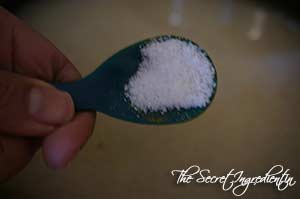
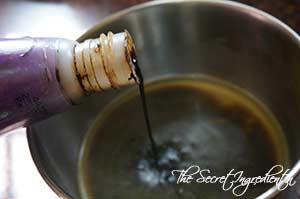
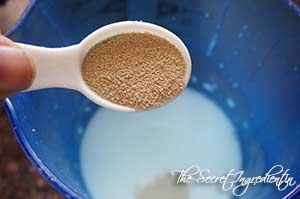
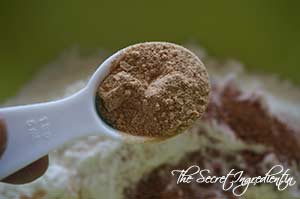
3. In a blender add the ber pieces along with mint leaves and Black Rock Salt and normal salt.


DSC05403


DSC05404


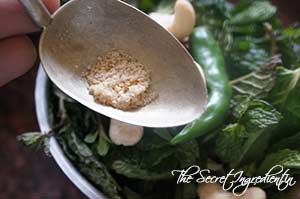
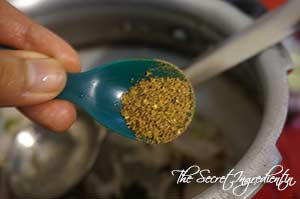
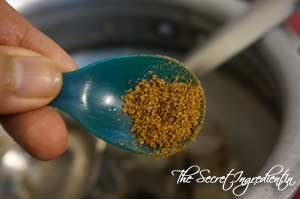
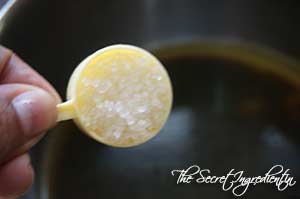
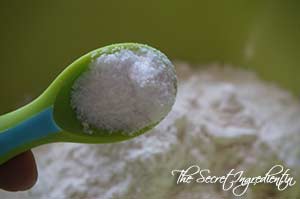
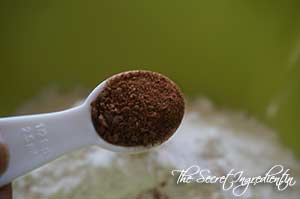
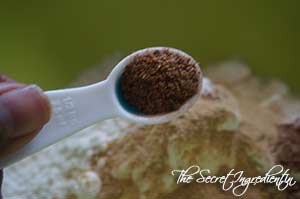
4. Also add sugar and roasted Cumin Seeds powder.


DSC05405


DSC05406


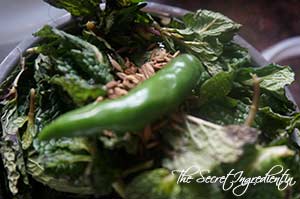
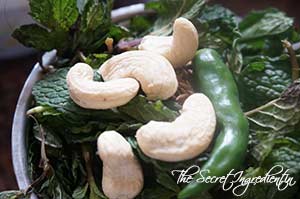
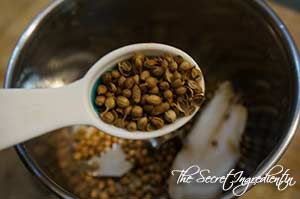
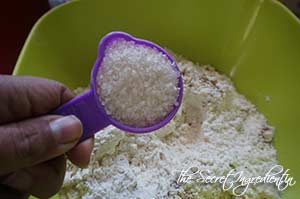
5. A green chilli, cashew nuts and a pinch of asafoetida


DSC05407


DSC05408


DSC05409


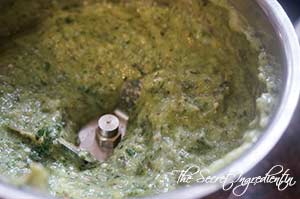
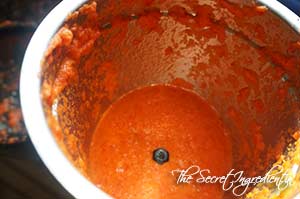
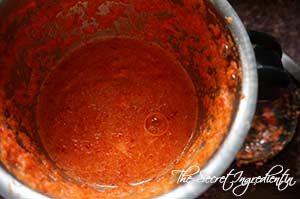
6. Blend them together to a smooth creamy paste.

DSC05410
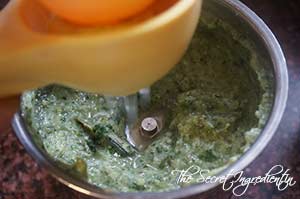
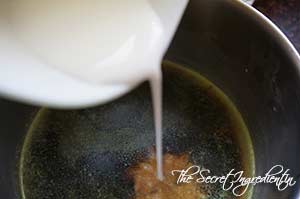
7. Add Lemon juice and pulse again.

DSC05412
8. Serve with your favourite snacks and enjoy its deliciousness. You can refrigerate the chutney for later use.

Other Chutney Dips and Salsa you can try here are: Aalubukhara ChutneyArgentine Chimichurri SalsaCoconut ChutneySweet and Sour Raw Mango ChutneyPudina ChutneySpinach Coriander Salsa| Phalahari Chutney Coriander Chutney without Onion GarlicRaw Mango Chutney with Mint and Coriander


[yumprint-recipe id=’196′]


Often there is an urge to eat something sweet, chocolaty which simply melts in your mouth. These cravings go berserk if you try to suppress them. And the only solution is to feed them with what they want. One super duper quick recipe is Brazilian Brigadeiros . These are simple chocolate fudge balls which involves minimal cooking and excellent results. Roll them in Chocolate Sprinklers and you get this amazing dessert.

I made this for my mother in law who is fond of chocolates and sweets. She was to do a road trip and I thought to make this for her so that she can enjoy her trip. And when I gave her a box of these she was like “wooowww did you make these they look just like store bought chocolate truffles”. And that made me a happy chirpy soul 🙂 Try them for your kids, specially when they are appearing for their exams. They would love to get pampered this way 😉

Directions:

1. In a pan melt Butter.
DSC05227
2. Empty a can of Condensed Milk.

DSC05229

3. Also add Cocoa powder and mix well. 

DSC05230

4. Keep cooking chocolate on medium flame until you see it bubbling. Make sure the chocolate doesn’t burn from the bottom so you need to keep stirring. If your chocolate is undercooked you wont be able to roll them into balls  and if its overcooked it wouldn’t taste good. So it has to be perfectly cooked. Draw a line in the centre with the spatula if the line remains  as it is , then its a sign your chocolate is done.

DSC05232
5. Line a plate with Parchment Paper, I have used Oddy Uniwraps Parchment Paper because it doesn’t stick to the food and you need not grease it. Spread the chocolate on the plate and let it refrigerate in fridge for 2 hours.


DSC05233


DSC05234


6. Grease your hands with oil and take a little portion of your chocolate and roll into a ball. If your chocolate is rightly cooked it will form the shape without a problem, if not you need to cook it further.


DSC05235


DSC05236


7. Roll the balls in chocolate sprinklers.

DSC05237
8. You can place them on a muffin cup liner to avoid sticking to the plate. Serve and enjoy the sweetness.

Other quick recipe you can try here are : Coconut Macaroons,Coconut Milk Mango PuddingApple Lapsi .

[whohit]Brigadeiros[/whohit]

[yumprint-recipe id=’195′]

StrawberryPreserve_Featured1

The Joy of Spring is in seeing some delicious fruits like cheery, blueberries, Strawberries and alike. They catch your attention instantly. The beauty of these fruits is that you can enjoy them as it is and at the same time make something fabulous out of them. Last year I got crazy with Cherries and I ended up doing Mascarpone Cherry Compote Cheesecake Glasses and Cherry Rosemary & Sea Salt Focaccia Bread. This season I have laid my hands on the gorgeous looking Strawberries. I just finished doing a batch of Strawberry cookies, I know it sounds weird but they tasted just yum. Will share the recipe soon 🙂 I have plenty on my mind but for now I bring you this heavenly strawberry preserve.

StrawberryPreserve_Featured5

The more I talk about this is less.. The freshness and bite size pieces of strawberry in the preserve was to die for. Smear it on top of a freshly baked bread slice and shut your eyes for a pure food orgasm. The bottled stuff you get in a market is all chemical but jam. I challenge you once you taste this you will never ever buy the market stuff.

StrawberryPreserve_Featured2

Look at that Spoon jeweled with Strawberry Preserve! Can you spot the pulp.. that’s what I call heaven! So when are you trying it? Make a small batch and enjoy the freshness of Strawberries without any preservative or pectin.

Directions:
1. Wash the Strawberries thoroughly and hull them using a pairing knife. 


DSC05144


DSC05147


DSC05149


2. Cut them into equal size pieces and put them in a bowl.

DSC05150
3. Add sugar and toss the berries. Cover it with a lid and let it sit for 4-5 hours, ensuring you stir them every half an hour.


DSC05151


DSC05152


4. That’s how the strawberries will release all its juice and squeeze up. Now put this in a saucepan over medium high heat.


DSC05172


DSC05220


5. Let it come to a boil. It should take 5-7 minutes. Use a potato masher to mash the strawberries as you cook. Keep stirring. In the meanwhile place a small ceramic or steel plate in the freezer. Don’t ask me why! I will tell you later 😛 Just do as I say 😉


DSC05221


DSC05222


6. Add lemon juice for the glaze and let it cook further till the time it has thickened and reduced.


DSC05223


DSC05224


7. When you think your jam is ready just take that plate out of the freezer and pour a little jam on the plate. Wait for 30 seconds and then draw a line in its centre with your finger. If the partition stays as it is then your preserve is ready and if its runny then you need to cook it for a little time more and do this test again. 


DSC05225


DSC05226


8. Let the preserve cool down completely transfer it to a air tight glass jar and refrigerate. You must always use dry hands and spoon to keep its longevity. It easily stays good for 8-10 months. Enjoy!

Other Jams, Chutneys and Preserves you can try here are: Fresh Plum Spiced ChutneyArgentine Chimichurri SalsaCoconut Chutney Sweet and Sour Raw Mango ChutneySpinach Coriander Salsa| Phalahari ChutneyRaw Mango Chutney with Mint and Coriander and Szechuan Sauce.

StrawberryPreserve_Featured4[whohit]Strawberry Preserve[/whohit]

[yumprint-recipe id=’194′]

MushroomBiryani_Featured1

I think someday my tastebuds will get salvation after constantly feeding them with different mushroom recipes. I hope that never happens in this lifetime. I get swayed when I see any new recipe with Mushrooms. Well I needn’t explain this again and again. If you follow my blog, you must have already known by now. I saw this amazing recipe on Beulah’s blog Full Scoops and I was infatuated. I tried and it turned out it was love at first bite.

MushroomBiryani_Featured2

Mushroom and rice married so well in the harmony of spices that the flavour was to die for. Who knew Mushroom rice could taste so well. It was a one pot recipe and I made a few changes to the original recipe by omitting the tomatoes and adding mint leaves directly. It was the best next rice recipe I have tried after Mint Rice. If you are looking for a quick fancy recipe for some guests , you have reached the right page. Don’t think twice just go for it 🙂

Directions:
1. Wash and soak rice for half an hour. I have used non basmati long grain rice. You can use any non sticky rice.

DSC02659

2. Wash and slice button mushrooms and keep aside. Also slice onions in length and finely chop some green chillies.


DSC02658


DSC02660


3. In a pressure pan add some ghee or clarified butter, bay leaf and cinnamon stick.


DSC02661


DSC02662


DSC02663


4. Also add green cardamom, cloves and star anise.


DSC02664


DSC02665


DSC02666


5. Saute sliced onions and green chillies in ghee. Also add ginger garlic paste and saute till the raw smell of ginger garlic fades away.


DSC02667


DSC02668


6. Also add to the pressure pan mint leaves, garam masala and ground cumin powder.


DSC02669


DSC02670


DSC02671


7. Add Salt and coconut milk to the pan and mix well.


DSC02674


DSC02675


8. Add soaked rice and water. Mix well.


DSC02676


DSC02677


9. Top it with freshly chopped coriander leaves. Close the lid and let it cook for 10 minutes or three to four whistles or till fully cooked. Dont open the lid immediately, let them cook in the pressure.

DSC02678
10. Fluff up with a fork and serve hot with Raita: Potato and Pomegranate Yogurt side dish.

Other Rice Biryanis and Pulao you can try are: Kathal Ki BiryaniPudina Pulao, Curd Rice.

You can try other Mushroom Recipes on The Secret Ingredient: Kadhai MushroomMalai Bell Pepper MushroomMushroom Do PyaazaChili MushroomGinger-Sesame Chicken with Bok Choy and Mushrooms Mushroom RisottoItalian Frittata with Mushrooms and SpinachMushroom MatarStuffed Mushroom Cheesy Crack BreadStuffed Mushroom and Spinach Braided Bread

MushroomBiryani_Featured3
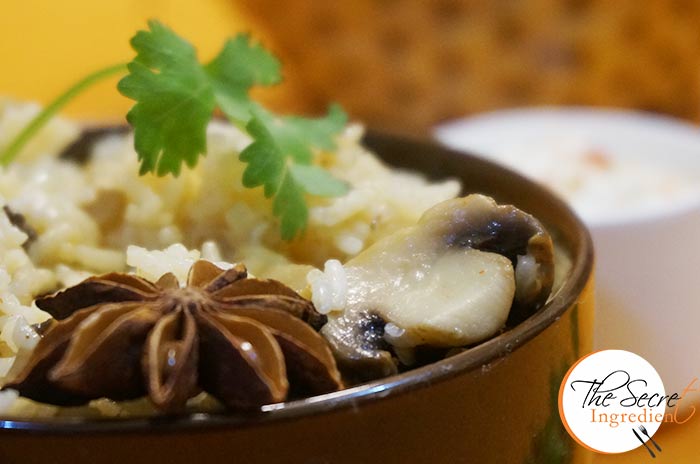
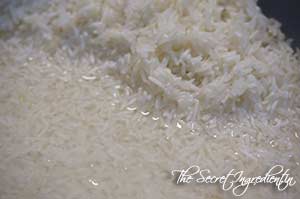
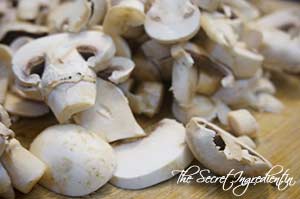
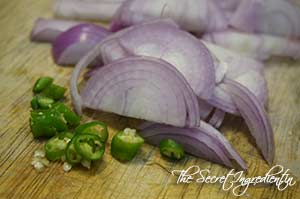
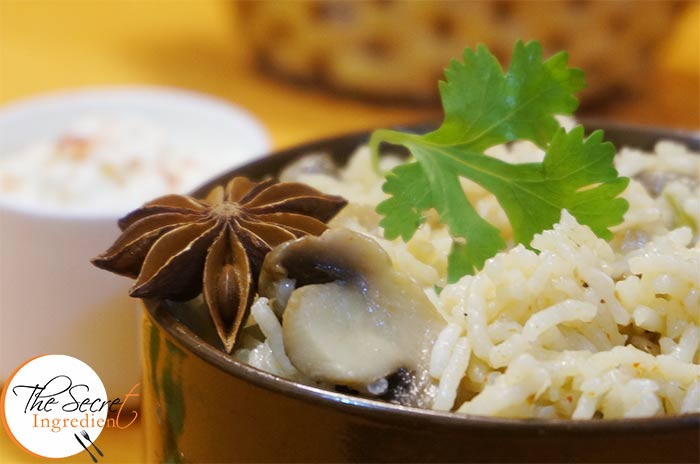
[whohit]MushroomBiryani[/whohit]

[yumprint-recipe id=’193′]

RedChiliJam_Featured5
It was a season of Red Chilies. I made about 20 kilos of Stuffed Red Chilli Pickle and was busy with its distribution all winter. I am back to my hills and I spotted more red chilies in the market. Oh man! Its my weakness. I cant resist red chillies for they are so darn pretty. Then I remembered I had once asked a dear friend of mine Kiran Padsala Amin to share this recipe of Red Chilli Jam. Its originally from Megha Vikram Singh. I must thank the girls for this lip smacking recipe.

RedChiliJam_Featured7

The jam or preserve was a hit in my family. My Mother in law who doesn’t like hot spicy food, also appreciated it and greedily ate with a parantha. Ah! what else do you want. If you ask me to describe the taste, its the taste of chillies with the sweetness of sugar. Of course, it has a hint of hotness which makes it to die for. I am not gonna add more words for I want you to try and leave back your comments below. 

Directions:
1. Wash the Red Chillies and Red Bell Pepper and pat them dry.

DSC05113

2. Deseed the Red Bell Pepper and cut them into small pieces. Add the pieces in a blender and make a coarse puree. It can be just a little chunky.


DSC05114


DSC05115


DSC05122


3. Similarly deseed the Red Chillies and Pulse them with the Red Bell Peppers to make a chunky puree.


DSC05116


DSC05123


DSC05124


4. In the meanwhile add sugar in a large heavy bottom pan. Also add White Vinegar and salt. Put the flame on on medium and let the sugar dissolve in vinegar. Do not stir the sugar, let it slowly melt. If you try to stir it, it will crystalize and you don’t want that to happen to your jam. So have patience and let it take its own sweet time.


DSC05125


DSC05126


DSC05127


5. Once you see the sugar has melted. Its time to put all the puree to the pan. If you are adding pectin* then this is the time. Add it to the sugar syrup. Give it a gentle mix and let it boil for good 20-25 minutes.


DSC05128


DSC05131


6. After 20-25 minutes you will see the mixture is syrupy but hasn’t thickened. Dont worry! Let it sit for 45 minutes or so to cool down. It will thicken as it cools.

DSC05132
7.  Transfer this to glass jars and indulge. Try it on a slice of bread or paratha or just eat barely!

You can even try Stuffed Red Chilli Pickle.

Other Accompaniments you can try here are: Spicy Chinese SaucePudina ChutneySweet and Sour Raw Mango ChutneyCoconut Chutney Argentine Chimichurri SalsaFresh Plum Spiced Chutney.

RedChiliJam_Featured2
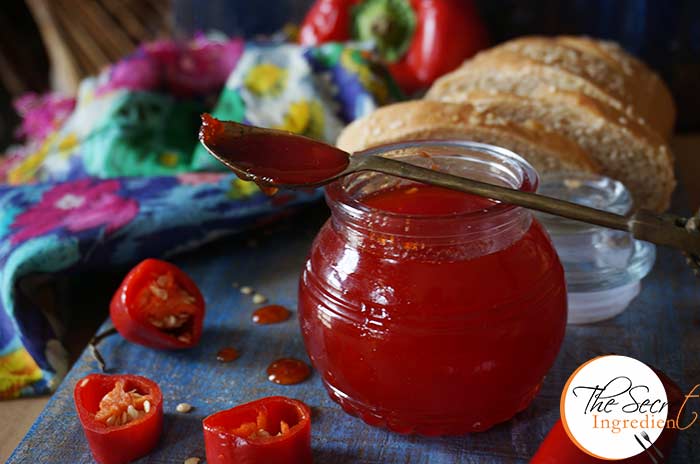
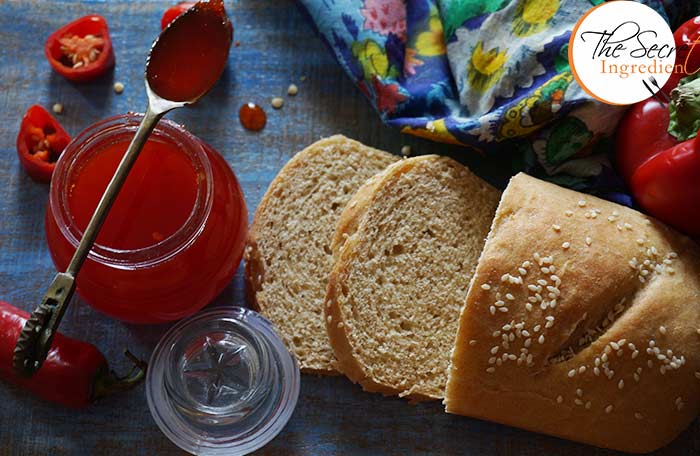
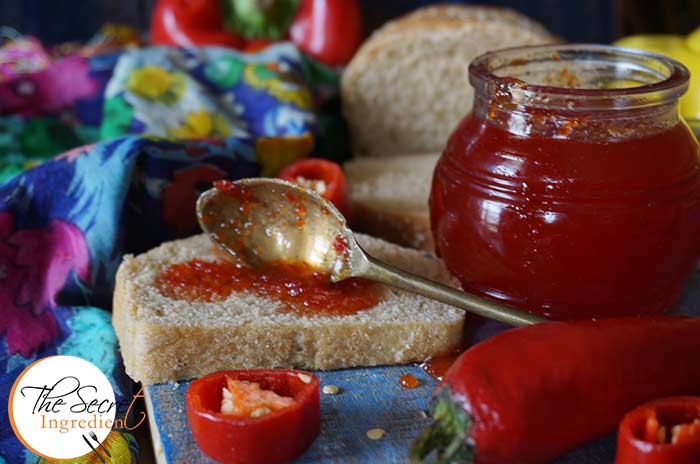
[whohit]RedChilliJam[/whohit]

[yumprint-recipe id=’192′]

BokChoyChicken_Featured3

Oriental flavours have always enticed me. They have that strong taste and the way it blends with meat and veggies cannot be defined in words. The combining sauce is often a blend of soy sauce, vinegar and ginger. This recipe has everything which gives it an authentic Oriental character. Recently, I found Bok Choy at my local farmer’s market. Honestly, I had no clue what it was. I asked the seller and even he was perplexed 😛 I bought it anyway and when I googled it I found it was bok choy, which I have always relished at my favourite oriental eatery.

BokChoyChicken_Featured1

I decided to use it in an oriental asian stir fry recipe. I had some chicken on hand and also mushrooms, bell pepper. I was actually feeling rich given the fact such ingredients are scarce where I live. The Stir fry came out absolutely aromatic and full of flavours. We had it greedily with rice and it was decided then and there that it will be a regular feature in our household (whenever we have those ingredients :P)

Directions:

1. Cut Boneless Chicken into cubes and set aside.

DSC05036

2. Wash heads of Bok Choy and split it into half. Cut the root part crosswise into squares. Leaves can be used in bokchoy soup, so reserve them.


DSC05038


DSC05039


3. Wash and Chop Mushrooms in slices and Red Bell Pepper in Small Squares.


DSC05041


DSC05040


4. In a pan add some vegetable oil and saute onion till they release their water and become a little brown.Remove them on a plate lined with Oddy Food Wrapping Paper, so that excess oil is soaked.


DSC05043


DSC05045


DSC05046


5. Now add little more oil to the same pan and add Red bell Pepper and Bok Choy. Stir Fry till they have cooked but still retain their crisp character. Also remove them on the plate lines with Food Wrapping Paper.


DSC05047


DSC05048


DSC05049


6. Repeat the same with Cubed Chicken. Stir Fry in the same pan by adding little oil. Season it with Salt and Pepper.


DSC05050


DSC05051


7. In a saucepan add some Chicken Broth or if you are using Broth Cubes add water and Broth Cube. Bring it to a boil and then turn the flame off.

DSC05052
8. In the same sauce pan add Sheer or White Wine, Soya Sauce and Sugar.


DSC05053


DSC05055


DSC05056


9. Also add Rice Vinegar, Cornstarch dissolved in water and sesame oil.


DSC05057


DSC05058


DSC05059


10. Also add Red Chili Flakes to the sauce pan and mix till everything is dissolved.

DSC05060
11. In a pan add oil and saute minced garlic and ginger for a minute and then add all the stir fried veggies and chicken. Mix well.


DSC05061


DSC05062


12. Add the sauce and let it simmer till it has reduced and thickened a little bit.

DSC05063
13. Transfer to a bowl and sprinkle some roasted sesame seeds. Serve hot with some boiled rice.

Other Indo Chinese Recipe you can try on The Secret Ingredient are: Chili MushroomGravy Gobhi ManchurianCrispy Honey Chili Potatoes with Sesame SeedsIndo Chinese Vegetable Chop SueyVegetarian Hakka Noodles.

BokChoyChicken_Featured4

[whohit]BokChoyChicken[/whohit]

[yumprint-recipe id=’191′] Sending this Recipe to Oddy Uniwraps

ThaiRedCurryPaste_Featured2

There is something about things made at home specially pickles, spice mixes, sauces, jams and many such things. They lend utmost satisfaction and give a feeling of pride. The advantage of doing them at home is not merely monetary but such things are hygienic, chemical free and do not taste like store bought industrial bottled stuff. 

I always have my refrigerator stocked with home made Szechuan Sauce, Kimchi, Chimichurri, Pesto. Whenever a recipe calls for a particular type you don’t have to run and make a trip to market. On my last trip to delhi I got a good batch of thai ingredients. I love Tom Yum Soup for which galangal and Bird’s Eye Chillies are a must. I have some Lemongrass growing in my garden, so I decided to make a big batch of Thai Red Curry Paste. Its a basic paste for plenty of Thai preparations specially, soups, stir fries and main courses.

ThaiRedCurryPaste_Featured4

The only hassle is to gather the ingredients and to bring them together doesn’t take much time. Specially when you are using non traditional way of grinding them, which is electric blender. Don’t judge me! Its a lot of effort doing it with mortar and pestle. I took the easy way and the curry paste still tasted divine. It filled my entire house with the aroma of these aromatic spices. You must try this to believe it.


Directions:

1. Chop the lemongrass root into small pieces. Let go off the long shoots. You can use them in Tom Yum Soup or to make tea. Take some dried Red Chilies, prik haeng. If you cant find this variety you can use ordinary red chillies. Deseed them and soak them in warm water for fifteen minutes before adding them to the paste.


DSC02979


DSC03305


2. Chop Galangal.

DSC05014
3. Add them to a grinder. Along with it add Whole White Pepper* and Dried Coriander Seeds.


DSC05016


DSC05015


3. Also add to it Peeled Garlic and Fresh Coriander stalks.


DSC05017


DSC05019


4. Also Add kaffir Lime Leaves** and Thai Red Bird’s Chili.


DSC03308


DSC05020


5. Add Shallots or Red Onion and Salt.


DSC05021


DSC05022


6. Add a spoon of water to ease grinding.

DSC03310
7. Grind it into a course paste and put it in a bottle. Refrigerate till use. You can make Thai Red Curry With Sticky Rice. with this paste.

Other Thai Recipe you can try here are: Veg Tom Yum Soup.

Other International Cuisines you can try on The Secret Ingredient are:  Italian Frittata, Chinese Steamed Baos with Custard Filling, Mexican Black Bean Salad with Mangoes, Argentine Chimichurri.

ThaiRedCurryPaste_1[whohit]ThaiRedCurryPaste[/whohit]


[yumprint-recipe id=’190′]

The whole Valentine hype is about hearts and cupids and all that romantic things we used to do ages back while we (me and my erstwhile Boyfriend and present Husband) were dating. Now that we are hitting middle age its time to think healthy and indulge in food which keeps our hearts healthy and not just full of love 😉

This is coming a week after Valentine’s day, but I did make this on Valentine’s day for the love of my life. I couldn’t post it earlier as I was in the middle of so many things, which if I start writing can go on and on. I chose this recipe over others because it was with whole wheat flour, had just three table spoons of oil and I used organic brown sugar which is way healthier. Having said that we totally enjoyed these brownies and they were a treat for my little sunshine. He loved them instantly and raised his thumb saying ” hmmm Mumma Tasty”. And what else do you wish to hear on Valentine’s Day <3

Directions:

1. Line a 15 cm x 15cm  Square baking sheet with Oddy Uniwrap Parchment Paper for mess free baking. Preheat the oven to 170 degree Celcius.
DSC04974
2.In a bowl add Whole Wheat Flour, organic brown sugar and cocoa powder.


DSC04975


DSC04976


DSC04979


3. Also add baking soda and salt.


DSC04980


DSC04981


4. Grind Oat meal in a grinder and add it to the flour mix.


DSC04977


DSC04978


5. Make a well in the centre.

DSC04982
6. Add whisked plain yogurt, Oil and Vanilla essence.


DSC04983


DSC04984


DSC04985


7. Combine everything with a spatula until moistened. Do not overmix as you do not want to develop gluten.

DSC04987
8. Pour the batter in the lined baking sheet and smoothen the top with a spatula. 


DSC04988


DSC04989


9. Top it with chocolate chips or grated chocolate.


DSC04986


DSC04990


10. Bake it in oven for 45 minutes or until the skewer inserted comes out clean. Remove the parchment paper from the base. You will be amazed how easily it will come out. That’s what I call a mess free baking.

DSC04991
11. Place it on a wire wrack and let it cool down. 

DSC04992
12. Cut into square pieces once it’s totally cooled.

You must also try Vegan Yellow Zucchini Chocolate Brownies, Whole Wheat Banana Peanut Butter Brownies,Gluten Free Chocolate Ragi Brownies, Vegan Avocado Chocolate Brownies

If you are looking for other eggless cake recipes you can try: Vegan Chocolate Banana CakeWacky Vegan Chocolate CakeWhole Wheat Vegan Banana Bread with Melon Seeds,  Eggless Orange Cake with Candied Orange Peel FillingEggless Almond Vanilla Cake .


[yumprint-recipe id=’189′] 

Sending this Bread to Oddy Uniwraps

CoconutMacaroons_Featured3
This is my first post the year. It has been crazy in the midst of workshops, bakes, pickle orders and a much much more. Not that I have not been baking , just that I have a different laptop to work with and it is taking a while to adjust. So a lull in posting. I hope you missed me as much I missed you. Here’s a super quick dessert which is easy, crisp and equally delicious.   

CoconutMacaroons_Featured2

These Coconut Macaroons are not to be confused with French Macarons. The two words refer to completely different things. Both macarons and macaroons are confections, and both names are derived from the Italian word ammaccare, which means “to crush” – but that’s where the similarities end. Traditionally, these coconut macaroons are made with whipped egg whites, however this recipe is eggless and far more easy and yet so delicious!

Directions:

1. Preheat your oven to  350 degree F ( Learn about Oven temperatures and Conversion). In a bowl add some dried flaky Coconut. Also add to it All purpose Flour and little salt.


DSC04576


DSC04577


DSC04578


2. Add to the bowl vanilla extract and condensed milk.


DSC04579


DSC04580


3. Mix them thoroughly using a spoon. Wet your hands and roll them into golf size balls.


DSC04581


DSC04584


4. Line a baking sheet with Oddy Uniwrap Parchment Paper and place these balls on it. 

DSC04585
5. Bake them in preheated oven for 15 to 17 minutes or until golden. Remove them on wire rack to cool off.

DSC04586
6. Enjoy these crispy flaky Coconut Macaroons in no time. Perfect solution for quick dessert cravings.

Still looking for more Coconut recipes? You can try Coconut Chutney , Coconut milk and Mango Pudding and Chocolate Coconut Cookies.
 
CoconutMacaroons_Featured5
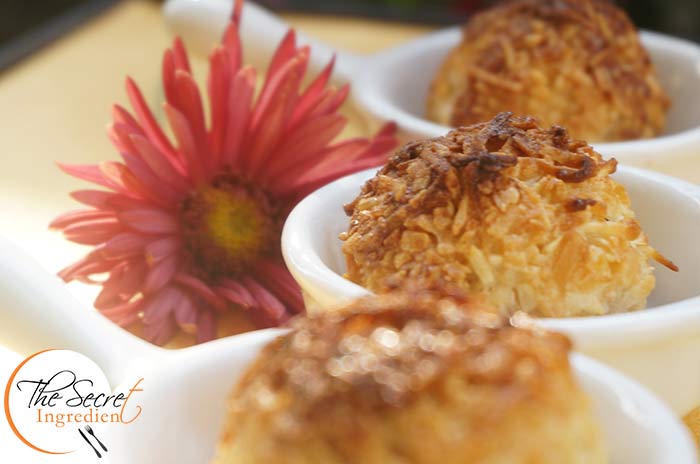
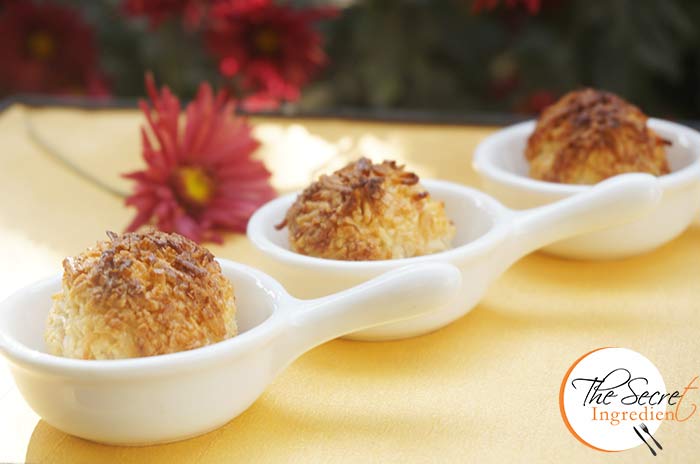
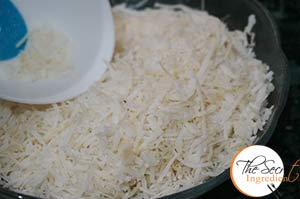
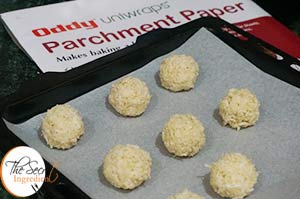
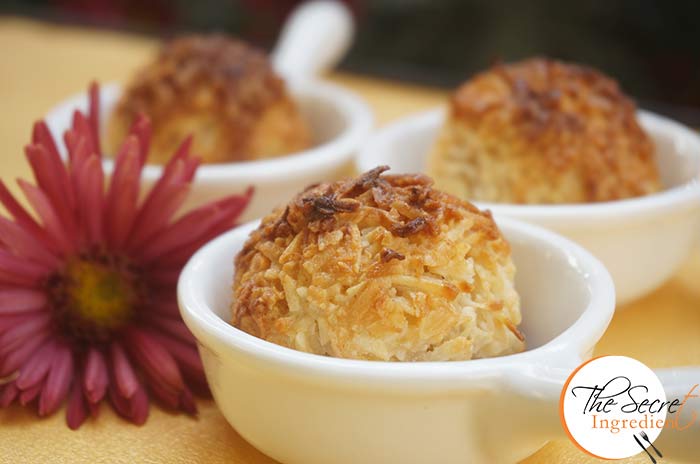
[whohit]CoconutMacaroons[/whohit]

[yumprint-recipe id=’188′]


PumpkinBuns_Featured1

It wasn’t until Mexico happened that I discovered that pumpkin can be used in making sweets and desserts apart from the traditional Indian style savoury curries. It was then I started making Pumpkin Puree at home which is available in abundance specially around halloween, thanksgiving and christmas. I find it an amazing ingredient to make nutritious pancakes for my kiddo. You can also make Pumpkin Soup, Pumpkin Pie and what not. My first stint with Pumpkin puree was when I made Pumpkin Cake Rolls. Ohh man! They were outrageously delicious.

PumpkinBuns_Featured2

Now that I am into bread baking, I came across this post from Aparna’s Blog My Diverse Kitchen where she made these gorgeous looking baby pumpkins. I decided then and there I will do this soon. And here I am with these little cute looking pumpkins. I showed them to my mother in law who loves tiny pumpkins and she took them for real pumpkins 🙂 When I told her these were buns she was amazed. They not only look cute but taste great with ground spices. You must try them soon.

Directions:
1. In a container take some lukewarm milk. Add instant yeast and also add sugar. Let the yeast sit for 5-7 minutes to bloom and become frothy. You can know more about ways and means to tame yeast.


DSC04461


DSC04462


2. In the meanwhile take All purpose flour in a bowl and add to it salt and cinnamon powder.


DSC04463


DSC04464


DSC04465


3. Also add ginger powder and ground cloves, along with more sugar, if you like them to be more sweet*. Give dry ingredients a mix.


DSC04466


DSC04467


DSC04468


4. Once you see the yeast milk has frothed up, you can add it to the flour mix.


DSC04469


DSC04470


5. Add Pumpkin Puree. You can use canned or you can easily make at home like this. Add to this egg and melted butter.


DSC04471


DSC04472


DSC04473


6. Using your hands bring the mixture together to form a dough. Dust your counter with flour and knead it well for good 10 minutes. Until it becomes paliable.


DSC04474


DSC04475


7. Make a ball of it and place in a greased bowl. Cover the bowl with a cling wrap and let it rest for an hour or until it doubles up. The time may vary depending on the weather conditions.


DSC04476


DSC04477


8. Once it has doubled in size deflate it and knead it on your flour dusted counter. Divide the dough into 8 equal size balls.


DSC04478


DSC04479


9. Press them a little from top to make them appear like discs. Cut them around with a sharp knife making it look like a flower. Ensure you just make incisions around the centre, not all the way. Let picture below be your guide.


DSC04480


DSC04481


10. Place them on a baking sheet lined with parchment paper. In this case I am using a silicon mat. Do keep a good gap between each bun for they will expand on second proof and further on baking. Using a clean Pencil make a small hole in the center of the flower. Cover the tray with a lint free towel and let it rise again for another 45 minutes or so.


DSC04483


DSC04486


DSC04484

11. That is how they should look after second rise. Give them a generous egg wash or you can use milk and water mixture. Bake them in a preheated oven for 15 to 20 minutes on 180 degree celsius (Learn more about Oven temperature and Conversions)


DSC04488


DSC04489


12. As they come out of the oven you can give them honey mixed with water glaze, for that sheen. In the cavity we made before you can place a pine nut or walnut piece sliced vertically like the tiny stem of pumpkin.

Other festive recipes you can try are: Gingerbread Man Cookies, Melomakarona: Greek Christmas Cookies, Pumpkin Cake Rolls, Persimmon Rum Cake, Pumpkin Pie Spice.

PumpkinBuns_Featured5
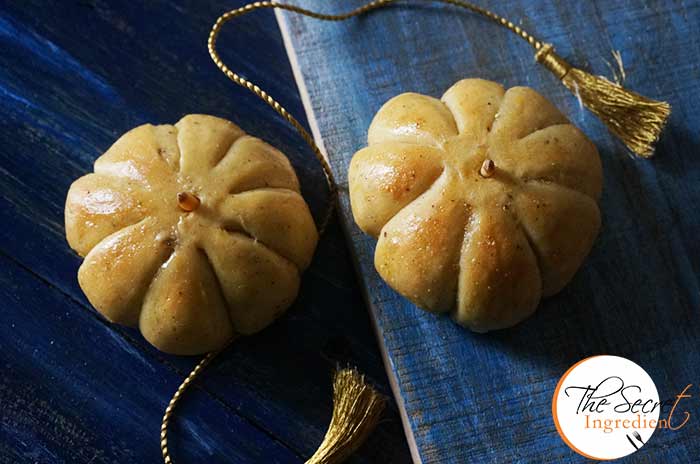
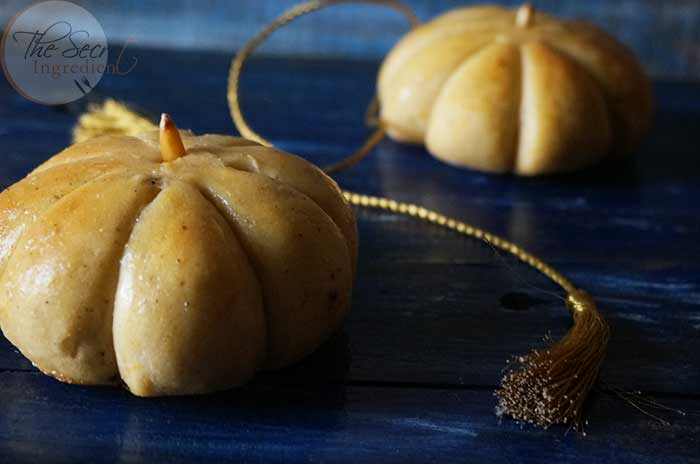
[whohit]PumpkinBuns[/whohit]

Sending this to YeastSpotting

PumpkinBuns_Pintrest

[yumprint-recipe id=’187′]