Author

anshu

Browsing

NoKneadBread_Featured4
My obsession for baking breads continues. I feel its a short life and so many breads to bake ๐Ÿ˜‰ yeah clearly I have lost it. Last I shared my White Sandwich Bread recipe with you. In my article “Basic Steps to bake a Perfect Bread Loaf” I have mentioned how important it is to knead a bread dough properly for the soft and fluffy bread crumb. But here is an exception.

NoKneadBread_Featured2

It doesn’t mean that you cannot bake a bread without kneading. Here is why I say this. This method uses no kneading and still the gluten is developed by the process of slow fermentation or proofing which happens overnight in the fridge. If you don’t understand all this, don’t worry. Simply follow the recipe and let science do its own thing ๐Ÿ™‚ This recipe is great if you cant bake right away. The dough proofs up overnight and complex and interesting flavours are developed. This is a fine example of bread which uses less yeast and more time.

Directions:

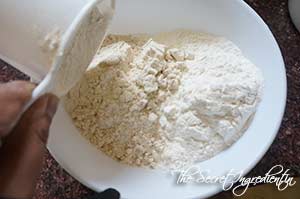
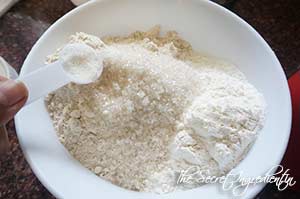
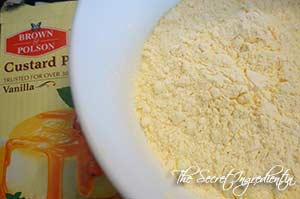
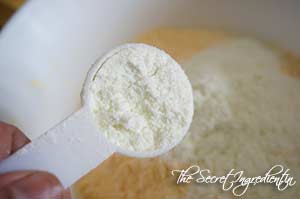
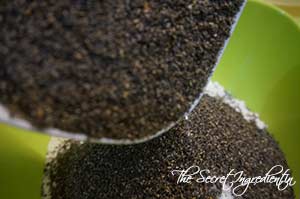
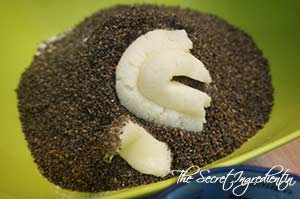
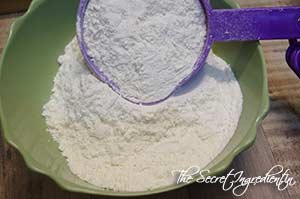
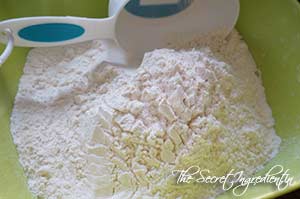
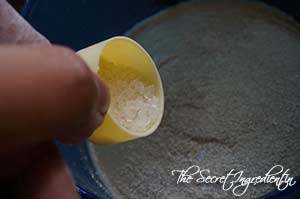
1. In a bowl add All Purpose Flour and Whole Wheat Flour.

DSC07846
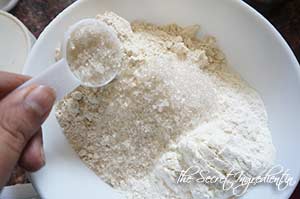
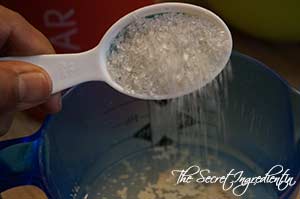
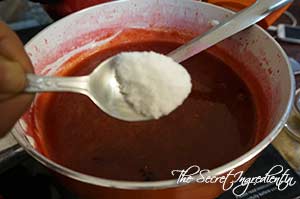
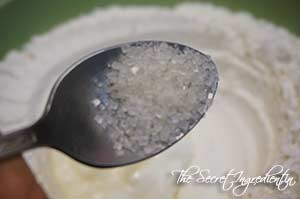
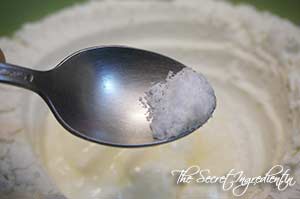
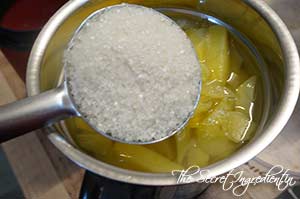
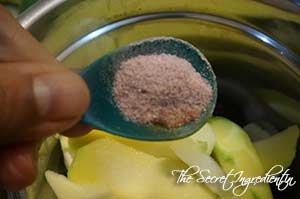
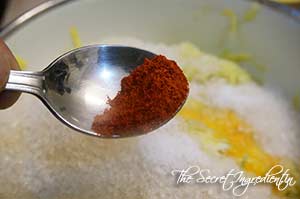
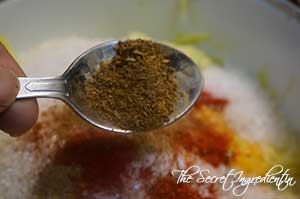
2. Add to the bowl sugar and salt and combine with the flour.


DSC07847


DSC07848


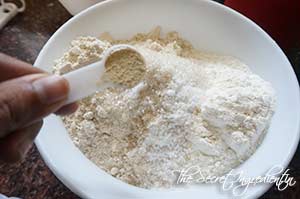
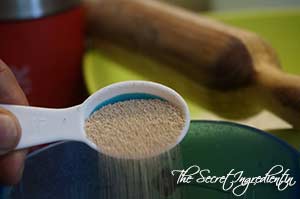
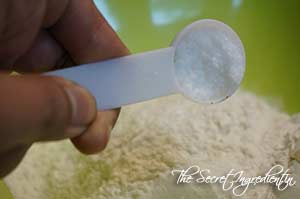
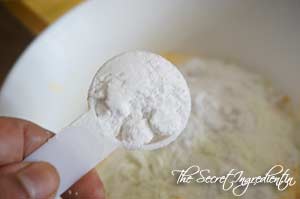
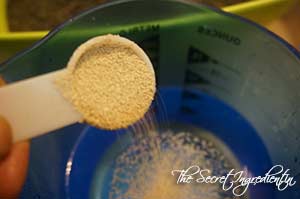
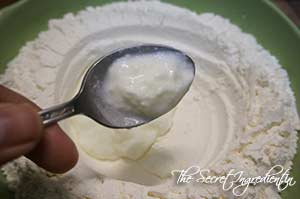
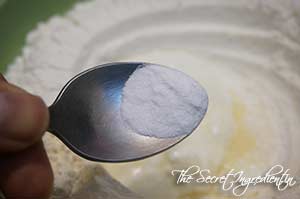
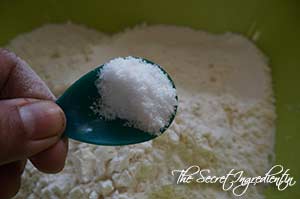
3. Add yeast and combine.

DSC07849
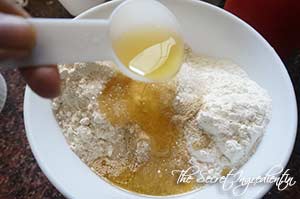
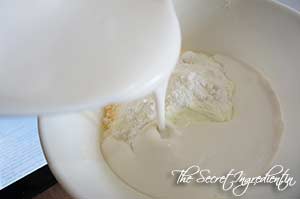
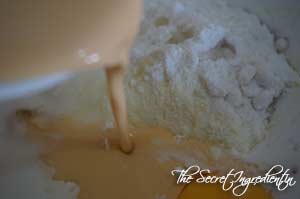
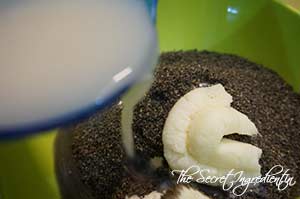
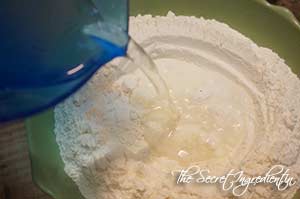
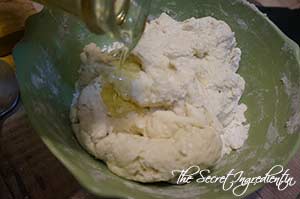
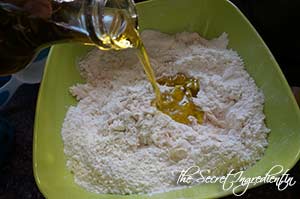
4. Pour oil and water on top. 


DSC07850


DSC07851


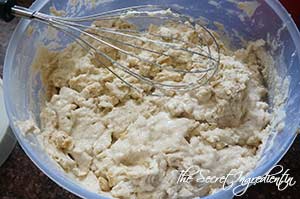
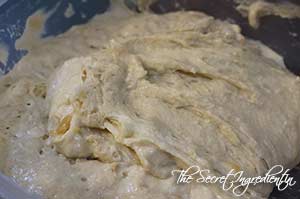
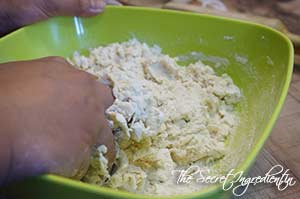
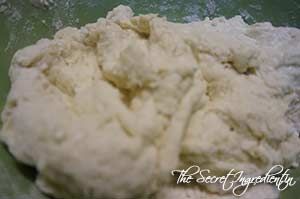
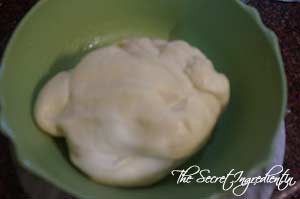
5. Whisk is together using a whisk or mix using a wooden spoon. Do not knead just mix.

DSC07852
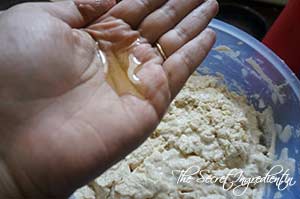
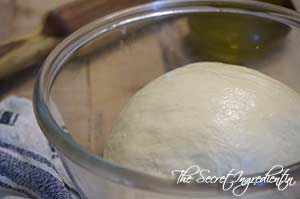
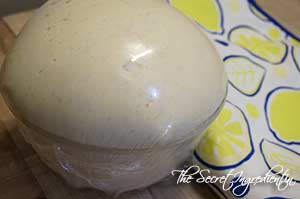
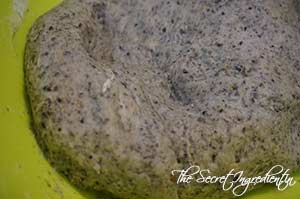
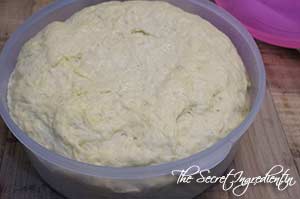
6. Take some oil in your palm and spread on the surface of it. Cover the bowl with a cling wrap and let it rest.


DSC07853


DSC07854


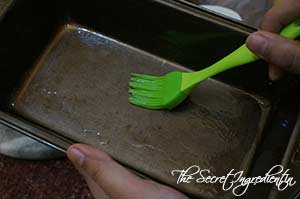
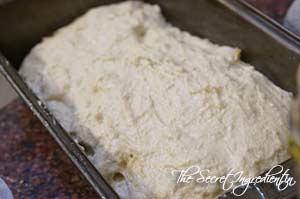
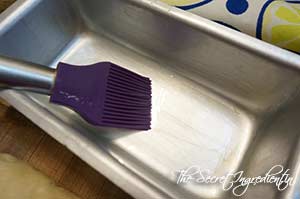
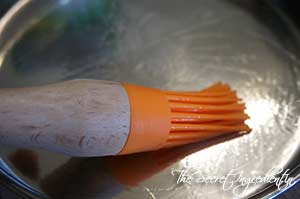
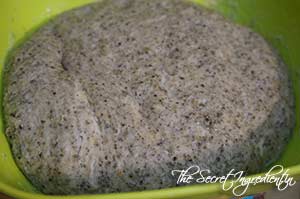
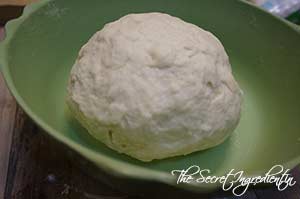
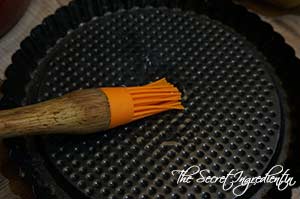
7. After 12 to 18 hours the dough should have proofed up and doubled in size. At this stage grease a 10×5 bread loaf pan or tin.

DSC07872
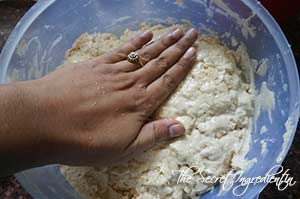
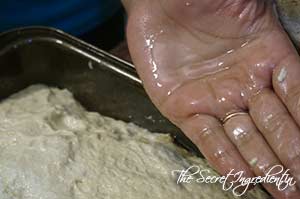
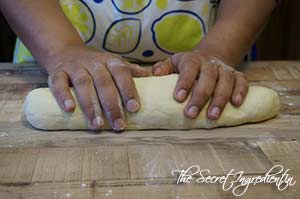
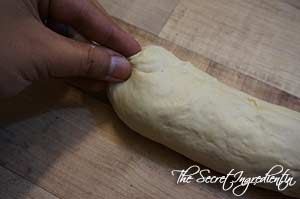
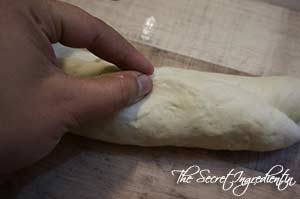
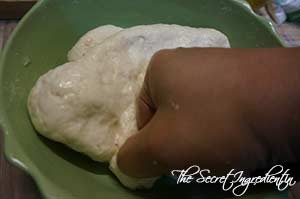
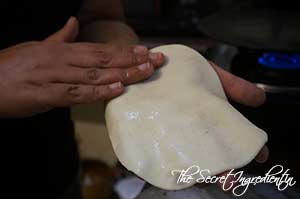
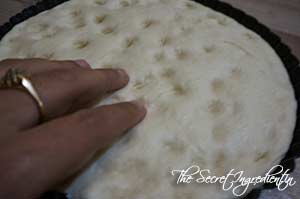
8. Stir the dough together gently and you start on one side, push your wet hand under the dough and pull up the dough all the way to fold over the top.


DSC07873


DSC07874


DSC07875


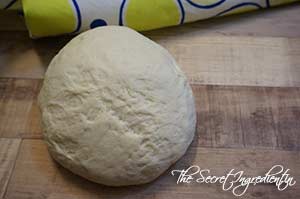
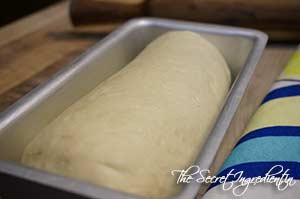
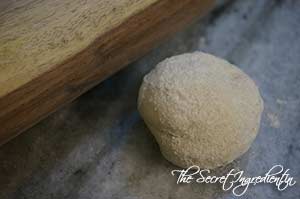
9. Now fold the dough in half, lift it out of the mixing bowl and place it in the loaf pan seam side down.

DSC07877
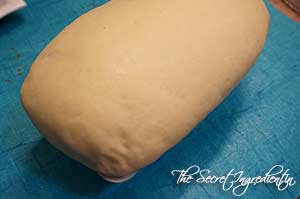
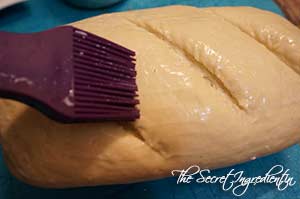
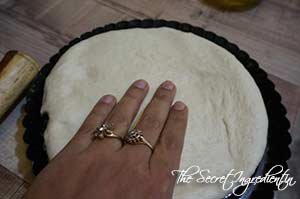
10. Make the surface levelled and  smooth by applying some oil in your hands .

DSC07878
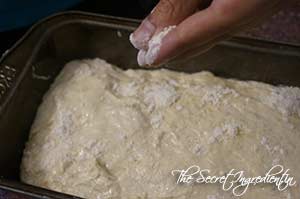
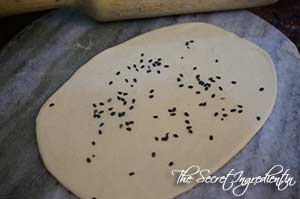
11. Sprinkle some dry flour on top.

DSC07879
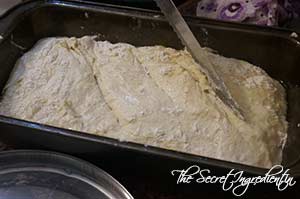
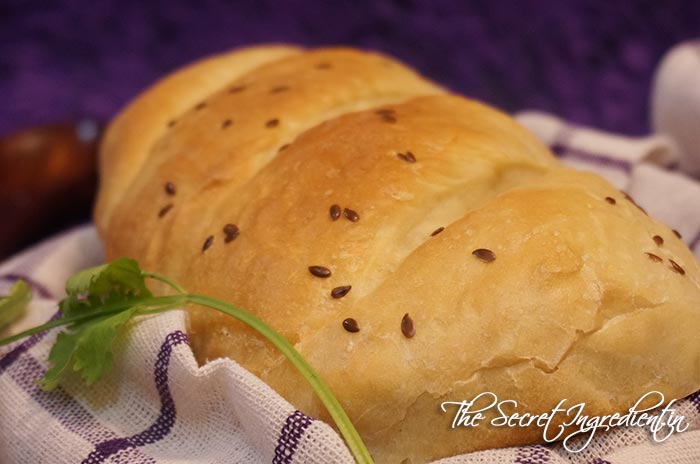
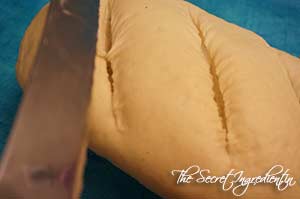
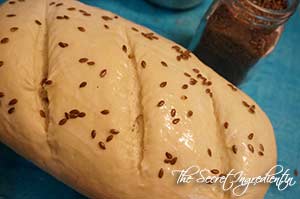
12. Make three slashes or cuts using a sharp knife which is known as scoring the bread.

DSC07880

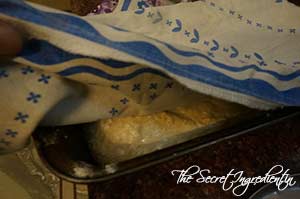
13. Cover the baking pan with a lint free kitchen towel or loosely with plastic cling wrap and let it rise for couple of hours somewhere between 1 to 2 and 1/2 hours depending upon the weather conditions, until it is barely above the tin pan. 

DSC07881
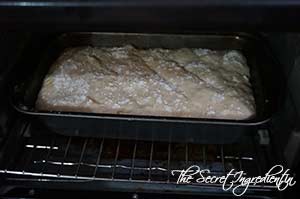
14. Bake it in a preheated oven on 190 degree Celsius for 50-60 minutes in the centre rack of your oven. If at any stage you feel the bread is browning too fast tent it with an aluminium foil and continue to bake.

DSC07882
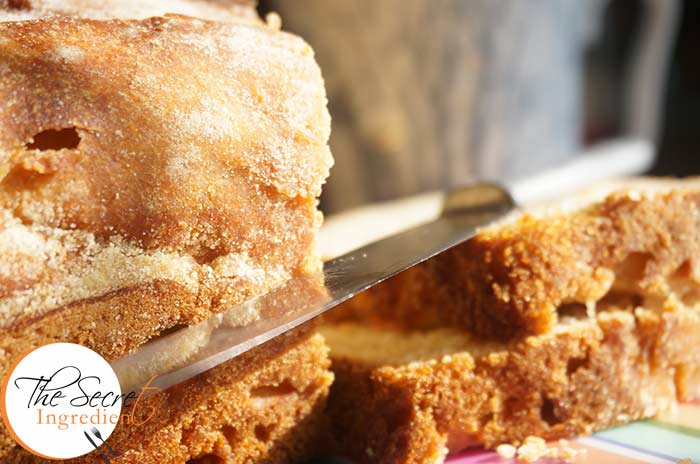
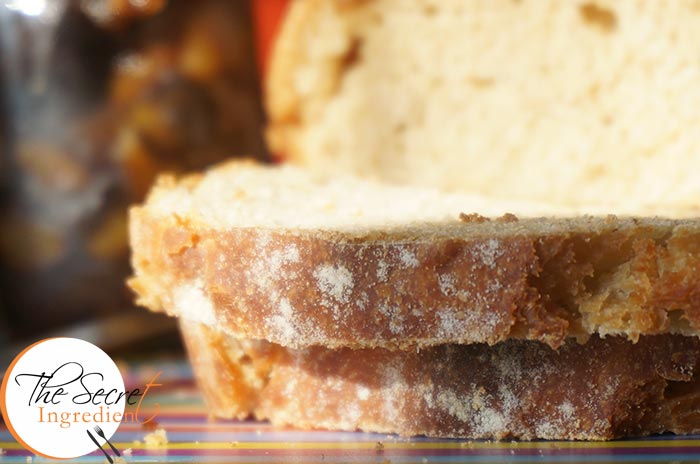
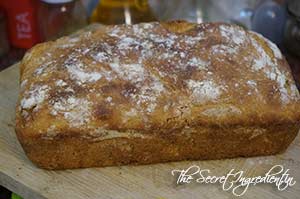
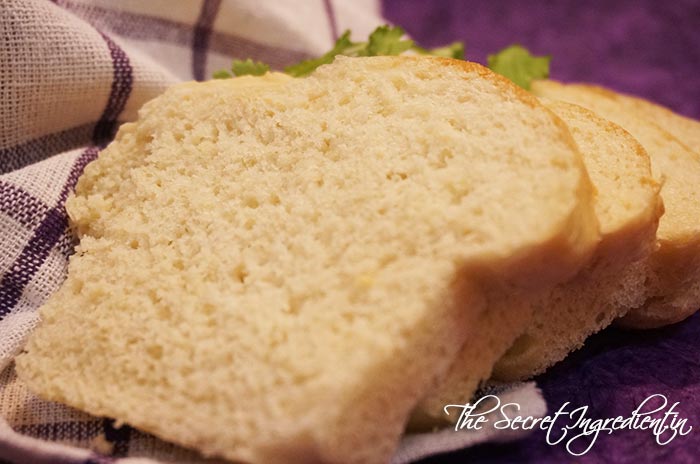
15. Let it cool down completely before slicing. You can place it on a wire rack to cool down. This will help with air circulation and will not make the crust soggy.

DSC07883

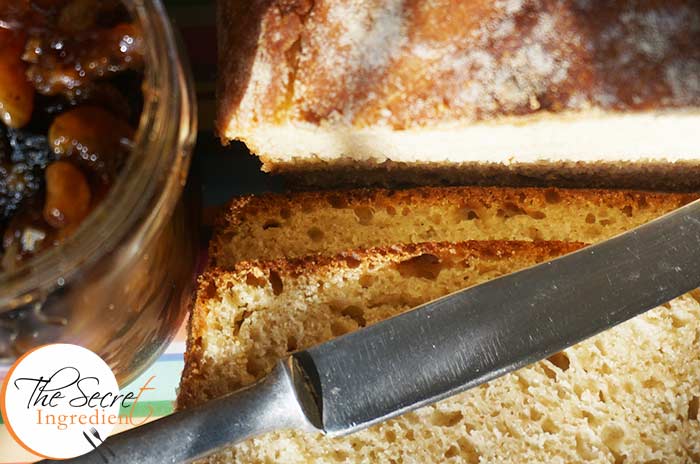
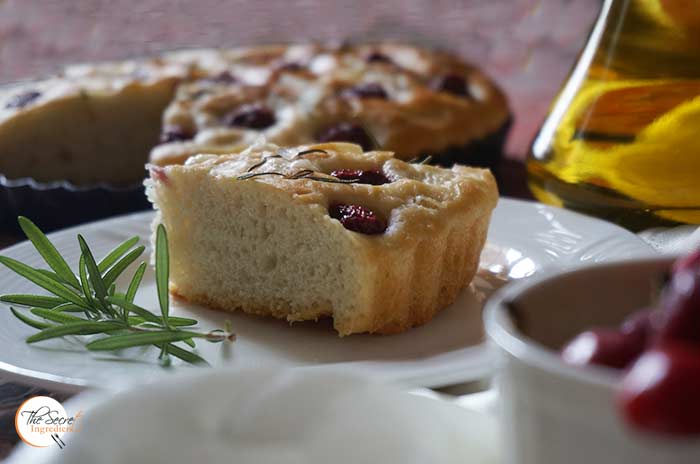
16. Slice it and smear some butter or jam or chutney on top. Enjoy this indulging home made bread.

Other Bread recipe you can try on The Secret Ingredient: White Sandwich BreadRussian BubliciWhole Wheat Sandwich BreadChinese Black Sesame Steamed BunsCherry Focaccia Bread with Rosemary and Sea SaltRosemary Garlic Focaccia Bread, Cinnamon Raisin BreadBeetroot Bread with Garlic and ThymeHoney Oats BreadDominoโ€™s Garlic Breadsticks.

NoKneadBread_Featured1[whohit]No Knead Bread[/whohit]

[yumprint-recipe id=’147′] Sending this Bread to YeastSpotting

WhiteSandwichBread_Featured4
Its been more than a year that I have bought a store made commercial bread. Its my husband who loves home made breads and detests those commercial ones. This started when I perfected the art of making this gorgeous bread. I have posted so many bread recipes before, but I wonder why I didn’t post my regular white bread recipe. Anyways better late than never.
I  recently posted an article about yeast ” All you ever wanted to know about yeast“. Often I found people asking me why their yeast would not proof. This article talks about basics of yeast. I am sure you will get a good insight into it. 

WhiteSandwichBread_Featured3
This is the most moist soft bread I have ever baked. Its my go to recipe for all types of sandwiches. Most of the time I dunk a slice  in my Chai and eat! Dont Judge me ๐Ÿ˜› 

Directions:

1. In a container take some lukewarm water. It should neither be hot nor cold, just hot enough to comfortably put your finger into it . The right temperature of the water is very important for yeast to activate. Put yeast into it.

DSC02540
2. Along with yeast add some sugar.

DSC02541
3. Give it a gentle stir with a fork and let the mixture sit and activate for 10 minutes or until you see some bubbles on top and mixture has become frothy and milky.

DSC02548
4. Take all purpose flour in a bowl and add salt and olive oil.


DSC02549


DSC02551


5. Add the proofed yeast to the flour little by little and mix till it comes together.

DSC02553
6. Bring the dough to a flat counter or your kitchen platform and knead for good 10 minutes till it becomes soft and supple. Read more about Bread baking techniques in “Basic Steps to Bake a Perfect Bread

DSC02554
7. Transfer the dough to a greased bowl. And cover with a kitchen towel or cling wrap. Let it sit for an hour or so to double up in size.


DSC02560


DSC02562


8. Punch it down and deflate the dough. Knead for another 5-7 minutes.

DSC02563
9. Grease your bread pan with oil and dust with some flour.

DSC02566

10. Roll the dough into a circle using a roller pin.

DSC02565
11. Take one end and roll it together . Fold in the sides and pinch the seam.


DSC02567


DSC02568


DSC02569


12. Place the rolled dough in the baking pan with seem side down.

DSC02573
13. Cover the dough loosely with a towel or cling wrap and let it rest again for 30 minutes till it rises again. Pre heat the oven to 180 degree Celsius for 10 minutes.

DSC02603
14. If you wish you can score the bread with a sharp knife.

DSC02604 
15. Brush the top gently with glaze.

DSC02605
16. Sprinkle the top with flax seeds or seeds of your choice.

DSC02606


17. Bake it in the centre rack of your preheated oven for 35-40 minute. Change sides half way for even cooking. If you feel your bread is browning too fast tent it with aluminium foil and continue to bake.

Other bread recipes you can try : Vegetarian homemade PizzaRussian BubliciWhole Wheat Sandwich BreadChinese Black Sesame Steamed BunsCherry Focaccia Bread with Rosemary and Sea SaltRosemary Garlic Focaccia Bread, Cinnamon Raisin BreadBeetroot Bread with Garlic and ThymeHoney Oats BreadDominoโ€™s Garlic Breadsticks.

[whohit]WhiteBread[/whohit]

WhiteSandwichBread_Featured


[yumprint-recipe id=’146′]


Sending this Bread to YeastSpotting


I am part of a prestigious cooking Group on Facebook by the name “Spatula Force” where the members challenge each other with a particular theme for the month. Last month it was Italian hosted by me where in I made Risotto ai Funghi  for the event. This month was much more challenging as the theme was Authentic Chinese, which means no Indo Chinese short cuts. It was quiet a herculean task to find a recipe which was doable as the ingredients used in Authentic Chinese Cuisine could be difficult to find at such a short notice. Also I wanted to try a dish which I had tasted before, so that I know if it tastes the same or has the same texture and look. After a lot of search on google I finally found a recipe which excited me. I was fortunate to find Steamed Black Sesame Custard Buns by Away Of Mind Bakery House. I have had steamed Buns or Chinese Baos (as they call in Chinese) in Mexico at a Chinese Buffet Restaurant. 


Traditionally these bao are sweet in taste and have a tender pork filling. But over a period of time a lot of filling variation has come up. You can stuff it with Red Bean paste, custard with Sweet Corns and many many more. You could simply make these with plain All purpose Flour or even add different flavours to the dough. I added Black Sesame Powder to the flour to make it blackish grey with bright yellow custard filling. They were soft and mildly sweet just the way I like it ๐Ÿ™‚

Directions:
1. For the filling Take Custard Powder in a bowl.

DSC02380
2. Add icing sugar and Dry Milk powder to the bowl.


DSC02382


DSC02381


3. Add coconut milk.

DSC02383
4. Break in the eggs.

DSC02384
5. Also add Evaporated milk.

DSC02385
6. Whisk it to make a lump free mixture.

DSC02386
7. Oops! I forgot to add Melted butter. I am doing it now and whisking.

DSC02387
8. Grease a plate or container which you can keep for steaming. I am using a dhokla stand.

DSC02388
9. Sieve and pour the mixture in the vessels. You dont want any lumps.

DSC02389
10. My mixture fitted in two plates of dhokla. 

DSC02390
11. Preheat the steamer with water till water starts bubbling.

DSC02391
12. Carefully place the stand and close the lid to steam for 12-15 minutes.


DSC02392


DSC02393


 13. Take the plates off the steamer and spoon up the custard thoroughly and try to mash with the back of spoon.


DSC02394


DSC02395


14. After it has come to room temperature and  little easy to handle. Take a handful in your fist and squeeze it together to form a sort of ball. It will not be easy for it to make it into a ball but as much as you squeeze it will come together. Your filling is ready keep it in the refrigerator if not using at that time.


DSC02397


DSC02398


15. For the dough grind black sesame seeds into a powder. Add the sesame powder to the All Purpose Flour in a bowl.


DSC02399


DSC02400


16. Add instant or dry active yeast in lukewarm water and gently stir.

DSC02401
17. Add sugar to it ans let it activate.

DSC02402
18. Add vegetable Shortening* to the flour along with yeast water and knead into a soft supple dough.


DSC02403


DSC02404


DSC02405


19. Cover the dough with cling wrap and let it rise for 45 minutes or so till it has doubled up.

DSC02406
20. Divide the dough into 18-20 parts and roll into a ball.

DSC02407
21. Take each ball and roll it into a thin disk and place one ball of custard in its centre. Close from all the ends and give it a bun shape. Place it on a greased baking sheet seem side down to rest for another 15-20 minutes. Steam them in the steamer by placing a sieve or spotted plate for them to cook in steam. You may like to grease the plate well for the buns can stick to the plate or cook with the wax paper. Steam for 10-12 minutes. Keep a 2 inch distance between bunds for they will rise on steaming.Close the lid.


DSC02409


DSC02410


22.  Bring them to room temperature and enjoy your favourite buns or baos. Let them be on room temperature in a box for a day or two. You can always freeze them and re steam them to use.

Chinese Baos

You can also try Russian Boiled Buns Bubliki or Vegetable Steamed Momos.

 [whohit]CustardBaos[/whohit]

[yumprint-recipe id=’144′]


I
n my last post I had made Fresh Plum Smoothie with the left over plums from my pantry. I was not very sure how this chutney would turn out because the store bought plum chutney do not appeal to me in taste. So I made a small jar to try it out. 


This recipe failed all store bought plum chutneys, infact it made me fall in love with it. It was a right balance of tart, sweet and assortment of spices. I added jaggery powder to it, you can use brown sugar or even normal white sugar if you like. I have always disliked chutneys with vinegar, it tends to make them so distasteful. This recipe is without any vinegar or wine, which makes it perfect and retains the true flavour of plums. 

You can use this on your breads, rotis, dosas and even scoop and smear it on your favourite pancakes.

Directions:

1. Wash the plums thoroughly and remove their tiny stem.

DSC02002
2. Put it in a pressure pan * along with water. Close the lid and let it cook for 3 whistles or 7-8 minutes after the pressure builds up. Switch the flame off.

DSC02003
3. Open the lid after the steam has escaped and you will see all pulp and stones separated from each other.

DSC02004
4. Discard the stones and put the pulp with water in a saucepan.

DSC02005
5. Bring it to a boil.

DSC02006
6. Add jaggery powder.

DSC02007
7. Also add  crushed dry red chili.

DSC02008
8. Season it with salt and red chili powder.


DSC02010


DSC02010


9. Also add coarsely crushed cloves for that incredible aroma.

DSC02011

10. Let the sauce cook on medium low flame for some time till you see it has thickened. The bigger batch you make the more time it will take to thicken, so have patience. Keep stirring in between.

DSC02012
11. Let it cool down completely and then transfer it to an air tight jar and refrigerate. The chutney remains good for months. Smear it on your bread or pancake or lick it just like that!

You can try other Chutneys from The Secret Ingredient: Mint Chutney, Spinach Mint Chutney, Raw Mango Coriander Chutney, Coconut Chutney, Sweet and Sour Raw Mango Chutney.

[whohit]PlumChutney[/whohit]

[yumprint-recipe id=’143′]


I live in the hills where the backyard of every house is occupied by the fruit trees and those trees are laden with ripe fruits. This time of the year we get plums or Aalubukhara in abundance. Although they are easy targets of monkey menace but we manage to get some fruits for ourselves. 


I am not very fond of plums as a fruit per se, but love to make delicious pies and chutney out of it. I finished making a batch of Plum Chutney and I still had a few lying unused. I decided to make a quick plum smoothie. I added some mango pulp to balance the tartness of plums. Ohh it was amazing and so very refreshing and not to mention how it helps to regulate High Blood pressure and Improves Bone Health.

Directions:

1. Pick some ripe plums and wash them thoroughly.

DSC02317

2. Cut the plums into slices and discard the stone. Also scoop out pulp of a ripe mango.

DSC02318

3. Put the plums and mango in a blender and add brown sugar or mascabado sugar. You can even use jaggery powder.

DSC02319

3. Add a pinch of salt and add water.


DSC02320


DSC02321


4. Blend it together to form a smoothie. Serve chilled and enjoy this summer drink.

You can try other thirst busters from The Secret Ingredient: Musk Melon & Cucumber Minty Smoothie & Aam Ka Panna.

[whohit]PlumSmoothie[/whohit]

[yumprint-recipe id=’142′]

Naan, nan or Khamiri is a leavened oven baked flat bread popular all over the world. Traditionally, yeast is used to leaven this bread and it is cooked in open fire tandoor or ovens. But this modern technique makes perfect naans using no yeast and can be quickly made on your stove top without much hassle. 

This flat bread is common to West, Central and South Asia. Indians are believed to have learnt this recipe from the Arabs who ruled India in ancient times. There are a lot of variations of Naan, they can be smeared with Butter or Ghee or Stuffed with filling and some seasoned with sesame or nigella seeds and many many more variatons. This recipe features the basic version of Naan. I shall be posting more naan recipes in future ๐Ÿ™‚

Directions:

1.  In a bowl add All purpose flour.

DSC01324
2. Make a well in the center and add curd and sugar.


DSC01325


DSC01326

3. Also add salt and baking soda.


DSC01327


DSC01328


3. Combine the ingredients in the bowl using your fingers. Add little lukewarm water and knead into a supple soft dough. Do not use a lot of water.


DSC01329


DSC01330


4. Add oil and knead again for 5 minutes.


DSC01331


DSC01332


5. Cover the dough ball and let it rest for 1 to 2 hour for fermentation.

DSC01333
6. After resting knead the dough again.

DSC01357
7. Roll the dough into oval shape using a rolling pin and dry flour. You can choose to do any shape. Sprinkle on top sesame seeds or nigella seeds if you like and roll again.


DSC01358


DSC01359


8. Heat an iron tawa with slight curved surface or iron skillet. Take the rolled naan in your palm  and wet the surface with slight water.

DSC01360
 9. Immediately place it on the hot tawa, wet side down. You will notice the naan will stick to the surface and the top surface will start rising at different places.

DSC01361
10. That is when you should lift the tawa with your sturdy hands and flip it on the burner flame. You can move the tawa over the flame to cook the naan evenly. You should see naan browning in patches.

DSC01364 
11. Once naan has evenly browned place the tawa on the flame and remove the naan using a metal spatula.

DSC01365
12. This is how your naan should look from behind, just perfectly cooked.

DSC01371

13. Smear the top surface with Ghee or Clarified butter. Naan pairs great with any dry gravy or curry. Try this with Butter Chicken, Shahi Paneer, Palak Paneer or even Dal Makhani.

Other Breads you can try from Indian Cuisine: Kulcha, Matar ka Parantha.

 [whohit]TawaNaan[/whohit]

[yumprint-recipe id=’141′]


Indian summers are scorching and can take a toll on you. So it is very important to keep your self hydrated and take all necessary steps to fight against the intense Indian Summer heat. One such way is to drink Aam Panna, it is a healthy drink made from the pulp of raw green mangoes, sugar and assortment of spices.


Aam Panna not only quenches your thirst but also helps prevent excessive loss of sodium chloride and iron in the body resulting due to heavy sweating. Its my favourite drink since childhood. You can make a concentrate of Aam Panna and keep it refrigerated. Simply add cold water to it and enjoy this refreshing summer drink with the goodness of Mango. 

Directions:

1. Wash and peel raw mangoes and cut them into small pieces discarding the inside seed. I have used slightly ripe mangoes but they were still quite tangy. You can even directly boil the mangoes with the peel and later separate the peel and pulp. But it gets messy so I prefer to simply boil the pulp.


DSC01633


DSC01755


2. Transfer the chopped mango pieces in a vessel.

DSC01756
3. Add water and let it come to a boil.

DSC01757 
4. Put the lid on and let it simmer on low heat for 10-15 minutes or until the mangoes have become soft. I inserted a knife to check its doneness. Turn the flame off and let it come to room temperature.


DSC01758


DSC01759


5. Transfer the cooked mango pulp with its water into a blender. Add sugar and roasted Cumin Powder.


DSC01791


DSC01792


6. Also add washed mint leaves and Black Himalayan Salt , also known as Kala Namak.


DSC01793


DSC01795


7. Blend Together to make a smooth liquid Concentrate. Pour a small portion of it in tall glasses and add chilled water as per your taste. Store rest of the concentrate in a container and keep it refrigerated.

You can try other Raw Mango recipes on The Secret Ingredient: Raw Mango Pickle South Indian Style, Raw Mango Sweet and Sour Chutney and Raw Mango Chutney with Mint and Coriander.

Other refreshing things you can try to beat the heat are: Mango Coconut Milk Pudding, Musk Melon Cucumber and Mint Smoothie and Quick Pista Badam Kulfi.

[whohit]AamPanna[/whohit]

[yumprint-recipe id=’140′]


RawMangoChutney_Featured3
Few days back I had posted recipe of Khatti Meethi Kacchey Aam ki Chutney. I still had some raw mangoes from the 10 kg bag my parents had sent me. Ohh yess its raining Mangoes! I had already made Raw Mango Pickle South Indian Style and also the Sweet and Sour Raw Mango Chutney. My mother makes this Raw Mango Chutney with Mint and Dhaniya so tried my hands on it. It tastes great with fried snacks like Sabudana Tikki and even Arbi Ke Patton ke Pattode.

RawMangoChutney_Featured2
This Chutney can be made instantly without any hassle. When you have guests coming over, this one is a quick fix recipe. You may probably have all the ingredients handy and readily available. I specially wanted to share this recipe when Monsoons are at your doorstop and you feel the urge to make some delicious snacks!

Directions:
1. Separate Mint and Coriander Leaves from the stem and wash them rigorously. Peel a raw Mango and discard its peel.

DSC01808

2. In a grinder add Raw mango chopped, Mint and Coriander leaves, Onion, clove of garlic and green chilies.

DSC01809
3. Also add Black Rock Salt and Chat Masala.


DSC01810


DSC01811


4. Add few table spoons of water to blend into a fine paste.

DSC01812
5. Transfer to a container and keep refrigerated. Stays good for up to a week. Can be made in advance.

You can try other raw mango Recipes: Raw Mango Pickle South Indian Style, Raw Mango Sweet and Sour Chutney.

Other Chutneys you can try are Pudina Chutney, Spinach Coriander Chutney, Coconut Chutney, Coriander Chutney without Onion Garlic, Szechuan Sauce, Chimichurri

RawMangoChutney_Featured1[whohit]RawMangoChutney[/whohit]

[yumprint-recipe id=’139′]


Focaccia Bread tops the list of breads which I bake on any given day. The highlight of the bread is the taste of Olive oil which makes the bread irresistible. Always use a good quality Extra Virgin Olive Oil – EVOO at least for all kinds of Focaccia breads.  Earlier I had posted recipe of Rosemary Garlic Focaccia Bread which of course  is my first love.


The other day I had some left over cherries after making Mascarpone Cherry Cheesecake Glasses. They were not a lot to make cherry bars but enough to make this Focaccia Bread. The combination initially sounded weird and I was skeptical to try them.

Reluctantly I rolled out the dough and placed the cherries on top and sprinkled some rosemary and sea salt and crossed my fingers. After an uneasy half an hour of waiting while the bread was baking the results were astounding. The three of us finished the bread in minutes. What a meal it was!

Directions:
1. In a bowl add all purpose flour. Also add salt to it.


DSC01922


DSC01925


2. In a measuring jug or any vessel take lukewarm water. It should be neither hot nor cold. You should be able to dip your finger easily in it. Add instant yeast or dry active yeast. Also add sugar to it and give it a gentle stir. Let it sit for 7-10 minutes till it turns frothy and milky. This is a sure test that your yeast is working!


DSC01923


DSC01924


3. Add Olive Oil to the flour and add the yeasty water little by little and knead it to  form a supple soft dough ball. IT should take good 15 minutes of kneading using all your energy. The more you knead the more it should become soft. The test is that the dough must retain its position on pressing with your. finger. Cover it with a cling wrap and let it rise for an hour and a half * till it doubles up in volume. 


DSC01926


DSC01932


4. Grease a broad baking tray with some olive oil. I am using a pie tray for this. But you can use any  flat bottom tray.

5. Deflate the dough and roll it into the shape of your baking pan, about half a inch in height.


6. Transfer the rolled dough into the greased baking tray.


7. Stretch it with your fingertips to spread till the corners. Make indents with your finger tips.


8. Pour olive oil all over so that its trapped in the dents. You can put as much olive oil you like. I ill not judge you.

9. Gently push Pitted Cherries onto the dough surface. Learn how to remove stones from Cherries easily without using a cherry pitter?


9. Spread fresh or dried rosemary all over.


10.  Lastly sprinkle with sea salt, I used Sendha Namak or Himalayan Rock Salt for this.

8. Cover it with a cling wrap or lint free kitchen towel and let it rest and proof again for another 30 minutes or until it has doubled in size.


13.  Bake it in a preheated oven in the middle rack on 200 degree C for 25 minutes or until its golden on top.

You can try other breads from The Secret Ingredient: Italian Focaccia Bread with Strawberries Rosemary Garlic Focaccia Bread, Garlic Cheesy Bread, Dominos Style Garlic Bread Sticks, Honey Oats Bread, Cinnamon Raisins Bread. Whole Wheat Sandwich Bread, Beetroot Bread.

Other Cherry Recipes you can try: Mascarpone Cherry Cheesecake Glasses.
[whohit]CherryFocaccia[/whohit]

[yumprint-recipe id=’138′]


Some time back I had posted the recipe of Instant Raw mango Pickle South Indian style and stated how I had to use 10 kg of raw mangoes sent to me by my parents. In the pursuit of using them wisely I also made this khatti Metthi Aam ki Chutney. It was my first time to make this chutney. I always loved the way my mommy made this chutney. So I asked her the recipe and gave it a try. 


This recipe is made differently in different parts of India and is also known by different names. Like in Gujarat a similar version is made and is known as Aam ka Chunda 

Directions:
1. Wash and peel some raw mangoes.

DSC01633
2. Grate them into strings.

DSC01673
3. Place them in a bowl and add sugar.

DSC01674

4. Also add salt, red chili powder.


DSC01675


DSC01676


3. Also add roasted Cumin Powder and Garam Masala.


DSC01677


DSC01678


4. Combine everything thoroughly and cover it with a lid and let it sit overnight at room temperature.

DSC01679
5. After the waiting period  put the mango mixture in a wok or kadhai on low heat and add add crushed cardamom. Stir it for fifteen minutes until it thickens and attains single string consistency.


DSC01710


DSC01711


6. Add musk melon seeds. They taste simply superb.

DSC01713
7. Let it cool down and transfer it to a glass container. Store in fridge, remains good for months.

You can try other chutneys from The Secret Ingredient: Pudina Chutney, Coriander Chutney, Spinach Coriander Chutney, Coconut Chutney, Chimichurri, Szechuan Sauce.

Other raw mango Recipes you can try: Instant Raw Mango Pickle South Indian Style.

[whohit]KhattiMeethiAamKi Chutney[/whohit]

[yumprint-recipe id=’137′]