Author

anshu

Browsing

I woke up one morning to find a mail in my mailbox saying that my blog has been listed under top 100 Indian Food Blogs by Feedspot. First I dint take it seriously because the link said I shared the space with Masterchefs like Sanjeev Kapoor and knwon faces like Nishamadhulika and Manjula’s Kitchen. But then by evening the word spread to Facebook and my friends started tagging me that my blog name is actually in top 100 Indian Blog list. I was numb for a moment but then I was jumping with joy. I want to thank you my readers , my family and my friends who have encouraged me and supported me in this food journey. What would I do without your love! 


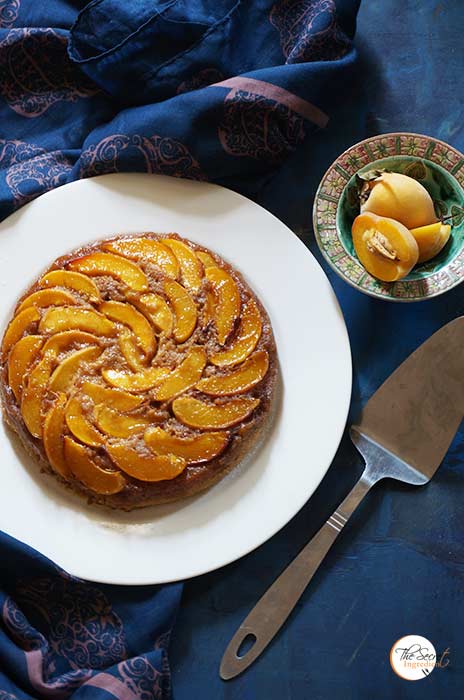
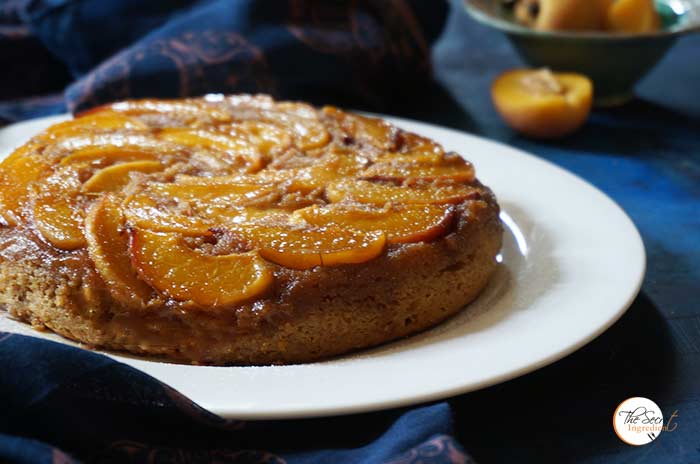
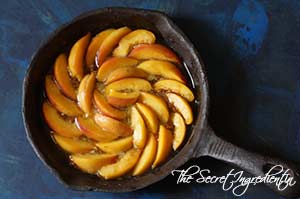
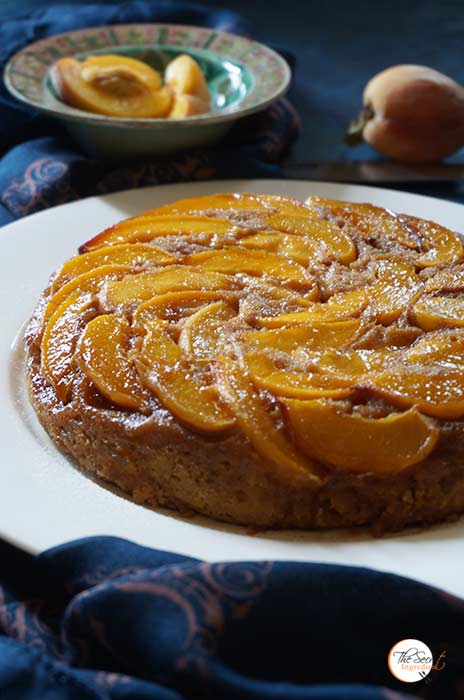
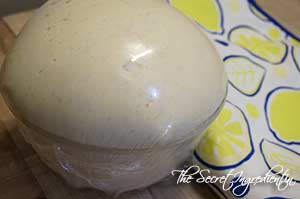
My family wanted a cake to celebrate the occasion and I though of baking this Peach upside down cake. This cake was baked in a cast iron skillet and uses no refined flour or sugar! It was moist and held the peaches so well. The flavour of jaggery gave it that earthy feel. What a healthy way to celebrate the occasion. 

Directions:

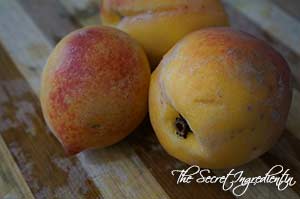
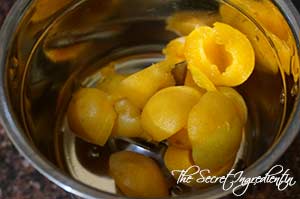
1. Thoroughly wash ripe peaches and slice them into wedges and discard the stones.


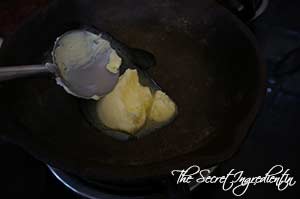
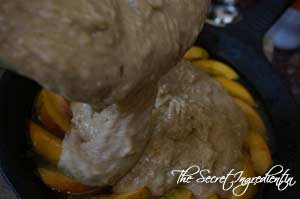
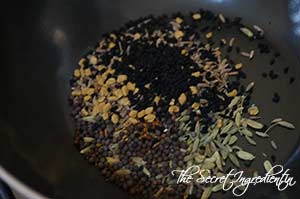
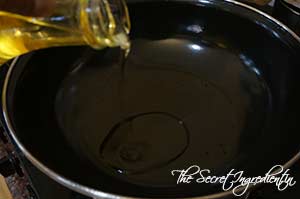
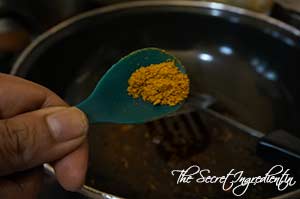
2. Place a 8-9 inches cast iron skillet* on stove and add butter. You can buy a 6 inches Cast iron skillet from our online store The Gourmet Shop . Let the butter melt and spread crumbled jaggery all over the surface. Instead of jaggery you can also add brown sugar. Let the jaggery melt and form a caramel like syrup. Turn the flame off.


3. Place peach wedges all over the skillet. Set aside. In the meanwhile preheat the oven for 10 minutes on 180 degree Celsius (Learn more about Oven temperatures and conversions)


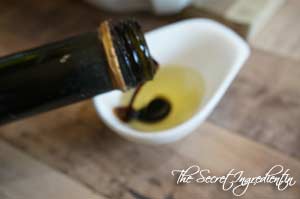
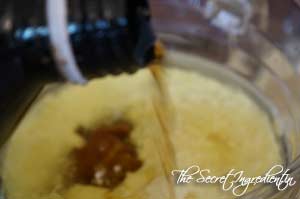
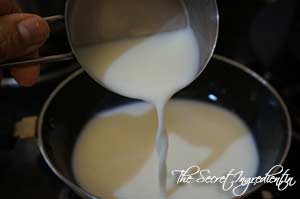
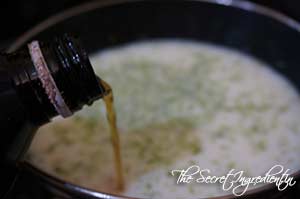
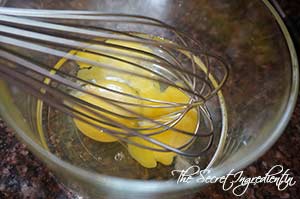
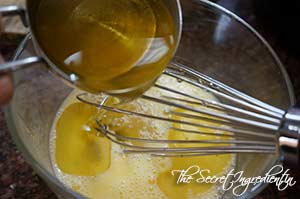
4.  In a vessel add milk and Apple Cider Vinegar**.


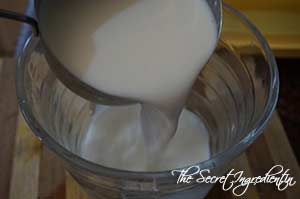
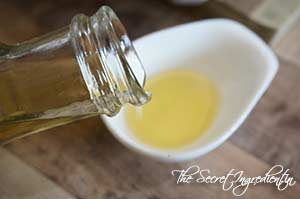
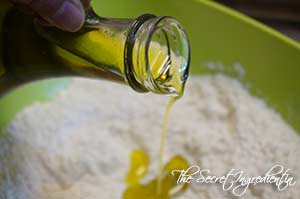
5. Stir to mix and also add oil. Heat the milk oil mix in a microwave for 2 minutes.


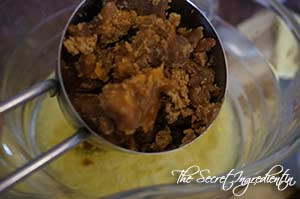
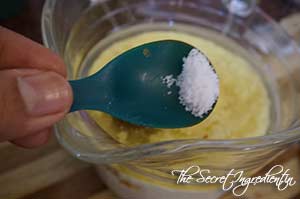
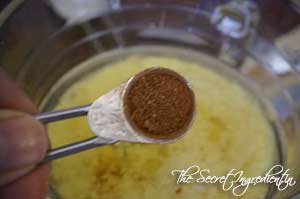
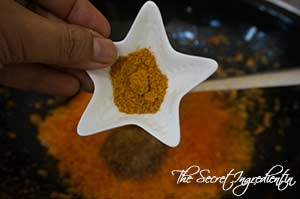
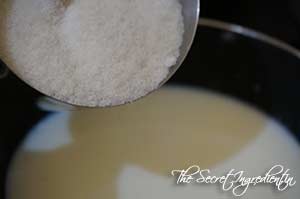
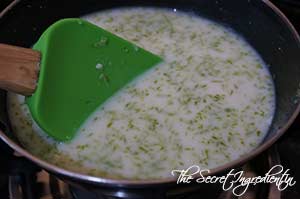
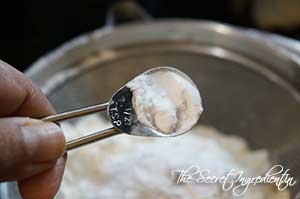
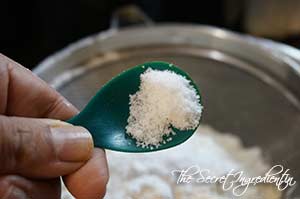
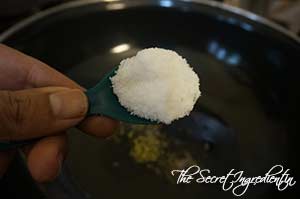
6. Add brown sugar or jaggery powder, salt and vanilla extract.


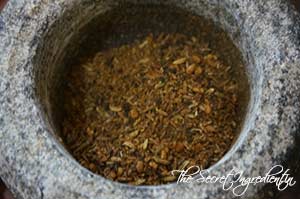
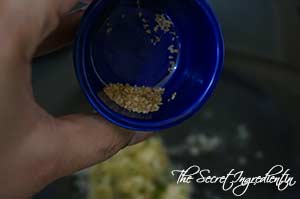
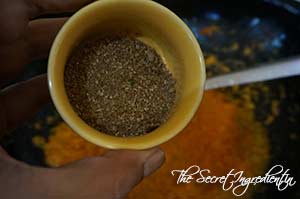
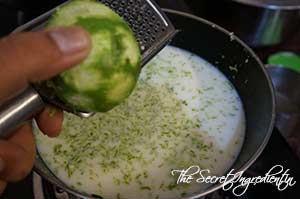
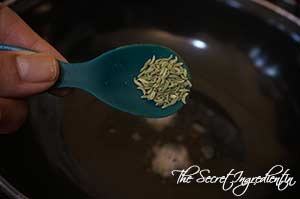
7. Also add cinnamon powder and nutmeg powder to the wet ingredients.


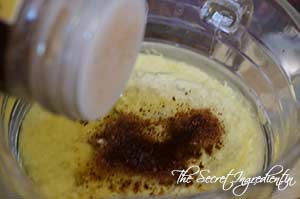
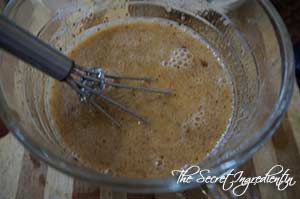
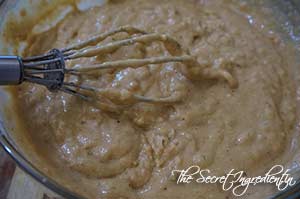
8. Give everything a good mix and set aside. 

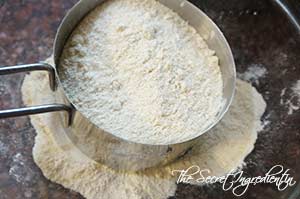
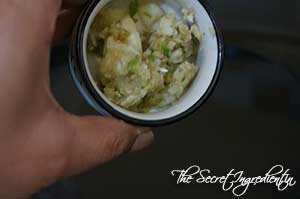
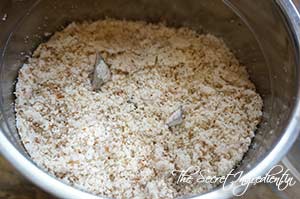
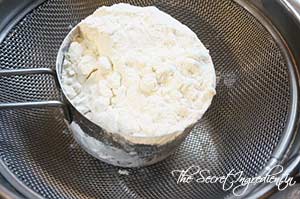
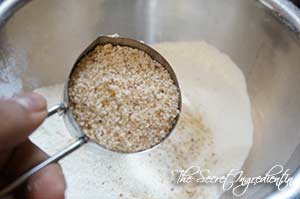
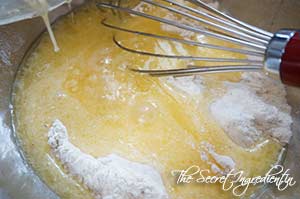
9. In another bowl add whole wheat flour and All purpose flour.


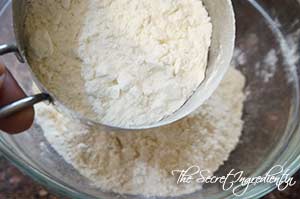
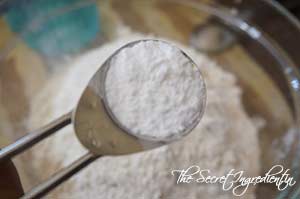
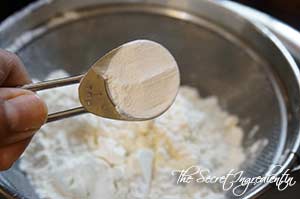
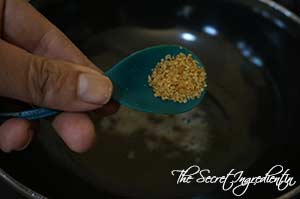
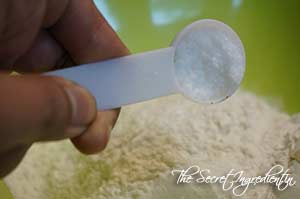
7. Also add baking powder and baking soda. Combine all the dry ingredients.


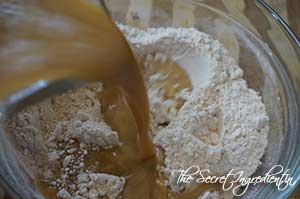
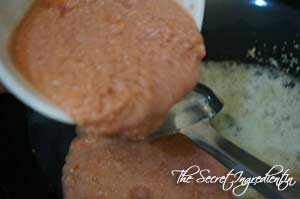
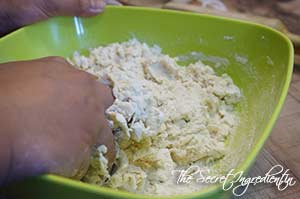
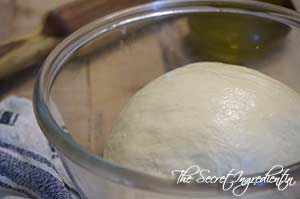
11. Add the wet ingredients to the dry ingredients and mix everything till everything is moistened. Do not over mix for you do not want a tough cake.


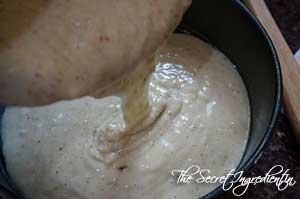
12. Pour this batter over the peaches in the skillet. Level up with a spatula and pop it in the oven for 30 minutes or till the tooth pick inserted comes out clean.  


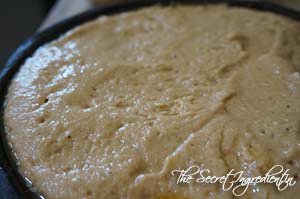
13. Bring the skillet outside the oven and let it sit on the counter for 10 minutes and only after that invert it on a serving plate carefully. If you do it before ten minutes the cake will spread everywhere and if you wait too long the caramelized peaches will stick to the skillet and will refuse to move. Therefore, invert the plate right after 10 minutes. Slice and enjoy!

Other recipes with fresh peach you can try are: Peach Lemonade and Eggless Fresh Peach Cobbler.

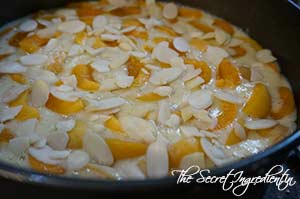
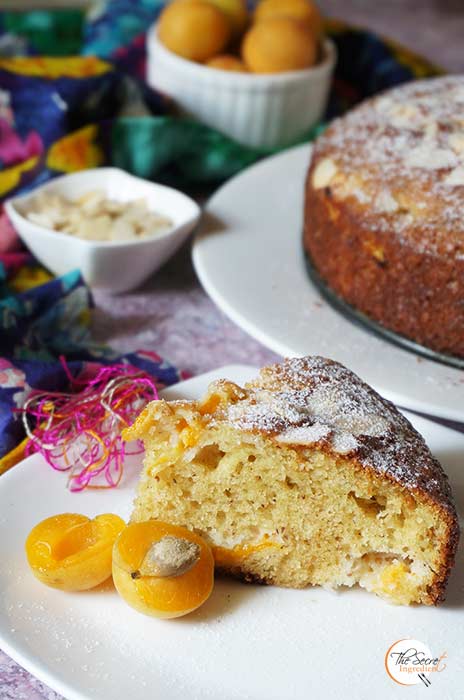
If you are looking for other Cakes and desserts with fresh fruits you can try: Fresh Apricot and Almond CakeApple CrispMango Vanilla CakeFestive Orange Blueberry Pound CakeSorghum and Wheat Flour Persimmon Cupcakes with Cream Cheese FrostingVanilla & Pomegranate CakeVegan Chocolate Banana CakeMascarpone Cherry Compote Cheesecake GlassesEggless Orange Cake with Candied Orange Peel FillingPersimmon Rum Cake,  Mango Tart with Vanilla Pastry Cream

[whohit]PeachUpsideDownCake[/whohit]

[yumprint-recipe id=’282′]


I have been making a lot of pickles lately! Why not after all its summers and its the best time of the year when you can pickle your fruits and veggies and let them soak sume sun. I have just finished making Punjabi Aam ka Achar , you can see it in the pictures. I will post the recipe soon. But nevertheless those pickle flavours have reached by main dishes and started making my gravies spicy, tantalizing and and utterly delicious. I am talking about this Achari Paneer.


This gravy is made with spices which are generic to all Indian Pickles. It makes the gravy spicy , tantalizing and utterly delicious. My little man is a picky eater and refuses to eat vegetables and curries in school. The other day he came back with an empty lunch box and tells me I love this cheese sabji. This surely made my day with a double assurance that I made something delicious which was liked by my sonny boy.


Directions:

1. Slice Paneer into cubes and set aside.

2. In a blender add tomato pieces and cashews and make a puree.


3. For the achari masala. In a small pan add mustard seeds, kalonji or nigella seeds.


4. Also add Cumin seeds, Fennel Seeds or saunf and Fenugreek Seeds or methi dana.


5. Dry roast them on a pan for a minute of so. Do not burn them. 


6. Grind them in a hand grinder or in a mixie jar and set aside.


7.  Heat oil in a kadai or deep sauce pan on medium flame for 2-3 minutes. Now, add ginger garlic and chili paste in the oil and let it become light brown in color. 


8. Add Asafoetida and mix it with the ginger garlic paste. You should add the tomato puree to the kadai .


9. Add Coriander powder, Turmeric powder to the wok.


10. Also add Red chili powder, salt and the achari masala we had made earlier.


11. Mix everything thoroughly and sauté till oil separates the masala. 

12. Now lower the flame to sim and add curd and continue whisking otherwise the curd will curdle.


13.  Add cubed Paneer to the curd gravy and mix well so that paneer is coated with the gravy.


14.  To this add Cream and combine well.


15.  Finish the dish with Kasuri Methi and Fresh  Coriander Leaves.


16. Serve hot with Roti or Rice. It makes the most amazing Indian Paneer dish ever.

Other Dishes with Paneer or cottage cheese you can try are: Vrat Wale Dahi-Paneer KebabsPaneer Ki KheerBaked Paneer Corn KababsStuffed Buns with Spicy PaneerPalak PaneerShahi Paneer

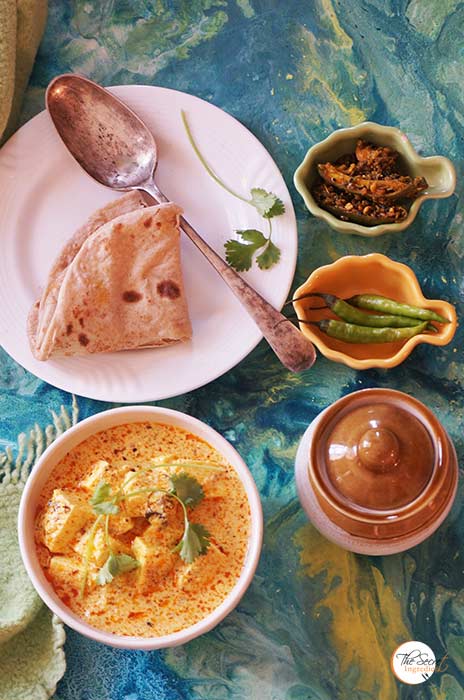
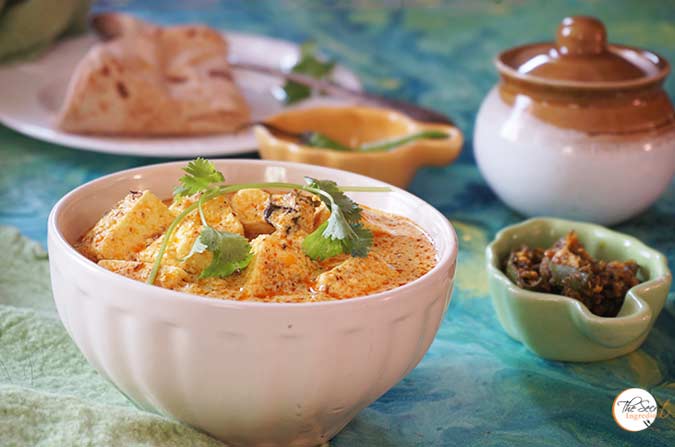
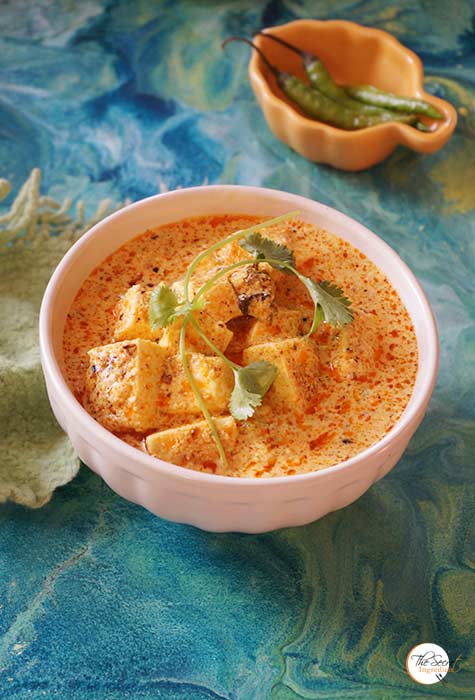
[whohit]AchariPaneer[/whohit]


A few days back I have made this delicious Apricot and Almond Cake. I had a handful Apricots left from baking. Incidentally,  I was talking to my friend Kanika and she told me she just made fresh apricot chutney. I was intrigued to try it. When I saw the picture of her chutney on instagram I immediately went inside the kitchen and made this simple yet delicious chutney with freshness of coriander and sweetness of Apricots. Thankyou Kanika it was amazing!!!! This is an addition to my long list of chutneys I keep trying. They add a zest to my taste buds. Definitely this is a keeper.


If you have any such recipes of your favourite chutney, share them with me,  I would love to try them and post on my blog giving due credit to you 🙂 In the meanwhile you can try these other chutney recipes from my blog : Aam Ki LaunjiKaccha Aam Aur Lehsun ChutneyGreen Ber Ki ChutneyRed Chilli Sweet ChutneyAalubukhara ChutneyRaw Mango Chutney with Mint and CorianderKhatti Meethi Kacchey Aam Ki ChutneyPhalahari Dhaniya Chutney , Tomato Onion Garlic ChutneyPalak Dhaniya ChutneyCoconut ChutneyPudina Chutney.

Directions:
1. Wash some fresh apricots and pat them dry. Deseed them and cut them into quarters. 


2.  In a chutney grinder add apricot quarters along with green chili.


3. Also add washed Coriander sprigs and red onion.


4. Add Rock Salt and Roasted Cumin powder.


5. Churn everything into a smooth paste. 


6. Serve with your favorite snack like Vegetarian Raw Bananas & Potato CroquettesBaked Broccoli Cheese PattiesBaked Paneer Corn KababsSabudana TikkiVeg Shami KababBaby Corn Satay.

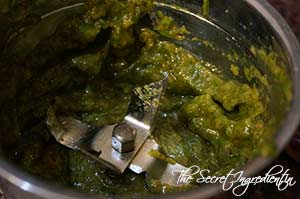
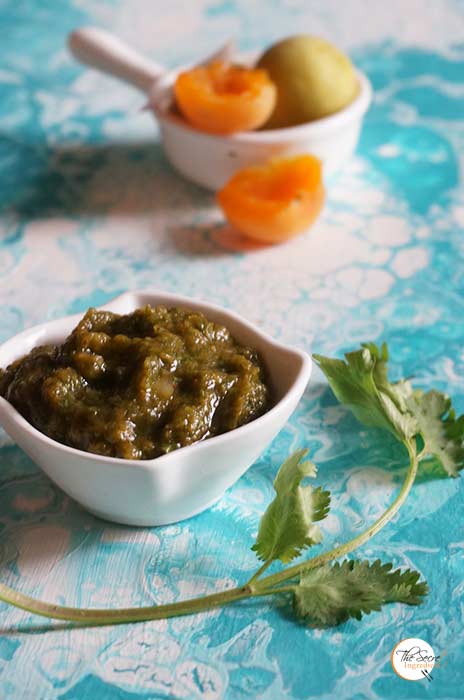
[whohit]ApricotCorianderChutney[/whohit]

[yumprint-recipe id=’281′]


The advantages of living on the hills are plenty. One of them being you get to taste the fruits first which grow around us everywhere. When I saw fresh Apricots, I bought them greedily. Yes I am a compulsive buyer. I end up buying so much produce and which all ends up in my bakes or I have to gift them to my friends. But yes I dont mind doing that because the pleasure of buying is always greater 😛 I hope my husband is not reading this or else I know a big lecture is coming my way 😛


I love to play around with fruits. I find excuses to bake with them or make something fabulous with them. I feel fruits give a lot of character to the dish. It makes them special and so very fresh and vibrant. In the past I have used pomegranate, papaya, peaches, apples, black grapes, persimmons, oranges, cherries, bananas, blueberries and what not in my food and recipes. This time I knew its going to be apricots and when I looked for this recipe with Almonds and Apricots in a cake the idea kinda clicked and then there was no looking back. I was here baking a cake with these pretty little apricots. The cake was moist and very spongy I loved its dark crisp crust which was perfect for tea time.

Directions:
1. Wash some ripe apricots and deseed them and cut them into quarters and set aside.


2. In a blender add some almonds and grind them into a powder. Set aside.


3. In a saucepan add milk and sugar.


4. Also add zest of a lemon and vanilla extract. Bring everything to a simmer till sugar dissolves in milk. Do not boil. Remove from the stove and let it cool down.


5. Grease a 9 inch Springform baking tin with oil and sprinkle some flour all over. You can buy this tin at our online store, The Gourmet Shop. Preheat the oven to 180 degree Celsius (Learn more about Oven temperature and Conversion).


6. In a bowl sift All purpose flour, baking powder and baking soda.


7. Also add salt and almond meal which we had reserved before. Keep the dry ingredients aside.


8. In another bowl add some eggs and whisk them till they are light and fluffy. And add oil to them and whisk again.


9. Add the egg and oil mix to the dry ingredients. Also add the cooled sugar milk we had made before. Combine everything together till everything is moist. Do not over mix for you will end up making a chewy cake.


10. Pour this cake batter on the greased tin. And tap couple of times to remove any trapped air bubble.


11. Randomly place apricot quarters all over the surface of batter. It may not be in a designed pattern because eventually nothing will show and they will spread all over the cake. Add some almond flakes over the batter. 


12. Bake in the preheated oven for 40-50 minute or until the toothpick inserted in the center comes out clean. If at any stage you feel the cake is getting too browned tent it with an aluminium foil. Once baked remove it from the oven and let it sit on the counter for 10 minutes. Remove from the tin and keep it on the wire rack till it has come to room temperature. You can dust it with some confectioner’s sugar, slice and serve.

Other cakes you can try are: Sorghum and Wheat Flour Persimmon Cupcakes with Cream Cheese Frosting Fresh Mango Cake with Vanilla and Chocolate CollarFestive Orange Blueberry Pound CakeVanilla Cake with Pomegranate Syrup Lemony Pound Cake with Lemon FrostingEggless Orange Cake with Candied Orange Peel FillingApple Raisins Streusel BreadPersimmon Rum CakeEggless Mediterranean Semolina CakeEggless Almond Vanilla CakeEggless Black Grape Cake with Strawberry Jam GlazeVegan Chocolate Banana CakeChocolate Vanilla Marble CakeSurprise Heart Inside CakePumpkin Cake RollsWacky Vegan Chocolate Cake.

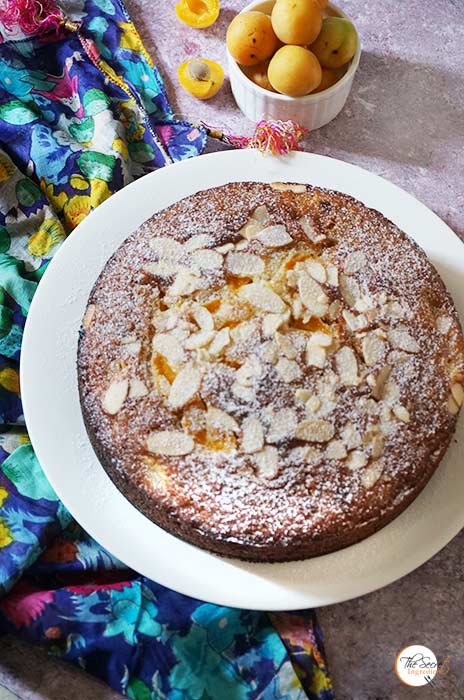
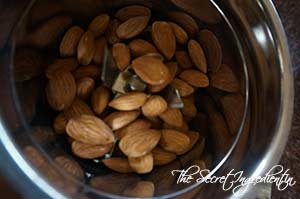
[whohit]ApricotAlmondCake[/whohit]

[yumprint-recipe id=’280′]

So the green mango saga continues. I had about 6-7 kgs of unripe green mangoes from my parents yard and I wanted to try out new recipes. Last week I had made Sweet and Sour Aam ki Launji which was simply phenomenal. I had asked for suggestions from my blogger friends if they could suggest a few recipes which could be made with unripe mangoes. My talented friend Rhea from the Food blog Euphorhea suggested Mango Dal which is unripe mango cooked with lentils. The idea kinda fascinated me. I tried it and the result was amazing. The dal was yummilicious with the tangy flavour of green mangoes.


I love anything which has temper of kaddi patta and mustard seeds. I don’t say it a lot but I feel I like South Indian food a lot. The tanginess of tamarind which is infused in sambhar or any dal is quite enthralling to my taste buds. And when this tanginess is absorbed by idlis or dosas …aah! the level of awesomeness achieves new heights. 

I finished one bowl of dal all by myself, even before the lunch was served. Quality testing is very important (yeah right!). A small change I did to her basic recipe was that I added ginger garlic paste to the dal which I think gave a lot of texture and taste to the lentils. 

If you have unripe mangoes you must give this dal a try. It will not disappoint you. And if you are looking for more unripe mango recipes you can check the links. I have listed all the possible things I have tried with green mangoes. This list is non conclusive as I am adding more things every day till the season of mangoes dies down for this year 🙂

Directions:
1. Wash and soak lentils in water for half an hour. I have used Masoor Chilka or Red Lentils without the skin. You can use any lentils which gets cooked readily.


2. In the meanwhile peel and chop some unripe green mangoes into cubes and set aside.


3. In a sauce pan add some oil and add drained lentils and saute them for at least 5 minutes.


4. Add ginger garlic paste and continue to saute with the lentils till the raw smell of garlic fades away. 


5. Add turmeric powder, red chilli powder and salt.


6. Add water to the lentils and bring it to a boil. Then cover with a lid and continue to simmer till the lentils have cooked. It should take from 10-15 minutes. 


7. In a wok add some ghee and add mustard seeds and cumin seeds. Let them crackle.


8. Also add dried red chilli and toss it in the oil to release flavours.


9. Add mango cubes and kaddi patta and cook them in the wok till mango cubes are cooked .


10. Add the boiled lentils to the mango temper and continue to cook for another 5-7 minutes on simmer. Check for salt.


11.  Serve hot with chapatis or roti or parantha.

Other recipe you can try with unripe green mangoes are:  Kaccha Aam Aur Lehsun ChutneyFresh Turmeric Pickle with Green Mangoes Raw Mango RiceAam Ka PannaRaw Mango Chutney with Mint and CorianderKhatti Meethi Kacchey Aam Ki Chutney Instant Raw Mango Pickle South Indian Style, Aam ki Launji.

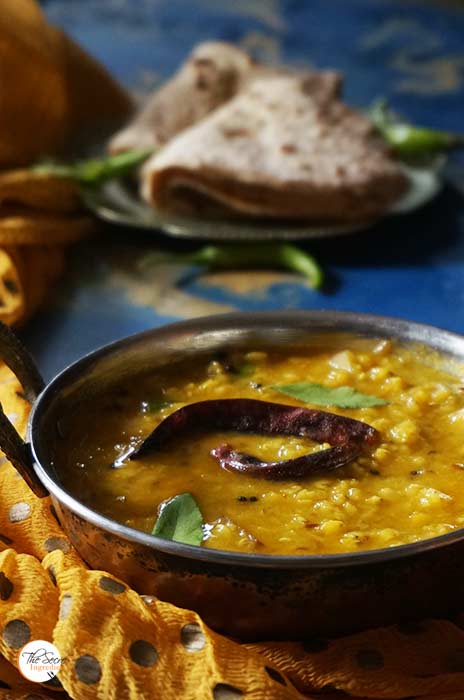
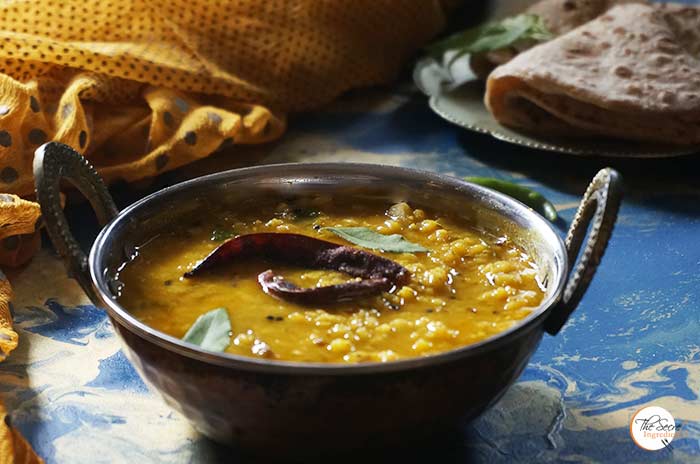
[whohit]MangoDal[/whohit]

[yumprint-recipe id=’279′]

Every year my father sends us raw green mangoes from his yard. They are in abundance and which means I get to try so many different recipes. But honestly I find this as an excuse. I clearly enjoy trying out new ways to utilize these green raw beauties. Last year I tried Kaccha Aam Aur Lehsun ChutneyFresh Turmeric Pickle with Green Mangoes Raw Mango RiceAam Ka PannaRaw Mango Chutney with Mint and Coriander,   Instant Raw Mango Pickle South Indian Style. And this year I am going even more crazy. I wanna make every possible recipe on the planet with Raw mangoes 😛 This Aam ki Launji is the first thing I tried. Its my Mother in laws recipe and is native to Uttar Pradesh state of India. The Launji or Chunky Mango Chutney turned out gorgeous! Although I am allergic to Fennel seeds but I went steady and added them anyways not thinking of the consequences. Fortunately I am alive and kicking as yet. 😛 


If you are looking for Mango Chunda which is similar Sweet and sour Raw Mango Chutney from Gujarat, you must try this recipe. I have already made Punjabi Style  Raw Mango Pickle which is my mommy’s recipe. I will be posting it soon. I have also made Dal with Raw Mangoes. It was lip smacking. I will be sharing that also in the next few days. If you have any recipe with raw mangoes let me know I will try them out and post on my blog space giving due credit to you.

Directions:
1. Wash and peel raw firm mangoes and cut them into long slices. You can even grate them but this will change the texture and the cooking time will vary.


2. In a wok add some oil and heat it up.

3. Add Nigella Seeds, Fennel Seeds and Asafoetida.


4. Add salt, Turmeric Powder and Red Chilli powder.


5. Add Mango slices to the spice mix and toss everything together.


6. Add water to the wok cover with a lid and let the mangoes cook down a little. They should become al dente and not mush.


7. Once it has cooked up a little, add jaggery to it. I have added crumbles jaggery so that it mixes evenly. You can cook little longer till the launji becomes thick in texture.


8. Transfer it to a jar on getting to room temperature. Keep it refrigerated and stays for more than a week.

Other Raw Mango Recipe you can try are: Kaccha Aam Aur Lehsun ChutneyFresh Turmeric Pickle with Green Mangoes Raw Mango RiceAam Ka PannaRaw Mango Chutney with Mint and CorianderKhatti Meethi Kacchey Aam Ki Chutney Instant Raw Mango Pickle South Indian Style

[whohit]AamkiLaunji[/whohit]

[yumprint-recipe id=’278′]

Last week I had posted my Watermelon and Feta Cheese Summer Salad Recipe which was appreciated by a lot of you. Many had requested me to share more such fresh salad recipes to beat the heat. It’s practically impossible for me to eat anything greasy and rich during summers. I can simply live on fresh salads. They not only soothe my soul but are a great detox. I can have one meal of just salads. This apple celery salad is very simple and requires no spadework and can be made in a jiffy. The dressing of Mustard Vinaigrette pairs so well with the sweetness and crunch of apples and the zing of celery.

Every salad needs that nutty flavour which balances the acidity and the crispness of vegetables. The toasted walnuts and pomegranate actually perform this role and trust me they are good. I will be posting more such salad recipes so keep watching the space and subscribe to my social media handles on Facebook, Instagram and Pinterest.

Directions:

1. Core and chop some fresh apples and place them in a salad bowl. Also add celery leaves and its tender stems.


2. Add chopped and toasted walnuts to the bowl along with pomegranate arils.


3. For the dressing add honey in a separate bowl and to this add dijon mustard sauce.


3. Squeeze in a juice of lemon and also add olive oil. Whisk everything together.


4. When you are ready to serve pour this dressing over the apple celery mix and toss everything well. 

5. Serve as it is.

Other Salad recipes you can try are:Watermelon and Feta Cheese SaladThai Green Papaya Salad RecipeCharred Peppers Salad with Anchovy White BeansCouscous Salad with Chickpeas in Lemon Olive Oil VinaigretteFresh Mexican Black Bean & Mango SaladSautéed Red Bell Pepper and Olive Pasta SaladSundried Tomatoes Pasta SaladGrilled Chicken SaladIndonesian Style Patni Red Rice Salad With Boiled Eggs in Pomegranate Molasses Sauce , Apple Spinach & Cranberry Salad.


[whohit]AppleCelerySalad[/whohit]

[yumprint-recipe id=’277′] 

So I have this constant itch to play with pizza dough or bread dough. Its like playing with clay and moulding it into different shapes to create something mesmerizing. Last time when I was getting adventurous I ended up making Soft Pretzels. My son and husband both loved them. This time I had some friends coming over for drinks and I wanted to make something quick and yet something they will remember for a long time. I had some cocktail sausages in my freezer which came in handy. I made the dough and simply rolled it over all those thawed sausages. This is actually not even a recipe… I’ll call it a no brainer! But yes it gives you ideas the possible ways we can use  this forgiving pizza dough.


This is a healthier twist over traditional Pigs in a Blanket recipe which uses pastry dough which is laden with lots and lots of butter. Once you have your dough ready you can roll them on your sausages and sprinkle the top with sesame seeds and bake in oven till they get that golden sheen.

Directions:

1. In a container take some lukewarm water. It should neither be hot nor cold, just hot enough to comfortably put your finger into it . The right temperature of the water is very important for yeast to activate. Put yeast into it.

DSC02540
2. Along with yeast add some sugar.

DSC02541
3. Give it a gentle stir with a fork and let the mixture sit and activate for 10 minutes or until you see some bubbles on top and mixture has become frothy and milky.

DSC02548
4. Take all purpose flour in a bowl and add salt and olive oil.


DSC02549


DSC02551


5. Add the proofed yeast to the flour little by little and mix till it comes together.

DSC02553
6. Bring the dough to a flat counter or your kitchen platform and knead for good 10 minutes till it becomes soft and supple. Read more about Bread baking techniques in “Basic Steps to Bake a Perfect Bread

DSC02554
7. Transfer the dough to a greased bowl. And cover with a kitchen towel or cling wrap. Let it sit for an hour or so to double up in size.


DSC02560


DSC02562


8. Punch it down and deflate the dough. Knead for another 5-7 minutes.


9. Divide the dough into 6 or 12 equal parts using a scraper. I have used half of this dough to make my regular White Sandwich Bread and the other half for these pigs in the blanket. Preheat the oven to 180 degree Celsius (Learn more about Oven Temperatures and Conversions


10. Roll each dough bite into a rope. 

11. Roll this role around the sausage like a serpent.


12. Repeat the same with rest of the sausages and place them on a baking tray lined with parchment paper or Silicon mat. You can buy both of them at our online store, The Gourmet Shop


13. Brush them with an egg wash. You can use egg whites with little water and whisk them together . sprinkle with Sesame seeds


14. Bake it in the preheated oven for 10-12 minutes of until it gets golden brown in colour. Serve hot with some Schezuan Sauce or even sweet Red Chilli Sauce.

[whohit]PiginBlanket[/whohit]


[yumprint-recipe id=’276′] 

Come summers and I become so picky about my food. The gravies and rich curries make me nervous. Thanks to the fact that I live in hills, which are pleasant even in the summers. All I want to eat all summers is salad. Therefore, I keep trying new combinations which doesn’t let me get bored. Summers also help me get rid of the winter fat I have picked up. If you are watching your weight and are looking for options I will be posting more such recipes and will also post links to the recipes I had done before. 


This time I got adventurous with this Watermelon and feta salad. Not to mention I almost chopped my finger while cutting the watermelon and there was blood all over 😛  This salad uses very few ingredients but makes bomb of a salad. The sweetness of watermelon marries the sourness of feta cheese and the crunchiness of fresh cucumber contrasts well with black olives.  The dressing is just minimal imparting it a subtle naughtiness! If you have been hit by summer go for this salad and be easy on yourself. Not everything about summers is bad.. remember we have watermelons to brighten up our lives 🙂

Directions:
1. Chop ripe and fresh watermelon into bite size cubes. Also chop some Tomatoes into cubes. Place them in a salad bowl.


2. Add cubes of Feta cheese and slices of black olives. Peel a fresh Cucumber and chop it into cubes. Add them to the salad bowl. Add leaves of Fresh Mint.


3. In a small bowl add olive oil and Balsamic Vinegar. Mix them well and pour over the salad.


4. Serve and enjoy the bounty of summer.

Other Salad recipes you can try are: Thai Green Papaya Salad RecipeCharred Peppers Salad with Anchovy White BeansCouscous Salad with Chickpeas in Lemon Olive Oil VinaigretteFresh Mexican Black Bean & Mango SaladSautéed Red Bell Pepper and Olive Pasta SaladSundried Tomatoes Pasta SaladGrilled Chicken SaladIndonesian Style Patni Red Rice Salad With Boiled Eggs in Pomegranate Molasses Sauce.

[whohit]WatermelonFetaSalad[/whohit]

[yumprint-recipe id=’275′]


Making these Soft Pretzels on my bucket list for such a long time. I had seen this recipe of my Guru Laura Vitale ages back and I wanted to give it a try. So I was doing my weekly bread baking and made some extra dough which I could utilize for making soft pretzels for  tea time. They were fairy easy and the out come was just mind blowing. They where crunchy on the outside but soft and gooey from the inside. If you are looking for snacking options to impress your guests your search ends here. Its the best snack ever. My kiddo tried them and says Mumma they are strange but quite nice! What else would you like to hear from your 5 year old sunshine.

I am making this soft pretzels which is different than those hard baked ones. This is to be consumed right after they are baked. However, the hard ones have a longer shelf life. 


I did a quick cheese dip to go along these soft pretzels. It was easier and tastier than your imagination. I mean posting a separate recipe of this recipe is pure crime. So I’ll be writing in this post only. 

I have also been thinking to do a post where I can make a collective of recipes which can be made just with your pizza or bread dough. How cool would that be na? Write to me if you think I should go ahead with that!

Directions:

1. In a container take some lukewarm water. It should neither be hot nor cold, just hot enough to comfortably put your finger into it . The right temperature of the water is very important for yeast to activate. Put yeast into it.

DSC02540
2. Along with yeast add some sugar.

DSC02541
3. Give it a gentle stir with a fork and let the mixture sit and activate for 10 minutes or until you see some bubbles on top and mixture has become frothy and milky.

DSC02548
4. Take all purpose flour in a bowl and add salt and olive oil.


DSC02549


DSC02551


5. Add the proofed yeast to the flour little by little and mix till it comes together.

DSC02553
6. Bring the dough to a flat counter or your kitchen platform and knead for good 10 minutes till it becomes soft and supple. Read more about Bread baking techniques in “Basic Steps to Bake a Perfect Bread

DSC02554
7. Transfer the dough to a greased bowl. And cover with a kitchen towel or cling wrap. Let it sit for an hour or so to double up in size.


DSC02560


DSC02562


8. Punch it down and deflate the dough. Knead for another 5-7 minutes.

DSC02563
9. Divide the dough into 12 parts depending on the size of pretzel you are looking for. I divided the dough into two parts and with one I made my regular White Sandwich Bread and the rest I further divided into six. Cover them with a lint free kitchen towel till you work on them one by one.

10. Take one lump of dough and roll it into a thin stick or rope using your finger tips. You can dust your counter with flour so that nothing sticks to the surface. It should be relatively uniformly thick all over. 


11. Place it on the counter and make a U shape. Take both end of the U and cross them in the center. Refer the images below. Repeat the same with rest of the dough.


12. Line a baking tray with Parchment paper and place them on it. Cover them with kitchen towel till you give them soda water bath.


13. In a flat bottom pan add some water and give it a boil. Add Baking Soda and let it come for a boil again.


14. As soon as the water comes to a boil, drown pretzel dough into the soda water and give it a bath for 30 seconds each. You can do two pretzels at a time. This Soda bath will give it that crusty exterior and soft center.


15. With a pair of tongs you can carefully remove the pretzel from the pan and place it back on the parchment paper. The quality of parchment is very important because a bad quality parchment will stick to the pretzel and will make everything messy. I use Oddy Uniwraps . It just doesn’t let anything stick on it while baking. You can buy this from our online store, The Gourmet Shop.


16. Add little water in the egg and whisk it well. Apply egg wash with a silicon brush. 

17. Sprinkle the top with coarse pieces of sea salt or himalayan salt.


18. Bake it in the preheated oven for 10-12 minutes until it turns dark brown in colour. For the dip take cheddar cheese in a microwave proof bowl add some milk and microwave it for a few minutes until it has melted. You can add chopped chives for additional flavour.


19. Serve these pretzels hot with these yummy Cheesy dip and you will be in heaven! You can thank me later 😉

Other Bread Recipes you can try are:Apple Cinnamon Swirl Bread, Pan De MuertoPeter Reinhart’s Potato Rosemary BreadItalian Focaccia Bread with StrawberriesPumpkin BunsStuffed Mushroom Cheesy Crack BreadStuffed Mushroom and Spinach Braided BreadWhite Sandwich BreadWhole Wheat Sandwich Bread Recipe, Strawberry Walnut Babka.


[whohit]SoftPretzels[/whohit]

[yumprint-recipe id=’274′]