Tag

easy

Browsing

surankhichdi_featured5

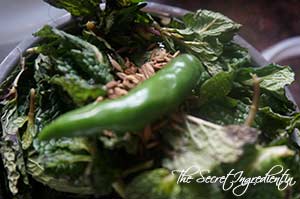
There are a few vegetables which are not commonly used in all households. It might be due to difficulty in making them or purely because of their taste. When I saw elephant foot Yam which is also known as Suran or Jimikand in the farmer’s market I asked my mother why we never brought it home. The reason she gave me was that she did not like its taste but that my grandfather was very fond of it. I decided to buy it and experiment it in my kitchen. Sometimes when you make a recipe in your own style disappoints you. What you need is a fresh eye and a new recipe which makes that dish exciting. That is exactly what I did and tried a gujarati recipe which can eaten during navratri fasting. 

surankhichdi_featured3

The recipe was quite simple and the results were amazing. The khichdi turned out delicious, filling and I found a new and interesting way to use Jimikand. I will be trying out more suran recipes in the days to come. Lets see if I can make Suran more appetizing and to my taste buds.

Directions:
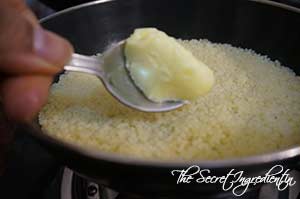
1. Apply oil in your hands to avoid irritation and itchy feeling on your hands while handling Jimikand.  Cut a piece of suran or jimikand and peel its skin.


dsc08945


dsc08944


dsc08946


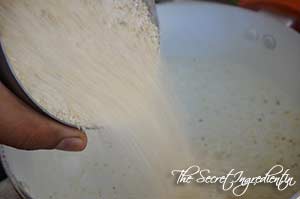
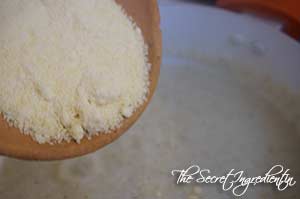
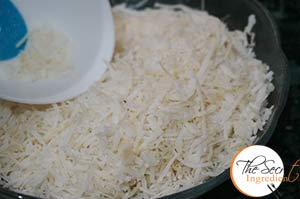
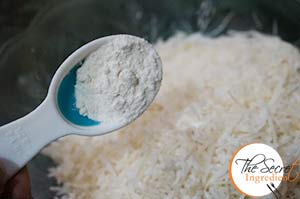
2. Grate the yam and soak the grated pieces in a bowl of water till we use it for cooking. This will prevent it from getting black.

dsc08947

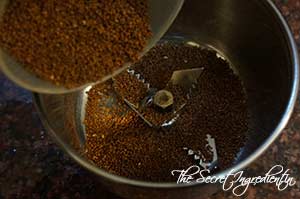
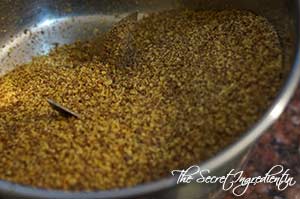
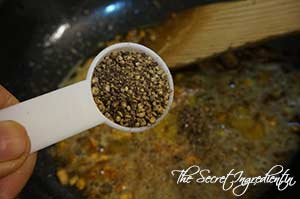
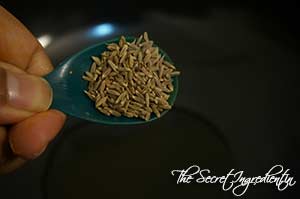
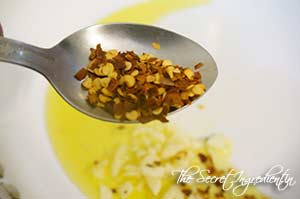
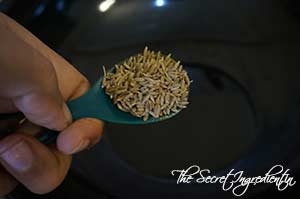
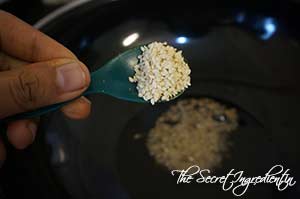
3. In a wok add some oil and when the oil is hot enough add cumin seeds and sesame seeds and wait for them to crackle for a few seconds.


dsc08948


dsc08949


dsc08950


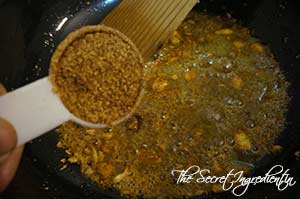
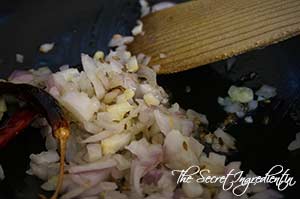
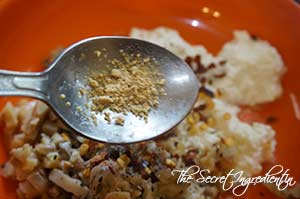
4. Add chopped green chillies and pounded peanuts. toss the peanuts till they have got some colour. Do not burn it.


dsc08951


dsc08953


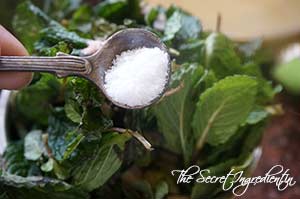
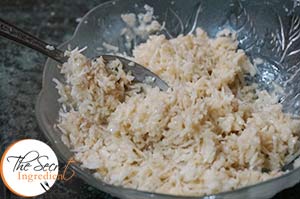
5. Add grated yam and salt. Mix everything and let it cook uncovered for 6-8 minutes.


Tdsc08952


dsc08954


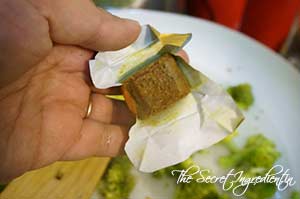
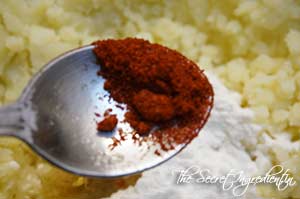
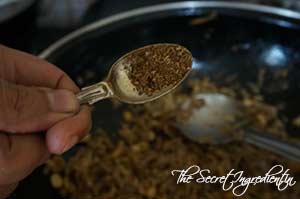
6. Add ground cinnamon and cloves and combine. Since its a gujarati Recipe you may like to add a little sugar to it. I am not fond of it so gave it a pass. Turn the flame off.

dsc08955

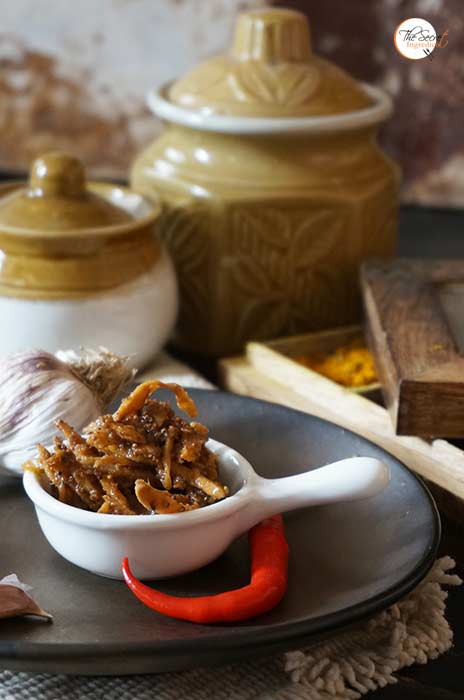
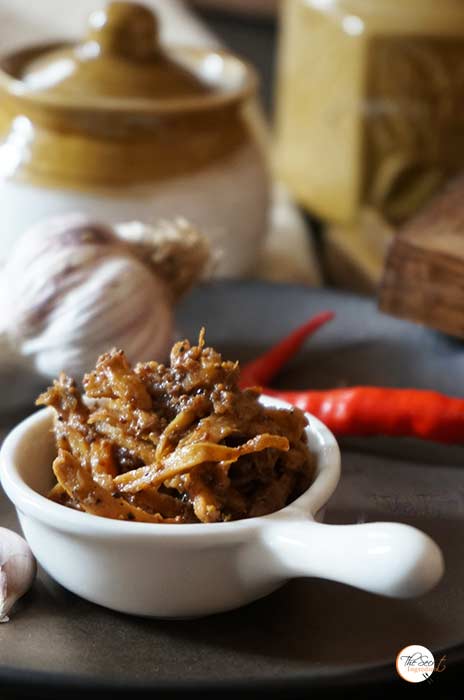
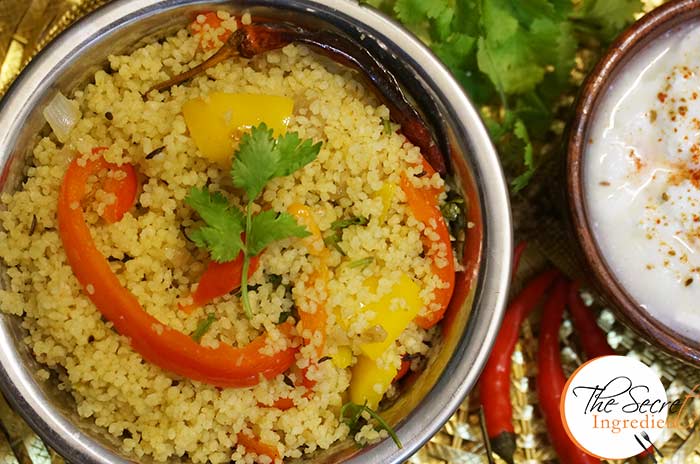
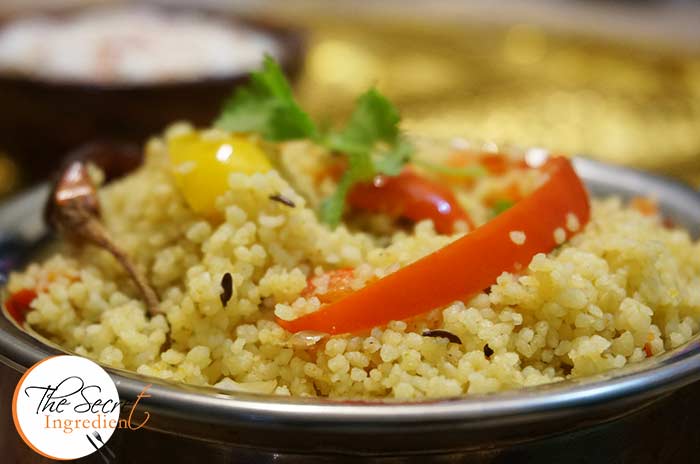
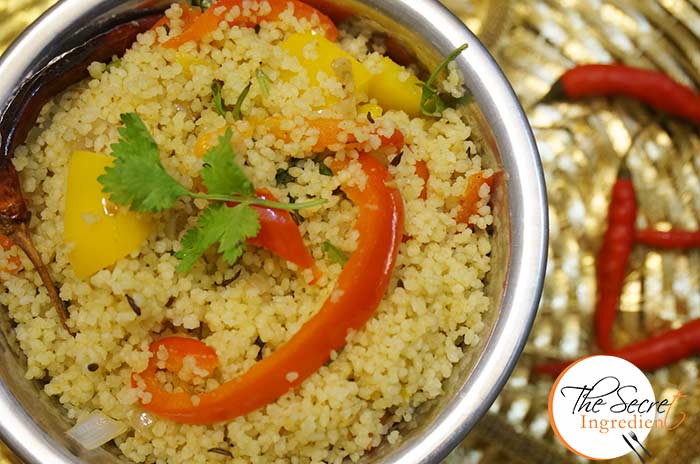
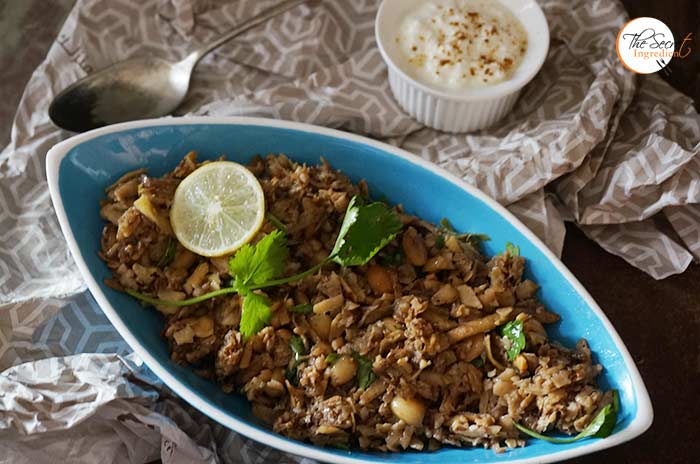
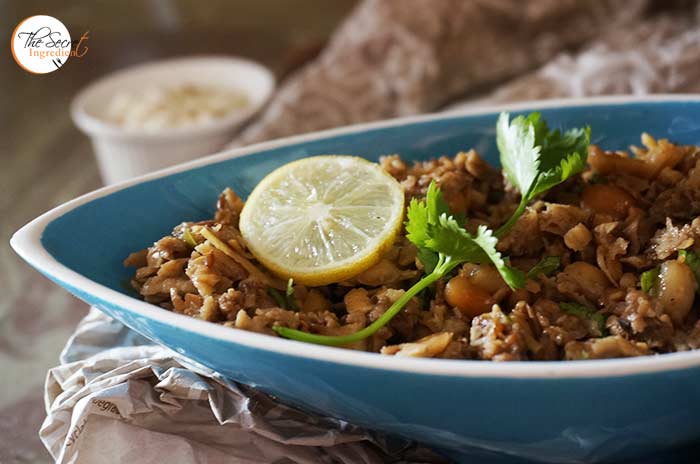
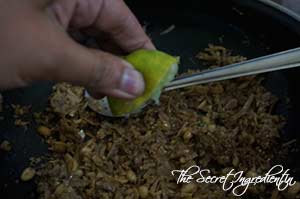
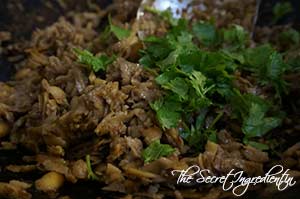
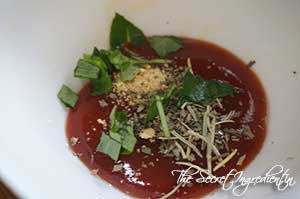
7. Add juice of lemon and mix thoroughly, this will prevent the itchy feeling when you eat it and overall makes the khichdi delicious. Garnish with fresh Coriander Leaves and grated fresh Coconut.


dsc08956


dsc08957


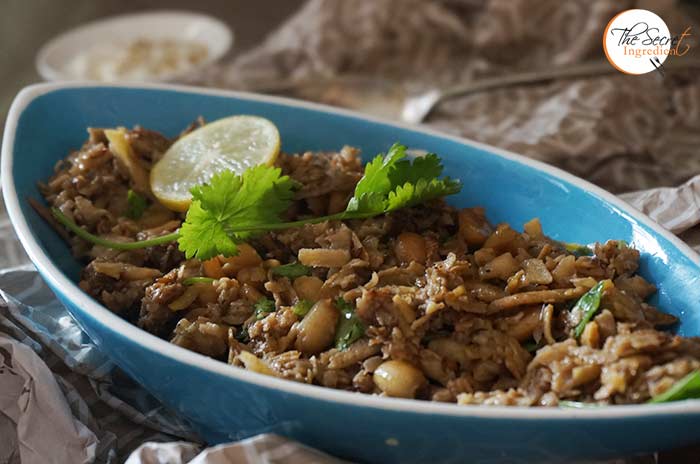
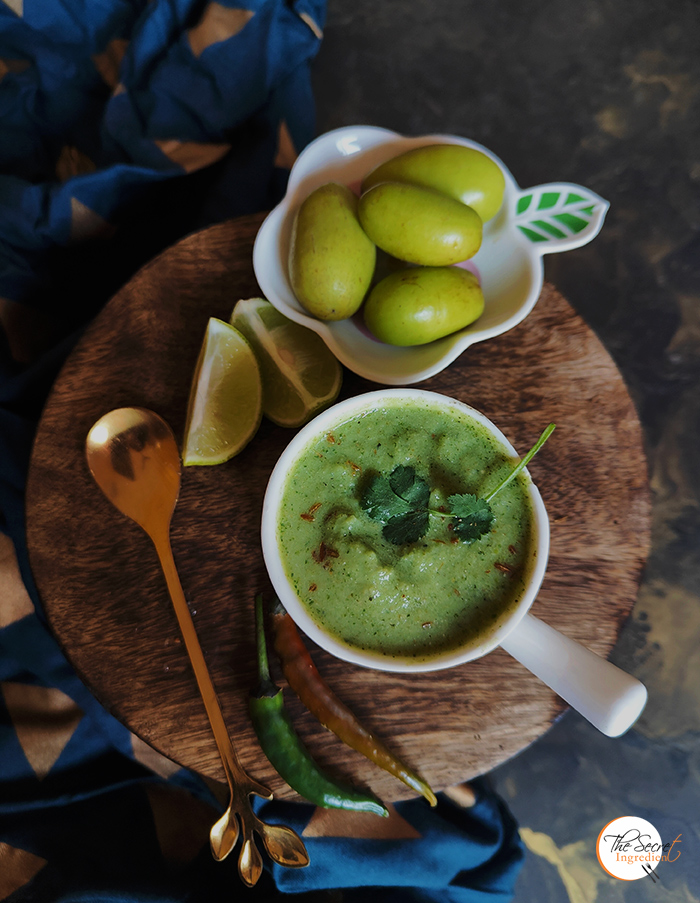
8. Serve hot with fresh plain curd and falahari Dhaniya Chutney. Its the most fulfilling vrat or fast recipe and can be made in no time.

Other recipes for fasting you can try are: Healthy Kachalu Aloo ChatTangy Mint PotatoesKhajoor Til Ke LaddooVrat Wale Dahi-Paneer KebabsSwang Ke Chawal Ka HalwaSwang Ke Chawal Ki PhirniTapioca Coconut Milk Pudding with Strawberry PreservePaneer Ki KheerSabudana KheerKaddu Ka Halwa,    Sabudana Khichdi .

surankhichdi_featured8[whohit]Suran Khichdi[/whohit]

[yumprint-recipe id=’248′]

MicrowaveMugLasagna_Featured2

I am an extremely lazy person and when that laziness assimilates in me I look for all possible ways to cut short my work, be it cooking, exercise or anything else. Such times see emergence of use of microwave in my kitchen. I hate microwaves and use it only for reheating. I detest baking in it but this lasagna recipe made me change my opinion about microwaves. This single serving lasagna in a mug is like your best buddy and can be made by anyone. Bachelors will love some quick fix dishes and so will people who are lazy like me.

MicrowaveMugLasagna_Featured3

This no cook pasta sauce has been a boon in disguise. I love it for my pizzas and for everything which requires red sauce. Gets ready in a jiffy without any hassle. The ricotta cheese can also be made in no time. Its just paneer with a little salt which is not set and has a crumbly texture. All you need is to curdle milk, drain the whey and its ready to use. Check out a detailed step wise step recipe to make Ricotta Cheese at home.

Directions:
1.  In a glass microwave friendly bowl add water and Lasagna sheet and microwave for 3 minutes. Cut it into small squares and set aside.


DSC07535


DSC07536


DSC07545


2. Chop Mushrooms and Shred Mozzarella Cheese, set aside.


DSC07539


DSC07540


3. In a bowl add Chopped mushroom, Ricotta Cheese, ground black pepper, granulated garlic,red chili flakes, chopped basil leaves and salt. Set mixture aside.


DSC07541


DSC07542


DSC07543


4. Prepare the sauce by mixing all the ingredients under No Cook Red Pasta Sauce. Set aside for assembly.

DSC07549

5. Pour 2 tablespoons of pasta sauce at the bottom of the mug. Top with a piece of softened pasta sheet. Add some mushroom mixture, 2 tablespoons of mozzarella, and a pasta sheet. Continue building the lasagna, ending with a layer of pasta sheet at the top. Sprinkle mozzarella over the pasta.


DSC07556


DSC07557


DSC07558


6. Microwave everything for 1 minute 30 seconds or until Mozzarella Cheese melts. Serve hot.

Other Lasagna recipes you can try: Vegetarian Mushroom Lasagna in Creamy White SauceCheesy Chicken Lasagna .

Other Pasta dishes you can try: Healthy Broccoli PastaPasta Alla VodkaSautéed Red Bell Pepper and Olive Pasta Salad , Sundried Tomato Pasta SaladWild Fiddlehead Fern & Angel Hair Pasta  Avocado Parsley Pasta.

MicrowaveMugLasagna_Featured1
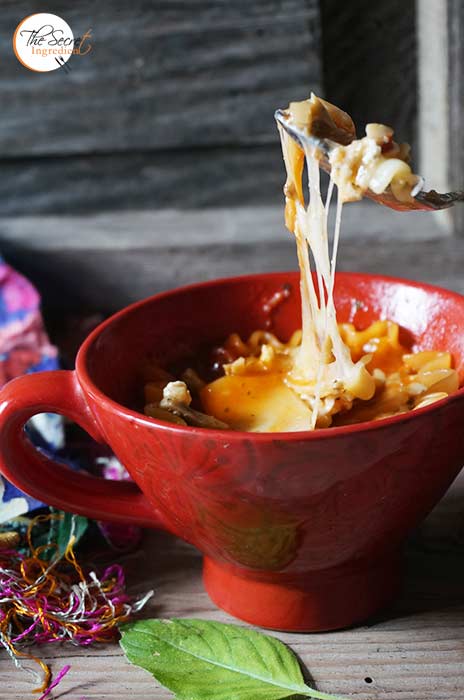
[whohit]LasagnaMug[whohit]

[yumprint-recipe id=’238′] 

We are an egg loving family. For us our breakfast has to be with eggs but the same old omelette and fried eggs can be boring at times. So when I picked up this Polenta from SOS organics I was keen to make something with it. Polenta is widely used in Italy as a porridge. Its also known as Corn Semolina. The corn is coarsely ground in a mill and is used widely in place of wheat and rice. Its excellent for those people with gluten allergies. 

This is not exactly an elaborate recipe post as you are used to seeing on my blog but its an interesting breakfast idea which can be made in a jiffy and which is utterly delicious and nutritious. You must be well aware by now what emotions I have with respect to Eggs. I have recently come across high protein, organic and nutritious Eggs from Eggee. And trust me I never had better eggs than this in India. If you can lay your hands on Eggee I insist you try any recipe with it and you will feel the difference in taste and texture. Earlier I had posted a few other egg breakfast recipes on blog like Spinach Mushroom Quiche, Italian Frittata with Mushrooms and SpinachShakshoukaWrapped French Toast Mexican Casserole Eggs. However, this combination of simple fried or poached egg with polenta and pesto is a killer. If you are looking for homemade Italian Basil Pesto  you can try here. Nevertheless, you can buy in a jar. Just cook your polenta following the directions below wand assemble everything together.

Directions:

1. For polenta, pour water in a saucepan and bring it to a boil. Add polenta and simmer it for 20-25 minutes till the polenta is cooked and has absorbed water.


DSC05430


DSC05431

DSC05432


2. Take it off the flame and season with salt, pepper and parmesan cheese. Mix thoroughly and set aside for assembly.


DSC05434


DSC05436


DSC05433


3. Fry eggs. If you like you can even poach them.

DSC05447

4. You can make your own pesto by using fresh ingredients and you can follow this recipe. Now in order to plate this dish ladle some Polenta in a large serving bowl, garnish with Pesto and olive oil and place your fried egg in the centre resting on the bed of Polenta and pesto. You can even garnish with pine nuts.

Related Recipes: Italian Basil Pesto

Other Delicious egg recipes you can try:  Italian Frittata with Mushrooms and SpinachShakshoukaWrapped French Toast Mexican Casserole Eggs.

[yumprint-recipe id=’237′] 


VratWaleDahiKebab_Featured1
Ever since my husband gifted me this Air fryer I cant stop trying recipes which I had earlier put in abeyance for I never wanted to eat fried food. This Navratri I was very excited because a lot of fasting food is fried and I gotta a chance to try variety of dishes in air fryer. Yesterday when I noticed my facebook friend Geeta di had posted the Dahi Paneer Kebabs for Vrat or Fasting, I could not control myself and made these in a jiffy. They were so delicious that my boys (Fully grown as well as my little kid) ate them tastefully.

VratWaleDahiKebab_Featured2
The taste was enhanced by the fact that they were healthy. I used half a teaspoon of oil for 9 kebabs, which isn’t bad at all. Ishall be posting more of my trial in my new Airfyer <3 Oh man! I am loving this.. 

Directions:

1. Wash and Boil some potatoes and peel off their skin. Place them in a mixing bowl.

DSC06153
2. Add crumbled paneer or Cottage Cheese to it.

DSC06154
3. Add Chopped Green Chillies and Grated Ginger.


DSC06155


DSC06156


4. Add Plain Thick Yogurt. You can even use hung curd. I had a creamy thick curd which wasnt runny, so I used that.

DSC06157
5. Add salt, red Chilli Powder and Garam Masala.


DSC06158


DSC06159


DSC06160


6. Add chopped Coriander leaves.

DSC06161
7. Add Singhara flour or also known as Water Chestnut Flour and combine everything well.


DSC06162


DSC06163


8. Take small portions and shape them into patties and place them all on a plate.


DSC06164


DSC06166


9. In the meanwhile preheat your Air Fryer to 180 degrees for 10 minutes.

DSC06165
10. Place the kebabs into the basket of air fryer and brush them with little oil on top.

DSC06167
11. Air fry them for 15-18 minutes till you get a golden colour on top. If you wish you can brush them with more oil in half time. I did not. Serve them hot with Phalahari Chutney

Other Navratri recipes you can try are:  Sabudada KhichdiSwang ke Chawal ki KhichdiSabudana Tikki Khajoor Til Ke LaddooArbi Masala CurryGajar Ka HalwaMakhane Ki KheerRasgullaSwang Ke Chawal Ka HalwaSwang Ke Chawal Ki PhirniAnaar Aloo ka RaitaPalak Dhaniya ChutneyCoriander Chutney without Onion Garlic, Vrat Ki Roti.

VratWaleDahiKebab_Featured3[whohit]DahiKebabForVrat][/whohit]

[yumprint-recipe id=’207′]

Green Ber ki Chutney I make every year because green ber is usually available at this time of the year. Yesterday was Maha Shivaratri, a Hindu festival  which is celebrated on the fourteenth day of every lunar month or the day before the new moon. It has a special significance for those who are on a spiritual path. A lot of Shaivas, devotees of Shiva observe fast on this day.  Around this time of the year the markets in India are flooded with some interesting fruits and vegetables, like the yellow ripe pumpkin, Cape gooseberry or Rasbhari in Hindi and also Ber or Indian Plum.

I have always loved eating Ber. It has a very peculiar taste not liked by everyone. This year on shivratri when I saw ber in the market I bought in abundance to munch all day long and tried to make this delicious chutney with mint. This recipe I had seen a while back and had been on my to-do list. I was a little skeptical about its taste but the end result was astonishing. Husband who doesn’t like ber also relished this chutney and asked for multiple servings with Samosa 🙂 Ha! what a happy end to ber.

Directions:
1. Wash and pit or destone the ber and  cut into pieces.

DSC05397

2. Separate the mint leaves from the stem and wash them well.

DSC05398

3. In a blender add the ber pieces along with mint leaves and Black Rock Salt and normal salt.


DSC05403


DSC05404


4. Also add sugar and roasted Cumin Seeds powder.


DSC05405


DSC05406


5. A green chilli, cashew nuts and a pinch of asafoetida


DSC05407


DSC05408


DSC05409


6. Blend them together to a smooth creamy paste.

DSC05410
7. Add Lemon juice and pulse again.

DSC05412
8. Serve with your favourite snacks and enjoy its deliciousness. You can refrigerate the chutney for later use.

Other Chutney Dips and Salsa you can try here are: Aalubukhara ChutneyArgentine Chimichurri SalsaCoconut ChutneySweet and Sour Raw Mango ChutneyPudina ChutneySpinach Coriander Salsa| Phalahari Chutney Coriander Chutney without Onion GarlicRaw Mango Chutney with Mint and Coriander


[yumprint-recipe id=’196′]

CoconutMacaroons_Featured3
This is my first post the year. It has been crazy in the midst of workshops, bakes, pickle orders and a much much more. Not that I have not been baking , just that I have a different laptop to work with and it is taking a while to adjust. So a lull in posting. I hope you missed me as much I missed you. Here’s a super quick dessert which is easy, crisp and equally delicious.   

CoconutMacaroons_Featured2

These Coconut Macaroons are not to be confused with French Macarons. The two words refer to completely different things. Both macarons and macaroons are confections, and both names are derived from the Italian word ammaccare, which means “to crush” – but that’s where the similarities end. Traditionally, these coconut macaroons are made with whipped egg whites, however this recipe is eggless and far more easy and yet so delicious!

Directions:

1. Preheat your oven to  350 degree F ( Learn about Oven temperatures and Conversion). In a bowl add some dried flaky Coconut. Also add to it All purpose Flour and little salt.


DSC04576


DSC04577


DSC04578


2. Add to the bowl vanilla extract and condensed milk.


DSC04579


DSC04580


3. Mix them thoroughly using a spoon. Wet your hands and roll them into golf size balls.


DSC04581


DSC04584


4. Line a baking sheet with Oddy Uniwrap Parchment Paper and place these balls on it. 

DSC04585
5. Bake them in preheated oven for 15 to 17 minutes or until golden. Remove them on wire rack to cool off.

DSC04586
6. Enjoy these crispy flaky Coconut Macaroons in no time. Perfect solution for quick dessert cravings.

Still looking for more Coconut recipes? You can try Coconut Chutney , Coconut milk and Mango Pudding and Chocolate Coconut Cookies.
 
CoconutMacaroons_Featured5[whohit]CoconutMacaroons[/whohit]

[yumprint-recipe id=’188′]


These days you can easily find fresh ginger root sold in the markets. The newly dug ginger root is pinkish in colour and is very soft without any membranes which makes them perfect for pickling. This is a very easy recipe of Adrak Lehsun ka Achar or Ginger Garlic Pickle which I learnt from my mother. I made this pickle for the Uttrakhand Food Festival where I participated last month. I sold more than 30 bottles of pickle in one day. That was quite an achievement for me. 

My husband is completely gaga over this pickle. He eats his every meal with this. Oh well he hasn’t been fond of pickle ever but wonder why he is hooked to this 😉 You must try this for you will fall in love with its simplicity.

Directions:
1. Wash Ginger Root thoroughly and remove all the mud. Cut or break it into small pieces. Peel its skin using a sharp knife.


DSC03804


DSC03806


2. Cut it into thin slices and further cut into thin sticks.


DSC03807


DSC03808


3. Place the ginger sticks into a bowl and add white vinegar. Add half teaspoon salt and cover. Let it rest overnight. The ginger will absorb vinegar and become pink in colour.


DSC03809


DSC03819


DSC03820


4. In a dry grinder add rai or red mustard** and make a course powder and set aside.


DSC03821


DSC03822


5. Also make a paste of garlic and set aside.


DSC03823


DSC03824


6. In a wok or karahi add mustard oil and smoke out the oil. Add garlic paste and saute till you see it changing its colour.


DSC03825


DSC03826


DSC03827


7. Add powdered rai powder, salt, black pepper powder.


DSC03828


DSC03829


DSC03830


8. Add ginger sticks and discard the vinegar. Mix well with the spices and let it cook a couple of minutes more. Turn the flame off. 


DSC03832


DSC03833


9. Let it cool down and transfer it to an airtight container. Keep it at room temperature. The pickle stays good for up till a year.

Other Pickle recipe you can try here: Jalapeño PickleKacchi Haldi ka Achar, Instant Raw Mango Pickle South Indian StyleBharwan Lal Mirchi ka Achaar


[yumprint-recipe id=’180′]


GingerGarlicPickle_Pinytrest


CousCousPilaf_Featured2

Its been a few months now I have been maintaining the regime to eat healthy and exercise daily. Luckily I have been able to shed a few kilos (Happy Dance!!) but a few kilos are still to go. I have been eating everything but in control and avoiding sugar and fried food as much as I can. I made Couscous Salad with Chickpeas some time back and it is a regular at my place.

Couscous Pilaf_Featured3
I wanted to try the couscous pilaf which tasted flavourful with some spices and vegetables. All I can say it was amazing, filling and gets ready in minutes.  If you are hungry and looking for quick dinner options, dont think twice make this healthy pulao which looks gorgeous and tastes divine. Its a good option when you want to avoid hi starch rice pulav.

Directions:

1. Chop Onions and Garlic Finely. Also chop Red and Yellow Bell Pepper in strips lengthwise. You can even add mushrooms, I did not have on hand. Set aside.

DSC03039

2. In a sauce pan add water and bring it to a boil. Turn the flame off.

DSC03040

3. Add Couscous to the boiled boiled and top it with ghee or clarified butter*. Cover and let it sit for 5-7 minutes or till the couscous gets cooked. Fluff it up with a fork and set aside.


DSC03041


DSC03042


4. In a pan add oil and heat it.

DSC03043

5. Add cumin seeds and let them crackle for a couple of seconds. Also add whole red chilies.


DSC03044


DSC03045


6.  Add garlic and saute. Also add onions and saute till it turns soft and translucent.


DSC03046


DSC03047


7. Add bell peppers and mushrooms if you are using. Saute them till they become cooked but still crisp.

DSC03048
8. Add turmeric Powder and salt. Combine.


DSC03049


DSC03050


9. Add cooked and fluffed couscous to the veggies and combine. Garnish with freshly chopped coriander leaves.


DSC03051


DSC03052


10. Serve hot with some Aloo Anaar Raita or plain yogurt.

Other Pulav or Pulao or Pilaf recipes you can try are: Mint Pulav, Mango Rice, Curd Rice, Kathal Ki Biryani,  Veggie Vermicelli Pulao.

If you are looking for other healthy recipes you can try, Couscous salad with Chickpeas, Mango Black bean Salad, Grilled Chicken Salad, Healthy Broccoli Pasta.

CousCousPilaf_Featured1[whohit]CouscousPilaf[/whohit]

CousCousPilaf_Pintrest

[yumprint-recipe id=’176′]

BrocolliPasta_Featured1

I have mentioned time and again that I am a die hard fan of pasta in all its forms. I don’t mind if its cheesy, boozy, creamy or simply loaded with veggies. Pasta holds a sacred place in my heart. As my little up is growing up I have seen similar or more violent streak to devour pasta. This makes the matter serious since we are a complete pasta loving family and I  have to come up with more and more pasta recipes. Sigh!

BrocolliPasta_Featured3

Well  lately my husband and me are on a load shedding spree, which means creamy and cheesy pastas have to be kept at bay. 🙁 I decided to make this healthier pasta with Broccoli which uses no cream and very little cheese and that too is purely optional. I have always loved such simple pastas. You can enjoy them without feeling very guilty ;). I had earlier posted Sauteed Red Bell Pepper & Olive Pasta which was also without cream and cheese. 

Directions:

1. Cut the broccoli into florets and wash them under running water to make it dirt free. Boil pasta as per packet instructions. You can choose any shape you like. Learn how to boil pasta perfectly.


DSC01649


DSC01650


2. Drain water and keep the florets aside. Also finely chop some garlic or you can even mince it. 

DSC01651

3. In a pan add some olive oil.

DSC01652
4. Add chopped garlic and Red chilli Flakes to the oil. Let the oil get infused with garlic and red chili flakes while it heats up.


DSC01653


DSC01654


5. Add broccoli florets and give it a toss in the oil. 

DSC01655
6. Add water and stock bullion. Or you can use vegetable stock only.


DSC01656


DSC01657


7. Season with salt and let it cook covered on low medium heat till broccoli is partially cooked. You will be able to cut the broccoli with a spatula.


DSC01658


DSC01663


8. Add boiled pasta to the broccoli and combine.

DSC01664
9. Season it with Ground Black pepper.

DSC01665
10. Add little butter to make it smoother.

DSC01666
11. Top it up with Parmesan Cheese.

DSC01668
12. Serve it hot with Cheesy Garlic Bread on the side.

Other Pasta recipes you can try here are: Pasta Alla Vodka, Sauteed Red Bell Pepper & Olive Pasta, Avocado Parsley Pasta, Sundried Tomatoes Pasta Salad, Spaghetti Vegetable Pasta , Chicken Lasagna, Mushroom Lasagna in Bechamel Sauce.

BrocolliPasta_Featured2[whohit]BroccoliPasta[/whohit]

[yumprint-recipe id=’173′]


BrocolliPasta_Pintrest


Similey's_Featured1
Any mother would understand how difficult it is to make your little ones eat. You have to apply so many tricks to handle and control their eating tantrums. The food has to be glamorized so that they at least give it a try. This could be very maddening at times.

Similey's_Featured2

Another challenge is to make them eat healthy and something which is not processed. These days super markets are stacked with frozen snacks which are processed and have no nutritional value. Unfortunately kids are tempted by its appearance and taste. One such snack is Smiley Potatoes by McCain. So I decided I would recreate those smileys at home from fresh products. To my utter surprise they were delicious and tasted almost the same as store bought but many times healthier. I could see the excitement in my kiddos eyes as he grabbed one piece after another. Only a mother would know what satisfaction this brings in.

Directions:

1. Boil potatoes till they are done and peel their skin off.

DSC02860

2. Mash the potatoes with a Potato masher in a bowl. Add corn Flour and mix with a spoon.

DSC02861
3. Add ginger garlic paste. Season with salt and red chili powder. If your kids don’t eat chili you can skip it.


DSC02862


DSC02864


DSC02863


4. Add little turmeric powder and juice of half a lemon.


DSC02865


DSC02867


5. Mix and mash  everything together till everything comes together in the form of a soft dough. Refrigerate for 30 minutes.

DSC02868
6. Take a spoon full of potato dough and shape it into a ball.

DSC02869
7. Flatten it by pressing between your hands about 2mm thickness. In alternate you can use a cookie cutter or small lids to make perfect shapes.

DSC02870
8. Use a clean pencil back end to make eyes.

DSC02871 

8. And a spoon end to make the smiley face.

DSC02872
9. Heat oil in a wok or kadai and fry these smileys till crisp and golden.


DSC02873


DSC02874


10. Absorb the oil on a kitchen paper towel and serve. You can put these as a lunchbox snacks for your kid. 

Other kids recipes you can try here are: Vegan Chocolate Muffins, Whole Wheat Banana Bread, Soya Veggie Vermicelli

Other Potato recipes on The Secret Ingredient: Punjabi Style Dum Aloo, Punjabi Style Aloo Methi, Aloo Patty, Yam Potato Chat, Aloo Anar Raita, Sabudana Vada, Roasted Potatoes with Garlic Rosemary.

Similey's_Featured3

[whohit]Potato Smileys[/whohit]

Similey's_Pin

[yumprint-recipe id=’168′]