Tag

PartyFood

Browsing


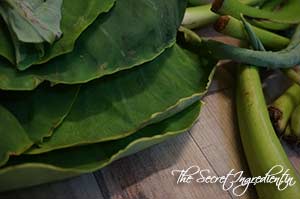
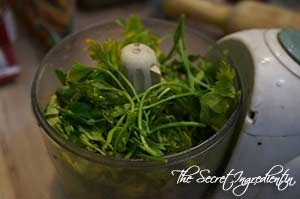
I first ate Arbi Ke Patte Ke Patode when my friend brought this in office during lunch. I relished its taste so much that the memory stayed fresh in my mind in spite of all these years. Then the other day my maid asked me if I use colocassia leaves or arbi k patte for cooking. I felt overwhelmed on hearing this and said yes yes!! She brought me some the next day from someone’s abandoned farm (my meaner self says I don’t mind ;))

I called my friend and quickly asked her the recipe. I planned to make this for evening snacks. My husband seemed not so excited and the idea sounded weird to him. Its a normal phenomena with him, things he hasn’t tried he doesn’t trust. When I finished making them he couldn’t stop eating them. Infact my little boy also ate couple of them. What a bliss it was 🙂

They are made in many ways in different part of India and known by various names. In Maharashtra its known as Alu Wadi, in Gujarat it is known as Patra, in North India it is known as Arbi Ke Patore or Patode.

Directions:

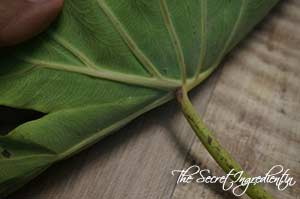
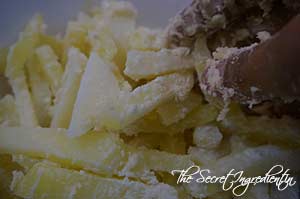
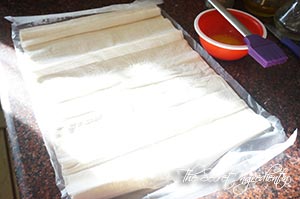
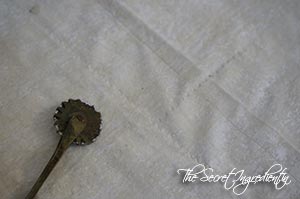
1. Select the softest and youngest leaves, they taste the best. I had no option of selecting.. you see beggars are not choosers 😛 Cut the central stem and remove the hard membranes using a knife.


DSC01473


DSC01474


DSC01487


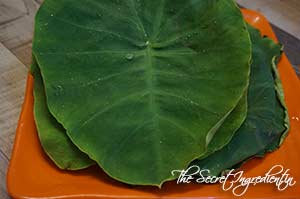
2. Wash them thoroughly and pat dry with a kitchen towel. Set aside.

DSC01475
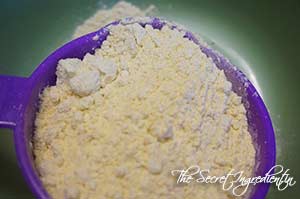
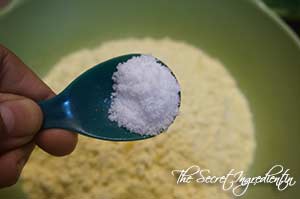
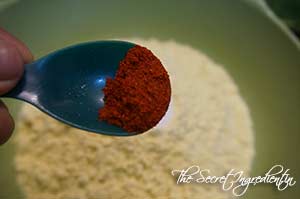
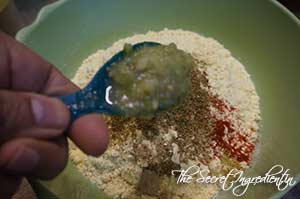
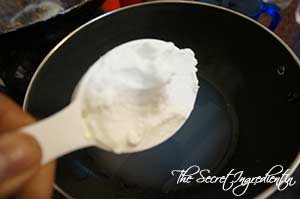
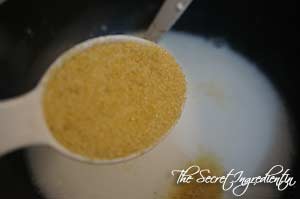
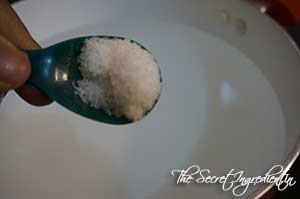
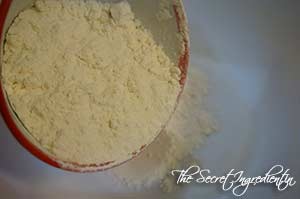
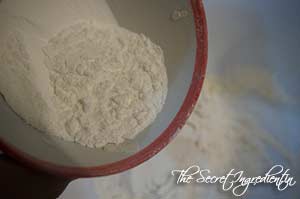
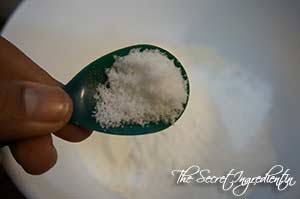
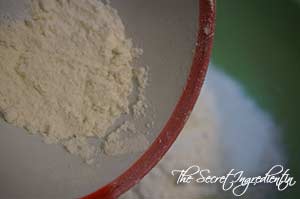
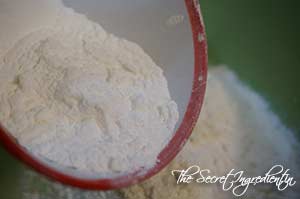
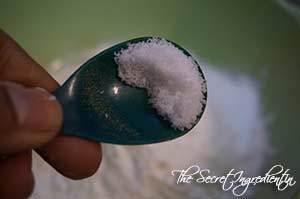
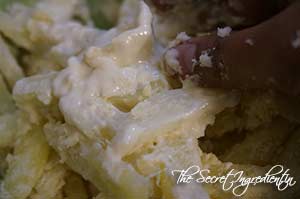
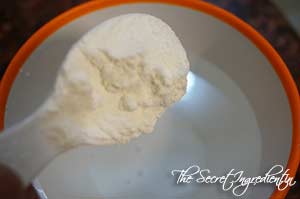
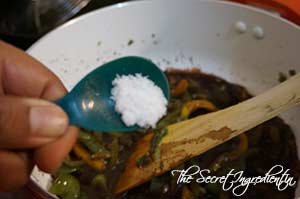
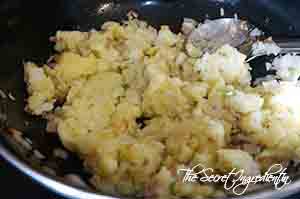
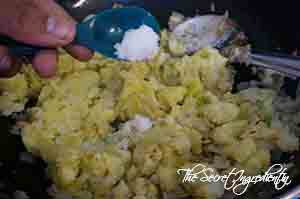
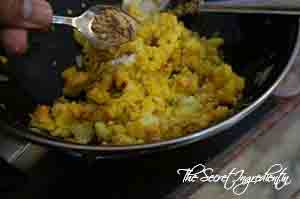
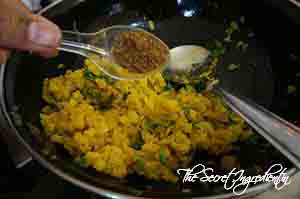
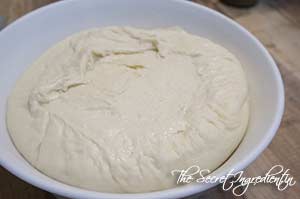
3. In a bowl add besan or chickpea flour. Also add salt and red chili powder.


DSC01476


DSC01477


DSC01478


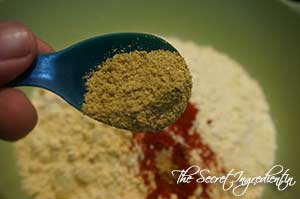
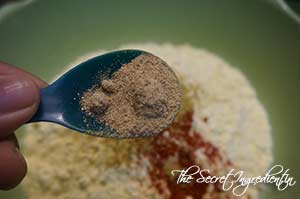
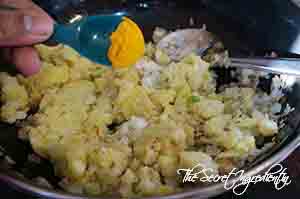
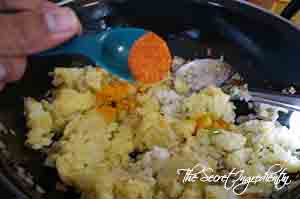
4. Also add Coriander powder, Amchur and Cumin Powder.


DSC01479


DSC01480


DSC01481


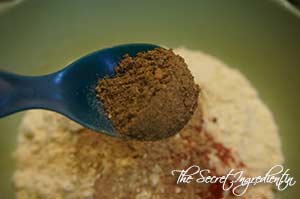
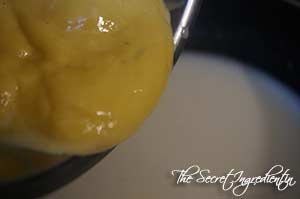
5. Add Ginger Garlic paste.

DSC01482
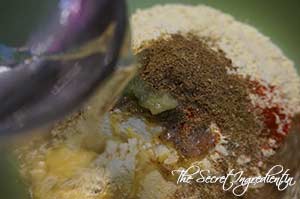
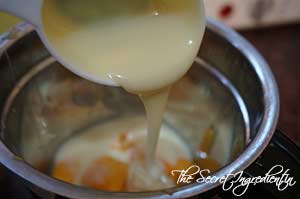
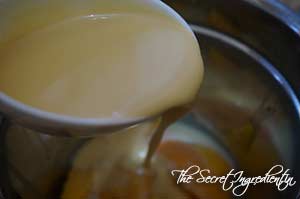
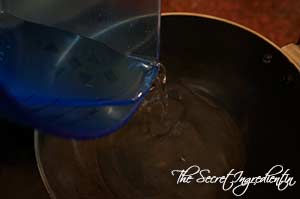
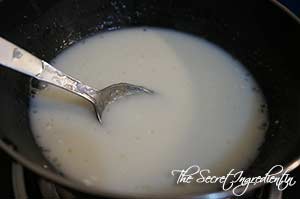
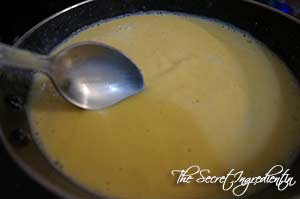
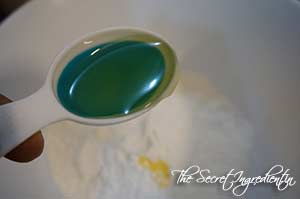
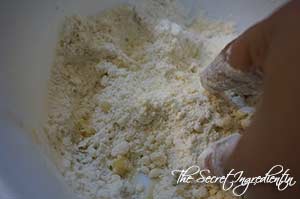
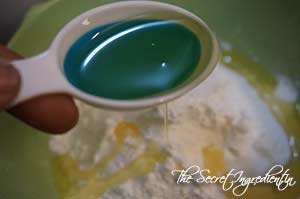
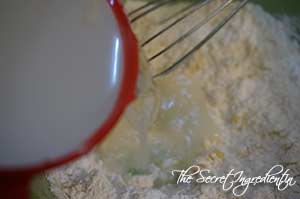
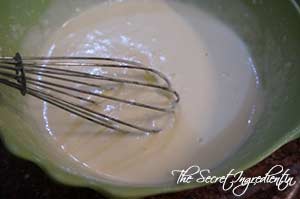
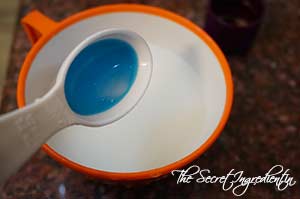
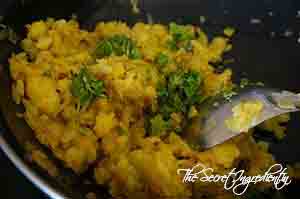
6. Add a little water and make a paste. Do not add all water at once, add little by little and keep stirring to make a lump free batter. The batter should not be thick nor runny. Just right.

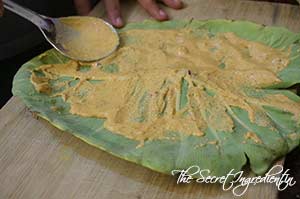
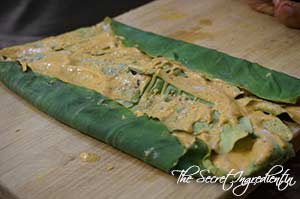
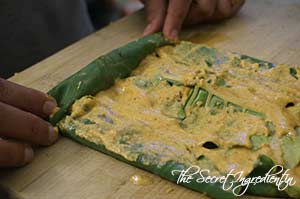
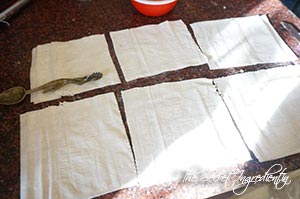
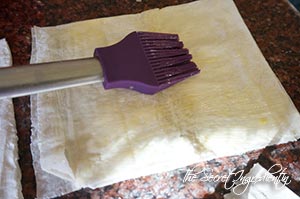
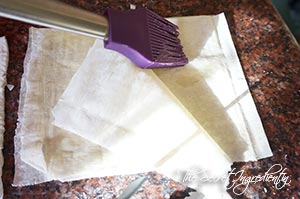
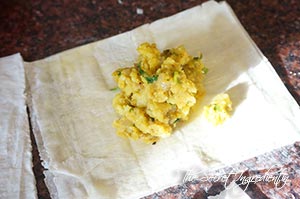
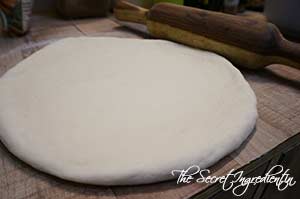
7. Place one leaf on a flat surface. The glossy and smooth part facing down. Spread the batter generously on top .

DSC01489
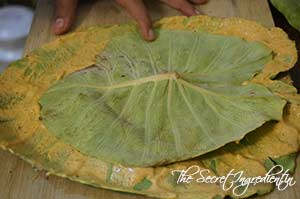
8. Place another leaf on top of it and keep doing this for 5-6 times. If you have large leaves you can stop after placing 4 leaves.

DSC01490
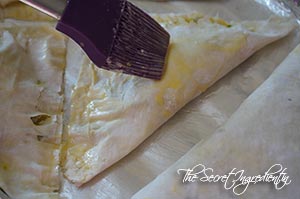
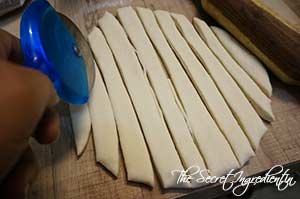
9. Fold the ends from both sides as depicted in the picture.

DSC01491
10. Now start rolling them from one end. Keep applying the batter in the inner side also.


DSC01492


DSC01493


DSC01494


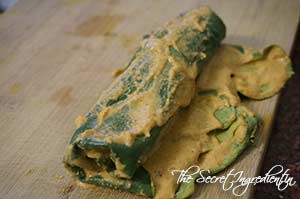
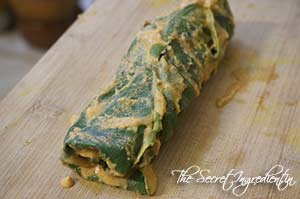
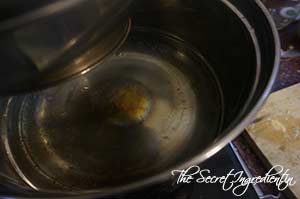
11. Now repeat this with another set of leaves. And keep them ready to be steamed. Heat water in a vessel.

DSC01495

12. I placed the rolls on my dhokla stand. But you can use a wire mesh or steel plate with holes too. 

DSC01496

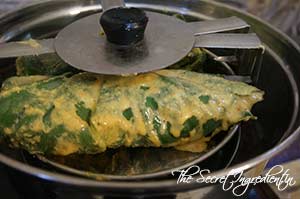
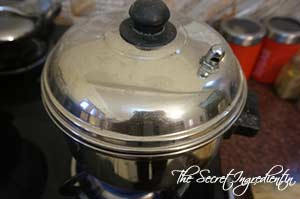
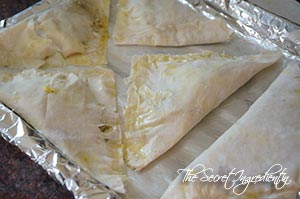
13. Cover with a lid and let it steam for 15 minutes on high heat.

DSC01497
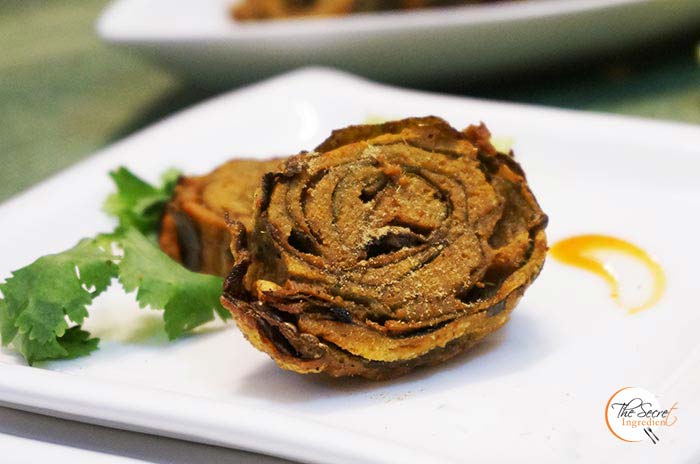
14. Once steamed they will look like this with all the batter steamed and non sticky.

DSC01498
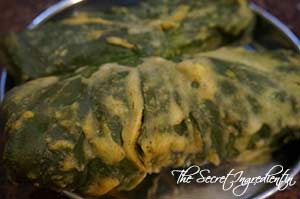
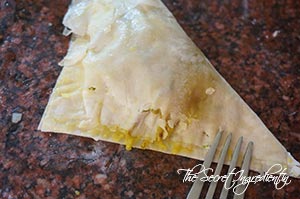
15. Let them cool down and come to room temperature. Now cut them into slices using a sharp knife. If you try cutting them while still hot they might break.

DSC01499
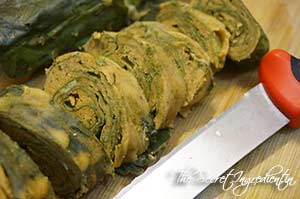
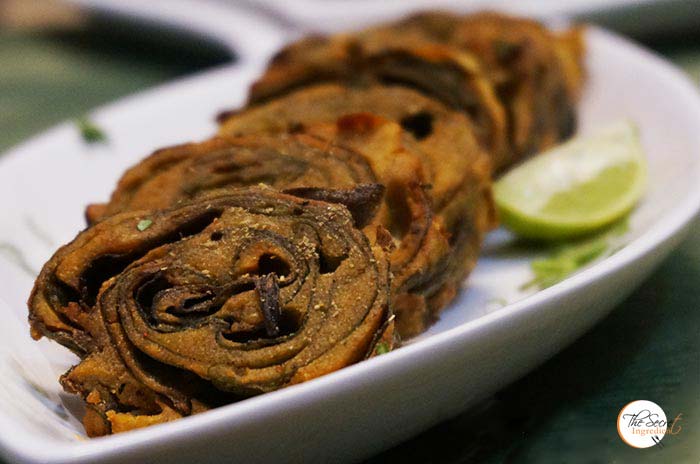
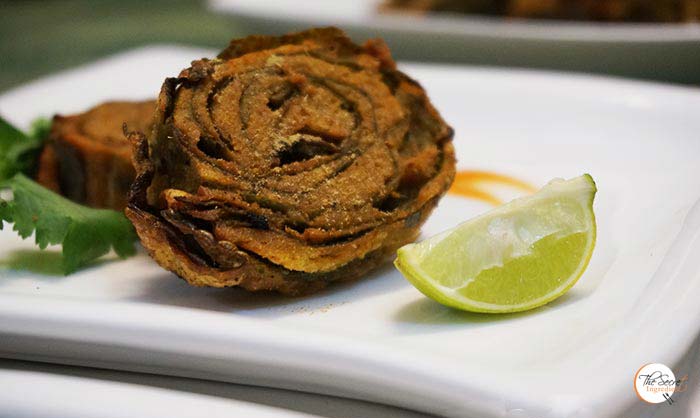
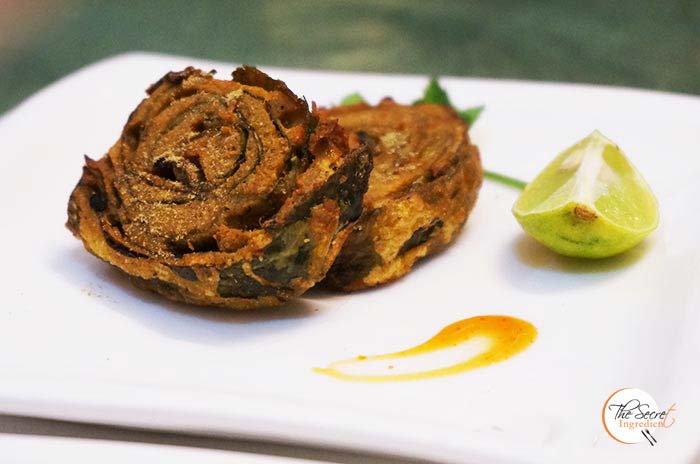
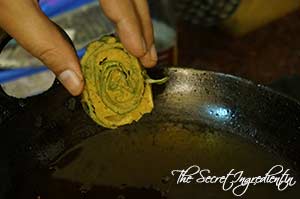
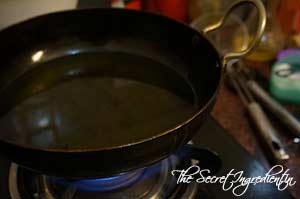
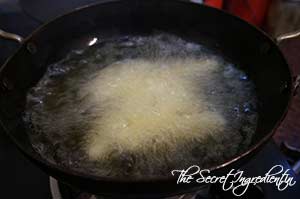
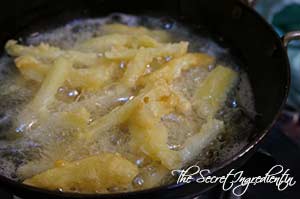
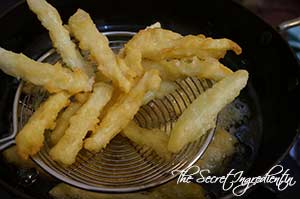
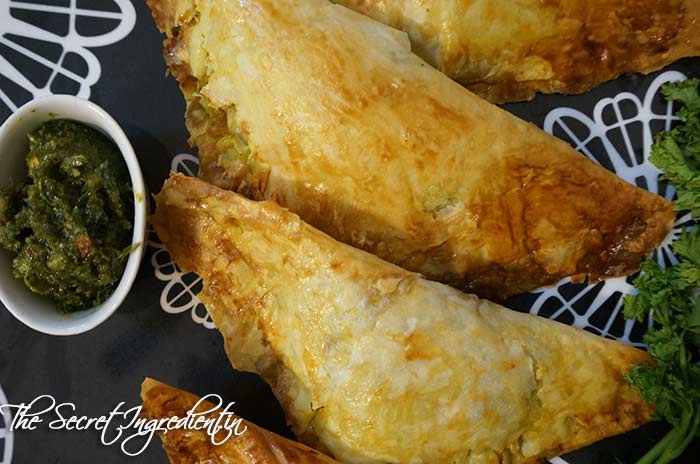
16. Heat oil in a wok or kadhai. and fry them for a minute on both sides till crisp and brown. The browner the crispier.


DSC01501


DSC01500


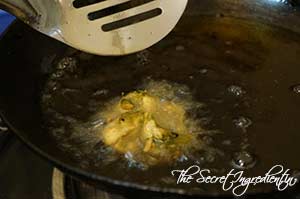
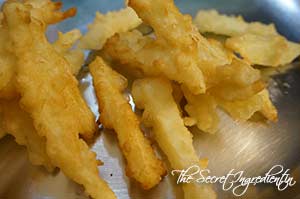
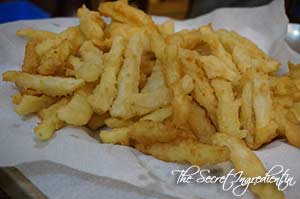
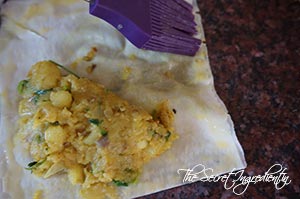
17. Remove them on a paper towel to absorb extra oil.

DSC01502
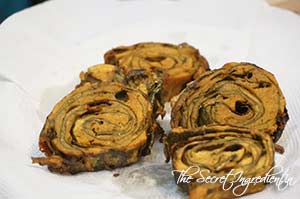
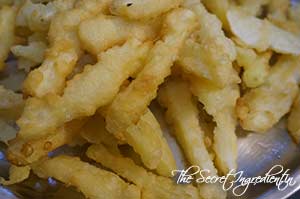
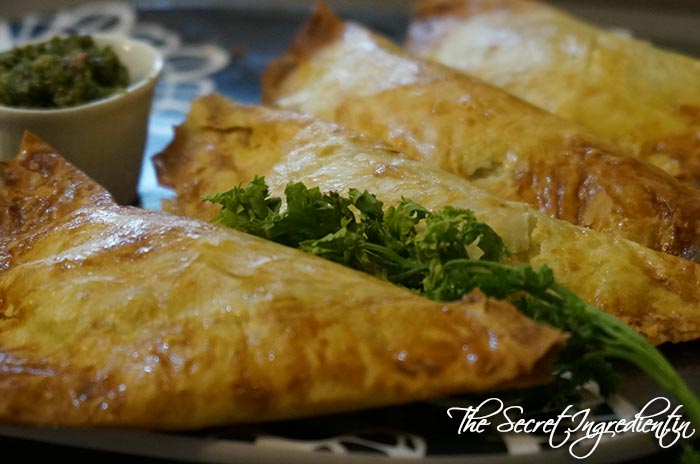
18. Sprinkle some chat masala on it and serve hot with lemon wedges and mint chutney

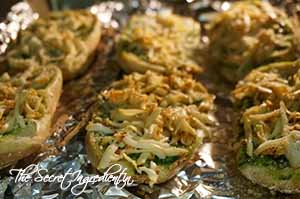
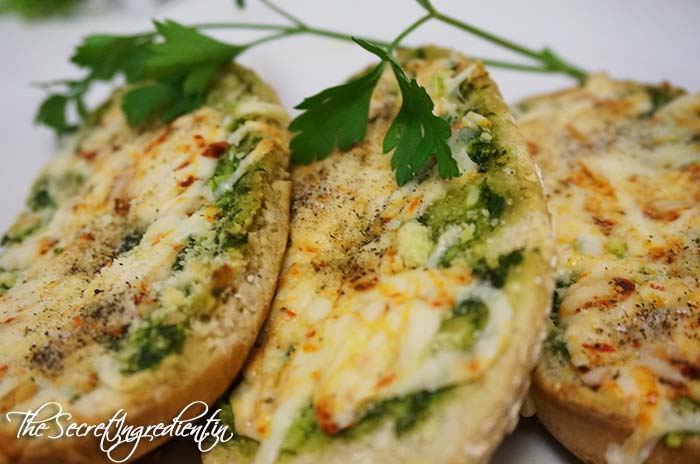
You can try other snacks such as Roasted Rosemary Garlic Potatoes, Sabudana Wada, Healthy Kachalu Chaat.
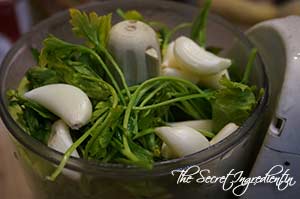
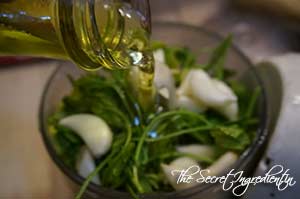
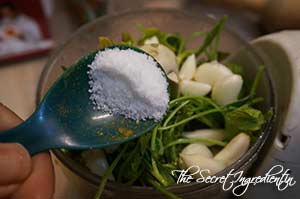
Other Chutneys you can club with these snacks are Pudina Chutney, Coriander Spinach Chutney, Coriander Chutney without Onion Garlic.

[whohit]ArbiKPatore[/whohit]

[yumprint-recipe id=’132′]

MangoCocoPudding_Featured2
Summers are here and so are Mangoes. They are refreshing , delicious and everyone’s favourite, specially my father. He LOVESSSSSS Mangoes. He is a mango addict. I am not kidding! I have seen my father hunting for mangos at 2’o clock at night. Huh! My father’s pantry is often full of boxes of Mangoes. He is a diabetic but he cannot leave Mangoes. What can I say! 

So coming back to mangoes, we are surrounded by mangoes everywhere these days and making delicious mango puddings makes the experience even more exciting. I came across this Korean blogger who had made this coconut milk Mango Pudding. I was simply awestruck. I had all ingredients on hand I made it immediately. This was soo delicious!

Directions:

1. Slice one mango and cut it into cubes. Put the cubes in the serving jars or glasses.


DSC00697


DSC00698


DSC00699


2. Scoop out the pulp of the other two mangoes and put them in the blender.

DSC00700

3. Add Condensed Milk and Evaporated milk to the blender. 


DSC00701


DSC00702


4. Pulse the blender to make a smoothie.

DSC00703
5. In the meanwhile, in a pan add some water, Coconut milk and  gelatine or agar agar for vegetarian option. 


DSC00705


DSC00706


DSC00707


6. On low heat dissolve the gelatine using a spoon. Put the flame off. Add the mango smoothie to the coconut mix and stir till well combined.


DSC00708


DSC00709


DSC00710


7. Pour them in the jars or glasses with mango cubes. Give it a gentle stir and chill till set. It should take 2 hours.


DSC00712


DSC00713


8. Serve chilled with more mango Cubes on top or may be some Pomegranate seeds.
You can even try our Orange Cake, Apple Streusel Bread, Pumpkin Cake Rolls and Persimmon Rum Cake.

MangoCocoPudding_Featured1[whohit]MangoCocoPudding[/whohit]

[yumprint-recipe id=’120′]


ChiliPotatoes_Featured1

My love for Indo Chinese Cuisine is increasing with growing years. To my surprise I do not like the food they serve at restaurants in the garb of Chinese food. The same gravy is poured over all dishes and they all taste alike. But making them at home has introduced me to different flavours and styles. I love to make Chili Mushrooms, Veg Manchurian, Gobhi Manchurian, Veg Momos with Szhezuan Sauce, Chili Baby Corn and now the latest and crispiest Chili Potatoes with Honey Glaze.

I always remember eating these potatoes but they were always frail and soggy simply smeared in the sauce. But when I tried making them at home they came out crispy with a crunch. Ohh Lord it was shere food porn. There are a few things which you must follow to make them crisp. It may look like a long procedure but the results will speak for themselves. I bet you will never go back making them the way you usually do.

Directions:

1. Wash and Peel Potatoes.


DSC00448


TDSC00449


 2. Cut them into half and further cup them into small fingers of more or less equal size.


DSC00450


DSC00451


 3. Pour water in a sauce pan and bring it to a boil. Add salt.

DSC00452

4. Put the finger potatoes into the water and submerse  for 5 minutes. Once blanched remove them from the water using a skimmer.

DSC00455

5. Run them under cold water for a minute so that they stop cooking. Set aside.

DSC00456

6. In a bowl add All purpose Flour, Corn Flour and Salt.


DSC00457


DSC00458


DSC00459


7. Now add salt and mix everything using your fingers. Take little flour in your fist and press lightly. If it comes together you know its correct.


DSC00460


DSC00463


DSC00464


8. Add blanched potatoes and mix. Coat the potatoes with flour using your hand.

DSC00465
9. Now  in a different bowl add more All Purpose Flour, Corn Flour and salt.


DSC00466


DSC00467


DSC00468


10. Now add oil and water and whisk the batter to make it lump free.


DSC00469


DSC00470


DSC00471


11. Heat Oil in a wok for frying.

DSC00472

12. Dip the flour coated potato fingers in the batter and fry them partially on medium high flame for 5 minutes.


DSC00473


DSC00474


DSC00475


13. Remove them from oil once you see them turn slight golden.

DSC00476
14. Separate fingers if they stick together.

DSC00477

15. Now fry them for the second time on low flame till they turn golden and crisp. This step is very important because this will ensure you have very crisp fries.


DSC00478


DSC00480


16. Remove them on a paper towel to absorb any extra oil. 

DSC00481
17. For the sauce chop some spring onions, ginger, Garlic, green chilies and capsicum. You can even use bell pepper. I have used yellow.

DSC00483


18. In a pan pour some oil and heat it. Add spring onions, slit green chilies, ginger & Garlic and saute them. 

DSC00484


19. Now add Capsicum and bell peppers and saute them as well.

DSC00485


20. Dissolve Cornflour in some water and set aside.


DSC00486


DSC00487


21. Add to the sauteed onions some soy sauce, szechuan sauce (not in pics) and Tomato Ketchup.


DSC00488


DSC00489


 22. Also add Freshly ground Pepper, salt and Sesame seeds .


DSC00490


DSC00492


DSC00493


23. Add the cornflour mixture we made before. Keep stirring on high flame till the sauce has reduced and thickened.

DSC00491
24. Turn the flame OFF and then add Honey for the glaze.

DSC00494
25. Wait for 5 minutes to let the sauce cool down a bit. Now add the fried potatoes. If you add the potatoes before it will make them soggy.

DSC00496

26. Transfer to a serving platter and sprinkle some more sesame seeds and onion greens.

You can even try Roasted Rosemary Garlic Potatoes.

You can also try more dishes from Indo Chinese Cuisine like Chili Mushroom, Szechuan Sauce, Vegetarian Momos. Vegetarian Hakka Noodles.

ChiliPotatoes_Featured2


[whohit]ChiliPotatoes[/whohit]

[yumprint-recipe id=’117′]

VegPatties_Featured2
I love Aloo Patty. This love began when I was in School. My school canteen used to sell Stuffed potato pastries or as we North Indians call it Aloo Patty (How Funny! Patty is the croquettes or tikki inside a burger but we call them as patty). Anyways! That patty was and is the best I have ever tasted in my life.  There are soo many wonderful memories woven around patties, canteen and my lovely school. I miss every thing about my school. This year my School celebrated its Golden Anniversary. I feel so proud to be part of St. Joseph’s Convent School and thankful for making me what I am today. I dedicate this post to my School :).

Ohh Lord! Patties can make me soo nostalgic. I almost lost track of this post 🙂 Coming back to the topic, you can make a lot of things with phyllo pastry and that too in a jiffy specially when some unannounced guests come over. I always kept some in my freezer in Mexico here in India I have to make an effort to procure them. But I still retain my stock in freezer. I recently conquered making Turkish Börek with feta cheese and spinach. And with leftover Phyllo I made aloo patty for my sheer love for them.

Directions:

1. Take phyllo sheets out from the freezer and thaw them. You can keep them in fridge overnight or put them on the counter for few hours so that they get ready for use. Chop some onions and green chilies. Set aside.

2. Wash & Boil potatoes and peel their skin. Put them in a bowl and mash them using a potato masher or with fork or even your hands.


DSC08953


DSC08954


3. Add oil in a pan and add chopped onions and green chilies. Saute them till the onions become translucent and tender.

DSC08952

4. Add Mashed potatoes to the pan and mix them with onions.

DSC08955

5. Add salt, Turmeric Powder and Red Chili Powder. Combine them.


DSC08956


DSC08957


DSC08958


6. Add amchur and also mix.

DSC08959

7. Add chopped Coriander leaves and Garam Masala. Mix together. Your stuffing is ready. Keep aside to cool down.


DSC08960


DSC08961


8. Melt butter in a bowl. Preheat the oven on 180 degree Celsius (Learn more about Oven Temperatures and Conversions)

DSC08962
9. Now unfold the thawed phyllo sheets on a dry surface. In order to avoid their drying up, place on top a damp kitchen towel. Always ensure to take out the sheet you are working with and cover rest of them.

DSC08963

10. Take 3-5 sheets of Phyllo sheets, one on top of each other and divide it into equal sized six squares using a sharp knife or pastry cutter. You need to be careful with it. Try not to tear the sheet.


DSC08964


DSC08965


11. Take one set of square and butter all layers with butter.


DSC08966


DSC08967


DSC08968


12. Put one spoon of stuffing and place it in the center of the square.

DSC08969


13. In a small bowl break one egg and add few spoons of milk and whisk together to make egg wash.


DSC08971


DSC08972


14. Apply this egg wash on all four sides of the pastry sheet using a pastry brush.

DSC08973

15. Take one tip of the pastry and fold it making a triangle.

DSC08970
  16. With the help of a fork seal the sides of the triangle by pressing it down.

DSC08974

17. Cover a baking sheet with aluminium foil or parchment paper and brush it with oil so that patties do not stick to the bottom.

DSC08975
18. Place the stuffed patties on greased baking sheet.

DSC08976

19. Brush the top with egg wash.

DSC08977

20. Bake for 15-18 minutes on preheated oven till the crust has turned golden brown. Serve hot with simple Ketchup and or Pudina Chutney or Chimichurri Sauce or Spinach Coriander Chutney.

You can even try other recipes made with Phyllo Pastry like Turkish Börek
[whohit]AlooPatty[/whohit]

VegPatties

[yumprint-recipe id=’76’]

CheesyGarlicBread_Featured1
This cheesy Garlic Bread is simply awesome. I am not exaggerating. You have to try it at home to believe me. In any given restaurant you will pay a handsome sum for those tiny piece of breads. If you make them at home they are not just easy on your pocket but also  a delight for your taste buds. You can always be stingy or generous with the cheese topping. The best part is it gets ready in no time and is a perfect party food.

Directions:
1. Preheat the oven to 400 degrees.

2.  You need to take any deli bread, it can be Italian or the bread roll you buy for sandwich from a bakery. A commercial bread loaf/slice may not bring in the same taste and texture. If its a big loaf cut the slices in slant to get maximum surface to put toppings. And you buy a packaged deli bread like me. It comes like a bun cut in two halves. Just perfect for garlic cheese bread.

GarlicBread1

3. In a bowl put some fresh parsley leaves and garlic cloves. If you do not have access to fresh parsley leaves you can always use a teaspoon of dried parsley leaves Add a generous drizzle of olive oil and blend it with a hand blender to form vinaigrette . If you have a small blender you can use that.


GarlicBread3


GarlicBread4


GarlicBread5


4.  Spread the vinaigrette over the bread slices and keep them on a baking sheet. Put one end of bread on the other with vinaigrette in the center like a sandwich.


GarlicBread6


GarlicBread7


5. Carefully roll your bread with some aluminium foil , place it on your baking sheet and pop it in your preheated oven for 10 minutes until the vinaigrette is well absorbed by the bread.


GarlicBread8


GarlicBread9


6. After ten minutes of baking, remove the bread from oven and  unwrap the aluminium foil and spread the foil on the tray. Place the bread slices on the tray, vinaigrette side up. Top it with some mozzarella cheese. I used the chili marinated mozzarella so it looks reddish. You can use any. Season it with some salt and pepper and sprinkle generous shavings of parmesan cheese.


GarlicBread10


GarlicBread11


7. Return the baking tray with bread into the oven for another 10 to 15 minutes until you see the cheese has melted and and its bubbly.

GarlicBread12
Enjoy it as a party snack or as a side dish with food of your choice.

CheesyGarlicBread_Featured2


[yumprint-recipe id=’1′] [whohit]garlicBread[/whohit]

GarlicKnots_Featured3
On any lazy Sunday when me and my husband get time to enjoy our cup of tea and yap, this snack gives us a perfect company. Its easy and ready in no time if you have some pizza dough readily available in your freezer. Its not very high in calories also so you can enjoy this anytime you wish. Its the same standard recipe which I use for my White Sandwich Bread, 

GarlicKnots_Featured1

Directions:

1. Take out the pizza dough bag out of freezer and put it in fridge overnight to thaw. If using fresh get the recipe here.

DSC05320


2.Preheat the oven to 400 degrees (Know more about Oven temperatures and Conversion), line a baking sheet with parchment paper, I am using Oddy Uniwraps Parchment Paper because this paper doesn’t burn on baking and doesn’t let the food stick to the paper.

DSC05323

3.Place the ball of dough on a floured surface and roll it into a circle using your roller pin.

DSC05321

4. Cut the dough into 1/2 inch strips using a knife or pizza cutter.

DSC05322

5. Wrap a dough strip around your two fingers and snip the remaining dough. Turn this end inside to form a knot. You can even roll it into small balls for convenience.


DSC05324


DSC05325


DSC05326


6. Place them on the baking sheet lined with parchment paper. Bake it in the preheated oven for 15-20 minutes until golden brown. In the meanwhile make the Vinaigrette .

DSC05327

4. In a small food processor, add the garlic cloves or garlic powder, oil and parsley.


DSC05328


DSC05329


DSC05330


5. Season with salt and pepper and blend until smooth to make vinaigrette.


DSC05331


DSC05332


DSC05333


6. Immediately as the knots are out of the oven put the knots to a large bowl and pour vinaigrette on top and toss together until they are well coated in the garlic oil.


DSC05334


DSC05335


DSC05336


7. Serve hot and enjoy the deliciousness of garlic parsley oil in these crisp pizza dough knots.

Other snacks you can try here are: Baked Paneer Corn KababsPotato SmileysHealthy Kachalu Aloo ChatRagi Masala TwistersSabudana TikkiVeg Shami KababArbi Ke Patte Ke Patode.

GarlicKnots_Featured2
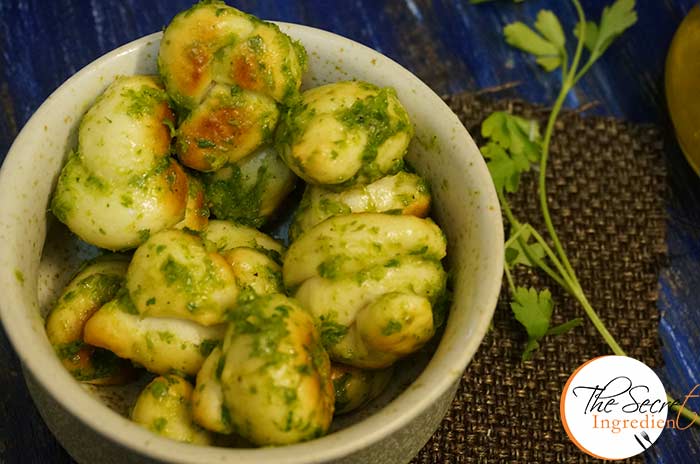
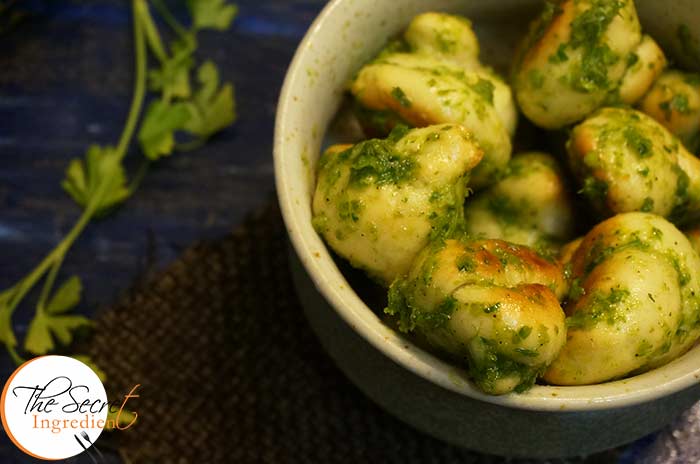
[whohit]GarlicKnots[/whohit]


[yumprint-recipe id=’4′]


[whohit]garlic-knots[/whohit]