Tag

health4u

Browsing

roastedchestnutwithcocoabutter_featured1

The magic of winters can be felt in its chill.. in the way the trees gracefully shed their leaves.. tinier days spent mostly in soaking the sun.. those longer nights where just about a hot cup of Chocolate makes everything warm and cozy.. sitting by the fireplace and eating Roasted Chestnuts. That just sums up my day in the hills  

There are days when I sulk that many vegetables are not available in the hills and then there are days I find myself blessed to find things which many people cannot dream of getting. So this constant tussle keeps me busy 😛 

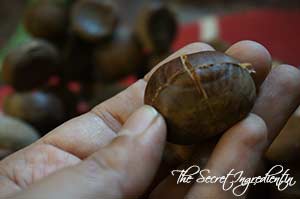
When I saw Chestnuts in the market I knew Christmas is just around the corner. The locals call it Pangar. This name denotes all kinds of chestnuts, some are edible and some are not. But of course the one I have used are edible and oh so delicious! The skin of the chestnut is very hard and in order to roast them you must also score them with a sharp knife, carefully hunh! If you dont score them they will pop and explode and can be a little dangerous. So wise people say score them and roast them and your festivity will be joyous without any accidents 🙂 

roastedchestnutwithcocoabutter_featured6
The festive season brings out the kid in me for I love to do cookies with warm spices, pies in all its forms and having hot roasted chestnuts takes it to a new level. I roasted them and when they popped open I tossed some Coffee Butter on them. That was the best thing I have done all season  What are your plans for the holiday season? Write to me under the post I would love to hear from you. 

Directions:

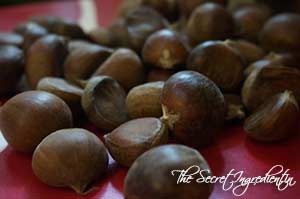
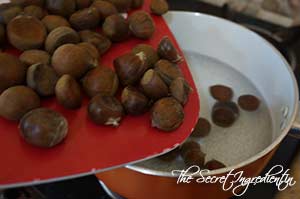
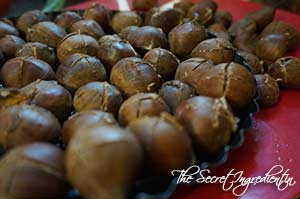
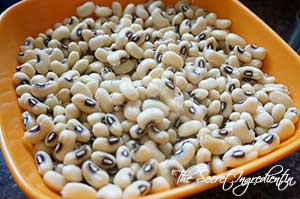
1. Choose chestnuts which are not bruised or open from anywhere. If their shell is punctured its likely they will be bad and rotten from inside.

dsc08718

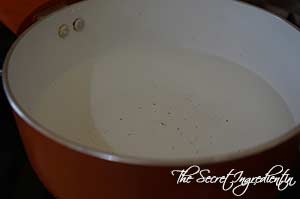
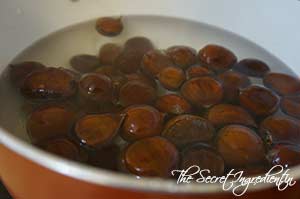
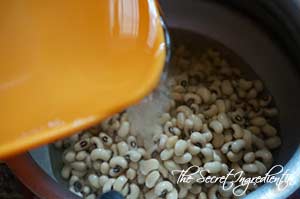
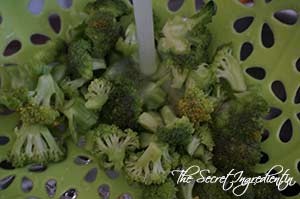
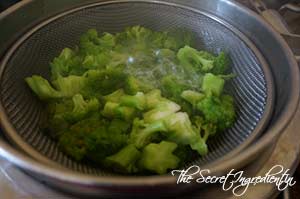
2. Boil some water in a sauce pan. and when it comes to a boil add the chestnuts and let them soak in for 5 minutes. 


dsc08717


dsc08719


dsc08720


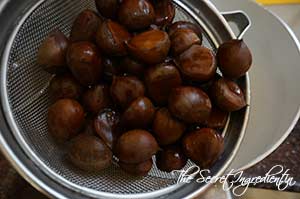
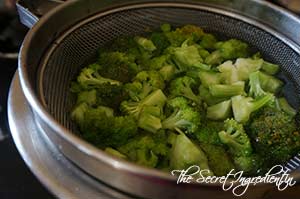
3. Drain them in a colander and pat them dry with a kitchen towel.

dsc08721
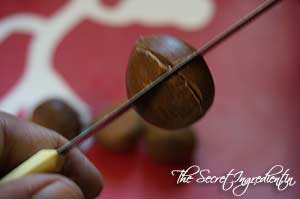
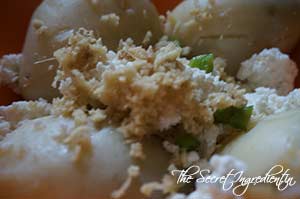
4. Now using a small pairing knife make an X on the face of each chestnut. I know its a huge talk and by the end of it my fingers were paining. But someone has to do the dirty job 🙂


dsc08723


dsc08722


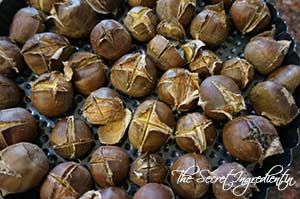
5. Once this stage is done its all easy peasy. Place the scored chestnuts in a baking tray with Scored part facing up. Preheat the oven to 200 degree Celsius for ten minutes and pop the tray inside the oven and bake for about 30-40 minutes. You will hear the popping and that will bring happiness to your soul. The skin of the chestnuts will curl up that’s an indication that they are doing just fine.


dsc08724


dsc08730


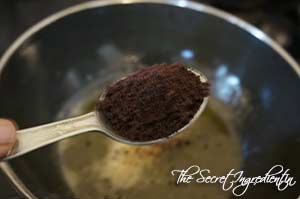
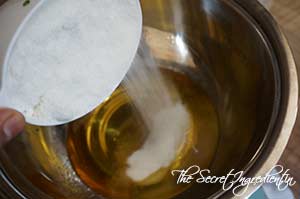
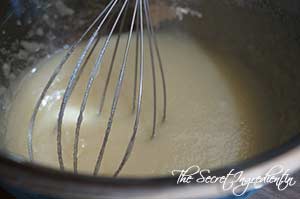
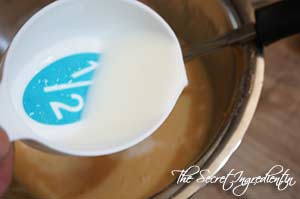
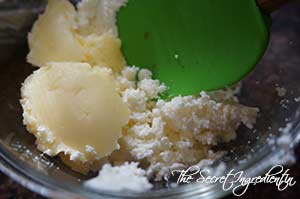
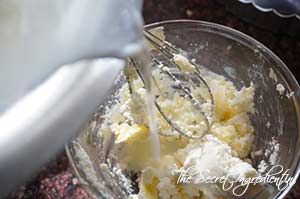
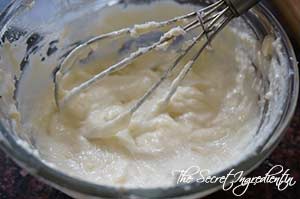
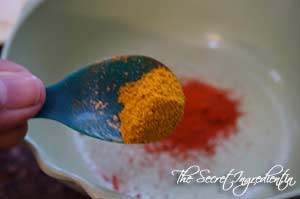
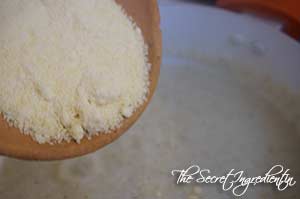
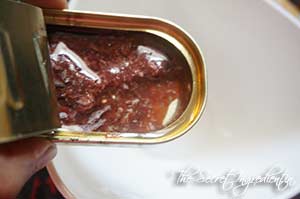
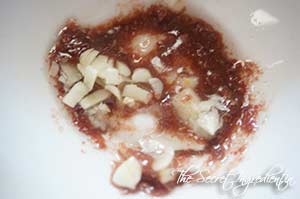
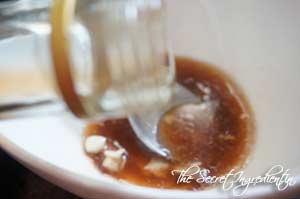
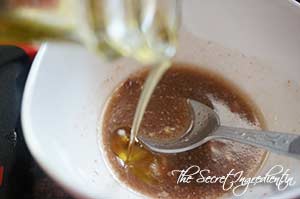
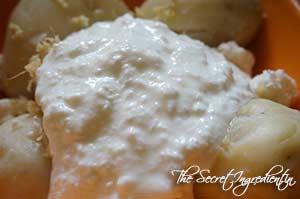
6. In the meanwhile we can work on the cocoa coffee butter. In a saucepan add butter and Maple syrup. Once it is bubbly remove it from the flame.


dsc08726


dsc08725


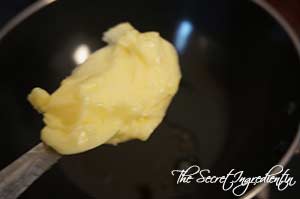
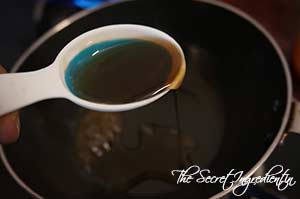
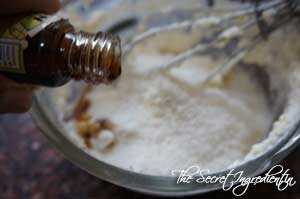
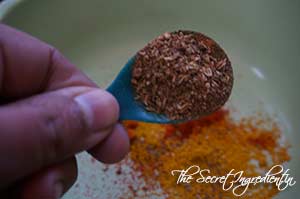
7. Also add instant coffee and vanilla essence. Keep stirring till the coffee has dissolved. 


dsc08727


dsc08728


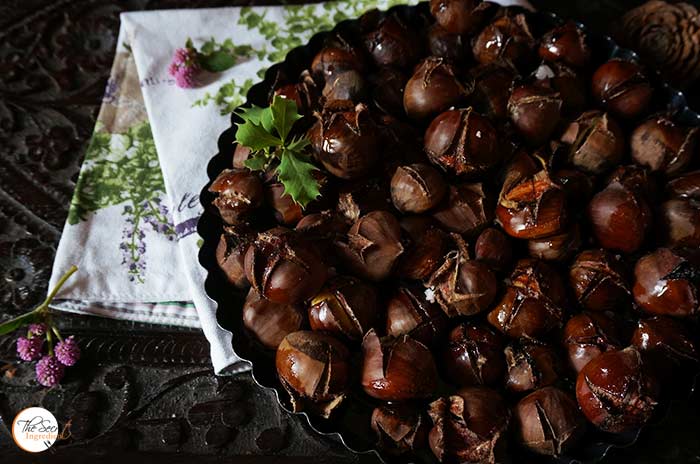
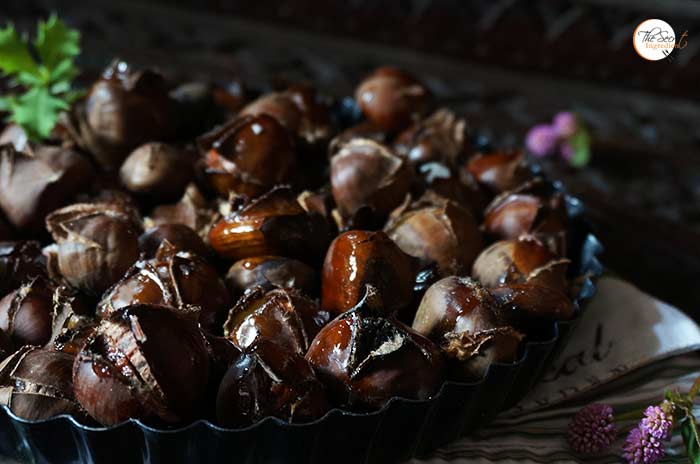
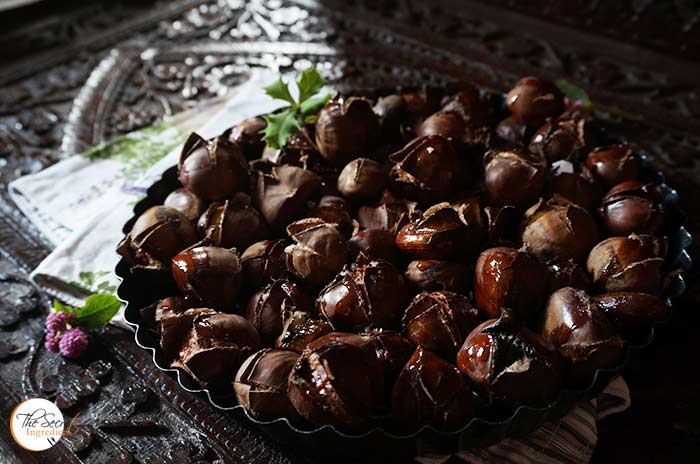
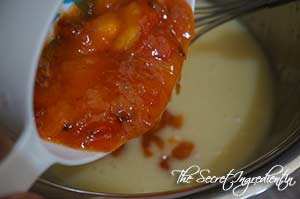
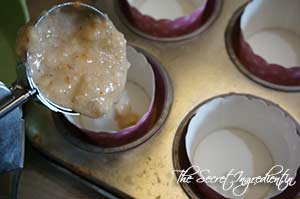
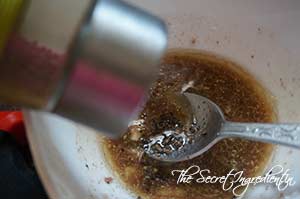
8. Place the roasted chestnuts in a serving platter with X side up. Drizzle this Cocoa Coffee butter on top and let it sink inside from the cracks. 

dsc08731
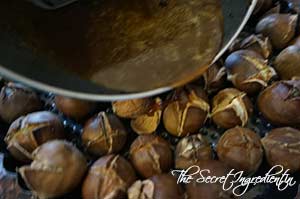
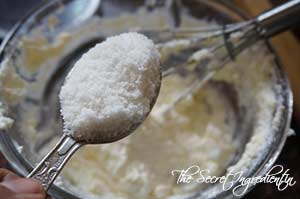
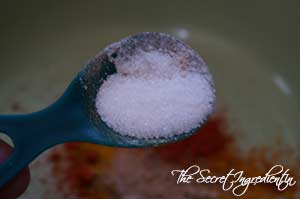
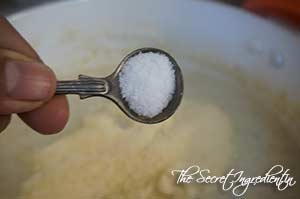
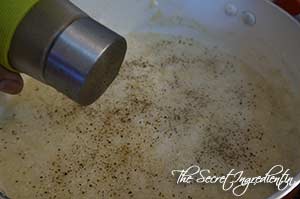
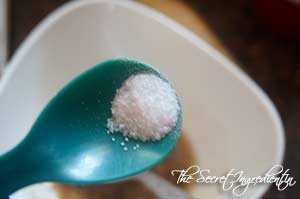
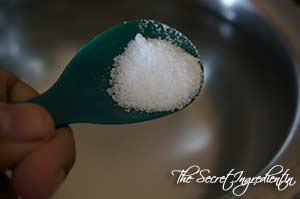
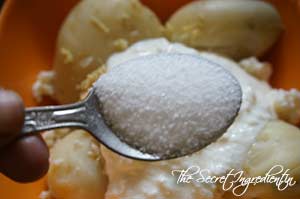
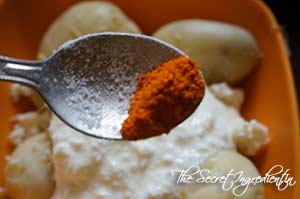
9. Cover the chestnuts for a while for nuts to absorb the flavour. When they are easy to touch season them with Flaky Crystal Salt and serve.

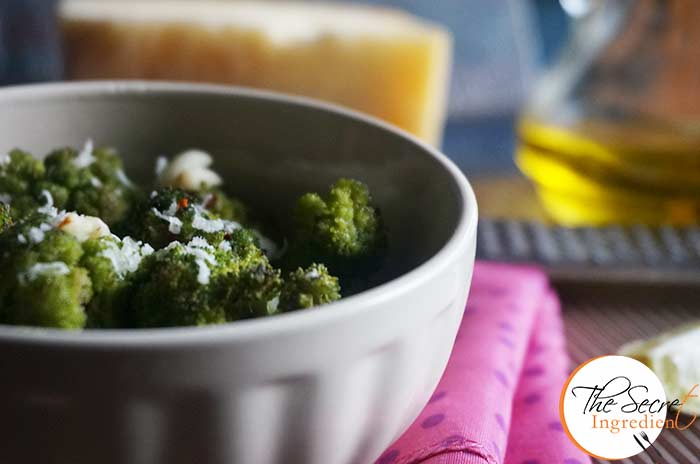
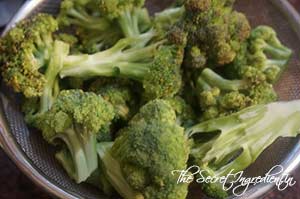
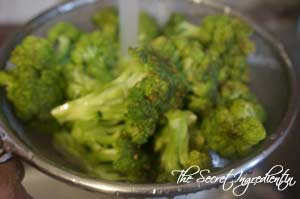
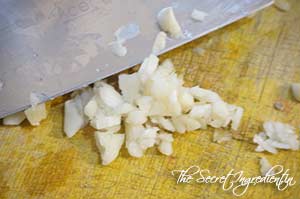
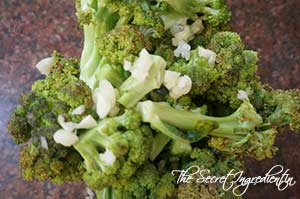
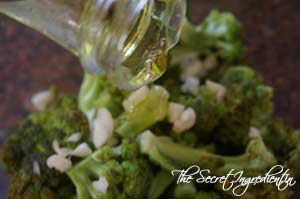
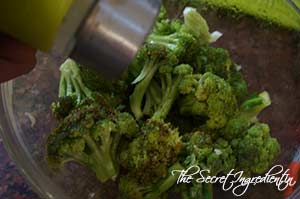
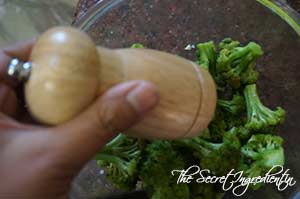
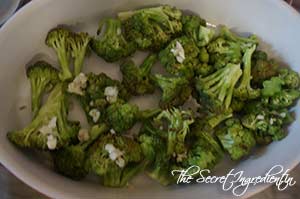
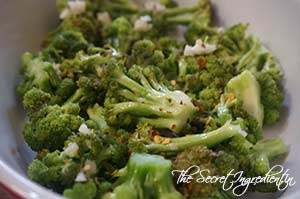
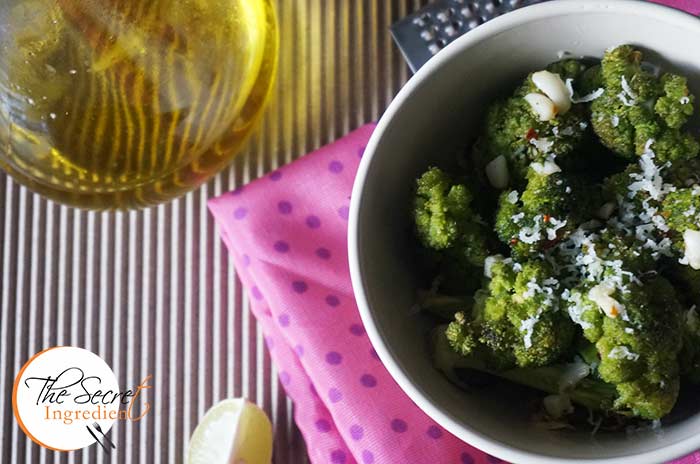
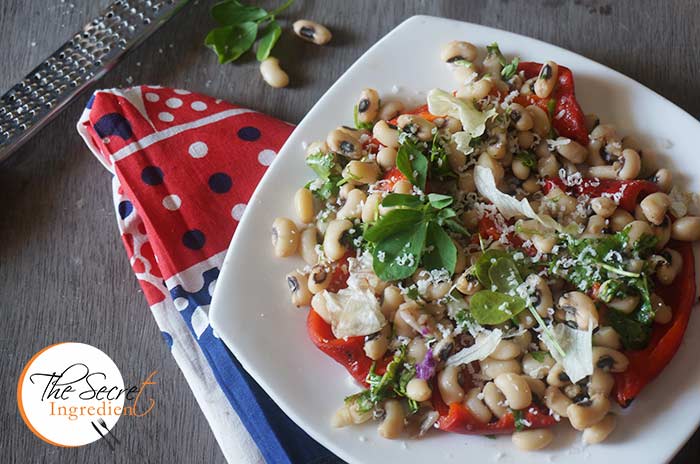
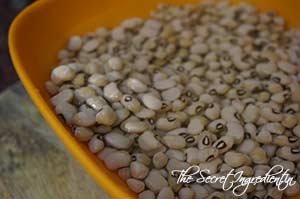
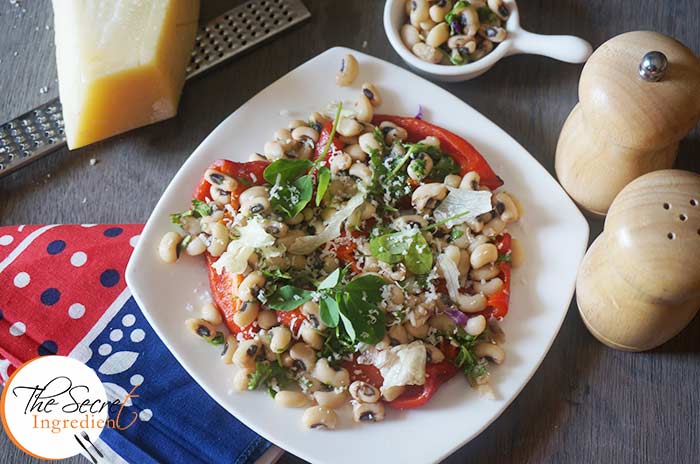
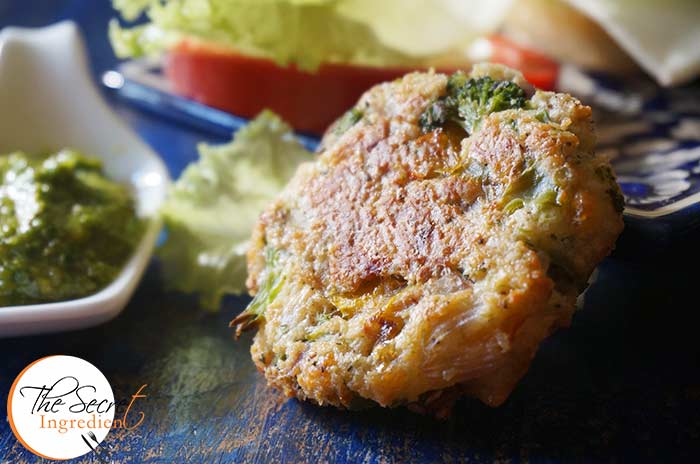
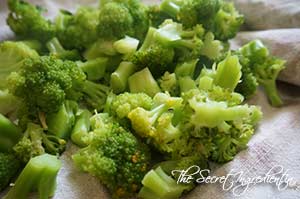
You can even try Roasted Broccoli with Garlic and Lemon Roasted Bell Pepper & Black Eyed Peas SaladRoasted Red Bell Pepper & Pine Nuts Fettuccine PastaRoasted Rosemary Garlic Potatoes.

roastedchestnutwithcocoabutter_featured2
[whohit]RoastedChestnutwithCocoaCoffeeButter[/whohit]

[yumprint-recipe id=’263′]

persimmoncupcakes_featured2

Last year when I saw Kaku or Ramphal or as it is called as Persimmon in english in my local market I was thrilled to try them. We get Hachiya variety of Persimmons in our hills which is a sweeter variety but tannic and astringent in taste if you eat them unripe. By ripe I mean they should be almost squishy and the pulp should almost run out of the fruit. Surprisingly the locals dont like the taste of the fruit. But the Persimmon Rum Cake I made last year was amazing. This year I wanted to take my experiments to a next level. I tried to make a healthy bake by adding Organic Sorghum Flour and Whole Wheat Flour. I made these gorgeous and delicious cupcakes with these enriching flours. I picked up Sorghum Flour or Jowar ka Atta from Conscious Food. Their products are absolutely top notch. We are proud to have partnered with them and now you can buy them on our online store The Gourmet Shop

persimmoncupcakes_featured1

I sent this recipe for the 2nd Anniversary Ovenderful Mom Bakers Community Annual Contest . With the grace of God my recipe got a consolation prize as one of the healthy bakes. So if you have persimmons on hand and healthy cupcakes is on your mind this is a winning recipe, well literally 🙂 

Directions:
1. You need to peel the skin of Persimmons and spoon out its pulp. If you are using the Hachiya variety make sure its squishy ripe. Remove seeds if any. With the help of a potato masher mash the pulp and set aside.

dsc09296

2. In an another bowl add vegetable oil and sugar. 


dsc09297


dsc09298


3. Whisk the sugar and oil till sugar is dissolved. Slowly whisk in eggs and make the mixture cremier.


dsc09299


dsc09300


4. Add the persimmon pulp and combine. Also add milk , vanilla extract and whisk well.


dsc09303


dsc09304


dsc09346


5. In another bowl add Wheat Flour and Conscious Food Sorghum Flour and combine them.


dsc09305


dsc09306


6. Add pumpkin pie spice and Baking soda to the flour and combine. 


dsc09308


dsc09307


 7. Sieve the dry ingredients to the wet ingredients and combine till everything is moistened. Do not over mix.


dsc09333


dsc09334


8. Preheat your oven to 180 degree C (Learn more about Oven temperatures and Conversions) and if you are using muffin liners, line your muffin tray with the liners. I am using stand alone bakeable cups. You can buy them at The Gourmet Shop. Pour the batter in the cups and fill only 3/4 of the cup. Bake in the preheated oven for 20-25 minutes until the top is golden in colour and the tooth pick inserted comes out clean. 

dsc09335
9. While these are baking make the cream cheese icing by whisking Cream cheese and butter in a bowl. Add a little milk to make the icing a little loose.


dsc09342


dsc09343


10. Once the icing is whisked add powdered sugar or icing sugar and continue to whisk.


dsc09344


dsc09345


11. Once the sugar has mixed well set the icing aside. Line a pipping bag with a pipping nozzle of your choice. and cut the top edge with a pair of scissor. 


dsc09347


dsc09348


dsc09349


12. Place the bag in a glass and pour the icing in it. Squeeze it to go further down. Now fold the top of the bag to avoid icing from flowing back.
dsc09350

14. Ice your cupcakes after they have cooled down completely. If you like you can top the icing with a half slice of persimmon. Enjoy.

You can even try Persimmon Rum Cake.

Other Cupcakes and Muffins you can try : Papaya Chocolate Muffins and Vegan Eggless Chocolate Muffins 

persimmoncupcakes_featured4
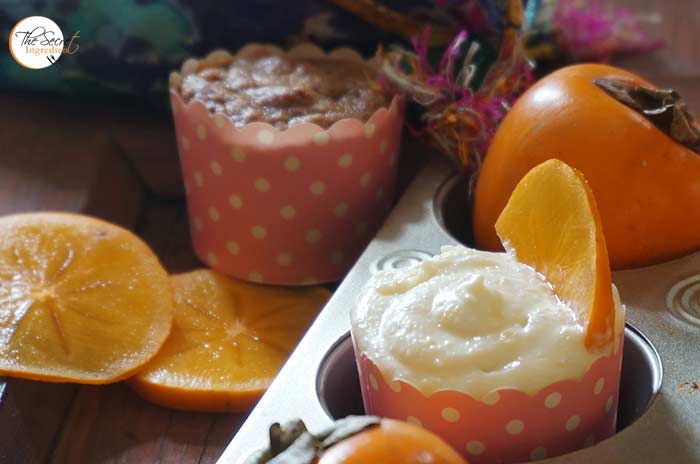
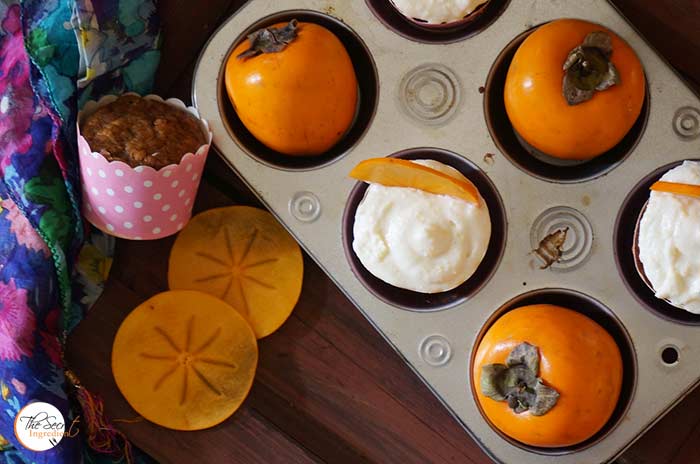
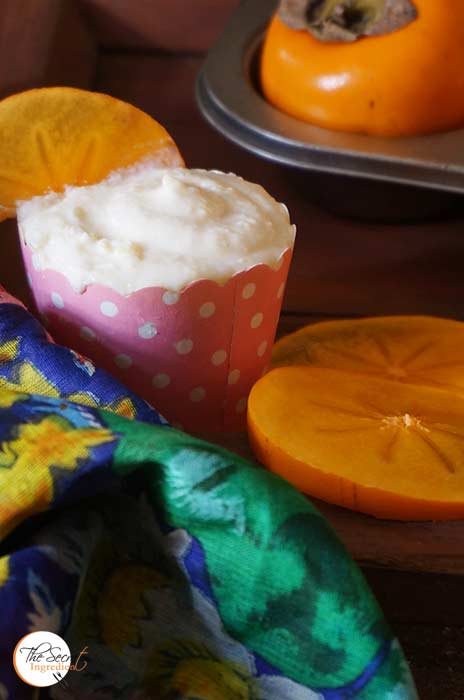
[whohit]PersimmonCupcakes[/whohit]

[yumprint-recipe id=’262′]

baigan-bhaja

Since the starting of the year when I got my air fryer I have been trying recipes giving them a new healthy avatar. I made Malai KoftaKamal Kakdi Kay Koftay Plantain & Potato Kebabs and many other things in this amazing gadget. It has changed the way we eat. The things I avoided because they were fried and greasy have come back in our life but now with a healthy makeover. Making this decisions not only keeps our weight in control but also gives us the pleasure of eating everything (almost) without feeling guilty. 

baigan-bhaja

Recently, I was thinking about making Begun Bhaja which are deliciously crispy Aubergine Slices which are marinated in spices and then deep fried. This recipe hails from Bengal which is known for its cuisine and culture. I love traditional recipes and dont wanna twist and turn them much. I followed the same recipe however I changed the way you cook it, I air fried them to make them guilt free. They were still crispy and delicious. If you are thinking to change your lifestyle do invest in an airfryer and make healthy choices, because you are what you eat 🙂

Directions:
1. Take a big sized Aubergine or Eggplant. The bigger the size the bigger will be the slices. Wash it and pat dry.

dsc09125
2. Cut it into thin slices about 1 cm thick and soak them in salted water for about 20-25 minutes. We soak the eggplant slices because sometimes the eggplants can be bitter and this will ensure they loose their bitterness. 


dsc09126


dsc09132


3. In the meanwhile in a bowl add Red Chili Powder and turmeric powder.


dsc09127


dsc09128


4. Also add garam masala, amchur powder.


dsc09129


dsc09130


5. Also season it with salt and add chana masala. yes that does the trick!


dsc09133


dsc09134


6. Pat dry the soaked pieces of eggplants and rub the dry spice mix on them on both the sides.


dsc09135


dsc09136


7. Place them in the bowl and sprinkle some lemon juice on them. Let them marinate for 10 minutes. 

dsc09137
8. Preheat your airfryer for 10 minutes on 180 degrees.

dsc09140
9. In a flat plate take some chickpea flour or besan and coat the marinated eggplant with flour on both sides. You can dust the extra.


dsc09141


dsc09142


10. Once the air fryer is preheated add a few slices on the wire rack of the basket and brush with some mustard oil. Let it air fry for 15-18 minutes. Flip it half way and brush the other side also with oil and continue to cook till you see them golden brown and crisp. Follow the same with rest of the slices.

dsc09145
11. Serve hot with dal and roti or you can just eat it like a snack with your drinks 🙂 

Other Eggplant recipes you can try are: Baingan Ka Bhartha Bharwan BainganBaingan Ka RaitaBaigan Ka Salan

baiganbhaja_featured3
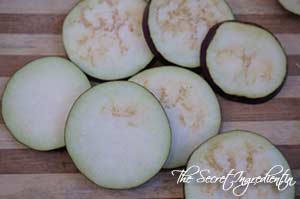
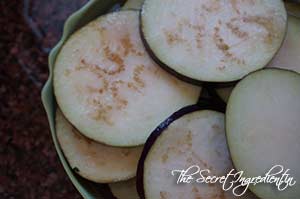
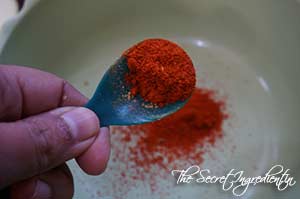
[whohit]BainganBhaja[/whohit]

[yumprint-recipe id=’255′] 

We are an egg loving family. For us our breakfast has to be with eggs but the same old omelette and fried eggs can be boring at times. So when I picked up this Polenta from SOS organics I was keen to make something with it. Polenta is widely used in Italy as a porridge. Its also known as Corn Semolina. The corn is coarsely ground in a mill and is used widely in place of wheat and rice. Its excellent for those people with gluten allergies. 

This is not exactly an elaborate recipe post as you are used to seeing on my blog but its an interesting breakfast idea which can be made in a jiffy and which is utterly delicious and nutritious. You must be well aware by now what emotions I have with respect to Eggs. I have recently come across high protein, organic and nutritious Eggs from Eggee. And trust me I never had better eggs than this in India. If you can lay your hands on Eggee I insist you try any recipe with it and you will feel the difference in taste and texture. Earlier I had posted a few other egg breakfast recipes on blog like Spinach Mushroom Quiche, Italian Frittata with Mushrooms and SpinachShakshoukaWrapped French Toast Mexican Casserole Eggs. However, this combination of simple fried or poached egg with polenta and pesto is a killer. If you are looking for homemade Italian Basil Pesto  you can try here. Nevertheless, you can buy in a jar. Just cook your polenta following the directions below wand assemble everything together.

Directions:

1. For polenta, pour water in a saucepan and bring it to a boil. Add polenta and simmer it for 20-25 minutes till the polenta is cooked and has absorbed water.


DSC05430


DSC05431

DSC05432


2. Take it off the flame and season with salt, pepper and parmesan cheese. Mix thoroughly and set aside for assembly.


DSC05434


DSC05436


DSC05433


3. Fry eggs. If you like you can even poach them.

DSC05447

4. You can make your own pesto by using fresh ingredients and you can follow this recipe. Now in order to plate this dish ladle some Polenta in a large serving bowl, garnish with Pesto and olive oil and place your fried egg in the centre resting on the bed of Polenta and pesto. You can even garnish with pine nuts.

Related Recipes: Italian Basil Pesto

Other Delicious egg recipes you can try:  Italian Frittata with Mushrooms and SpinachShakshoukaWrapped French Toast Mexican Casserole Eggs.

[yumprint-recipe id=’237′] 


BabyCornSatay_Featured1

Last week when I had plenty of Baby corns lying in my refrigerator I wanted to use them differently. Not just adding them to any Thai or Chinese dishes. I looked all over the web, unfortunately there were not  many recipes which excited me. They were the usual Baby Corn Manchurian in hot chili sauce. But then I found this recipe by Lubna Karim, a fellow blogger from Yummy Food. The recipe instantly pleased me. It stood top in all three parameters. It was easy, quick and fairly healthy. These were Baby Corn Satays in Indianised avatars to suit our palettes  

BabyCornSatay_Featured4

Satays are Southeast Asian Dishes with pieces of Grilled Meat on skewers. They are some what close kin of Seekh Kebabs famous all over the world. However, this vegetarian version was totally terrific and perfect for parties.

Directions:

1.  Wash and clean Baby Corns and place them to steam in a steamer filled with water. Close the lid while the baby corns cook through for about 10-15 minutes depending on the thickness of corns. You can also microwave them for 3 minutes till they are blanched. You should be looking at baby corns which are ready to eat but still hold their crunch. 


DSC06650


DSC06651


2. In a bowl add plain Yogurt or curd, corn flour and turmeric powder.


DSC06652


DSC06653


DSC06654


3. Also add red chilli powder, carom seeds or ajwain and garam masala.


DSC06655


DSC06656


DSC06657


4. Also add salt and minced garlic and marinate the blanched baby corn in this. Let the baby corns sit in the marinade for 20 minutes or so.


DSC06658


DSC06659


DSC06660


5. After 20 minutes, pour some oil in a non stick pan.

DSC06661

6. Add the marinated baby corns to the pan along with the marinade. Toss them in the oil till the baby corns have absorbed the marinade and have attained a slight golden colour.


DSC06662


DSC06663


DSC06664


7. Insert the skewers in each piece and serve hot with Mint Chutney or simply ketchup.

Other Party Menu ideas you can try are: Baked Paneer Corn KababsHealthy Kachalu Aloo ChatTangy Mint Potatoes and Veg Shami Kabab.

BabyCornSatay_Featured3
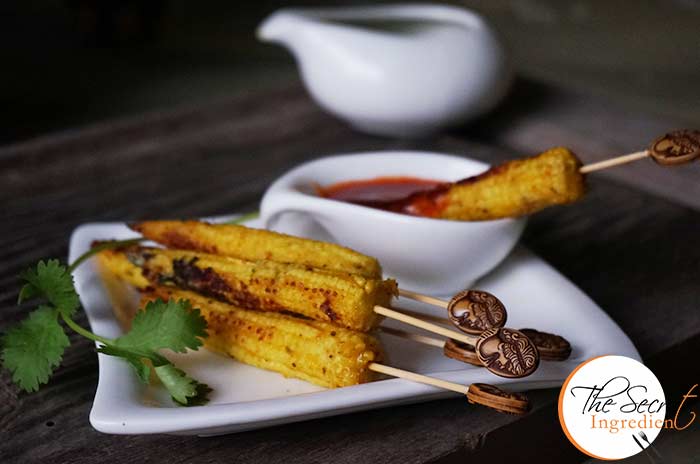
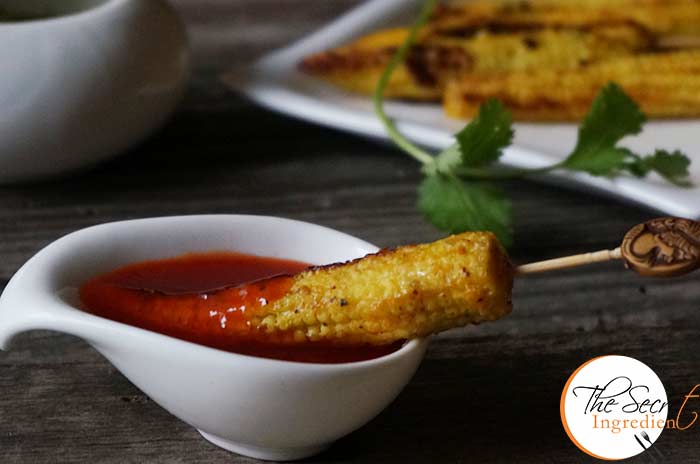
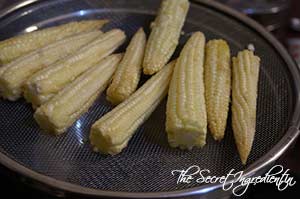
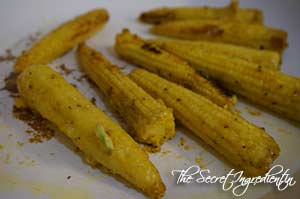
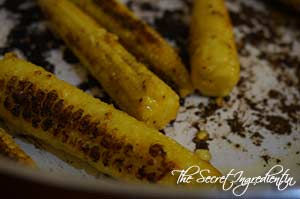
[whohit]BabyCornSatay[/whohit]

[yumprint-recipe id=’220′]


RoastedBroccoli_Featured2
After months of consistent exercise regime and healthy eating I am ten kilos down. The irony of a Food Blogger is that you have to cook fancy schmancy food which is not always healthy. At the end of the day that ends up in your butt. But the only way to escape is to compensate all those calories with equal amount of exercise. In the past few months I also ended up cooking and baking healthy recipes which makes eating a guilt free experience. Addition of soups and salads in my diet has uplifted by energy level. 

RoastedBroccoli_Featured3

Boiling Vegetables is so underrated and cruel. Roasting them gives them that crisp coat and enhances its flavour. I love to roast vegetables and doing it with my favourite Broccoli makes it top notch delicious. The addition of Garlic to this makes it a lethal combination. You must try it to believe me. If you like a little spicy, pep it up with some red chilli flakes.

Directions:
1. Preheat your Oven to 200 degree Celsius (Learn more about Oven temperatures and Conversion). Cut a Broccoli head into small sized florets. Place them in a colander and wash them thoroughly under running water for any grit. 


DSC06441


DSC06442


2. Chop some cloves of garlic finely and toss them with the broccoli florets.


DSC06444


DSC06445


3. Add a drizzle of Olive oil.

DSC06446
4. Season with Salt & Black Pepper. 


DSC06447


DSC06448


5. Transfer the broccoli in a baking dish and place in a single layer. Sprinkle some Red Chilli Flakes.


DSC06449


DSC06450


10. Bake in the oven for 20-25 minutes until the broccoli is tender. Toss in lemon juice, parmesan cheese, and 1 tablespoon olive oil; serve immediately.

Other Broccoli recipe you can try here are: Healthy Broccoli PastaCream of Broccoli Soup with ChivesBaked Broccoli Cheese Patties.

You can even try Roasted Potatoes with Garlic and Rosemary.

RoastedBroccoli_Featured1

[yumprint-recipe id=’218′] 


RoastedBellPepper&WhiteBeanSalad_Featured3

The mercury is rising all across the nation and the effect has started to be felt even on our hills. The parched summer gives the appetite a toss and all you can think of eating is Summer Salads and drink cool smoothies and drinks. I have already made my favourite Mexican Mango & Black Bean Salad yesterday and also tried Couscous and Chickpea Salad last week.

RoastedBellPepper&WhiteBeanSalad_Featured4

 So which means it was time for me to try out something new. I had some Black eyed peas or as we call them lobia in Hindi in my pantry. No one in my home is fond of lobia. I tried to use it in my salad for that protein power and paired it with charred red bell peppers. The most delightful was its dressing. I had canned Anchovies  in Oil and I added it to the Red Wine Vinegar and tossed it on my bean salad. The pungent and strong flavour it added to my salad was amazing. If you are a vegetarian or do not eat fish then I would say you can easily skip adding this to your salad. Rest everything remains the same.

Directions:

1. In a bowl soak lobia or Black eyed peas in water for an hour. Add water and pressure boil it for  15 minutes until al dente. Make sure its not mush. Alternatively you can use canned Black eyed peas.


DSC06240


DSC06241


DSC06242


3. Take red Bell Peppers and Char them and peel its skin. and cut into large chunks and set aside. Learn how to roast Red Bell Peppers in Oven and peel its skin.

DSC06243

3. In a bowl add canned anchovy, without the oil and mix with minced garlic. 


DSC06244


DSC06245


4. Add red wine Vinegar and Olive oil.


DSC06246


DSC06247


5. Season with Salt and Pepper.


DSC06249


DSC06248


6. Add Chopped Fresh Coriander Leaves. You could even add parsley instead of Coriander. It will give different yet a fabulous taste.

DSC06250

7. Add boiled and drained Black eyed peas to the Vinaigrette and combine.


DSC06251


DSC06252


8. For the assembly, place the roasted pieces of Bell pepper on the platter and spoon the top with the black eyes peas in the vinaigrette. You can throw in any greens to balance the flavour. I used a few leaves of iceberg lettuce and a few leaves of Fenugreek or methi. I know Fenugreek sounds weird but it totally balanced out the sweetness of Peppers. Last but not the least a generous sprinkle of Parmesan Cheese.

Other Salads you can try are: Grilled Chicken Salad Couscous Salad with Chickpeas in Lemon Olive Oil VinaigretteFresh Mexican Black Bean and Mango SaladSautéed Red Bell Pepper and Olive Pasta SaladSundried Tomato Pasta Salad

RoastedBellPepper&WhiteBeanSalad_Featured6
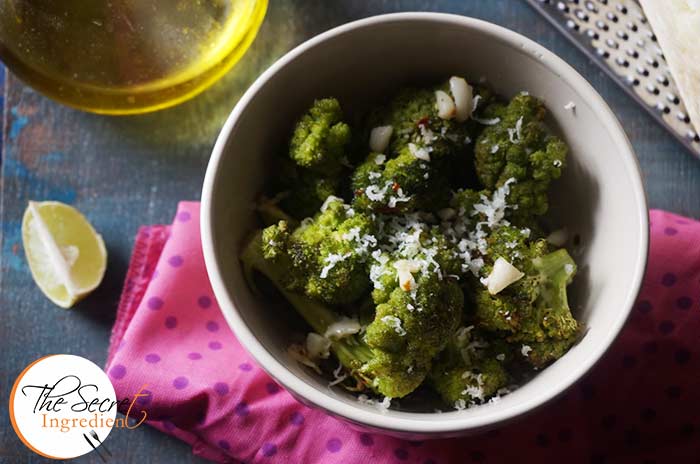
[whohit]RaostedRedPeppers&BeanSalad[/whohit]

[yumprint-recipe id=’213′]

BroccoliPatties_Featured5

Its been a while that I have fried anything in my wok. I either air fry stuff or bake them to perfection. I guess eliminating fried food from my life has helped me lose weight and I actually feel good about it. Some time back I had posted Baked Paneer and Corn Kebabs, they were immensely loved by you all and also by my family. So the other day I had Broccoli florets and I wasn’t in a mood for Cream of Broccoli Soup. I decided to make baked croquettes with Broccoli with an addition on egg and bread crumbs. What I thought would turn out an average dish came out an amazing recipe.

BroccoliPatties_Featured4

We tugged it under a burger bun and smeared some Parsley Pistachio Pesto over it and enjoyed our lunch in comfort. It was the best broccoli recipe I have ever made. If you have Broccoli Naah! people in your family, surprise them with this amazing dish.

Directions:

1. Take one head Broccoli and cut it into florets. Wash well under running water.


DSC05824


DSC05825


DSC05826


2. In a large pot add some water and bring it to a boil. Add salt to it.

DSC05827

3. In a wire mesh submerge Broccoli florets in water for  seven to nine minutes or until they are blanched al dente. Don’t let them go mush.


DSC05828


DSC05829


4. Drain the broccoli and place them on a kitchen towel and squeeze out all the water. Give broccoli a coarse chop under the knife and set aside.


DSC05830


DSC05832

DSC05836


5. Chop Onions and Garlic and set aside.

DSC05833
6. In a pan add little oil and add chopped onions and garlic. Oh I had some chopped red and yellow bell pepper I added them too for colour. But its optional. Saute them until they are slightly cooked.


DSC05834


DSC05835


7. In a bowl mix Broccoli, eggs, onions and garlic, grated cheese and breadcrumbs.

DSC05837

8. Add salt and pepper to the mix and combine.


DSC05838


DSC05839


9. Line a tray with Parchment Paper and preheat the oven* to 200 degree Celsius.(Learn more about Oven temperatures and Conversions). Take a little dough in your hands and shape them into patties.

DSC05841

10. Place them on baking sheet and brush them with oil.

DSC05842

11. Bake in the oven for 15 minutes. Flip and bake for another 15 minutes or until browned and crispy.

DSC05843
12. Tug them inside a burger bun and top it with Parsley Pistachio Pesto and enjoy hot. You can also line the burger with veggies and cheese.

Other Broccoli dishes you can try are: Healthy Broccoli PastaRoasted Broccoli with Garlic and Lemon & Cream of Broccoli Soup with Chives 

Other Croquettes and Kebabs you can try here are: Baked Paneer Corn Kababs Tapioca CroquetteVeg Shami KababAirfried Yogurt & Cottage Cheese Kebabs for Fasting.

BroccoliPatties_Featured2
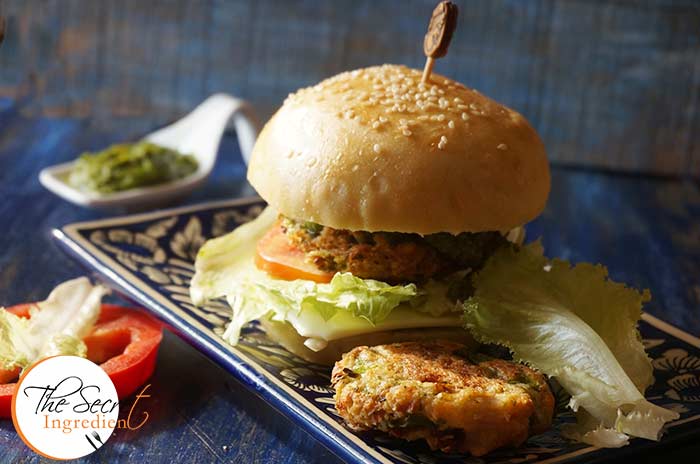
[whohit]BroccoliCroquettes[/whohit]

[yumprint-recipe id=’211′]

VratWaleDahiKebab_Featured1
Ever since my husband gifted me this Air fryer I cant stop trying recipes which I had earlier put in abeyance for I never wanted to eat fried food. This Navratri I was very excited because a lot of fasting food is fried and I gotta a chance to try variety of dishes in air fryer. Yesterday when I noticed my facebook friend Geeta di had posted the Dahi Paneer Kebabs for Vrat or Fasting, I could not control myself and made these in a jiffy. They were so delicious that my boys (Fully grown as well as my little kid) ate them tastefully.

VratWaleDahiKebab_Featured2
The taste was enhanced by the fact that they were healthy. I used half a teaspoon of oil for 9 kebabs, which isn’t bad at all. Ishall be posting more of my trial in my new Airfyer <3 Oh man! I am loving this.. 

Directions:

1. Wash and Boil some potatoes and peel off their skin. Place them in a mixing bowl.

DSC06153
2. Add crumbled paneer or Cottage Cheese to it.

DSC06154
3. Add Chopped Green Chillies and Grated Ginger.


DSC06155


DSC06156


4. Add Plain Thick Yogurt. You can even use hung curd. I had a creamy thick curd which wasnt runny, so I used that.

DSC06157
5. Add salt, red Chilli Powder and Garam Masala.


DSC06158


DSC06159


DSC06160


6. Add chopped Coriander leaves.

DSC06161
7. Add Singhara flour or also known as Water Chestnut Flour and combine everything well.


DSC06162


DSC06163


8. Take small portions and shape them into patties and place them all on a plate.


DSC06164


DSC06166


9. In the meanwhile preheat your Air Fryer to 180 degrees for 10 minutes.

DSC06165
10. Place the kebabs into the basket of air fryer and brush them with little oil on top.

DSC06167
11. Air fry them for 15-18 minutes till you get a golden colour on top. If you wish you can brush them with more oil in half time. I did not. Serve them hot with Phalahari Chutney

Other Navratri recipes you can try are:  Sabudada KhichdiSwang ke Chawal ki KhichdiSabudana Tikki Khajoor Til Ke LaddooArbi Masala CurryGajar Ka HalwaMakhane Ki KheerRasgullaSwang Ke Chawal Ka HalwaSwang Ke Chawal Ki PhirniAnaar Aloo ka RaitaPalak Dhaniya ChutneyCoriander Chutney without Onion Garlic, Vrat Ki Roti.

VratWaleDahiKebab_Featured3[whohit]DahiKebabForVrat][/whohit]

[yumprint-recipe id=’207′]