Tag

health4u

Browsing

AparagusSoup_Featured1

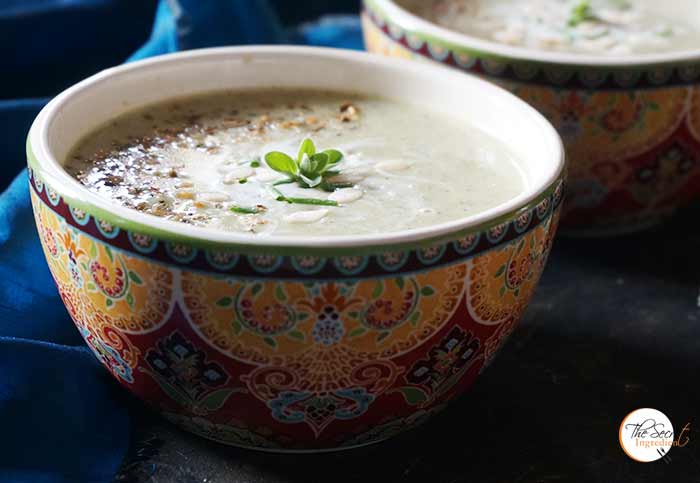
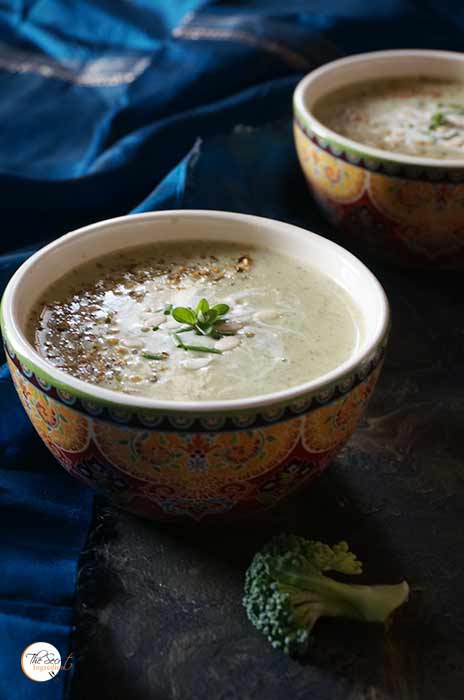
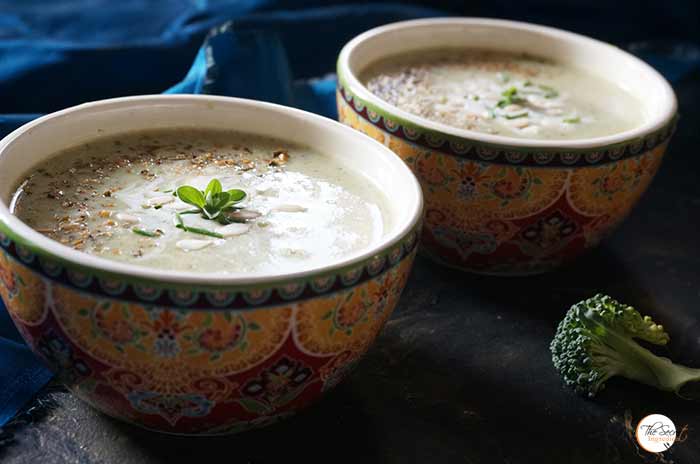
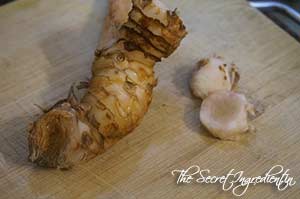
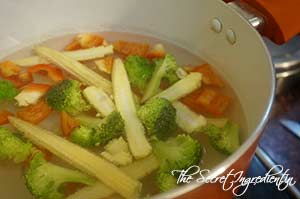
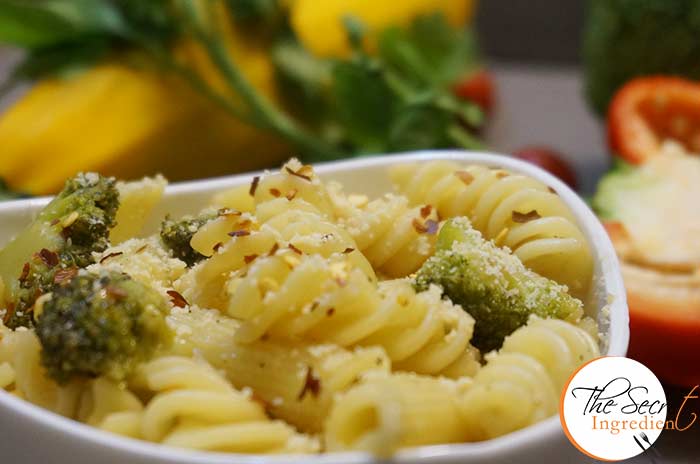
On my last trip to Delhi I got these Asparagus. I remembered how I gorged on these while I was in Mexico. I loved the Roasted Asparagus with Parmesan Cheese. Oh the flavour still lingers in my head. I wish to do that recipe for you next time I get Asparagus. This time I wanted to share with The Asparagus Soup which is relatively healthy if you control the cream part. Its a favourite in my family. Just team it up with a good hearty sandwich or pasta for that matter and your meal is complete. 

AparagusSoup_Featured2

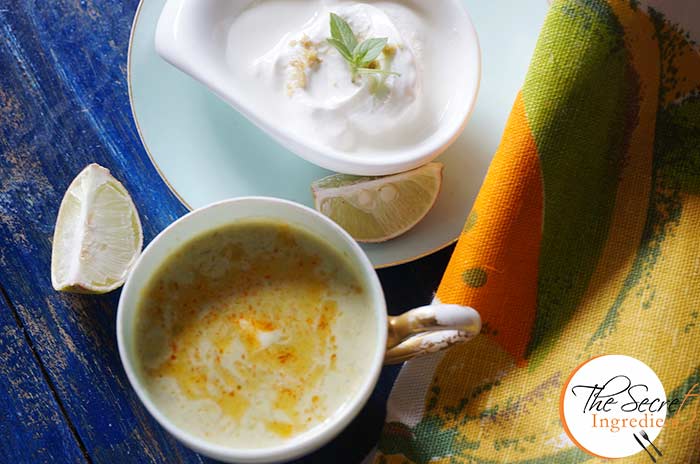
The original Recipe from Chef John added zesty Lemony Cream on top. I did the same along with some Chilli Oil for that extra kick! Both the versions are delish. 


Directions:
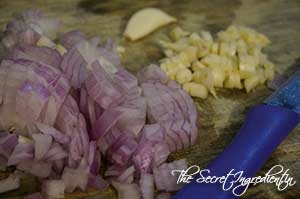
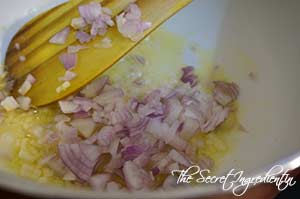
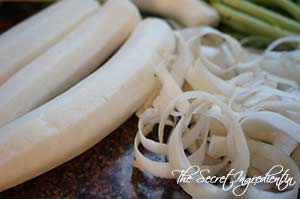
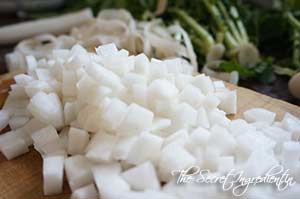
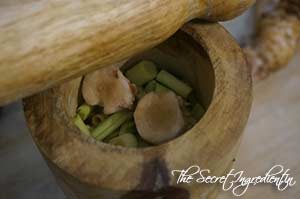
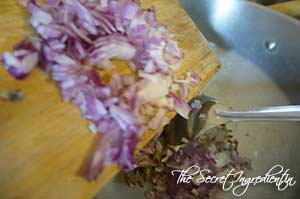
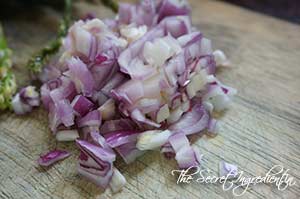
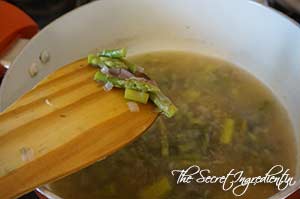
1. Chop some Onions and set aside. You can use white Onions but all I had was the red ones.

DSC05522

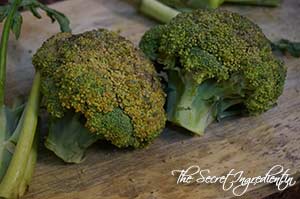
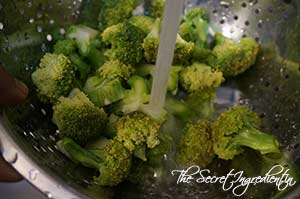
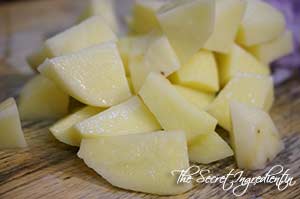
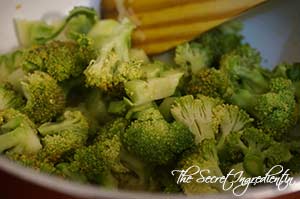
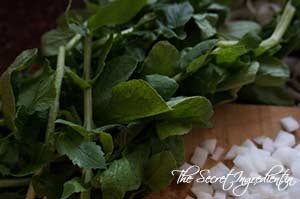
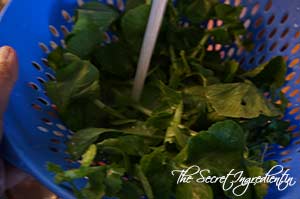
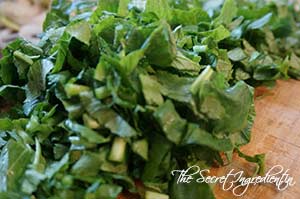
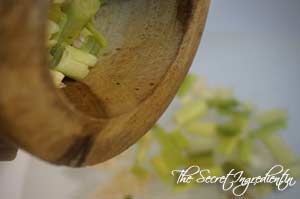
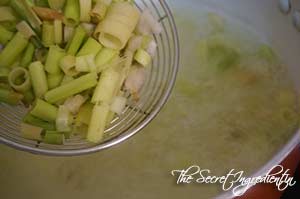
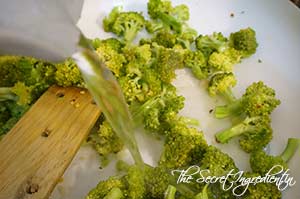
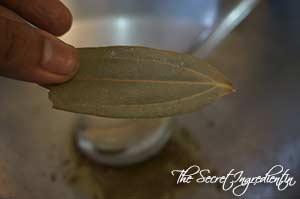
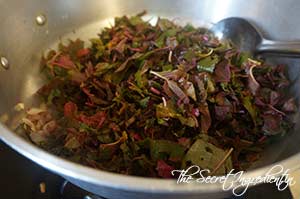
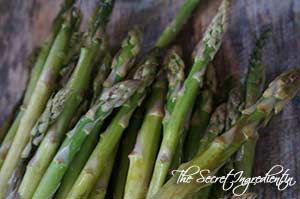
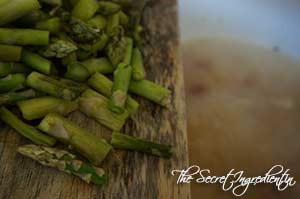
2. Wash a bunch of asparagus and chop it into small pieces, leaving out the woody ends.


DSC05523


DSC05524


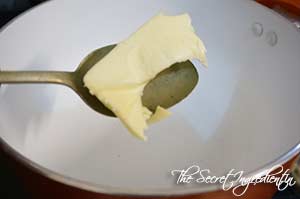
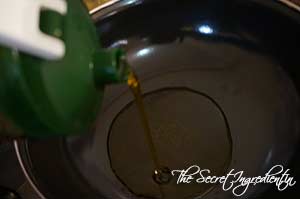
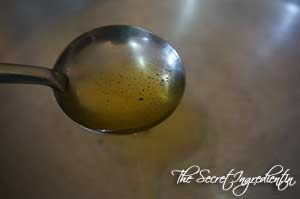
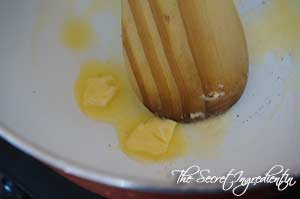
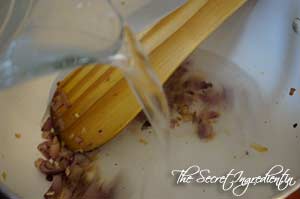
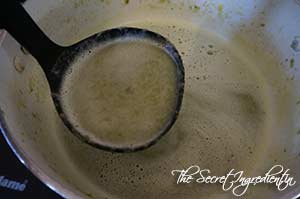
3. In a pot melt some butter.


DSC05525


DSC05526


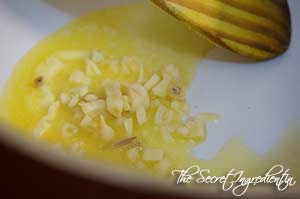
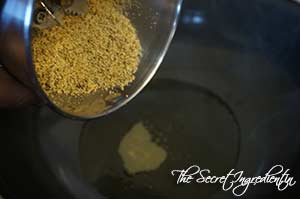
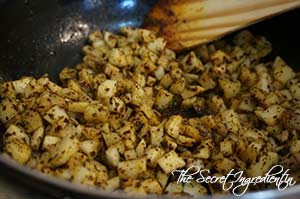
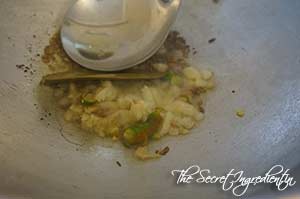
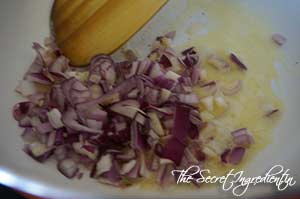
4. Add the chopped onions to the melted butter and keep sauteing it till it has become translucent. The longer you do that on low flame the more sweeter will be your soup from the onions.

DSC05527

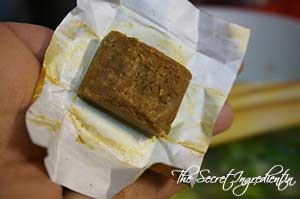
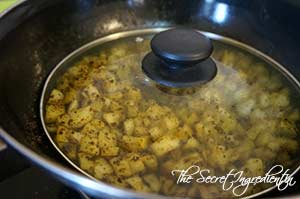
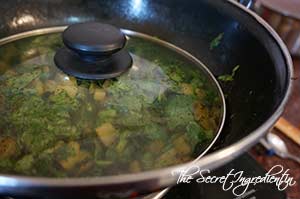
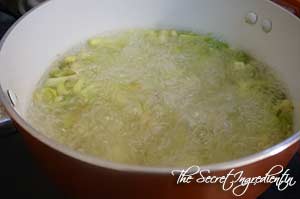
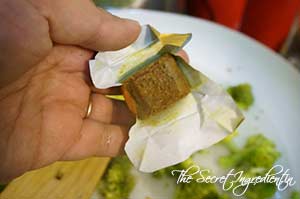
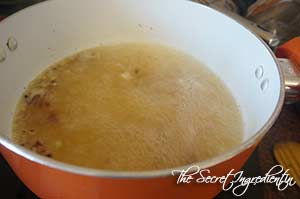
5. Add vegetable broth or you can use water and broth cube,


DSC05528


DSC05529


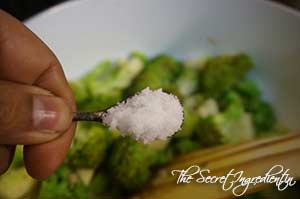
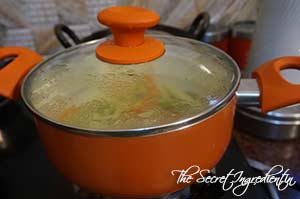
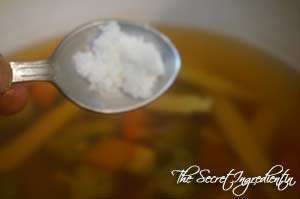
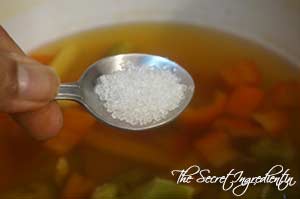
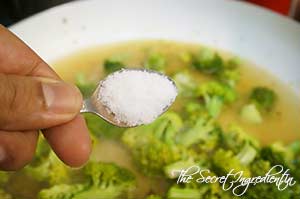
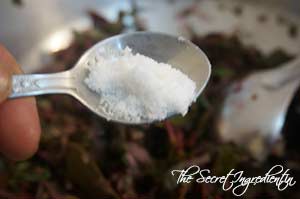
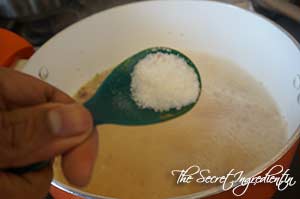
6. Let the broth simmer for a while and then add salt to it.


DSC05531


DSC05532


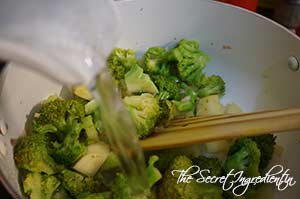
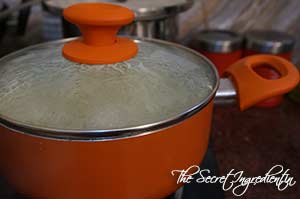
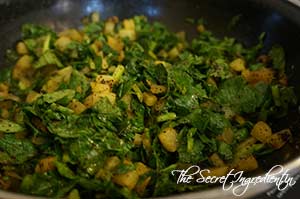
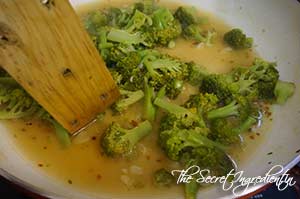
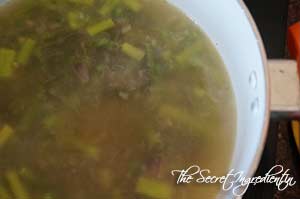
7. Add chopped asparagus and let it cook uncovered till you see they have become slight soft. You don’t want them mush as it takes away the beautiful green colour and makes it look pale.


DSC05533


DSC05535


DSC05536


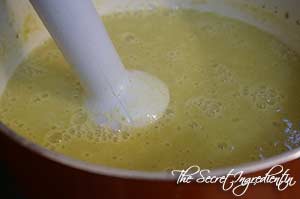
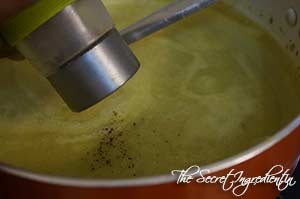
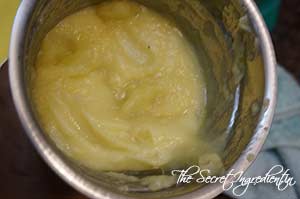
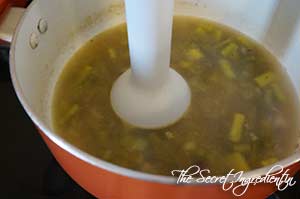
8. Turn the flame off and blend it into a smooth puree. You can pass this soup through wire mesh or strainer to remove the fibre. I chose not to. You can do whatever you prefer. Add some cream to the soup and combine.


DSC05537


DSC05538


DSC05539


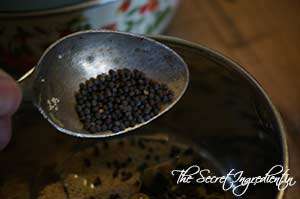
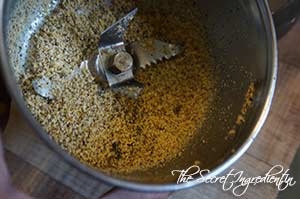
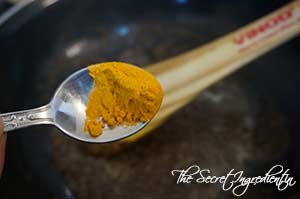
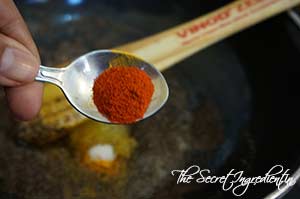
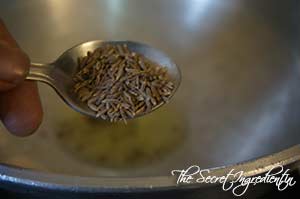
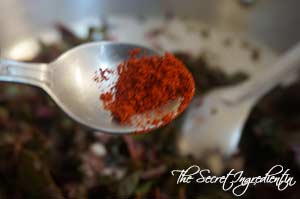
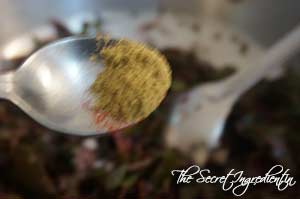
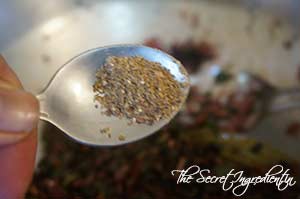
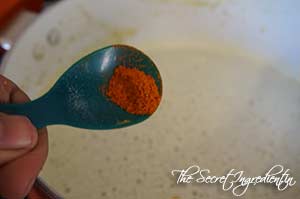
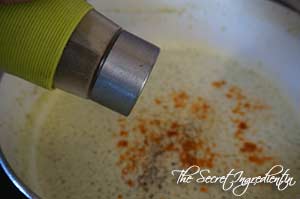
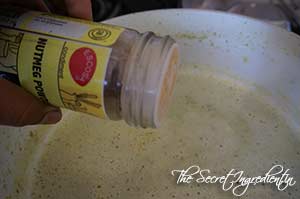
9. Add little cayenne pepper or you can even use red chilli powder, some ground black pepper and nutmeg powder.


DSC05540


DSC05541


DSC05542


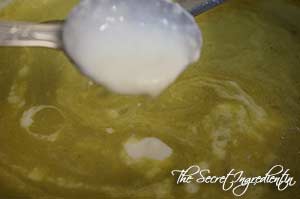
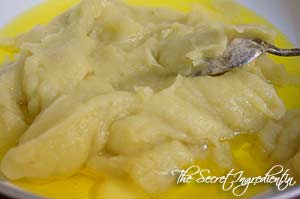
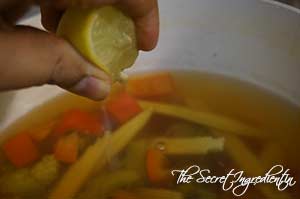
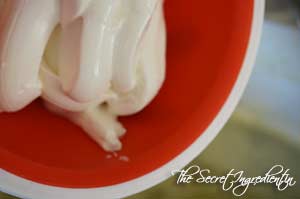
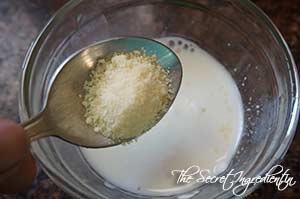
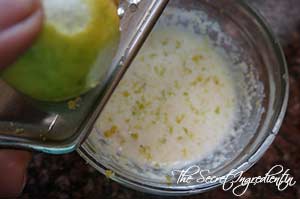
10. In a bowl add cream and parmesan cheese  and zest of a lemon. Whisk everything together using a whisk.


DSC05543


DSC05544


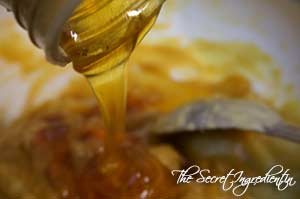
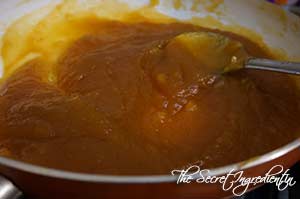
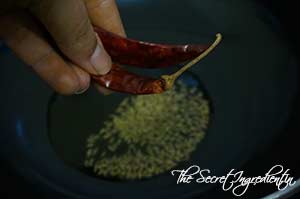
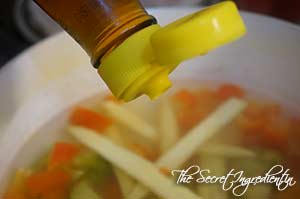
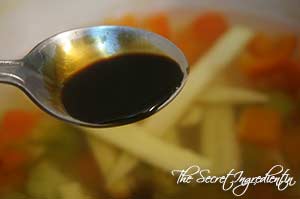
11. Top the soup with a spoonful of this zesty cream and a few drops of Chili Oil.

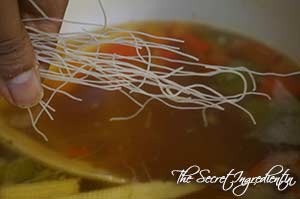
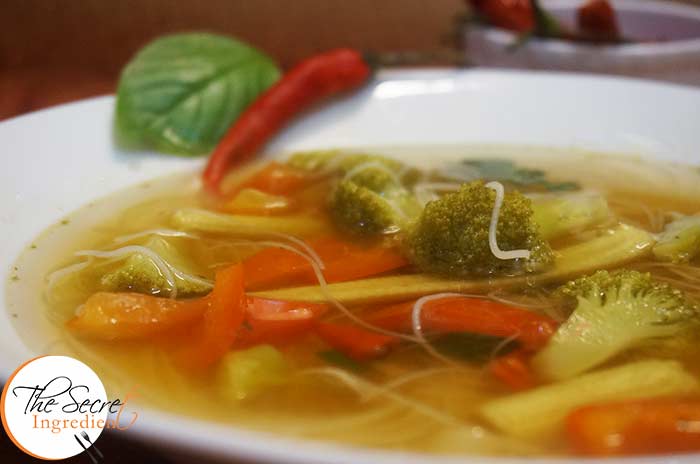
Other soups you can try here are: Chicken Soup with RiceRussian Beetroot & Vegetable SoupClassic French Potato Leek Soup Sopa De FrijolTomato SoupZucchini Garlic Soup with Yak Cheese Shreddings. Cream of Brocolli, Peas and Mushroom Spicy Soup with Indian Flavours

AparagusSoup_Featured3

[whohit]CreamOfAsparagus[/whohit]


[yumprint-recipe id=’201′]


Winters are the best time of the year when you enjoy feasting and gorging on rich food. The body requires certain food to keep it warm. As a result we end up hogging so much that as the summers approach we are up by a few kilos. I know you are nodding in agreement. But this year I have decided to keep a strict watch on my diet. I am staying away from fatty, greasy, fried food by all means. In order to keep the body warm I have started making warm soups every evening, which are healthy and my family enjoys.


Last week when my mommy sent me broccoli from the plains (yeah unfortunately we don’t find this in our hills :() I knew I had to make this soup. Its the best way to ingest broccoli specially when you despise its flavour. I also made Broccoli Pasta which is creamless and a big hit in my family. The soup is made creamy not by adding whole lot of creamy fat but by adding potatoes. It gives it a smooth creamy texture and rich flavour.

Directions:

1. Take two heads of broccoli and cut out their stems. Cut it into florets.


DSC04189


DSC04190


2. Wash the florets under running water for any grit.
DSC04191
3. Chop some Garlic and Onions finely. Peel Potato and cut it into cubes.


DSC04192


DSC04193


4. Add Butter in a large pot and let it melt. Add garlic and onions and saute them till they turn a little pink.


DSC04194


DSC04195


DSC04196


5. Add broccoli florets and potato cubes to the pot and mix them well.


DSC04197


DSC04198


6. Add Salt and Water.


DSC04199


DSC04200


7. Add a cube of broth. I used vegetable broth if you like you can use chicken. Cover with a lid and let it simmer for 15 minutes or until the potatoes have cooked.


DSC04201


DSC04202


8. Open the lid and let it cool off a little. Puree the soup with a blender and make it into a smooth soup.


DSC04203


DSC04204


9. Season with black pepper powder and a little cream.


DSC04205


DSC04206


10. Garnish with freshly chopped Chives and serve hot with soup sticks.

Other Soups you can try here are: Tomato SoupZucchini Garlic Soup with Yak Cheese ShreddingsClassic French Potato Leek SoupPeas and Mushroom Spicy SoupRussian Beetroot & Vegetable SoupChicken Soup with RiceSopa De Frijol .

[whohit]CreamOfBroccoliSoup[/whohit]

[yumprint-recipe id=’184′]

Mooli aur Mooli Ke Patton Ki Sabzi is a winter delicacy. Winters are here in full swing and the most inviting winter produce we get in India are white long radishes. In mexico I have seen red colour variation of these. But nonetheless both are delicious in their own ways 🙂 The radish which are sold now often come with the leaves on. If you are lucky to visit the market in the morning you might find the fresh radish with their greens on. That what you must pick for this recipe. The tender the leaves the more delicious they will be. This is an interesting way to cook radish than to have it just as a salad or stuffed in a parantha.

It is my maternal aunt Neena’s recipe which she often makes with ground poppy seeds and mustard seeds. I tried this first time fearing my fussy husband wouldn’t like it. He simply detests radish and its close kin turnip. But I was hellbent to impress him. The dish came out delicious and it was proved without doubt when my husband took a second helping 🙂

Its not only delicious but very nutritious. The fresh greens and radish are a rich source of roughage and helps to regulate blood pressure. It fights constipation and is extremely good for asthmatic patients. Who doesn’t wanna like this humble vegetable with such health benefits.

Directions:
1. Take some firm radish with fresh tender leaves. Wash the radishes. Cut the neck of the radish and separate the leaves. Do not throw them away. Peel the radish. 


DSC04129


DSC04130


DSC04131


2. Cut the radish into small cubes and separate the tender leaves.


DSC04132


DSC04133


3. Wash these leaves well so that no grit remains. Chop them finely, set aside.


DSC04134


DSC04147


4. In a dry grinder or coffee grinder add poppy and mustard seeds and grind them to a powder. Set aside.


DSC04135


DSC04136


DSC04137


5. In a wok or kadhai add mustard oil and smoke it. Add the mustard, poppy seeds powder and saute for a minute.


DSC04139


DSC04140


6. Add turmeric powder, salt and red chili powder.


DSC04141


DSC04142


DSC04143


7. Add chopped raddish and mix well with the spices. Cover with a lid and cook on medium low heat for 7-8 minutes or until your see its partially cooked.


DSC04144


DSC04145


DSC04146


8. Add the chopped radish greens to the wok and mix well. Cover it and further cook for another 5 minutes.


DSC04149


DSC04150


9. Serve hot with Roti and with some Bathua raita on the side.

For more everyday recipes you can try: Gobhi Danthal ki Sabji, Aloo Methi Punjabi Style, Swanjhane ki Sabji, Methi Matar Malai.


[yumprint-recipe id=’183′] 

MooliKiSabji_Pintrest

Chywanprash_Featured2

Chyawanprash also spelled as chyavanaprasha, chyavanaprash, chyavanaprasam is a jam like mixture of Indian Gooseberry or Amla, Jaggery and other herbs. Traditionally, it is prepared as per the instructions available in the Ayurvedic Texts. It is a comprehensive herbal tonic with wonderful health benefits. It promotes anti-aging and longevity. Apart from other benefits it also builds your immunity against cough and cold during thick winters. The original recipe calls for a lot of herbs and many of those I cant even pronounce the name 😉 

Chywanprash_Featured1
As a little girl my parents often fed me with a spoon full of Chyawanprash everyday with a glass of lukewarm milk. Honestly as a kid it was difficult to eat, as its flavour is a little too strong. My husband still makes faces 😛 But with age I realised its benefit. Its the most popular herbal tonic sold in India and even endorsed by a lot of film stars. Having said that I wanted to make own chyawanprash at home as you cannot trust what is inside that bottle and one day I found recipe posted by Alka Bhayana, a very sophisticated, warm and well respected women I have known over time through Facebook. Her recipe of Chyawanprash mesmerized me. It required a few basic ingredients which you can easily find at home. The very next day I brought home amlas and gave it a go. The chyawanprash was sooo delicious even my picky Big Boy (my husband) ate without a hitch and was gaga over it. He called his real mommy (thats my mother in law) and told her that he was a big boy and that he finally eats chyawanprash 😉 

Truly even I loved the flavour of chyawanprash it may not have all 80 or more herbs but I know for sure whatever it has is pure, healthy and made with love. Thankyou Alka Mam, this post goes to you!

Directions:

1. Wash Amlas or Indian Gooseberry and pat them dry with your kitchen towel.


DSC04160


DSC04161


2. Arrange a pressure pan with a rack at its bottom and add amlas to it. Add water and close the lid. Boil the amlas for 2 whistles or 10 minutes on full pressure. Turn the flame off and let it sit in steam till the pressure is released.

DSC04162
3. Drain the water and remove the pit. After they boil they become soft and you can easily remove the pit.


DSC04163


DSC04164


4. Put the pulp in a blender and make a smooth puree. You make use a spoon of water to ease grinding.


DSC04165


DSC04166


5. In a pan add some ghee or clarified butter. And add amla puree to the ghee. Keep sauteing for good ten minutes or until you see it leaves out the oil.


DSC04168


DSC04169


5. Add Jaggery or Gur to the amla puree. I decided to put a big chunk as it was soft. But incase your jaggery is hard as a rock, I would recommend you to break it into small pieces or make a powder.

DSC04171

6. Add Honey. Keep sauteing till you achieve a thick, sticky, messy mass.


DSC04172


DSC04173


DSC04174


6. Take green cardamom, fennel seeds, whole black pepper,  few strands of saffron and cinnamon in a dry grinder and make a powder .


DSC04167


DSC04170


7. Add ground spiced to the pan and mix well. Continue to cook for another 5 minutes till everything is well combined. 


DSC04175


DSC04176


8. Let it cool down and transfer to an air tight jar. Eat a spoon full daily with a glass of milk and have a healthy, illness free winter. 

Other healthy recipes you can try here are: Mexican Black Bean and Mango Salad, Couscous Chickpea Salad, Classic Russian Borsch Beetroot Soup.

Chywanprash_Featured3[whohit]Chyawanprash[/whohit]

Chywanprash_Pintrest

[yumprint-recipe id=’181′]


RagiMasalaTwisters_Featured3
Last week I  was invited to the Uttrakhand Food Festival in Nanital. I was asked to put up a stall featuring food and produce from Kumaun and Garhwal region. I decided to bake my Ragi Whole Wheat Cookies, Ragi Brownies and these savoury twisters also made from Ragi or Mandua which is grown in this region and predominantly part of the kumaoni palette. The most amazing part of these twisters is that they are baked and have very little oil in them. This is an idle guilt free snacking option, specially for weight watcher’s like me. 20 twisters contain 100 calories.. isn’t that amazing!

RagiMasalaTwisters_Featured2
All twisters and Ragi Brownies were sold off on the very first day of the event. It was a huge success. I was overjoyed when I bagged the second prize for Innovation in Baking. Truly I felt my hard work paid off 🙂

Directions:

1. Preheat the oven to 180 degree Celcius (Learn more about Oven temperatures and Conversions.). Line a baking tray with parchment paper. I am using a silicon mat. Set aside. Take Ragi and Whole Wheat Flour in a bowl.


DSC03924


DSC03925


2. Add plain yogurt or curd to the bowl. Also add Ginger Garlic and chili paste.


DSC03926


DSC03927


3. Add Cumin Seeds, little sugar and salt and combine.


DSC03928


DSC03929


DSC03930


4. Add turmeric powder and freshly chopped Coriander.


DSC03932


DSC03933


5. Add oil and water just enough to form a paliable dough. Therefore, add little water spoon by spoon.


DSC03934


DSC03935


6. Knead a soft paliable dough. It should not be very stiff nor very sticky.

DSC03936
7. Divide the dough into two and roll each of them by dusting the surface with dry flour. The dough should be rolled in a large circle of 200 mm. (8”) in diameter.


DSC03937


DSC03938


DSC03939


8. Now cut it into strips  about 25 mm. x 12 mm. (1″ x ½ “) using a sharp knife or a pizza cutter.

DSC03940
9. Twist each strip vertically with your hands and place them on a lined baking sheet and bake in a preheated oven for 20 minutes or until they become crisp and light brown in colour. Flip sides gently after half time. Let the come to room temperature before indulging as they will crisp up even more. Store them in an airtight container, stays good for a very long time.

Other Baked Snacks you can try are: Baked Paneer Corn Kebabs

Other Ragi or Red Millet recipes on The Secret Ingredient: Instant Ragi Dosa, Ragi Whole Wheat Cookies.

RagiMasalaTwisters_Featured4[whohit]RagiMasalaTwisters[/whohit]

RagiMasalaTwisters_Pintrest

[yumprint-recipe id=’177′]

CousCousPilaf_Featured2

Its been a few months now I have been maintaining the regime to eat healthy and exercise daily. Luckily I have been able to shed a few kilos (Happy Dance!!) but a few kilos are still to go. I have been eating everything but in control and avoiding sugar and fried food as much as I can. I made Couscous Salad with Chickpeas some time back and it is a regular at my place.

Couscous Pilaf_Featured3
I wanted to try the couscous pilaf which tasted flavourful with some spices and vegetables. All I can say it was amazing, filling and gets ready in minutes.  If you are hungry and looking for quick dinner options, dont think twice make this healthy pulao which looks gorgeous and tastes divine. Its a good option when you want to avoid hi starch rice pulav.

Directions:

1. Chop Onions and Garlic Finely. Also chop Red and Yellow Bell Pepper in strips lengthwise. You can even add mushrooms, I did not have on hand. Set aside.

DSC03039

2. In a sauce pan add water and bring it to a boil. Turn the flame off.

DSC03040

3. Add Couscous to the boiled boiled and top it with ghee or clarified butter*. Cover and let it sit for 5-7 minutes or till the couscous gets cooked. Fluff it up with a fork and set aside.


DSC03041


DSC03042


4. In a pan add oil and heat it.

DSC03043

5. Add cumin seeds and let them crackle for a couple of seconds. Also add whole red chilies.


DSC03044


DSC03045


6.  Add garlic and saute. Also add onions and saute till it turns soft and translucent.


DSC03046


DSC03047


7. Add bell peppers and mushrooms if you are using. Saute them till they become cooked but still crisp.

DSC03048
8. Add turmeric Powder and salt. Combine.


DSC03049


DSC03050


9. Add cooked and fluffed couscous to the veggies and combine. Garnish with freshly chopped coriander leaves.


DSC03051


DSC03052


10. Serve hot with some Aloo Anaar Raita or plain yogurt.

Other Pulav or Pulao or Pilaf recipes you can try are: Mint Pulav, Mango Rice, Curd Rice, Kathal Ki Biryani,  Veggie Vermicelli Pulao.

If you are looking for other healthy recipes you can try, Couscous salad with Chickpeas, Mango Black bean Salad, Grilled Chicken Salad, Healthy Broccoli Pasta.

CousCousPilaf_Featured1[whohit]CouscousPilaf[/whohit]

CousCousPilaf_Pintrest

[yumprint-recipe id=’176′]


TomYum_Featured2
I have always been fond of clear soups. They are flavourful, light and don’t make you feel overly full. One day I was surfing on web to look for some delicious clear soup options. I was spell bound by the description of Thai Tom Yum Soup. It was spicy, sour and loaded with veggies. I planned to give it a try as I had lemongrass growing in my kitchen garden and galangal I had just got from my recent Delhi trip. I wanted to make a vegetarian version of this without shrimps. There are so many variations available. This is without coconut milk and tomatoes. Also I haven’t used any Thai Red Curry Paste.

TomYum_Featured3

Tom Yum soup was followed by Thai Red Curry and Sticky rice in main course. That night’s dinner was unforgetful. I am still recovering from the blast of flavours I had in my mouth. If you have never tried this soup before I would say go for it. Its a weight watcher’s haven.

Directions:

1. Chop lemongrass into small pieces. Last three inch you can trim and discard.

DSC02979
2. Peel off Galangal root and roughly cut into pieces.

DSC02981
3. Put both chopped lemongrass and galangal in a mortar and crush it with a pestle. You want it to release its juices.

DSC02982
4. Bring water to a boil in a dutch oven or any pot. Add crushed lemongrass and galangal.

DSC02983

5. Let the water boil further along with lemongrass and galangal. Reduce heat to low and simmer 15 minutes. Remove galangal and lemongrass.


DSC02984


DSC02985


6. Chop some veggies . I used Baby corn, Broccoli, Red & yellow bell pepper and mushrooms.

DSC02986

7. Add them to the pot of aromatic water. Put the lid on. Boil them till the vegetables are tender.


DSC02987


DSC02990


8. Add Fish sauce. If you are a vegetarian skip this altogether. 

DSC02991
9. Add Soy Sauce.
DSC02992 
10. Squeeze in a juice of lemon. Season with salt and also add sugar to balance the acidity.


DSC02994


DSC02995


DSC02996


11. Add chopped red chilli .

DSC02989
12. Add Rice Noodles and give the soup a boil.

DSC02997
13. Garnish with torn basil leaves and chopped coriander leaves.

DSC02998

 Serve hot and enjoy the freshness of flavours.

Other International Cuisines you can try here are: Italian Frittata, Chinese Steamed Baos with Custard Filling, Mexican Black Bean Salad with Mangoes, Argentine Chimichurri.

If you are looking for more healthy soups : Russian Beetroot & Vegetable Soup , Zucchini Garlic Soup with Yak Cheese ShreddingsClassic French Potato Leek Soup Chicken Soup With RiceTomato SoupSoup of Red Kidney Beans.

TomYum_Featured1[whohit]TomYumVeg[/whohit]

[yumprint-recipe id=’174′]

BrocolliPasta_Featured1

I have mentioned time and again that I am a die hard fan of pasta in all its forms. I don’t mind if its cheesy, boozy, creamy or simply loaded with veggies. Pasta holds a sacred place in my heart. As my little up is growing up I have seen similar or more violent streak to devour pasta. This makes the matter serious since we are a complete pasta loving family and I  have to come up with more and more pasta recipes. Sigh!

BrocolliPasta_Featured3

Well  lately my husband and me are on a load shedding spree, which means creamy and cheesy pastas have to be kept at bay. 🙁 I decided to make this healthier pasta with Broccoli which uses no cream and very little cheese and that too is purely optional. I have always loved such simple pastas. You can enjoy them without feeling very guilty ;). I had earlier posted Sauteed Red Bell Pepper & Olive Pasta which was also without cream and cheese. 

Directions:

1. Cut the broccoli into florets and wash them under running water to make it dirt free. Boil pasta as per packet instructions. You can choose any shape you like. Learn how to boil pasta perfectly.


DSC01649


DSC01650


2. Drain water and keep the florets aside. Also finely chop some garlic or you can even mince it. 

DSC01651

3. In a pan add some olive oil.

DSC01652
4. Add chopped garlic and Red chilli Flakes to the oil. Let the oil get infused with garlic and red chili flakes while it heats up.


DSC01653


DSC01654


5. Add broccoli florets and give it a toss in the oil. 

DSC01655
6. Add water and stock bullion. Or you can use vegetable stock only.


DSC01656


DSC01657


7. Season with salt and let it cook covered on low medium heat till broccoli is partially cooked. You will be able to cut the broccoli with a spatula.


DSC01658


DSC01663


8. Add boiled pasta to the broccoli and combine.

DSC01664
9. Season it with Ground Black pepper.

DSC01665
10. Add little butter to make it smoother.

DSC01666
11. Top it up with Parmesan Cheese.

DSC01668
12. Serve it hot with Cheesy Garlic Bread on the side.

Other Pasta recipes you can try here are: Pasta Alla Vodka, Sauteed Red Bell Pepper & Olive Pasta, Avocado Parsley Pasta, Sundried Tomatoes Pasta Salad, Spaghetti Vegetable Pasta , Chicken Lasagna, Mushroom Lasagna in Bechamel Sauce.

BrocolliPasta_Featured2[whohit]BroccoliPasta[/whohit]

[yumprint-recipe id=’173′]


BrocolliPasta_Pintrest


RagiBiscuits_Featured2

I live in the hills where Ragi or Manduwa is very popular. Kumaoni food has a special place for Mandua ki Roti or Ragi Flour Flat bread. Its considered very nutritional, specially in winters as it has the ability to keep body warm against fierce winters in this belt. I tried making crisp Instant Ragi Dosas with the flour and my family loved it. It has found a permanent place in my household. 

Recently, I opened my small bakery by the name The Secret Oven, for homemade breads and other baked items. A local shopkeeper asked me to supply sample for Ragi biscuits. I had never made them before but then it seemed an an appropriate opportunity to give it a try. I made these crisp delicious discs strictly following Padhu’s recipe from her blog Padhu’s Kitchen.

RagiBiscuits_Featured1
The recipe was foolproof and the biscuits came out so beautiful. Fortunately, my sample was liked and i got a 10 kg Ragi biscuit order 🙂 This would not have been possible without this perfect recipe. The biscuits are healthy and team up very well with a glass of cold milk. My boys (my son and husband) gorge on these. It is difficult to stop them from stealing biscuits from my order.

Directions:

1. Roast Manduwa or Ragi Flour in a pan on a medium low flame. Keep tossing for a few minutes until the aroma of roasted flour fills the air.


DSC03686


DSC03687


2. In a bowl add sifted Whole Wheat Flour and Roasted Ragi Flour.

DSC03688

3. Also add sifted Baking Powder to the flour and give it a gently mix.


DSC03689


DSC03690


4. Refrigerate butter for 20 minutes and cut it into cubes. Add these butter cubes to the flour mix. 

DSC03691
5. Mix the flour with the butter with your finger tips till you get a coarse mixture.

DSC03693 
6. Add powdered sugar and mix.

DSC03694 
7. Add milk 1 tablespoon at a time and bring the mixture together like a dough. If you add too much liquid or too less liquid it will not hold the shape and will crumble.


DSC03695


DSC03696


8. Cover it with a cling wrap and refrigerate for 15-20 minutes.

DSC03697
9. Roll the dough on a flat counter using a roller pin. You may dust a little with wheat flour to prevent it from sticking. The rolled dough should not be very thin nor very thick, just right 🙂 

DSC03698

10. Cut it into desired shapes. I am using a circular biscuit cutter, you can use cookie cutters or even lids.

DSC03699

11. Place the biscuits on a greased baking sheet. You can use a sharp knife or spatula to lift it up. You can line the baking sheet with parchment paper. I am using a silicon mat to prevent sticking to the bottom. 


DSC03700


DSC03701


12. You can make striped design with a fork and bake it in a preheated oven on 180 degree C (Learn more about Oven temperatures and Conversions) for 15-18 minutes in the middle rack until they acquire a slight brown colour. 

DSC03703
13. The biscuits will still me soft as you remove them from the oven. Let the cool down on a wire rack until they become crisp and delicious! You can enjoy them anytime with or without a glass of cold milk or a fresh cup of hot chai.

Other cookies and biscuits you can try are: Italian Almond Biscotti, Choco Coconut Cookies, White Chocolate Chip Cookies, Chocolate Peanut Butter Cookies.

RagiBiscuits_Featured4

[whohit]RagiBiscuits[/whohit]

[yumprint-recipe id=’172′] 

RagiBiscuits_Pinetrest


Amaranth Saag

I just attended my brother’s wedding last week and I realised I was much plumper than before (I don’t wanna demean my self by calling fat :P). So on returning back my husband and me decided to go on good healthy diet with proper exercise. Its been a week and we still seem to be on the right track. I have been avoiding sweets and cheese and bringing in more vegetables and proteins in my diet. One such vegetable is the nutritious leafy vegetable which is known as Cholai or Chaulai in Hindi and Amaranth or Amaranthus in English. I made this stir fried Amaranth Leaves with spices.

Amaranth Saag
 Grains of Amaranth  are also used in food and are very good  source of energy. I found these leaves in the farmer’s market and quickly decided to make something out of them. The colour of leaves vary from purple to red and green to gold. I have used the former types as I love these colours but you can use any variant. Amaranth leaves are good antioxidants and good source of Vitamin A and Vitamin C. If you eat amaranth in leafy form, it acts as a good roughage and helps cure constipation. It is very easy to cook amaranth. Its a simple recipe with bountiful of nutrition. 

Directions: 

1. Separate the leaves from the stems. Place them together.


DSC02475


DSC02419


2. Wash the leaves thoroughly as there can be a lot of grit in the leaves.

DSC02420
3. Chop them coarsely and set aside.

DSC02421
4. In a wok or karahi add clarified butter or ghee and turn the flame on. Vegan may use any other cooking oil.

DSC02422
5. Add Cumin seeds and A bay Leaf.


DSC02423


DSC02424


6. Add Ginger Garlic paste along with chopped green chilies and saute them until the raw fragrance of garlic diminishes.

DSC02425
7. Add onions and continue to saute till the onion becomes soft and translucent.

DSC02426
8. At this stage add the chopped cholai leaves and toss them with the onions. 

DSC02427
9. Season with Salt, red chilli powder.


DSC02428


DSC02429


10. Also add coriander powder and Garam Masala.


DSC02430


DSC02431 


11. Cook on medium low flame, uncovered until soft and thoroughly cooked. Serve hot with Chappatis.

Other simple everyday recipes you can try on The Secret Ingredient: Tori Wadi, Masaledar Arbi, Baingan ka Bhartha, Langar Wali Dal.
Other dishes with Leafy vegetables you may try: Palak Paneer,  Aloo Methi, Arbi Ke Paton Ke Patode, Pudina Pulav, Methi Matar Malai.

Amaranth Saag

[yumprint-recipe id=’159′]