Author

anshu

Browsing

CousCousPilaf_Featured2

Its been a few months now I have been maintaining the regime to eat healthy and exercise daily. Luckily I have been able to shed a few kilos (Happy Dance!!) but a few kilos are still to go. I have been eating everything but in control and avoiding sugar and fried food as much as I can. I made Couscous Salad with Chickpeas some time back and it is a regular at my place.

Couscous Pilaf_Featured3
I wanted to try the couscous pilaf which tasted flavourful with some spices and vegetables. All I can say it was amazing, filling and gets ready in minutes.  If you are hungry and looking for quick dinner options, dont think twice make this healthy pulao which looks gorgeous and tastes divine. Its a good option when you want to avoid hi starch rice pulav.

Directions:

1. Chop Onions and Garlic Finely. Also chop Red and Yellow Bell Pepper in strips lengthwise. You can even add mushrooms, I did not have on hand. Set aside.

DSC03039

2. In a sauce pan add water and bring it to a boil. Turn the flame off.

DSC03040

3. Add Couscous to the boiled boiled and top it with ghee or clarified butter*. Cover and let it sit for 5-7 minutes or till the couscous gets cooked. Fluff it up with a fork and set aside.


DSC03041


DSC03042


4. In a pan add oil and heat it.

DSC03043

5. Add cumin seeds and let them crackle for a couple of seconds. Also add whole red chilies.


DSC03044


DSC03045


6.  Add garlic and saute. Also add onions and saute till it turns soft and translucent.


DSC03046


DSC03047


7. Add bell peppers and mushrooms if you are using. Saute them till they become cooked but still crisp.

DSC03048
8. Add turmeric Powder and salt. Combine.


DSC03049


DSC03050


9. Add cooked and fluffed couscous to the veggies and combine. Garnish with freshly chopped coriander leaves.


DSC03051


DSC03052


10. Serve hot with some Aloo Anaar Raita or plain yogurt.

Other Pulav or Pulao or Pilaf recipes you can try are: Mint Pulav, Mango Rice, Curd Rice, Kathal Ki Biryani,  Veggie Vermicelli Pulao.

If you are looking for other healthy recipes you can try, Couscous salad with Chickpeas, Mango Black bean Salad, Grilled Chicken Salad, Healthy Broccoli Pasta.

CousCousPilaf_Featured1[whohit]CouscousPilaf[/whohit]

CousCousPilaf_Pintrest

[yumprint-recipe id=’176′]

VratKiRoti_Featured1
This is no ordinary food. Its special food we eat during Navratri, the nine day Fasting period of Hindus. The fasts are more like feasting. So much of mouth watering dishes are made during this time that its hard to stay empty stomach 😉 Oops!! I hope I dint offend the Gods 😛  This is my mom’s recipe which is soo delicious and different from the usual recipes you make during fasting. It has Buckwheat flour also known as Kuttu ka Atta, Water Chestnut Flour also known as Singhara Atta and Barnyard Millet Flour also known as Sama or Swank k Chawal ka Atta. The  flours are tossed in shredded pumpkin and radish and mixed with boiled mashed potato. 

VratKiRoti_Featured2
The rotis or flatbread are very flavourful and filling at the same time. You will not need anything to eat for a good time after gorging on to these. You can eat them with a dollop of butter or at the same time team them up with Vrat wale Aloo and Chaach. Ohh its Divine!

Directions:

1. Grate or shred Radish and a little pumpkin in a bowl.


DSC03873


DSC03874


2. Add a boiled potato to the bowl.

DSC03875
3. Add all the three flours. Buckwheat, Water Chestnut and Barnyard Millets Flour.


DSC03876


DSC03877


DSC03878


4. Season it with salt and red chilli powder.


DSC03879


DSC03880


5. Mix the flour and vegetables together with your hand. You should not require any extra water as the radish with salt will release its own juices enough for you to make a pliable dough.

DSC03882
6. In order to roll it you need a clean plastic sheet. You can also use a ziplog bag. Place it on top of your counter and grease it with ghee or oil.


DSC03883


DSC03884


7. Place a ball of dough double the size of a golf ball on the greased plastic sheet. Place the other end of sheet on top of the dough.


DSC03885


DSC03886


8. Press with your fingers to spread the dough to take the shape of a flatbread or roti.

DSC03887
9. If you like to make the shape perfect which is purely optional, you can cut the perfect round using a lid. Uneven shape will also taste as good as even shaped roti 😛

DSC03893
10. Put little ghee on a hot flat skillet or tawa.

DSC03889
11. Remove the Plastic Sheet and carefully place the roti on a well heated tawa.


DSC03895


DSC03894


12. Cook on one side and add ghee on the top side and flip. Cook on the other side till you get a slight brown colour on both sides.


DSC03891


DSC03892


13. Serve hot with a dollop of butter. You can serve Aloo ki sabzi, curd and chaach along with it.

Other Navratri recipes you can try are:  Sabudada KhichdiSwang ke Chawal ki KhichdiSabudana Tikki Khajoor Til Ke LaddooArbi Masala CurryGajar Ka HalwaMakhane Ki KheerRasgullaSwang Ke Chawal Ka HalwaSwang Ke Chawal Ki PhirniAnaar Aloo ka RaitaPalak Dhaniya ChutneyCoriander Chutney without Onion Garlic.

VratKiRoti_Featured4[whohit]VratKiRoti[/whohit]

[yumprint-recipe id=’175′]


TomYum_Featured2
I have always been fond of clear soups. They are flavourful, light and don’t make you feel overly full. One day I was surfing on web to look for some delicious clear soup options. I was spell bound by the description of Thai Tom Yum Soup. It was spicy, sour and loaded with veggies. I planned to give it a try as I had lemongrass growing in my kitchen garden and galangal I had just got from my recent Delhi trip. I wanted to make a vegetarian version of this without shrimps. There are so many variations available. This is without coconut milk and tomatoes. Also I haven’t used any Thai Red Curry Paste.

TomYum_Featured3

Tom Yum soup was followed by Thai Red Curry and Sticky rice in main course. That night’s dinner was unforgetful. I am still recovering from the blast of flavours I had in my mouth. If you have never tried this soup before I would say go for it. Its a weight watcher’s haven.

Directions:

1. Chop lemongrass into small pieces. Last three inch you can trim and discard.

DSC02979
2. Peel off Galangal root and roughly cut into pieces.

DSC02981
3. Put both chopped lemongrass and galangal in a mortar and crush it with a pestle. You want it to release its juices.

DSC02982
4. Bring water to a boil in a dutch oven or any pot. Add crushed lemongrass and galangal.

DSC02983

5. Let the water boil further along with lemongrass and galangal. Reduce heat to low and simmer 15 minutes. Remove galangal and lemongrass.


DSC02984


DSC02985


6. Chop some veggies . I used Baby corn, Broccoli, Red & yellow bell pepper and mushrooms.

DSC02986

7. Add them to the pot of aromatic water. Put the lid on. Boil them till the vegetables are tender.


DSC02987


DSC02990


8. Add Fish sauce. If you are a vegetarian skip this altogether. 

DSC02991
9. Add Soy Sauce.
DSC02992 
10. Squeeze in a juice of lemon. Season with salt and also add sugar to balance the acidity.


DSC02994


DSC02995


DSC02996


11. Add chopped red chilli .

DSC02989
12. Add Rice Noodles and give the soup a boil.

DSC02997
13. Garnish with torn basil leaves and chopped coriander leaves.

DSC02998

 Serve hot and enjoy the freshness of flavours.

Other International Cuisines you can try here are: Italian Frittata, Chinese Steamed Baos with Custard Filling, Mexican Black Bean Salad with Mangoes, Argentine Chimichurri.

If you are looking for more healthy soups : Russian Beetroot & Vegetable Soup , Zucchini Garlic Soup with Yak Cheese ShreddingsClassic French Potato Leek Soup Chicken Soup With RiceTomato SoupSoup of Red Kidney Beans.

TomYum_Featured1[whohit]TomYumVeg[/whohit]

[yumprint-recipe id=’174′]

BrocolliPasta_Featured1

I have mentioned time and again that I am a die hard fan of pasta in all its forms. I don’t mind if its cheesy, boozy, creamy or simply loaded with veggies. Pasta holds a sacred place in my heart. As my little up is growing up I have seen similar or more violent streak to devour pasta. This makes the matter serious since we are a complete pasta loving family and I  have to come up with more and more pasta recipes. Sigh!

BrocolliPasta_Featured3

Well  lately my husband and me are on a load shedding spree, which means creamy and cheesy pastas have to be kept at bay. 🙁 I decided to make this healthier pasta with Broccoli which uses no cream and very little cheese and that too is purely optional. I have always loved such simple pastas. You can enjoy them without feeling very guilty ;). I had earlier posted Sauteed Red Bell Pepper & Olive Pasta which was also without cream and cheese. 

Directions:

1. Cut the broccoli into florets and wash them under running water to make it dirt free. Boil pasta as per packet instructions. You can choose any shape you like. Learn how to boil pasta perfectly.


DSC01649


DSC01650


2. Drain water and keep the florets aside. Also finely chop some garlic or you can even mince it. 

DSC01651

3. In a pan add some olive oil.

DSC01652
4. Add chopped garlic and Red chilli Flakes to the oil. Let the oil get infused with garlic and red chili flakes while it heats up.


DSC01653


DSC01654


5. Add broccoli florets and give it a toss in the oil. 

DSC01655
6. Add water and stock bullion. Or you can use vegetable stock only.


DSC01656


DSC01657


7. Season with salt and let it cook covered on low medium heat till broccoli is partially cooked. You will be able to cut the broccoli with a spatula.


DSC01658


DSC01663


8. Add boiled pasta to the broccoli and combine.

DSC01664
9. Season it with Ground Black pepper.

DSC01665
10. Add little butter to make it smoother.

DSC01666
11. Top it up with Parmesan Cheese.

DSC01668
12. Serve it hot with Cheesy Garlic Bread on the side.

Other Pasta recipes you can try here are: Pasta Alla Vodka, Sauteed Red Bell Pepper & Olive Pasta, Avocado Parsley Pasta, Sundried Tomatoes Pasta Salad, Spaghetti Vegetable Pasta , Chicken Lasagna, Mushroom Lasagna in Bechamel Sauce.

BrocolliPasta_Featured2[whohit]BroccoliPasta[/whohit]

[yumprint-recipe id=’173′]


BrocolliPasta_Pintrest


RagiBiscuits_Featured2

I live in the hills where Ragi or Manduwa is very popular. Kumaoni food has a special place for Mandua ki Roti or Ragi Flour Flat bread. Its considered very nutritional, specially in winters as it has the ability to keep body warm against fierce winters in this belt. I tried making crisp Instant Ragi Dosas with the flour and my family loved it. It has found a permanent place in my household. 

Recently, I opened my small bakery by the name The Secret Oven, for homemade breads and other baked items. A local shopkeeper asked me to supply sample for Ragi biscuits. I had never made them before but then it seemed an an appropriate opportunity to give it a try. I made these crisp delicious discs strictly following Padhu’s recipe from her blog Padhu’s Kitchen.

RagiBiscuits_Featured1
The recipe was foolproof and the biscuits came out so beautiful. Fortunately, my sample was liked and i got a 10 kg Ragi biscuit order 🙂 This would not have been possible without this perfect recipe. The biscuits are healthy and team up very well with a glass of cold milk. My boys (my son and husband) gorge on these. It is difficult to stop them from stealing biscuits from my order.

Directions:

1. Roast Manduwa or Ragi Flour in a pan on a medium low flame. Keep tossing for a few minutes until the aroma of roasted flour fills the air.


DSC03686


DSC03687


2. In a bowl add sifted Whole Wheat Flour and Roasted Ragi Flour.

DSC03688

3. Also add sifted Baking Powder to the flour and give it a gently mix.


DSC03689


DSC03690


4. Refrigerate butter for 20 minutes and cut it into cubes. Add these butter cubes to the flour mix. 

DSC03691
5. Mix the flour with the butter with your finger tips till you get a coarse mixture.

DSC03693 
6. Add powdered sugar and mix.

DSC03694 
7. Add milk 1 tablespoon at a time and bring the mixture together like a dough. If you add too much liquid or too less liquid it will not hold the shape and will crumble.


DSC03695


DSC03696


8. Cover it with a cling wrap and refrigerate for 15-20 minutes.

DSC03697
9. Roll the dough on a flat counter using a roller pin. You may dust a little with wheat flour to prevent it from sticking. The rolled dough should not be very thin nor very thick, just right 🙂 

DSC03698

10. Cut it into desired shapes. I am using a circular biscuit cutter, you can use cookie cutters or even lids.

DSC03699

11. Place the biscuits on a greased baking sheet. You can use a sharp knife or spatula to lift it up. You can line the baking sheet with parchment paper. I am using a silicon mat to prevent sticking to the bottom. 


DSC03700


DSC03701


12. You can make striped design with a fork and bake it in a preheated oven on 180 degree C (Learn more about Oven temperatures and Conversions) for 15-18 minutes in the middle rack until they acquire a slight brown colour. 

DSC03703
13. The biscuits will still me soft as you remove them from the oven. Let the cool down on a wire rack until they become crisp and delicious! You can enjoy them anytime with or without a glass of cold milk or a fresh cup of hot chai.

Other cookies and biscuits you can try are: Italian Almond Biscotti, Choco Coconut Cookies, White Chocolate Chip Cookies, Chocolate Peanut Butter Cookies.

RagiBiscuits_Featured4

[whohit]RagiBiscuits[/whohit]

[yumprint-recipe id=’172′] 

RagiBiscuits_Pinetrest


MuttonRoganJosh_Featured1
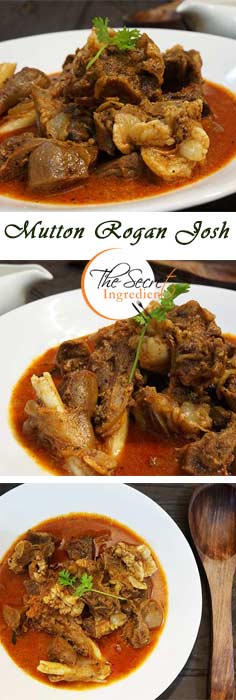
This is that post of the month where I cook and present according to the theme in Spatula Force’s Monthly Challenge. It’s a group of talented bloggers who have come together to try new cuisines, new dishes out of the ordinary. This month’s theme was hosted by me and it was an opportunity to explore Kashmiri Cuisine. I had never cooked lamb before so when it was time to make something Kashmiri I knew I had to debut cooking Mutton or Lamb or Goat and the signature Dish from Kashmiri Cuisine was none other than Rogan Josh.

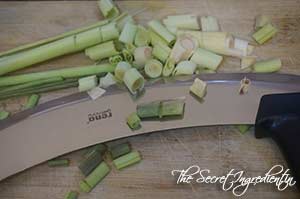
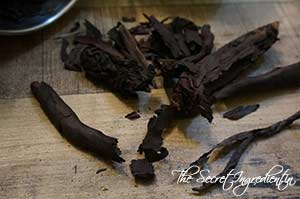
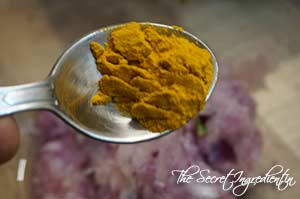
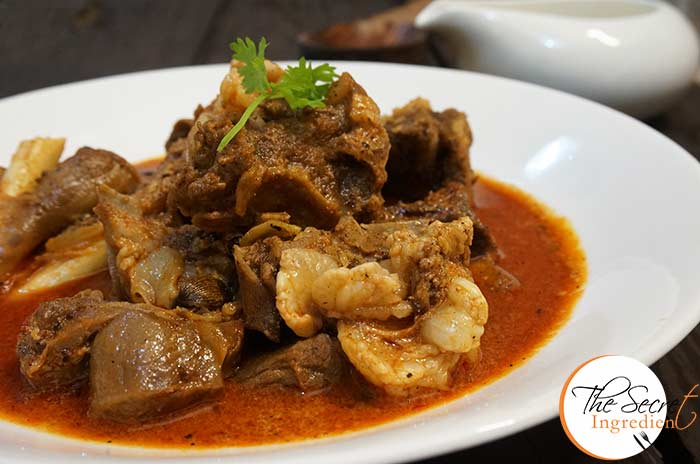
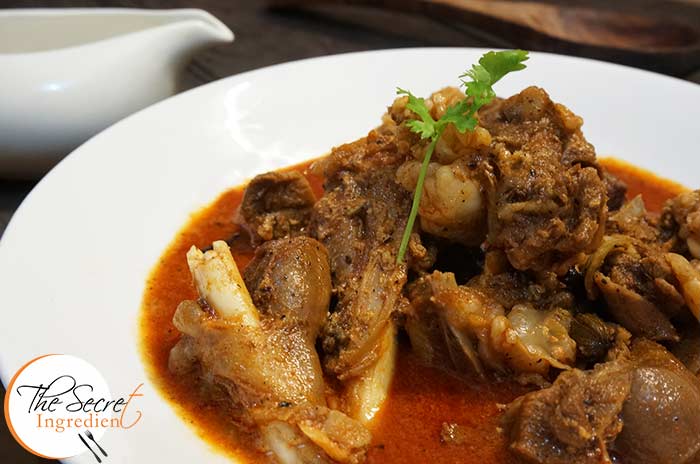
Rogan Josh is an aromatic Lamb dish of Persian Origin. Rogan Josh the name has many interpretations. Rogan or Roughan means ‘Clarified butter’ or fat and Josh means the ‘passion, the intensity, the heat’. Rogan Josh thus means cooked in oil in intense heat. The colour of gravy is crimson red due to Kashmiri Red Chilies which gives more colour than the heat to the dish. Apart from this Ratan Jot or Alkanet a dried herb from the region is used to give its amazing red colour. I have used Ratan Jot infused in oil for the colour.

MuttonRoganJosh_Featured3

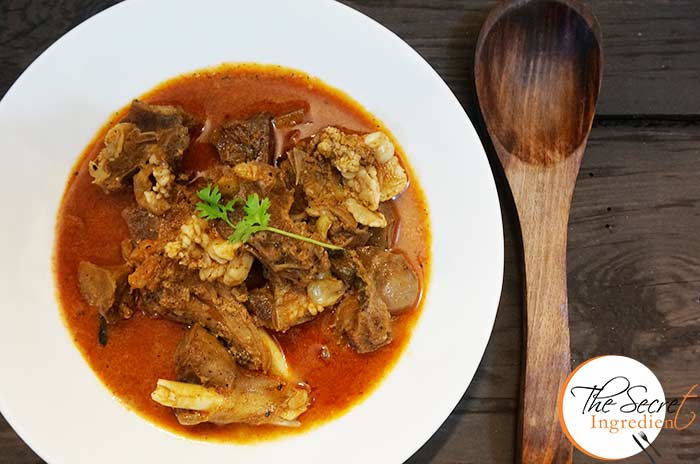
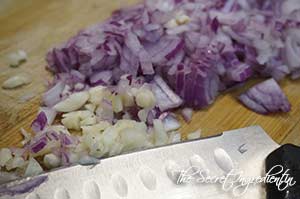
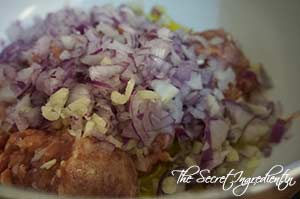
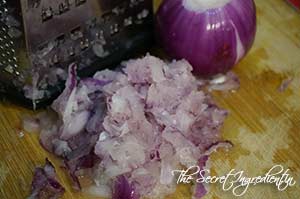
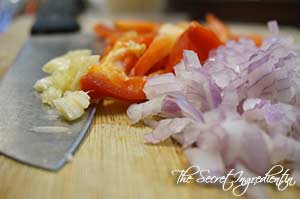
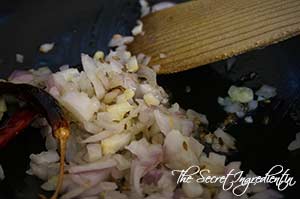
Another interesting fact about this dish is that there are two distinct way of cooking it. The Hindu way and the Muslim way. Muslims use Praan, local shallots tasting like garlic whereas the Kashmiri Brahmins avoid onion and garlic and use Yogurt to bring down the spice in their curry. Also it is noteworthy that in India instead of Mutton Goat is unvaryingly used since genuine lamb is less widely available than goat meat.

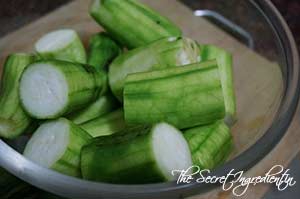
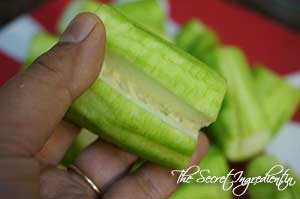
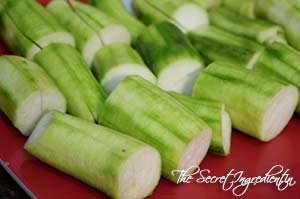
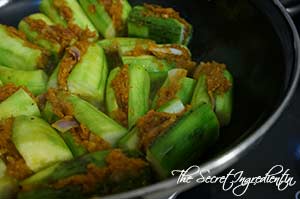
I have made the dish without any fresh vegetables. It made me think loud as to how treacherous can the cold be in the Kashmir Valley where not a blade of grass grows in thick winters and the valley is covered in a blanket of snow. It is where the human being learns to adapt with whatever is available, preserved, and dried. 

I totally enjoyed cooking this specially reading about the Kashmiri Cuisine. Special mention goes to Farrukh Shabad for her incredible lip smacking recipe of Rogan Josh from her blog Cubes n Juliennes. What can be more appropriate than adding this recipe on Bakra Eid. I wish my readers Eid Mubarak!

Directions:

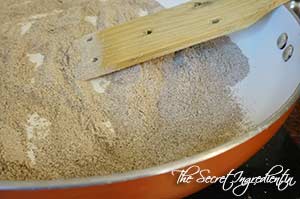
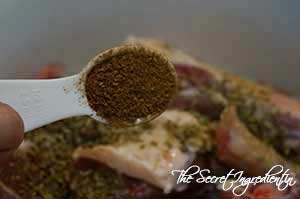
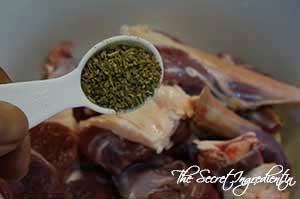
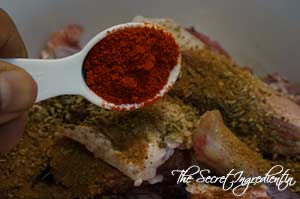
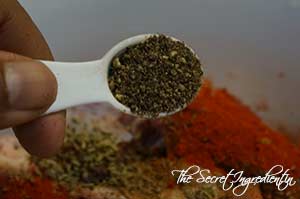
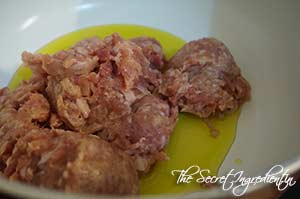
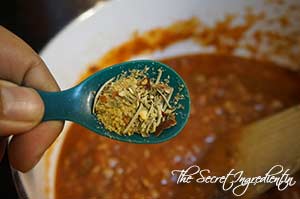
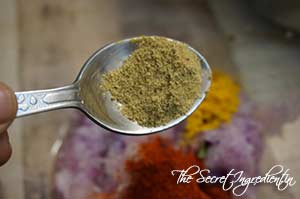
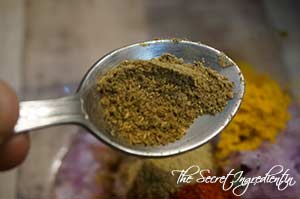
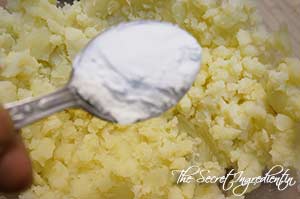
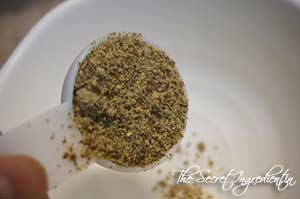
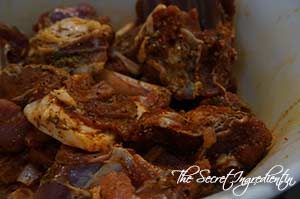
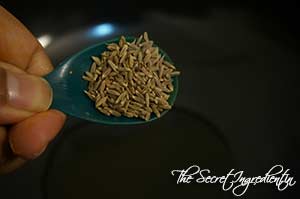
1. In a bowl marinate chopped mutton pieces with Cinnamon Powder and Fennel or Saunf Powder.


DSC03756


DSC03755


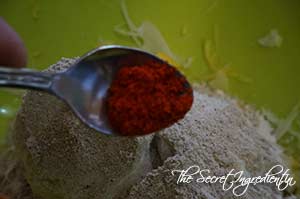
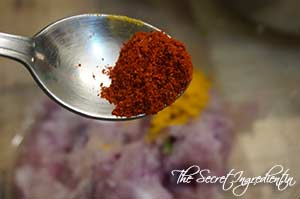
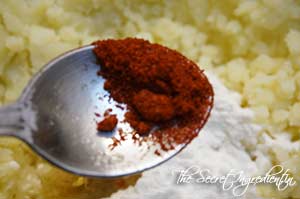
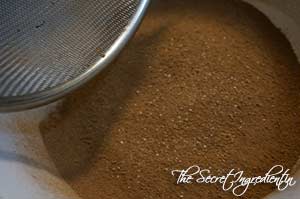
2. Also red Kashmiri Chili Powder, Black pepper Powder and Cardamom Powder or Crushed Cardamom.


DSC03757


DSC03758


DSC03761


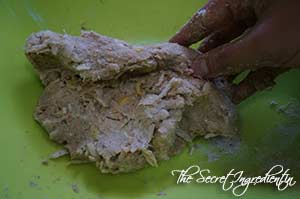
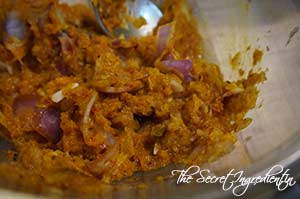
3. Rub the lamb pieces rigorously with the spices and let it sit for an hour or so.

DSC03760
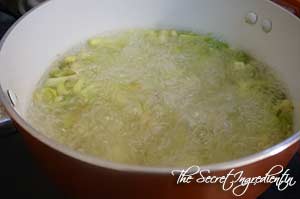
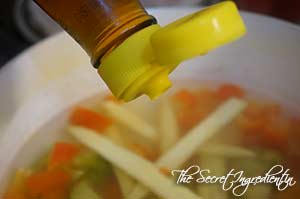
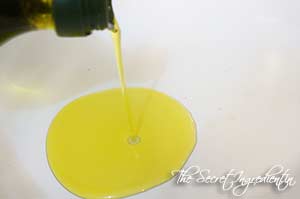
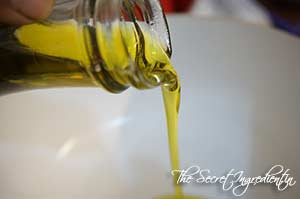
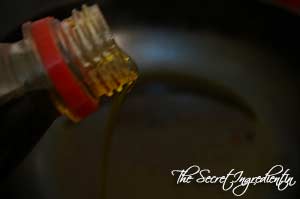
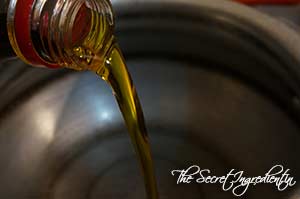
4. After an hour or marination add mustard oil in a pressure pan. You can use open pot also for slow cooking. Let the oil smoke out. As you spot the smoke turn the flame off.

DSC03762
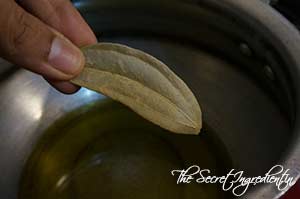
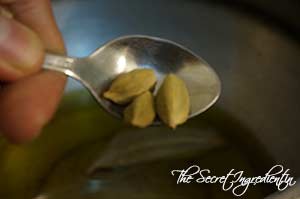
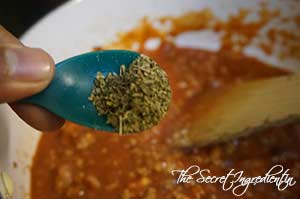
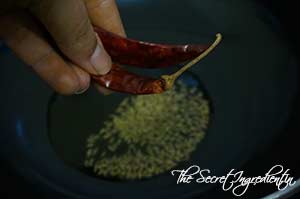
5. Add Bay leaf, Black Cardamom and Green Cardamom.


DSC03763


DSC03764


DSC03765


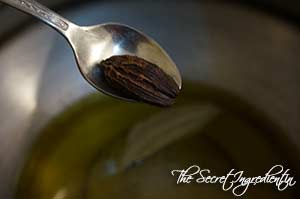
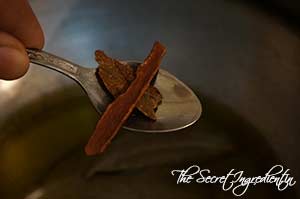
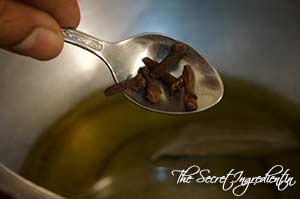
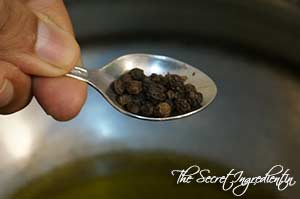
6. Also add Cinnamon Sticks, Cloves and Black Pepper Corns. Roast the spices in oil on low flame till aroma starts coming.


DSC03766


DSC03767


DSC03768


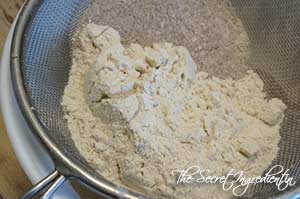
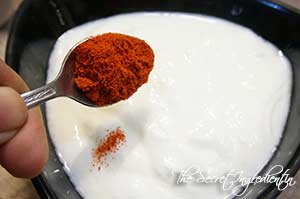
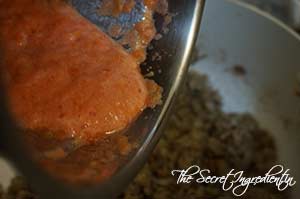
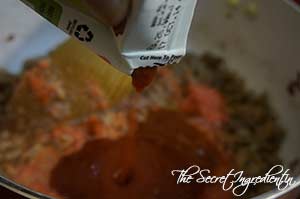
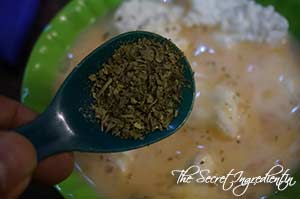
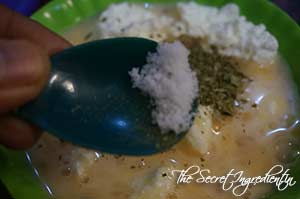
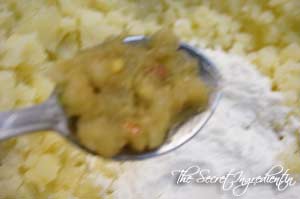
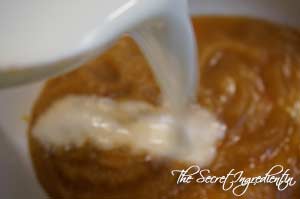
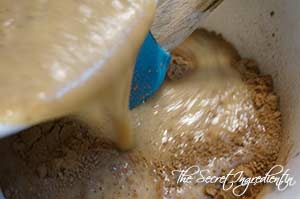
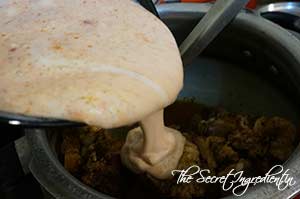
7. In a small bowl whisk some thick creamy yogurt, make sure its without lumps. Add Red Chilli Powder and Fennel Powder to it. Set aside.


DSC03769


DSC03770


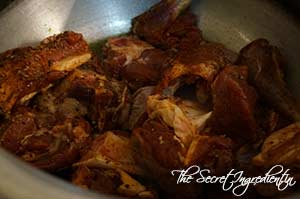
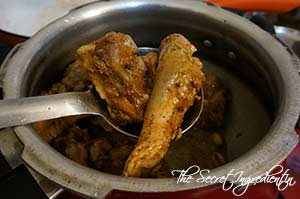
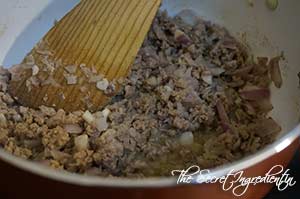
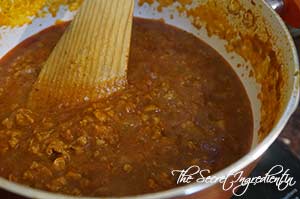
8. When your whole spices have roasted add the marinated mutton pieces to the pressure pan and fry in oil for 6-8 minutes stirring occasionally. At this stage the colour of mutton will change from red to brown. 


DSC03771


DSC03772


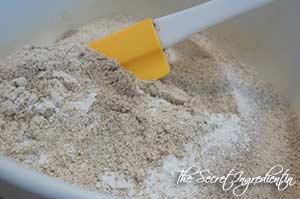
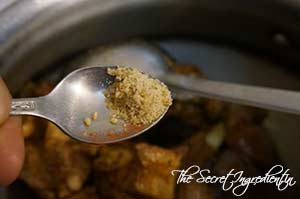
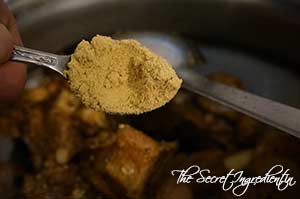
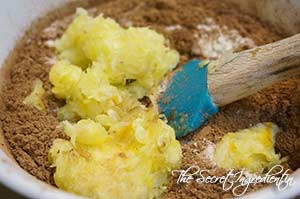
9. At this stage add Asafoetida and Dry Ginger Powder to the pan and combine with the mutton.


DSC03773


DSC03774


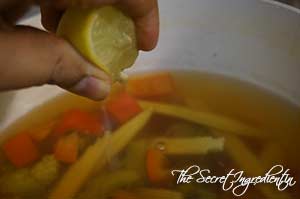
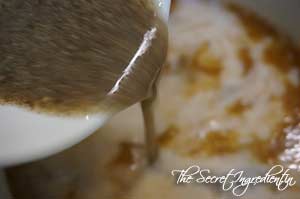
10. Add a cup of water and simmer for good 10 minutes.

DSC03778
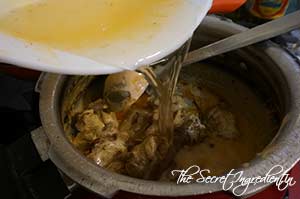
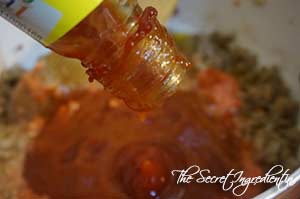
11. Turn the flame on low and then add Yogurt mix to the mutton and combine till whole of mutton is combined in yogurt.
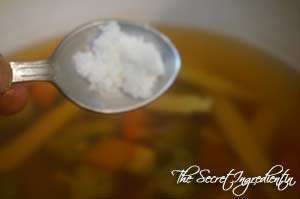
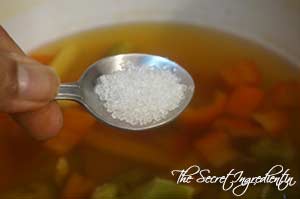
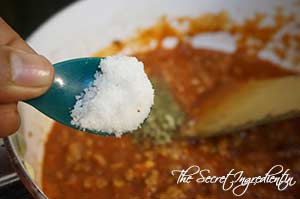
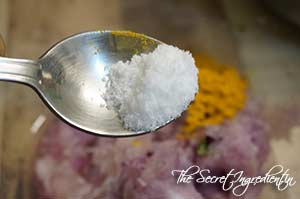
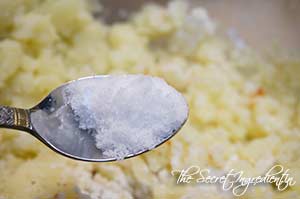
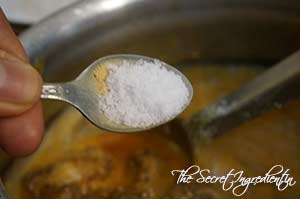
DSC03777
12. Add salt. 

DSC03781
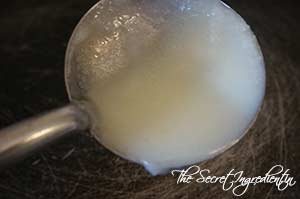
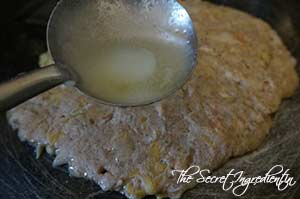
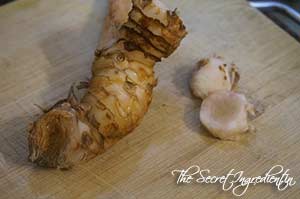
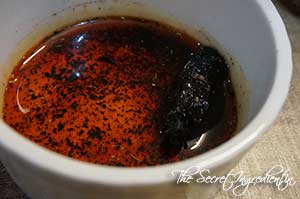
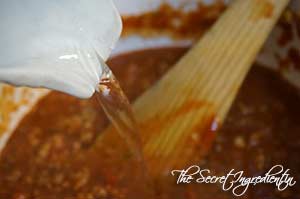
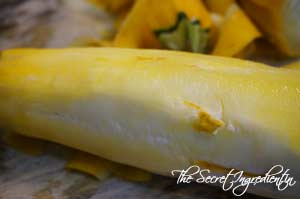
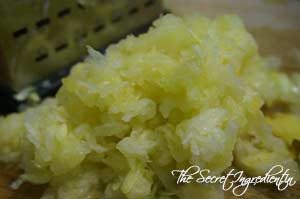
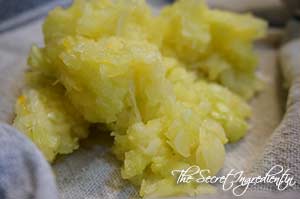
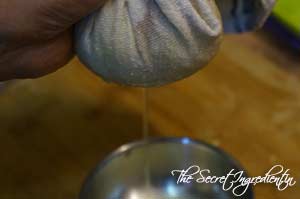
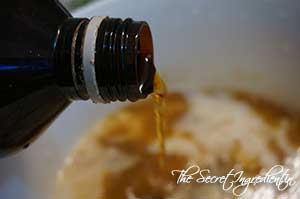
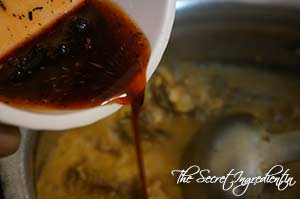
13. In a bowl add ratanjot or alkanet with little oil and microwave it for a minute. This will infuse the colour in oil. It is important to mention that ratan job only infuses in alcohol and oil and not in water.


DSC03776


DSC03779


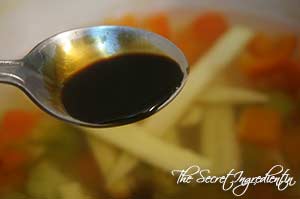
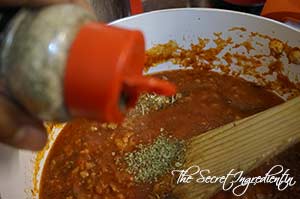
14. Add this ratanjot infused oil to the curry and combine.

DSC03780
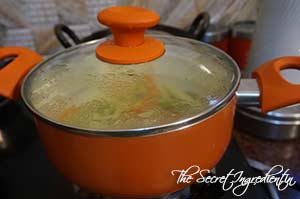
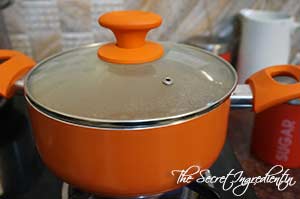
15. Close the lid and bring in 3 whistles and then turn the flame on sim. Let it cook for another 20 minutes undisturbed. If you are cooking in a crock pot cook it covered. It can take upto 1 and 1/2 hours to 2 hours. Do not forget to stir at regular intervals. Serve hot with Rice or simple Roti or Tawa Naan.

Other Popular dishes from Indian Cuisine you can try Butter Chicken, Dal Makhani, Shahi Paneer, Palak Paneer, Mushroom Do Pyaaza.

MuttonRoganJosh_Featured2[whohit]RoganJosh[/whohit]

MuttonRoganJosh_Pintrest

[yumprint-recipe id=’171′]
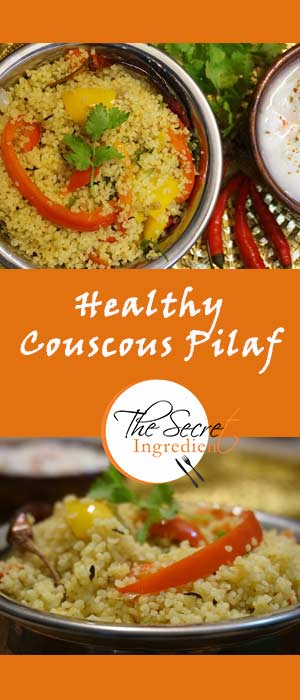
ChickenLasagna_FeaturedLogo3
My first experience of Lasagna was at an Italian place in Mexico. It was such a let down as if someone spatted tomato right on my face :P. It was way too tomatoee. Anyways I am not a big fan of red pasta sauces for the very reason they taste bland and of tomato puree all the way. But my husband loves red sauce while I gorge on white sauce. 

ChickenLasagna_FeaturedLogo2

One day I mustered the courage to put behind all the tomato sauce scare and decided to make my own lasagna with RED SAUCE! Everything was from scratch.  It took me good time to make this but trust me it was worth it. The sauce was amazing to my surprise, full of flavour and was not at all bland. After going back to this recipe for years I can say this is the best Lasagna Recipe so far!

This recipe uses chicken but you can always replace it with Italian sausage. Do make it for your family over some weekend or festivity or even for Thanks Giving dinner table. They will want this more and more 🙂

Directions:

1. Finely chop some onions and garlic. Also puree some tomatoes in a blender and set aside.


DSC00902


DSC00903


DSC00904


2. In a pan add some olive oil and add minced chicken or any other meat you are using.


DSC00905


DSC00906


3. Saute for a minute and then add chopped onions and garlic. Saute them for good time till they all get a brown colour.


DSC00907


DSC00908


4. Add fresh tomato puree to the chicken onion mix.

DSC00909
5. Add packaged tomato puree along with Tomato Ketchup.


DSC00911


DSC00913


6. Season it with Sugar, Parsley and Salt. 


DSC00914


DSC00919


DSC00916


7. Also add ground black pepper, Italian seasoning and basil.


DSC00917


DSC00918


DSC00915


8. Add water and let this come to a boil.

DSC00920
9. Bring the flame to low and let it simmer with lid on for a good 1 and half hours. Stir occasionally.


DSC00921


DSC00927


10. In the meanwhile in another bowl combine ricotta cheese with an egg. Add Parsley and a little salt. Combine and set aside. You can make Ricotta Cheese easily at home. click here to find out.


DSC00935


DSC00936


11. Bring a large pot of lightly salted water to a boil. Cook lasagna noodles in boiling water for 8 to 10 minutes. Drain noodles, and rinse with cold water. Be careful to rinse well as the noodles might stick to each other.


DSC00937


DSC00939


12. Preheat the oven to 375 degrees F (Learn more about Oven temperatures and Conversions). For assembling the lasagna, spread 1 & 1/2 cups of meat sauce in the bottom of a 9×13 inch baking dish. Line the top of sauce with Lasagna Noodles.


DSC00940


DSC00941


13. Spread with one half of the ricotta cheese mixture.

DSC00942

 14. Layer it with grated Mozzarella Cheese. You can even use Mozzarella slices. 

DSC00943

15. Now add another ladle of sauce and repeat the last few steps, until you exhaust your sauce and noodles. Spread on the top layer some mozzarella cheese and parmesan cheese. 

DSC00944

16. Cover the baking pan with aluminium foil . Ensure the foil is greased with oil so that nothing sticks to it and bake for 25 minutes.


DSC00945


DSC00946


17. Now after 25 minutes remove foil and continue to bake further for 25 minutes or till the top layer of cheese gets melted and slight brown. 

DSC00950
18. Let it cool down completely for at least 15 minutes before serving.

You can even try Vegetarian Mushroom Lasagna in White Bechamel Sauce. Quick Vegetarian Lasagna in a Mug Recipe 

Other Italian dishes recommended are: Roasted Rosemary Garlic Potatoes, Italian Mushroom Risotto, Almond Biscotti, Vegetarian Home made Pizza

ChickenLasagna_FeaturedLogo1[whohit]ChickenLasagna[/whohit]


[yumprint-recipe id=’170′]

StuffedTori_Featured4

Mother is your first teacher, friend and a guide. But later in life you meet friends who make your life meaningful and you start learning new things from them. Life was kind on me and made me come across a friend on facebook in one of the Food Groups I am a member of. Sonu and me haven’t met ever but this friendship is beyond seeing each other. It is about the bond we share. This recipe of Stuffed Touri I learnt from her. It is how her mother in law likes it. Oh by the way I also learnt from her Authentic Kaddha Prasad which is already on my blog 🙂

StuffedTori_Featured2

I have always been making touri the way my mommy has taught me, with waddi as we call it in Punjabi. You must try this Touri Waddiyan recipe as well. But Sonu taught me this new version which was as delicious as the other one. This is to add to my series of Stuffed Vegetables I have on my blog. If you are keen to try them, I have Stuffed Baby Brinjals Punjabi Style, Stuffed Bittergourd or Bharwan Karela, Stuffed Apple Gourd or Bhawan Tinda listed here, will be adding more shortly.

Directions:

1. Take fresh smooth gourd, wash and peel its skin.


DSC01582


DSC01583


2. Cut it into three to four pieces.

DSC01584
3. Make a slit in the side but do not cut all the way. The piece should be intact. We are making a cavity for the filling.


DSC01585


DSC01586


4. For the filling. peel the onion skin and grate them using a grater.

DSC01587
5. Add turmeric powder to the grated onion along with salt and red chilli powder.


DSC01588


DSC01589


DSC01590


5. Also add Garam Masala and Chaat Masala.


DSC01591


DSC01592


6. Mix thoroughly and with the help of a spoon stuff each piece of gourd.


DSC01593


DSC01594


7. Now in a pan heat some mustard oil and let it smoke out. Put the flame on low and carefully place the stuffed gourds into it.


DSC01595


DSC01596


8. Keep changing sides and cook them uncovered till they are fully done. Avoid over cooking them. They must be soft but still be able to hold their shape.

DSC01597
9. Serve them hot with chapatis or naans.

Other Summer vegetable dishes you can try are: Touri Waddiyan, Bharwan Karela, Cholai ka Saag, Baingan ka Bhartha

StuffedTori_Featured1[whohit]StuffedTurai[/whohit]

[yumprint-recipe id=’169′]

Similey's_Featured1
Any mother would understand how difficult it is to make your little ones eat. You have to apply so many tricks to handle and control their eating tantrums. The food has to be glamorized so that they at least give it a try. This could be very maddening at times.

Similey's_Featured2

Another challenge is to make them eat healthy and something which is not processed. These days super markets are stacked with frozen snacks which are processed and have no nutritional value. Unfortunately kids are tempted by its appearance and taste. One such snack is Smiley Potatoes by McCain. So I decided I would recreate those smileys at home from fresh products. To my utter surprise they were delicious and tasted almost the same as store bought but many times healthier. I could see the excitement in my kiddos eyes as he grabbed one piece after another. Only a mother would know what satisfaction this brings in.

Directions:

1. Boil potatoes till they are done and peel their skin off.

DSC02860

2. Mash the potatoes with a Potato masher in a bowl. Add corn Flour and mix with a spoon.

DSC02861
3. Add ginger garlic paste. Season with salt and red chili powder. If your kids don’t eat chili you can skip it.


DSC02862


DSC02864


DSC02863


4. Add little turmeric powder and juice of half a lemon.


DSC02865


DSC02867


5. Mix and mash  everything together till everything comes together in the form of a soft dough. Refrigerate for 30 minutes.

DSC02868
6. Take a spoon full of potato dough and shape it into a ball.

DSC02869
7. Flatten it by pressing between your hands about 2mm thickness. In alternate you can use a cookie cutter or small lids to make perfect shapes.

DSC02870
8. Use a clean pencil back end to make eyes.

DSC02871 

8. And a spoon end to make the smiley face.

DSC02872
9. Heat oil in a wok or kadai and fry these smileys till crisp and golden.


DSC02873


DSC02874


10. Absorb the oil on a kitchen paper towel and serve. You can put these as a lunchbox snacks for your kid. 

Other kids recipes you can try here are: Vegan Chocolate Muffins, Whole Wheat Banana Bread, Soya Veggie Vermicelli

Other Potato recipes on The Secret Ingredient: Punjabi Style Dum Aloo, Punjabi Style Aloo Methi, Aloo Patty, Yam Potato Chat, Aloo Anar Raita, Sabudana Vada, Roasted Potatoes with Garlic Rosemary.

Similey's_Featured3

[whohit]Potato Smileys[/whohit]

Similey's_Pin

[yumprint-recipe id=’168′] 

ZuchiniBrownies_Features1
Its been a month me and my husband have been clean. No No its not what you are thinking 😉 We are not on DRUGS!!! We are eating healthy and exercising to burn those extra kilos we have gathered as a result of food blogging 😛 We are trying hard to keep our meals simple, clean and avoiding sugar as much as we can. I know its a painstaking task. But you see every Christ has to carry one’s own cross 😉

ZuchiniBrownies_Features2

This gave me an opportunity to look into healthier and nutritious dishes. I recently made Couscous Chickpea Salad, Mexican Black Bean Mango Salad. But nevertheless the craving for sweet things gets in more too often. I tried to indulge in a dessert which is gultfree. I know Dessert and Guiltree are like the North and the South Pole. But trust me these Chocolate brownies are without any eggs, oil or butter and no extra sugar is added to it. Its sweetened with apple sauce, chocolate and maple syrup and above all it has goodness of Yellow Zucchini. Another fabulous idea to hide in Zucchini in your kiddos food without letting them know 😉

Directions:

1. Preheat oven to 180 degree Celsius for ten minutes. Wash, peel and core apple. Cut into small pieces and make a smooth puree in a blender. Set aside.


DSC03397


DSC03398


DSC03399


2. Wash, peel and grate a zucchini. You can use yellow or green. Both will serve the purpose. 


DSC03400


DSC03401


3. Place the grated Zucchini  in a cheese cloth and squeeze out all the water. Set aside. You can use this water to make roti dough. 


DSC03402


DSC03403


4. In a small bowl add Flax Seed meal or Flax seed powder (Learn how to make Flax seed Powder at home) and add some water. Let it rest for ten minutes and become gelatinous.


DSC03404


DSC03405


5. In a mixing  bowl add apple sauce and soya milk.*


DSC03406


DSC03407


6. Also add Maple syrup and Vanilla extract.


DSC03408


DSC03409


7. Add the gelatinous flax meal mixture to the bowl and give everything a good stir.


DSC03410


DSC03412


8. In another bowl swift and add cocoa powder and whole wheat flour.


DSC03414


DSC03415


9. Also sift and add in baking powder and combine with the dry ingredients. The purpose of sieving is to eliminate all lumps.


DSC03416


DSC03417


10. Gently fold the wet ingredients in the dry ingredients.

DSC03420

11. Add grated and squeezed zucchini and combine using a spatula.

DSC03421
12. Chop some chocolate and add to the batter. Save a little for the top garnish. You can even use chocolate chips instead.


DSC03419


DSC03422


13. Line a 8×8 baking tray with some parchment paper and grease it with little oil so that nothing sticks. Pour the batter in the greased tray. 


DSC03423


DSC03424


14. Top it with reserved chopped chocolate and keep it for baking in a preheated oven for 25 – 30 minutes.

DSC03425

15. Remove it from the oven and let it cool down completely before you cut it into squares. You can store them up in fridge in air tight containers for a few days .

Other desserts you can try here are: Blueberry Jam Bars, Pumpkin Cake Rolls, Mascarpone Cherry Compote Cheesecake Glasses

ZuchiniBrownies_Features5

[whohit]ZucchiniBrownies[/whohit]

ZuchiniBrownies_Featured_Pintrest

[yumprint-recipe id=’167′]