Author

anshu

Browsing

PhalahariCorianderChutney_Featured1

Navratri or Navratras are very special to me. I feel so rejoiced during the entire fasting period. I love to fast, cook and feast. Thanks to my mother for introducing new food every time so every time we have something new to try.

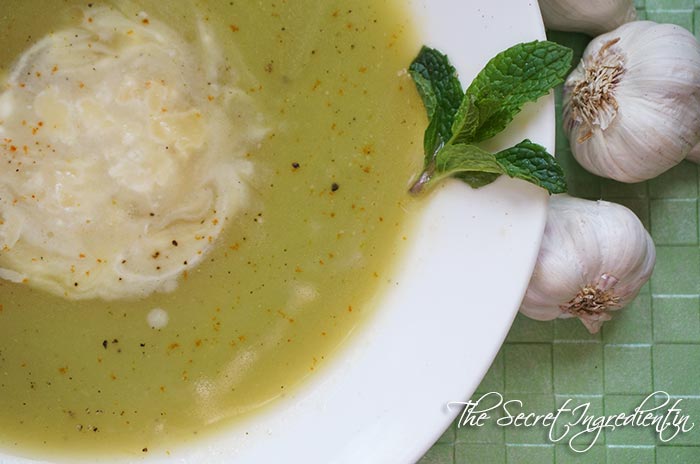
You can eat Sabudana Tikkis, Sabudana Khichdi, Sama k chawal ki Khichdi or simple Aloo Jeera. But everything you eat is accompanied with plain simple curd or in the form of Raita and a chutney to enhance the deliciousness of food. 

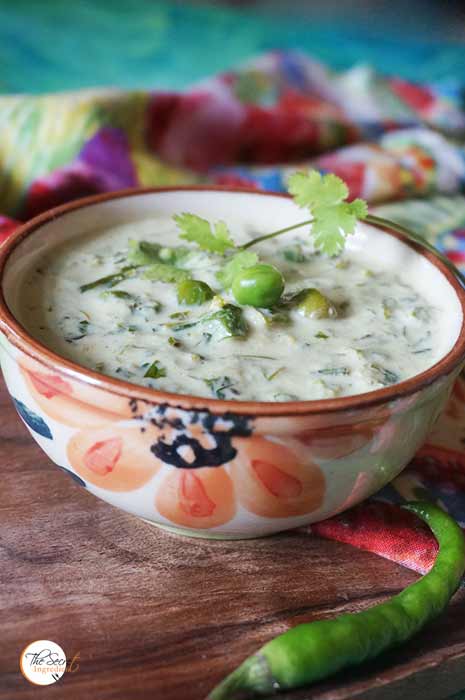
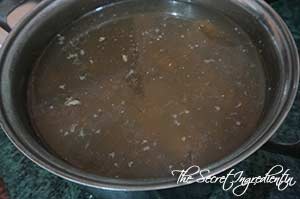
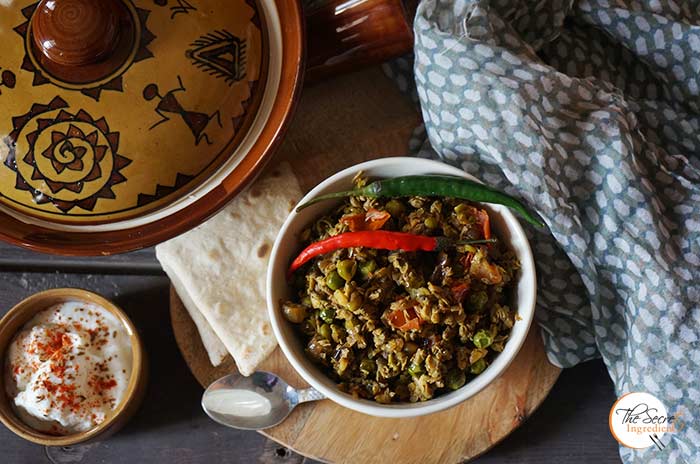
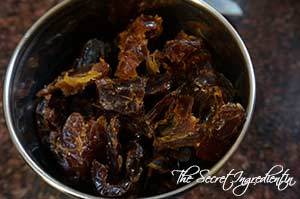
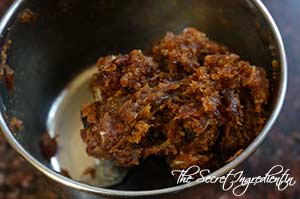
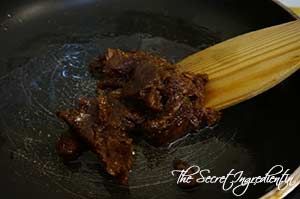
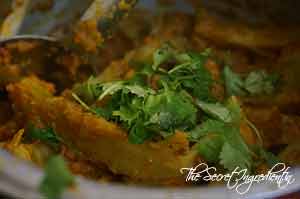
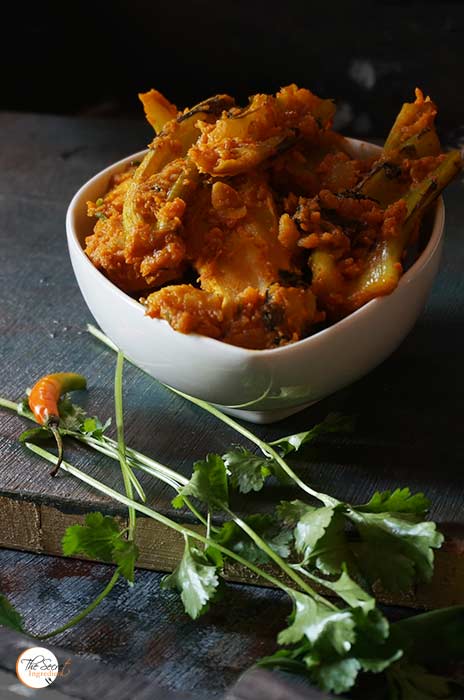
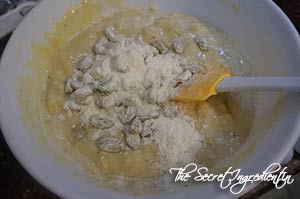
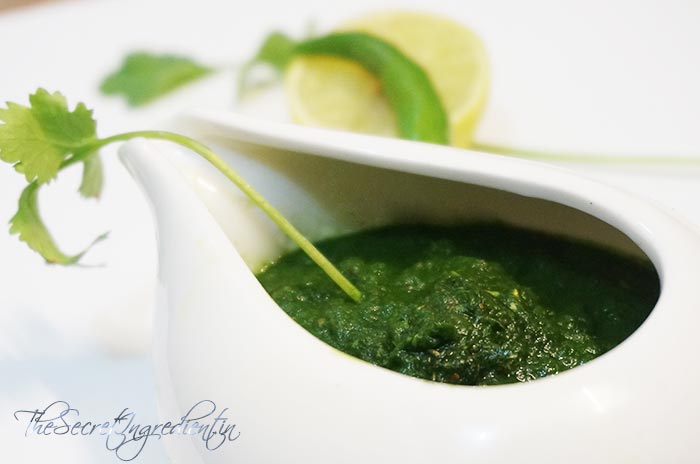
Here is one such phalahari chutney which uses minimal ingredients and uses no onion garlic but primarily coriander. My mother has been making this as long as I remember. She also makes another pharahari chutney of Spinach Coriander but thats only if your fasting rules allow eating Spinach.

Directions:

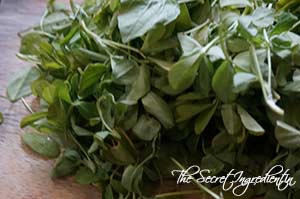
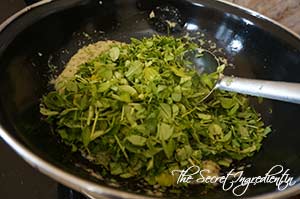
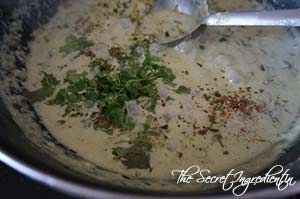
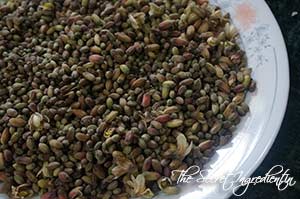
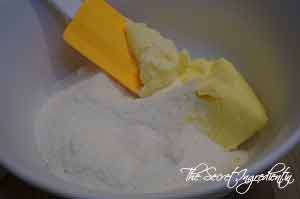
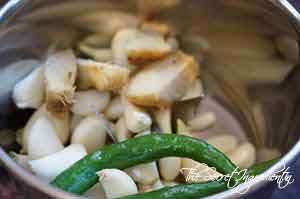
1. Separate the coriander leaves from the thick stem. You can spare the tiny soft stems.

DSC00312

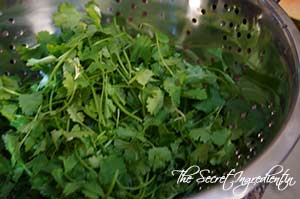
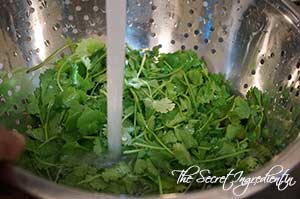
2. Wash the coriander thoroughly under running water.

DSC00314

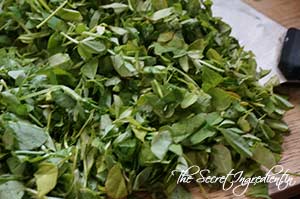
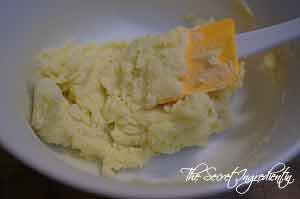
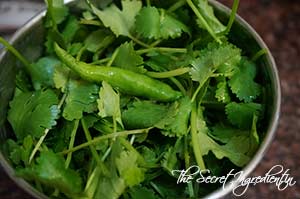
3. Put the washed coriander leaves in a grinder along with green chilies. I am using one because my husband has a sour throat these days.

DSC00315


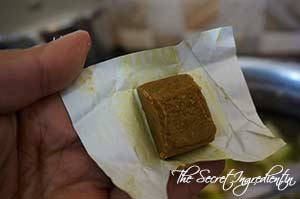
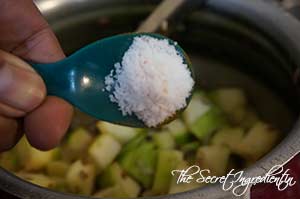
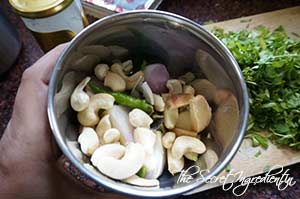
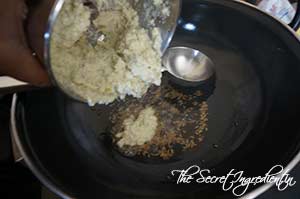
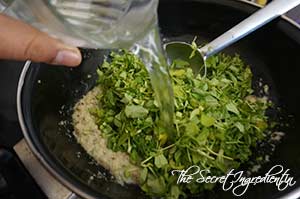
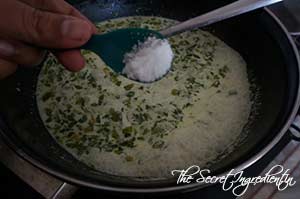
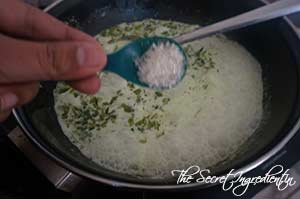
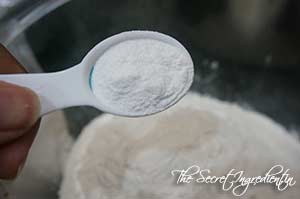
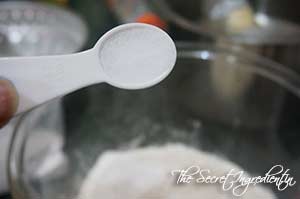
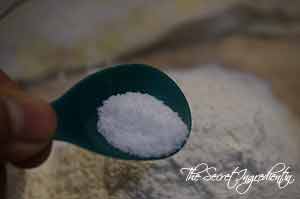
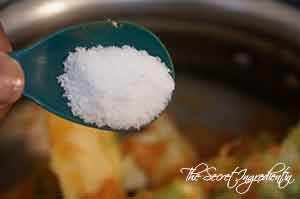
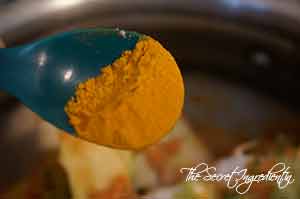
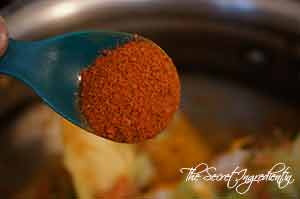
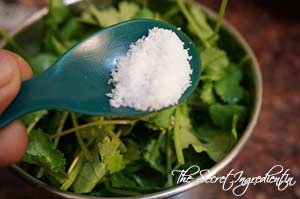
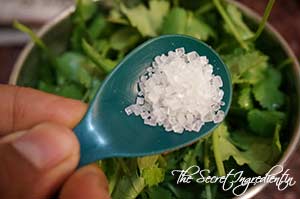
4. Add to it sendha namak or rock salt and. little sugar


DSC00317


DSC00316


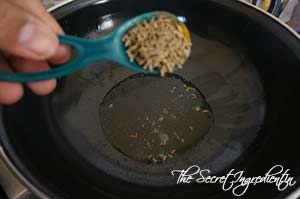
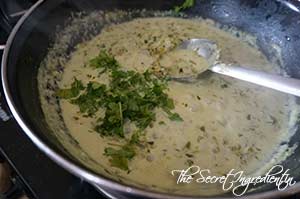
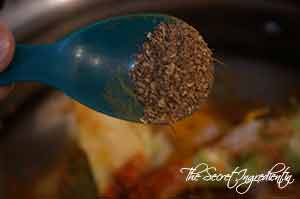
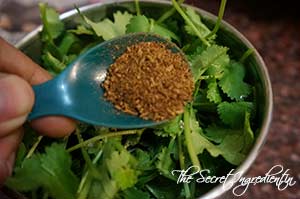
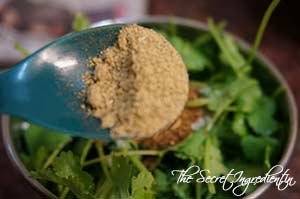
5. Also add to it roasted cumin powder and chat masala if its allowed as per your fasting rules.


DSC00318


DSC00319


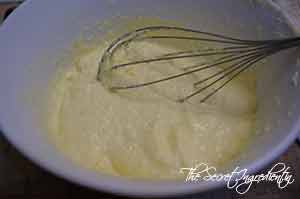
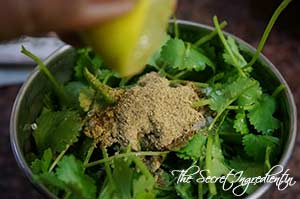
6. Squeeze juice of a lemon.

DSC00321

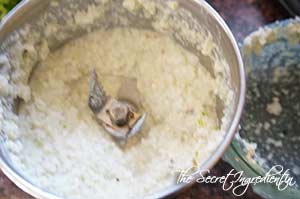
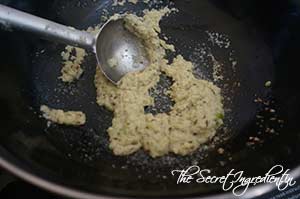
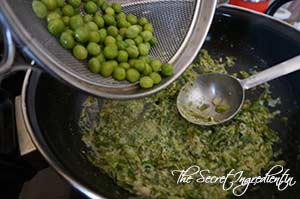
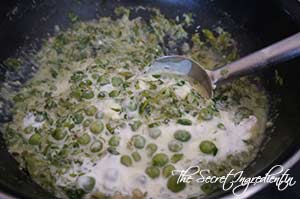
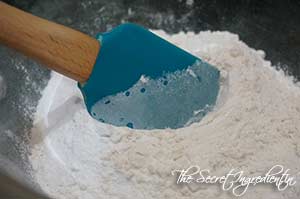
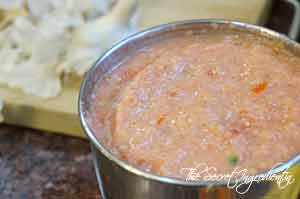
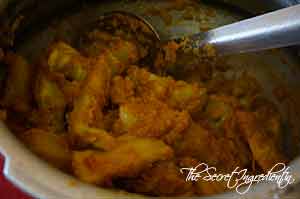
7. Grind them to form a smooth paste. Check for salt Serve with your favourite food.

You can try other Chutneys and Salsa like Mint Chutney, Coconut Chutney, Chimichurri, Phalahari Spinach Coriander Chutney.

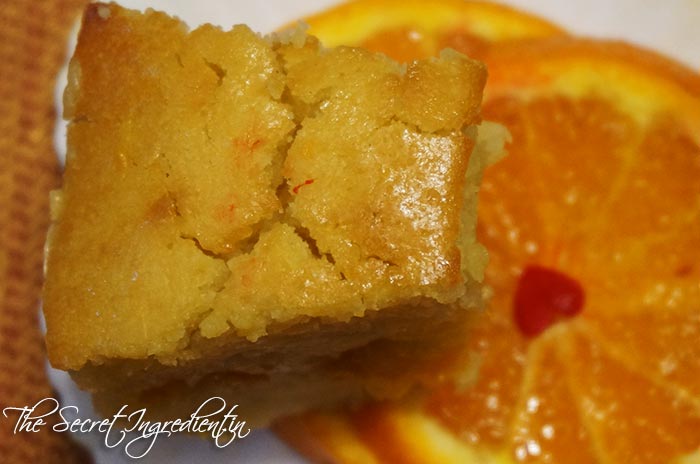
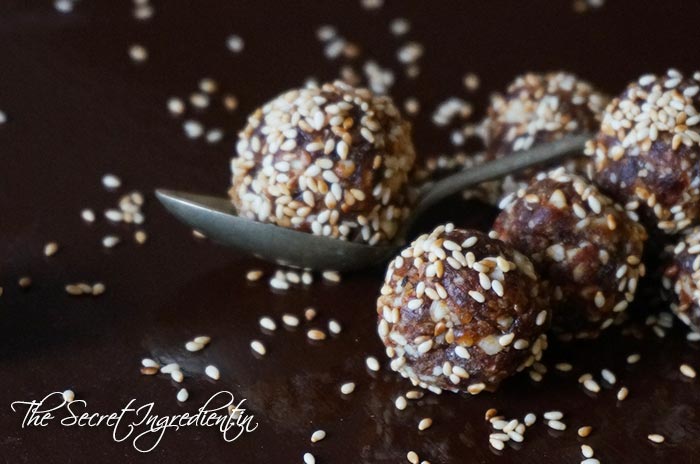
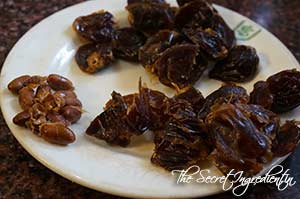
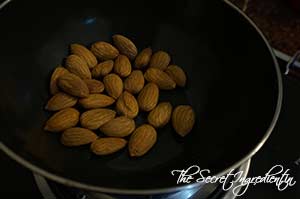
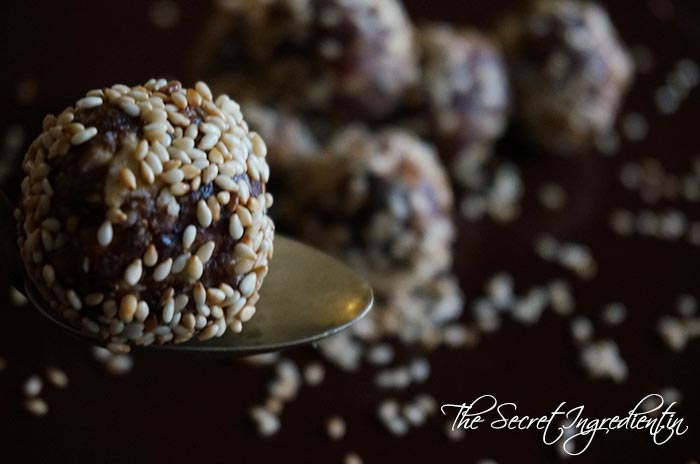
You can try other Navratri Food Like Sama Ke Chawal Ki Khichdi, Kaddu ka Halwa, Rasgulla, Khajoor & Til Laddoo.

PhalahariCorianderChutney_Featured2

[yumprint-recipe id=’107′] 


ZuchiniSoup_Featured2

I Live in a small town in the Himalayas where Summer has still not beckoned us but there are traces of spring here and there. When I saw Zucchini in the Farmer’s Market I knew summer isn’t that far off. I picked it up and wanted to make something light for my kiddo who like all kids his age is a fussy eater. I made it into a soup and wola!!!! He loved it. That is the greatest joy a mother can feel. Little shreddings of yak cheese gave this humble soup a new meaning. It was flavourfully devoured by my little one his daddy and his mumma 🙂

Directions:

1. Wash zucchini and if the skin is hard peel it off otherwise retain the skin and cut it into cubes. Set aside The soup will be more green with the skin on.


DSC09989


DSC09990

DSC09991


2. Chop Onions and Garlic. Set aside.

DSC09992
3. In a pressure pan add butter and melt it on a low flame.

DSC09993
4. Add chopped onions and garlic and saute them till they are soft and tender.


DSC09995


DSC09996


5. Add the cubed zucchini and saute it for a minute.

DSC09997
6. Add water with chicken/vegetable bullion or chicken stock.


DSC00001


DSC00002


7. Add salt and ground black pepper.


DSC09998


DSC09999


8. Close the lid and cook for ten minutes till the zucchini is soft.

DSC00004
9. Open the lid and puree the soup with a hand blender till soft and creamy.

DSC00005
10. Serve hot with a dollop of fresh cream and yak cheese shreddings. You can also have this cold.

You can also try other soups from The Secret Ingredient like Russian Borsch, Mexican Chicken Soup with Rice, Tomato Soup, Mexican Soup of Kidney Beans.

ZuchiniSoup_Featured1
[whohit]ZucchiniSoup[/whohit]

[yumprint-recipe id=’105′]


Methi Leaves or Fenugreek leaves are widely available in winters. The slight bitterness in these leaves brings an interesting flavour to the dish. Usually in my kitchen I make Fenugreek with Potatoes or as we call it in hindi, Aloo Methi . But this time I wanted to try something new so tried cooking Methi Matar Malai.

It was my maiden attempt at this dish and I am proud to say it came out very yummy. The bitterness of leaves, the crunchiness of peas and the creaminess of malai or cream gives it a unique, balanced flavour.

Directions:

1. Separate the fenugreek leaves from their stem. Wash it rigorously and chop it coarsely.


DSC08663


DSC08664


 2. In a grinder add Cashew Nuts, Onion, Ginger, Green Chilies and Garlic. 

DSC08665


3. Make a smooth paste without using water. You can add a spoon of water if there is difficulty in making a paste.

DSC08666

4. In a wok add little ghee or clarified butter.

DSC08667 

5. Add cumin seeds till they splutter. Then add the ground cashew mixture.


DSC08668


DSC08669


 6. Saute the mixture till rich aroma starts coming. You don’t have to brown the paste. 

DSC08670

7. Add chopped fenugreek leaves and pour 1/4 to 1/2 cup water.


DSC08671


DSC08672


 8.  Simmer for a few minutes then add boiled peas and Cream or malai.


DSC08673


DSC08674


 9. Keep simmering it further. Now add salt and sugar to balance the bitterness of fenugreek.


DSC08676


DSC08677


10. Give it a mix. and keep simmering for a minute or two.

DSC08678

11. Garnish with Fresh Coriander Leaves and little Garama Masala.


DSC08680


DSC08681


 12. Serve hot with Rotis.

You can even try Aloo Methi.

If you are looking for more winter dishes you can try Swanjhane Ke Phool Ki Sabji.Besan Kaddhi Pakora, Kathal ki Sabji.


[whohit]MethiMatarMalai[/whohit]

[yumprint-recipe id=’104′]

Swanjhane ke phool or drumstick flowers as it is known in English are bitter flowers available at this time of the year. These are also known as Moringa flowers, sahjan k phul, swanjhra gulah and are widely popular in Sindhi Cuisine. My mother being a punjabi makes this amazing dish which is known in lessor households, rather not a lot of people know that these flowers can be cooked. When I made this last time my parents in law tried it for the very first time. 

This is my favourite dish and I yearn to eat this whenever these flowers are in season and I am at my mother’s place. I haven’t been able to perfect this recipe but this is the exact recipe she follows. I think its the addition of love which makes it more delicious. Many people dislike this because they complain of being very bitter. But my mom’s recipe makes it neutral and delicious. You must try it out. It has that earthy taste which makes it simply delicious. 

Directions:

1. When you buy the flowers and buds of drumstick just ensure it doesn’t have any unwanted stems. 

DSC09754


2. Boil some water in a pot and add salt.

DSC09755


3. When the water comes to a boil add the flowers and let it cook for a minute and then turn the flame off.

DSC09756


4. Close the lid and let it sit overnight or 8 to 9 hours. This will take out the bitterness out of the flowers.

DSC09757

5. After soaking for 8 hours this is how it will look. The water will become brown.

DSC09758

6. Now drain the flowers and  put them under running water.


DSC09759


DSC09760


7. Put the flowers back in the pot and add fresh water.

DSC09761

8. Keep boiling it for 20-25 minutes till the flowers are soft and cooked. You can take a flower and try to mash it with your fingers.*


DSC09762


DSC09764


9. Drain the flowers using a colander.

DSC09765


10. Squeeze out extra water using your hands. It will mash up the flowers but its okay. You can do it in batches.

DSC09766

11. Keep them aside on a plate. In the meanwhile chop some onions, tomatoes and green chilies for the temper.


DSC09767


DSC09763


 12. In a wok add some ghee or clarified butter,

DSC09768

 13. Add peas and cook them for five to seven minutes till they become soft and crunchy.
DSC09769

14. Add chopped onions and saute them till they become transparent and little brown.

DSC09770

15. At this  stage add chopped tomatoes and green chilies. And cook till tomatoes are softened.

DSC09771

16. Add salt and red chili powder.

DSC09772

17. Cook for five minutes or until the oil begins to separate.

DSC09773

18, Add boiled and drained flowers and mix.

DSC09774

19. Cover it with a fitting plate and let it cook on low flame for five minutes.

DSC09775

20. Sprinkle some Garam Masala.

DSC09776

Serve hot with Rotis.

You can try other recipes from my Mother’s Kitchen like Tori Wadiyan, Bharwan Karela, Besan Kaddi Pakora, Aloo Methi, Gobhi Danthal, Dal Makhni.

[whohit]SwanjhneyKPhool[/whohit]

[yumprint-recipe id=’103′] 


OrangeCake_Featured3

I have never been fond of Orange Flavour specially the artificial flavour in ice lollies, squashes, sweet orange candies. But when I saw the recipe of this cake it enticed me. The recipe said it is made with fresh orange juice and candied orange peels. The idea itself was so inviting that I took a plunge and decided to bake this cake.

To my surprise the cake came out delicious, fluffy and moist in spite of being eggless. The most impressive thing about this cake was the center filling with candied orange peel. It  took this cake to the next level of deliciousness. Now you will understand why I chose this special cake for my 100th post on my blog 🙂 🙂

Directions:

1. Make Candied Orange Peels and keep aside. You can follow this recipe. Grease a Bundt pan or any pan of your choice. Do not forget to dust it with flour so that the cake can come out easily after baking. Preheat your oven for 10 minutes on 180 degree Celsius. Learn More about Oven temperatures and Conversions.


DSC09849


DSC09850


2. In a bowl add All purpose flour, salt and baking powder. Combine  them together and keep aside.


DSC09740


DSC09741


DSC09742


3. In another bowl add melted butter and sugar, Whisk them together. You can even use an electric whisker,


DSC09743


DSC09744


4. Add Yogurt or curd and keep whisking together till everything is smooth and lump free.

DSC09745


5. Add Vanilla extract and combine.

DSC09746

6. Pour half of wet ingredients in dry ingredients and combine.

DSC09747

7. Add Orange juice and mix everything. Add rest of the flour mix and combine. 

DSC09749


8. Add little milk to make the batter runny. Gently mix until everything is moistened. Do not over mix.

DSC09752


9.Pour half the batter in a greased pan and spread the candied orange peel all over the surface.

DSC09851

10. Now pour rest of the batter on top of the candied peels.

DSC09855

11.Bake in preheated oven on 180 degree Celsius  for 40-50 minutes or until the toothpick inserted comes out clean. Let the cake cool down completely before you invert it on a tray. Otherwise the cake will break. Cut into slices and enjoy the delicious, moist orange cake.

You can even try our other cakes and breads like Apple Raisin Streusel Bread, Persimmon Rum Cake, Pumpkin Cake Rolls. You can learn how to make Candied Orange Peel at home.

OrangeCake_Featured1

 [whohit]OrangeCake[/whohit]

[yumprint-recipe id=’102′]

DatesLaddoo_Featured1

This post is specially for diet conscious people or people who are watching their weight. These dates ball are quick and easy to do with minimal ingredients. When you want to snack on to something guilt free or quench your mid night cravings this is a perfect treat. Store them in air tight jar and these go a long way. They look small but they are very filling, so ensure you make small sized balls.

When I made them last time I never got an opportunity to store them for they were gone by the evening. Yes me and my husband had 6 each ;). A little dieting never hurts anyone 😛

Directions:

1. Remove the seeds from the dates.

DSC08289
2. Dry roast the almonds and walnuts or pecans in a pan in batches. You can use any nut of your choice. Ensure you keep tossing them for you don’t want to burn them. Coarsely grind them in a grinder leaving a few chunky pieces to give texture to the balls.


DSC08290


DSC08291


DSC08298


3. In the same pan add the sesame seeds and toss them to get a slight colour and crunch on them. Roast them on a low medium flame.


DSC08292


DSC08293


4.  Add the pitted dates in a coffee grinder or normal grinder and make a sticky paste.


DSC08294


DSC08295


5. In a pan add little butter or ghee or if you are vegan add coconut oil or any neutral oil.

DSC08296

6. Add the dates and cook them in ghee for about 2-3 minutes. The dates will absorb all the butter.

 DSC08297

7. Now add the ground chunky nuts and mix them to combine evenly using a spatula. Soon everything will be well combines in one thick paste.


DSC08299


DSC08300


8. Let the mixture cool down a bit. Take a spoon full of it in your palm and make a smooth ball with it.


DSC08301


DSC08302


9. Place all the balls in a plate and one by one roll them in roasted sesame seeds.


DSC08303


DSC08304


 10. Store them in an air tight jar and enjoy them whenever you feel like snacking!

DatesLaddoo_Featured2


[whohit]DatesLaddoo[/whohit]

[yumprint-recipe id=’101′]

There are many who say they cant bake. After numerous failed attempts they have given up on baking. This recipe is for those who have lost all faith in baking and for those who want to debut in baking muffins. Do not worry this is the basic recipe to make that perfect moist cake without the use of eggs. What can be more perfect than baking these moist chocolate muffins for your Valentine this Valentine’s Day.

Directions:

1. Line the Muffin Tray with Muffin Liners and Preheat the Oven to 180 Degree Celsius for ten minutes. (Learn more about Oven Temperatures and Conversions).

DSC06923

2. In a bowl add All Purpose Flour and Sugar.

DSC06916
3. Add Baking Soda and Cocoa Powder.


DSC06920


DSC06921


4. Give it a gentle whisk to combine. Set aside.

DSC06922

 5. In an another bowl add warm water and vegetable oil.


DSC06924


DSC06925


6. Add Vanilla Extract and White Distilled Vinegar.


DSC06926


DSC06927


7. Mix dry ingredients to the wet ingredients.

DSC06928

8. Whisk together till everything moistens and the batter is lump free. Do not over mix.

DSC06929

9. Using a spoon fill 2/3 of the muffin cup with batter.

DSC06930

10. Bake in the preheated oven for 10-12 minutes or until the toothpick inserted comes out clean.Let them cool down before you dig in. You can ice it, glaze it or eat just like that.

You can try Other Cake recipes like Surprise Heart inside Cake, Pumpkin Cake Rolls, Persimmon Rum Cake and Apple Raisins Streusel Bread.

[whohit]EgglessChocolateMuffins[/whohit]

[yumprint-recipe id=’100′] 

SurpriseHeartInsideCake_Featured2

Valentine’s Day is right across the corner. What can be more exciting to surprise your Valentine with this Surprise Heart inside Cake. This cake has been on my mind for a long time. Finally I gathered courage and patience to bake this delicious cake. Its a wonderful DIY project you can do with your kids. Specially when the result is enthralling. The ordinary looking cake when cut open has a cute heart in every slice! How romantic! Isn’t it?

 Directions:

1. Preheat the oven to 180 degree Celsius and grease a bread loaf 7 cm long and 2 inches deep pan with oil or butter. Line it with a parchment paper and set aside.

DSC09461

2. In a bowl combine sugar and butter, till it turns creamy.


DSC09455


DSC09456


3. Add eggs and keep mixing.


DSC09457


DSC09458


4. Add vanilla extract and mix.

DSC09459

 5. In an other bowl add All purpose flour, Salt and Baking powder. Whisk everything together.


DSC09460


DSC09462


6. Add dry ingredients to the wet ingredients and combine using a spatula.

DSC09463

7. Add food colour as per your choice. I am using red and blue to make pink.


DSC09465


DSC09466


DSC09467


8. Pour the batter in the greased loaf pan and bake for 40 minutes or till the toothpick inserted comes out clean.

DSC09472

9. Let the cake cool down completely.

DSC09474


10. Cut the cooled loaf into slices . About seven slices.

DSC09480

11. Take a cookie cutter and cut heart from each slice. Don’t throw the trimmings away, they can be used to make cake pops or truffles. Place the hearts of a tray lined with parchment paper freeze the hearts for 30 minutes.


DSC09481


DSC09483


12. Re grease the loaf pan with oil . Sift flour, baking powder,salt and mix with creamed butter and sugar.


DSC09484


DSC09485


 13. Thickly spread some of the cake mixture over the bottom and sides of the tin, making sure it is completely covered.

DSC09486

14. Arrange the sponge hearts, upright, down the length of the tin, closely together so that they support each other.


DSC09487


DSC09488


 15. Carefully spoon the remaining cake mixture on top of the hearts, gently tapping the tin on the work surface to help the mixture settle round the hearts. Make sure the hearts are well covered in cake mixture to help create the surprise. Bake the cake in preheated oven on 180 degree Celsius for 40 minutes or so or till the toothpick inserted comes out clean. Cool it on a wire rack. 


DSC09490


DSC09493


 16.For the chocolate sauce melt butter in a saucepan on a low flame. Once the butter is melted add chocolate chips and keep stirring till the chocolate melts and becomes thick in consistency.


DSC09495


DSC09496


DSC09499

 17. Place the cake on a wirerack with a plate under it. When the chocolate mixture starts to thicken, spoon over the top of the loaf. Gently tap the wire rack on the tray to spread and smooth the icing on top, letting it drip down the sides of the cake. Leave to stand in a cool place for several minutes to allow the icing to set before transferring to a serving plate. 


DSC09503


DSC09504


 18.Your cake is ready to slice and surprise!

You can try other Valentine’s Day recipe like Blueberry Bars, Wacky Vegan Chocolate Cake, Persimmon Rum Cake.

[whohit]SurpriseHeartCake[/whohit]

SurpriseHeartInsideCake_Featured1


[yumprint-recipe id=’99’]


Gobhi or Cauliflower is the most versatile vegetable after potatoes and found in almost all across the globe. In winters it is available in abundance in India. One gets tired of eating Aloo Gobhi or Cauliflower cooked with Potatoes so a variation is always welcome. Few days back I had posted recipe of Gobhi Manchurian. which is an indo-chinese way of cooking this nutritious vegetable. The interesting thing to note is that not only the cauliflower florets are used in cooking but the central stem holding the florets also makes such an amazing dish. My mother makes it and its absolutely delightful.Its one of my favourite dishes and I insist that you must try it in thick winters. Its also known as Vegetarians meat. 

gobhidanthal_featured4

You have to reserve and collect the stems or danthals when you cook cauliflower. The softer the stems the better the dish tastes. You can keep the danthals or stems in the fridge for two weeks and cook once you have enough danthals to get started. The other option is you can ask your local vegetable vendor to give you the stems. They will be happy to give away to you.

Directions:

1. You need atleast two full pods of Garlic for this. Peel the skin and keep the garlic cloves aside.

DSC09357


2. In a blender add garlic, green chilies, ginger and tomatoes and make a fine paste. Keep aside.


DSC09358


DSC09359


DSC09360


3. Remove the florets and take the central stem of the cauliflower. You can also use the hard shoots,ensure they are fresh. Wash them rigorously to remove all dirt.

DSC09361


4. Cut the danthals into half or if they are big cut them into fours lengthwise.

DSC09362
5. Put some mustard oil in the pressure pan. Wait till the oil starts to smoke out.

DSC09363
6. Put the tomato puree.

DSC09364
7. Also add the danthals and combine them with the puree.


DSC09367


DSC09368


 8. Add salt, turmeric powder and red chili powder.


DSC09369


DSC09370


DSC09371


 9. Also add garam masala and combine.


DSC09372


DSC09373


 10. Close the lid and cook for 6-7 whistles or till it becomes soft and tender.

DSC09374

 11. Garnish with Green coriander leaves.

DSC09375

Serve hot with Rotis and enjoy the most amazing vegetarian meat. Do not forget to remove the hard stems like bone 😉

You can even try other dishes from Punjabi Cuisine like Besan Kaddhi Pakore, Bharwan Karela, Dal Makhni, Langar Wali Dal and Dum Aloo.

[whohit]Danthal[/whohit]


[yumprint-recipe id=’98’]

AppleBread_Featured1

When apples are in abundance you look haywire for some interesting apple recipes. This is in continuation to my post of Apple Cinnamon Pancakes. I made this very delicious cake with streusel or crumple topping. It gives this bread such an amazing texture. The bread has a lovely flavour of fresh apples and raisins. You can have a slice with your warm cup of Coffee or tea. Its perfect when you invite some friends over for an evening tea or serve it for dessert at dinner table with a scoop of Vanilla Ice cream.

Directions:

1. In a bowl combine All Purpose Flour, Cinnamon Powder,baking powder and Salt.


DSC07080


DSC07081


DSC07082


2. In a small bowl add raisins and 1/4 cup of Flour mix and toss them together. Set aside.

DSC07084


3. In another bowl add milk and eggs.


DSC07085


DSC07086


4. Add Vanilla Extract, Orange Zest and Sugar.


DSC07087


DSC07088


5. Add Oil and whisk everything together to form a frothy mixture.


DSC07089


DSC07090


6. Peel, core and grate apples and add to the wet ingredients.


DSC07091


DSC07092


7. Add dry ingredients to the wet ingredients and fold them using a spatula until every thing is moist. Also add the raisins and combine.

DSC07093

8. Preheat the oven on 350 degree Fahrenheit (Learn more about Oven temperatures and conversions). Grease a 9×5 loaf pan and line it with Oddy Uniwrap Parchment paper. Pour the batter into the pan and keep aside.

DSC04629


9. For the streusel or crumble in a bowl add cold butter cubes, all purpose flour salt and sugar. Using your finger tips or a fork combine them to form a crumbly mix.


DSC07095


DSC07096


DSC07097


10. Sprinkle the crumble on top of the bread batter evenly leaving no space.

DSC07098


11. Bake it in oven for an hour or until the toothpick inserted comes out clean without any wet batter. Let it cool down completely before slicing. Enjoy!

You can even try our Persimmon Rum Cake, Spiced Raisin Bread and Pumpkin Cake Rolls.

[whohit]AppleBread[/whohit]

AppleBread_Featured-2


[yumprint-recipe id=’97’]