Author

anshu

Browsing

SpinachCorianderChutney_Featured2
During Navratri or any Hindu Fasting Onion Garlic is primarily abstained other than foods depending on each type of fast or one’s own personal belief. My mother makes this delicious Spinach Coriander Chutney in bulk to last a few days for Navratri. It goes great with Sabudana Khichdi, Sabudana Tikki and even with Swang ke Chawal ki Khichdi. It is so yummy that you can easily devour a bowl full of chutney with any food. You can also make this on any other day. Its full of flavour and spice.  

Directions:

1. Separate Spinach and Coriander leaves from their stem and wash them thoroughly to remove all dirt. Also wash tomatoes and green chilies. I also had a red chili. I used that also.

SpinachCorianderChutney1

 2. Roughly chop tomatoes and put them in blender along with chilies, spinach and coriander. To it add black rock salt.

SpinachCorianderChutney2

3. Also add amchur and chat masala.


SpinachCorianderChutney3


SpinachCorianderChutney4


4. Add few spoons of water to make blending easier.

SpinachCorianderChutney5

Serve with your favourite dishes like Sabudana Khichdi, Sabudana Tikki and Swang ke Chawal ki Khichdi. Stays good to eat for 2-3 days on refrigeration. 

You can also try our Pudina Chutney and Coconut Chutney.

SpinachCorianderChutney[whohit]SpinachCorianderChutney[/whohit]

[yumprint-recipe id=’64’]


Sabudana kheer
Since I was a little girl I love Sabudana Kheer. More for its texture and less for its taste. The swollen tapioca /sago pearls makes it gooey and creamy.  I personally like it cold and refrigerated for the kheer becomes thick and dense. The only time I get to eat this is during Navratras when I am fasting.

It is definitely a delicious delight. But if you have some guests coming over you can make this in a jiffy. Just that you have to soak Sabudana in water few hours in advance.

Directions:

1. Soak Sabudana Pearls in water for atleast 2 hours. Overnight is Best. Pour water only to the level of sabudana.

2. In a deep pan put ghee and roast the dry nuts until crisp. Set aside.

SoojiHalwa10

4.  Add milk in a wok or milk boiler and bring it to a boil. Let it simmer on low flame for 10-15 minutes till it reduces to almost half.

SabudanaKheer4

5 . Add soaked sabudana discarding the water, if any. Keep Stirring till milk reduces and sabudana absorbs the milk.


SabudanaKheer5

5.  Add saffron strands and crushed cardamom. You must not miss adding rose water to give it that extra deliciousness.

SabudanaKheer6

6. Add sugar and stir.

SabudanaKheer7

7. Garnish with roasted dry fruits, fresh rose petals and even dried rose petals will add glamour to the pudding.  Serve Hot or refrigerate to serve cold.

Other recipes for fasting you can try are: Healthy Kachalu Aloo ChatTangy Mint PotatoesKhajoor Til Ke LaddooVrat Wale Dahi-Paneer KebabsSwang Ke Chawal Ka HalwaSwang Ke Chawal Ki PhirniTapioca Coconut Milk Pudding with Strawberry PreservePaneer Ki Kheer, Swang ke Chawal ki KhichdiKaddu Ka Halwa,  Sabudana Khichdi .

[whohit]Sabudana-Kheer[/whohit]

[yumprint-recipe id=’63’]

Rasgulla_Featured1
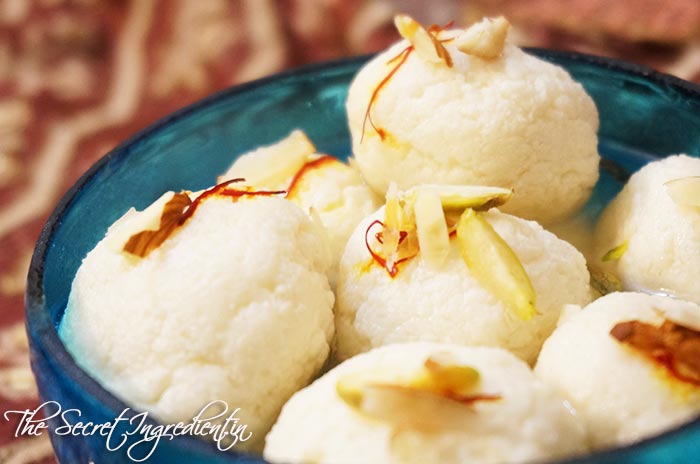
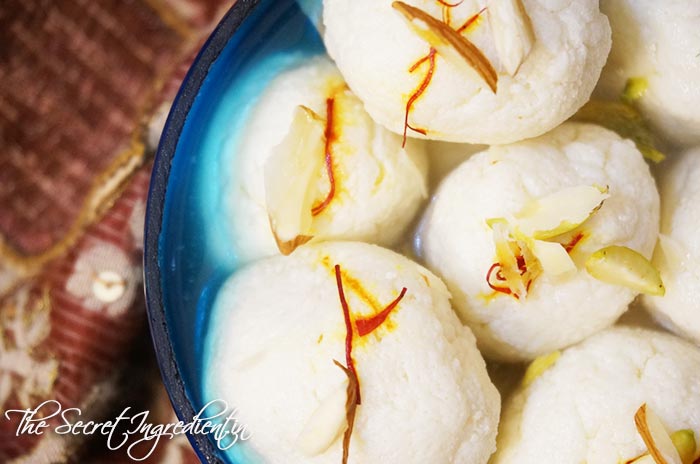
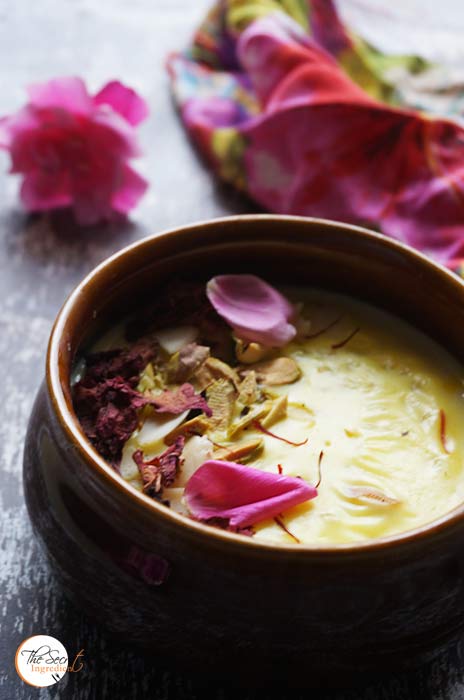
Rasgulla is a traditional Indian sweet, popular all across the globe. They are cottage cheese balls soaked in sugary syrup. Its widely available in all sweet shops in India. You can also buy them in cans, which makes them available  in Indian stores even outside India.

I am a member of a Food Group on Facebook Chef at Large . It is one of the largest food groups in India. Its members are very talented and inspire everyone to cook better and new things every day, every minute or I should say every second :P. That is where I came across this easy recipe to make rasgulla. Its Garima Sarolia Narera’s most popular recipe. I am sure all the members would have tried it at least once and I am not kidding 🙂 So I thought why shouldn’t I also give it a try. After all who minds delicious rasgullas.

Making them was easy as the recipe is very well written with tips and tricks to make mouth melting rasgullas. Here is my take on them.

Directions:

To Make Chenna:

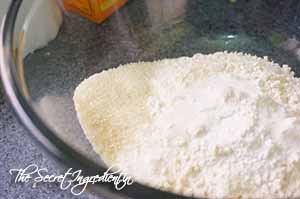
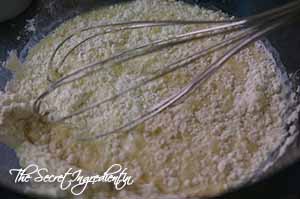
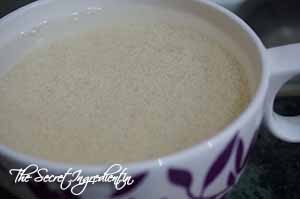
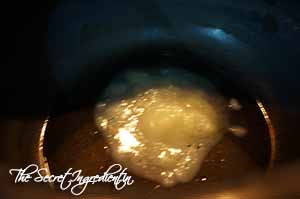
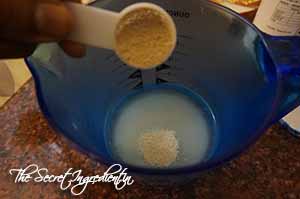
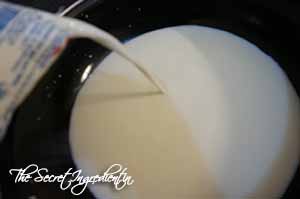
1. Boil milk in a milk boiler. I used full fat milk, let it cool and removed all the cream. Then reboiled it.

Rasgulla2


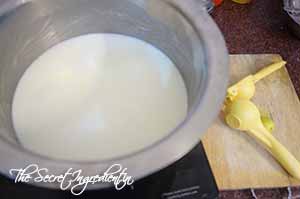
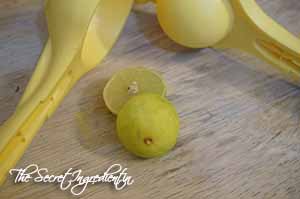
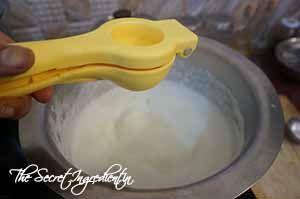
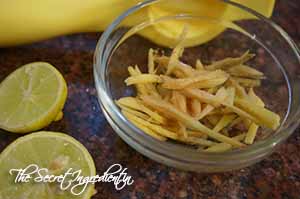
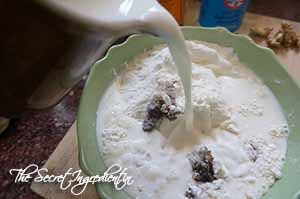
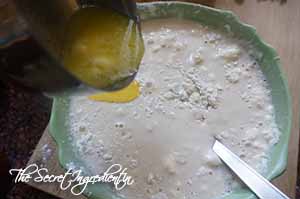
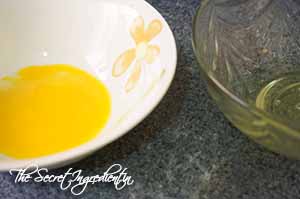
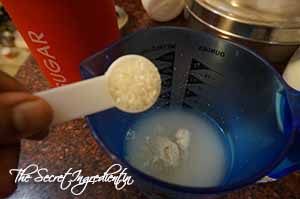
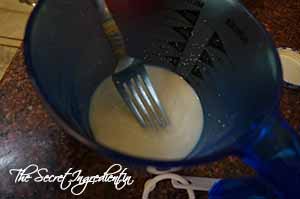
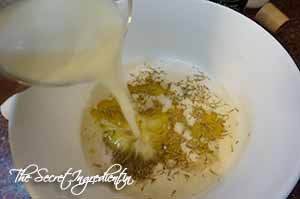
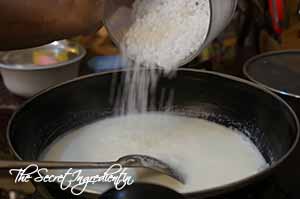
2. When the milk comes to a boil put the flame off and put in it lemon juice to curdle the milk. You can even use distilled white Vinegar.

Rasgulla1

Rasgulla4

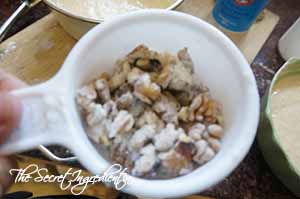
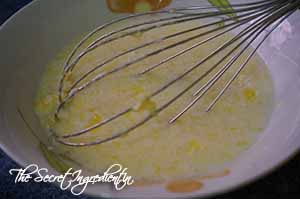
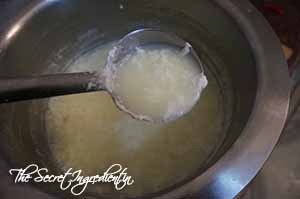
3. The milk mass and whey will start separating like this. If it doesn’t happen you should add more lemon juice or vinegar till it starts to curdle. Add ice cubes and let it rest for a minute.

Rasgulla5
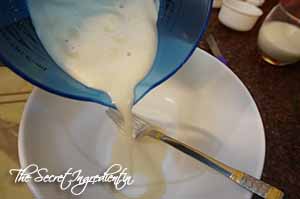
4. Strain this in a mesh colander. You can even line it with a cheese cloth. I did not.

Rasgulla6
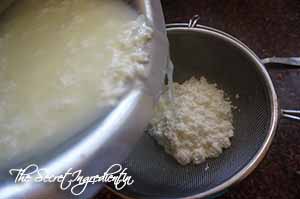
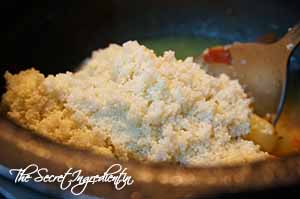
5. Let the entire whey pass through the colander and you will be left with a crumbly milk mass. Do not throw whey away. You can use it to make dough for rotis. It makes nutritious Rotis.

Rasgulla8

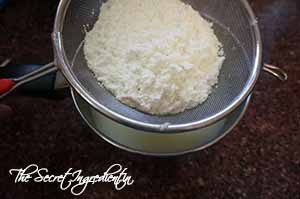
6. Put the colander under running water and with the help of your hands thoroughly rinse the milk mass. You are looking to remove the sourness and taste of lemon from the cheese. 


Rasgulla9
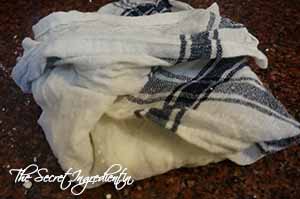
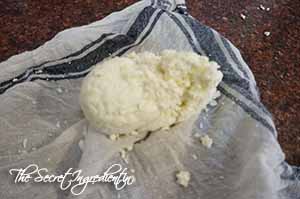
7. Once clean you can transfer it on to a cheese cloth and tie it tightly and hang it so that all the liquid seeps out. You can even give it a squeeze before hanging it. It should take 10-15 minutes.

Rasgulla10
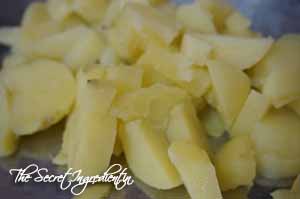
8. The chenna should be dry enough to knead into a ball. If it is wet it will not com together.So it should be dry and just a little moist.

Rasgulla11    

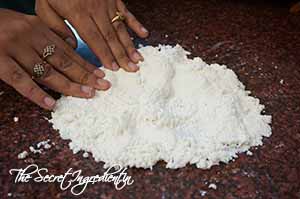
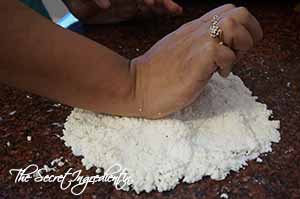
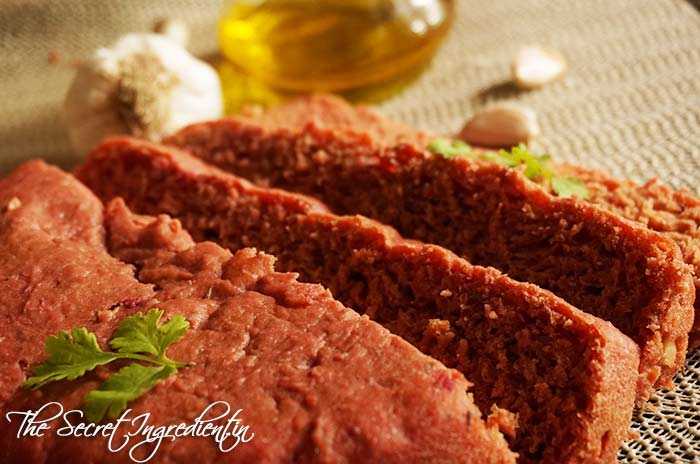
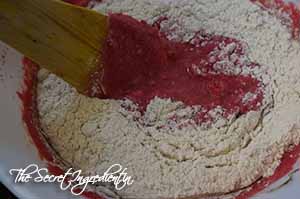
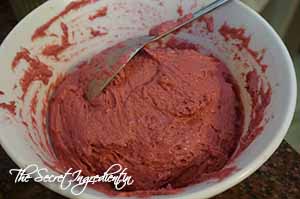
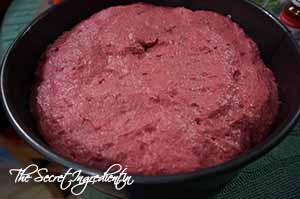
9. Transfer it to a smooth surface where you can knead it with your fingers and palm ends into a smooth dough. It will take 5-8 minutes. You have to knead till the fat comes out. It will be like grease coming out.

Rasgulla12

Rasgulla13

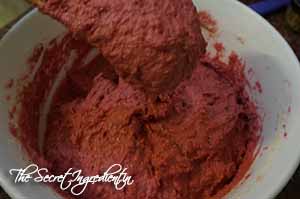
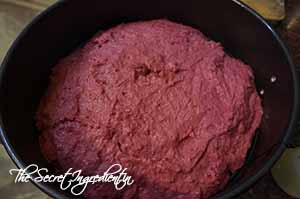
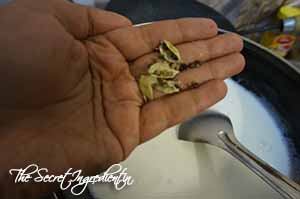
10. This is the most crucial step. The right texture of rasgulla depends on how well you knead. It should come together like this ball.

Rasgulla14

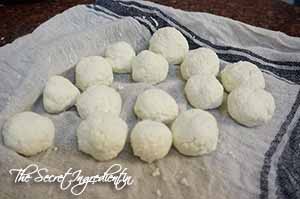
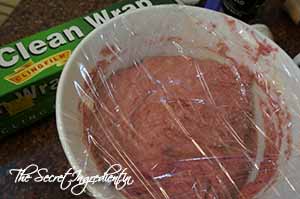
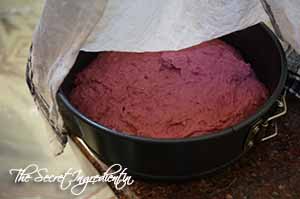
11. Divide the dough into more or less equal sized balls. Try to make them crack free balls. I failed 😛 It should ideally make 15 balls. You can make them bigger or smaller. Word of caution:the balls will double up in size on boiling. You can line them up on a kitchen towel and cover them up till your sugar syrup gets ready. You don’t want them to dry out.

Rasgulla15

Rasgulla16

For the Sugary Syrup: We will make two types of syrup for the rasgullas. Both made with sugar but with different consistency. One Light Sugar Syrup and the other little more Sugary. The same light sugar can be made into more sugary syrup after boiling the rasgullas.

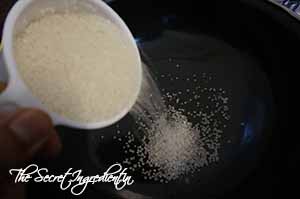
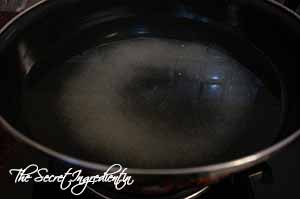
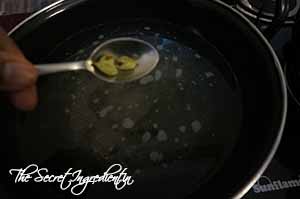
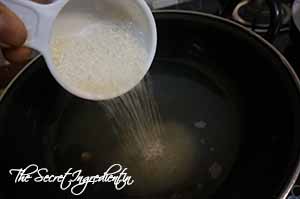
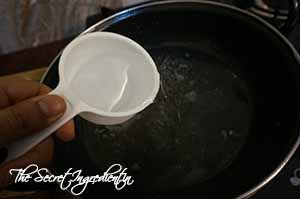
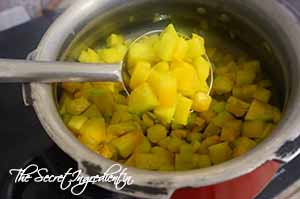
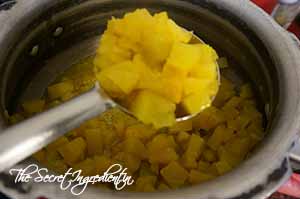
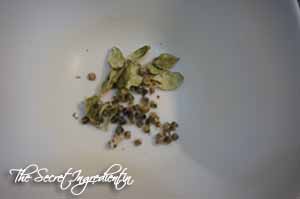
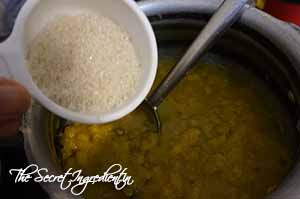
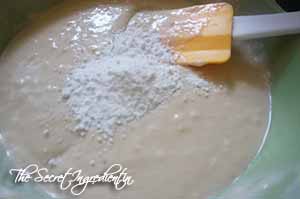
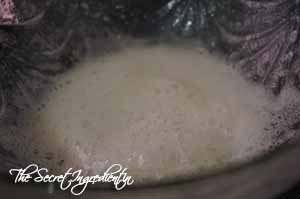
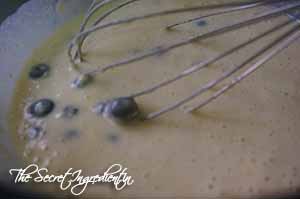
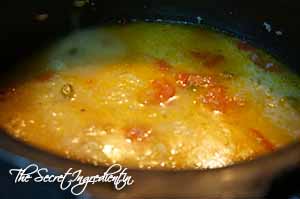
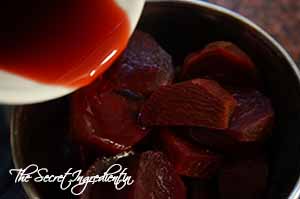
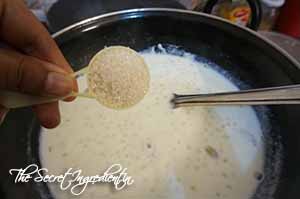
12. So for the light syrup add water, sugar and cardamom powder to a wide container. You can use a milk boiler also. I used a wok which can make room for more rasgullas in one go. Remember they double up. Cook till sugar dissolves.


Rasgulla17


Rasgulla18


Rasgulla19


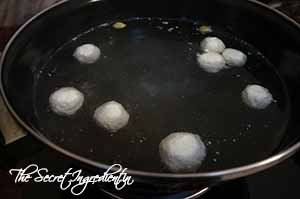
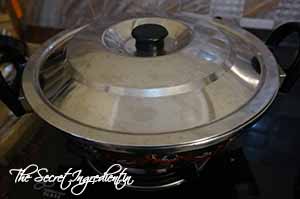
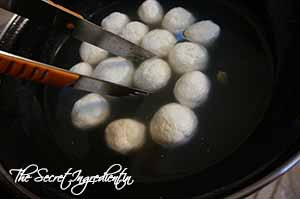
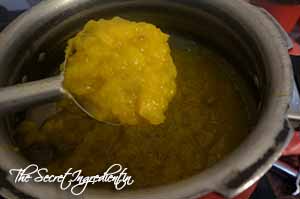
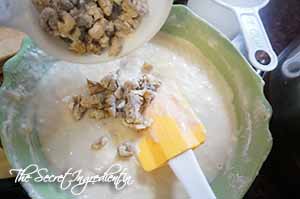
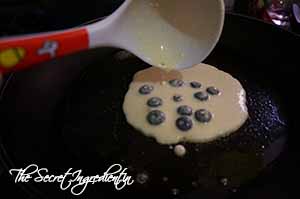
13. Just as the light syrup comes to a boil add the balls to it, cover the lid and cook for 12-15 minutes. I never wanted to crowd the space so added 8 of them for the first batch.


Rasgulla21


Rasgulla22


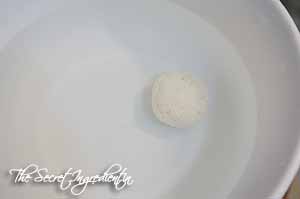
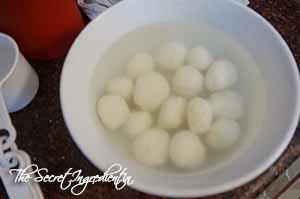
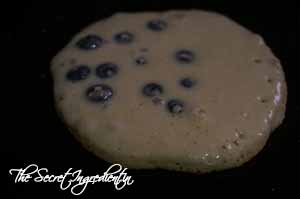
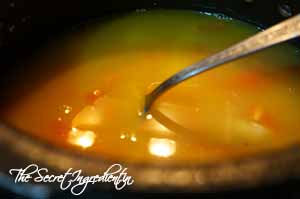
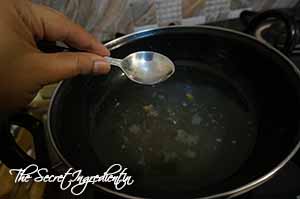
14. The test to determine if the rasgulla balls have properlycooked is to drop one of them in a bowl or glass full of water. If it sinks to the bottom consider it ready. If they float you will have to boil them further for a couple of minutes more. Remove them from the vessel into a bowl full of plain drinking water. There should be ample water to accommodate all the rasgullas for they will loose their shape.


Rasgulla23


Rasgulla24


To make thicker Sugar Syrup

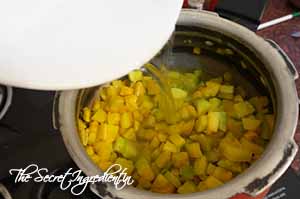
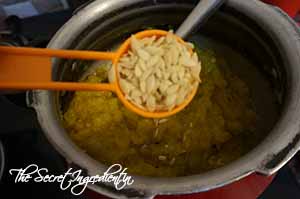
15. Add more water and more sugar to the light syrup.  Boil the water till sugar dissolves and then turn the flame off. At this stage you can add saffron strands and or Rose water. I only added rose water for that wonderful aroma. Let the syrup cool down and come to room temperature. It should take 30 minutes or so.


Rasgulla25


Rasgulla26n


Rasgulla27


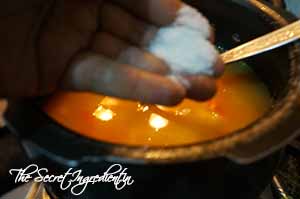
16. Carefully squeeze the water from the rasgullas and drop them gently in sugar syrup.


Rasgulla28


Rasgulla29


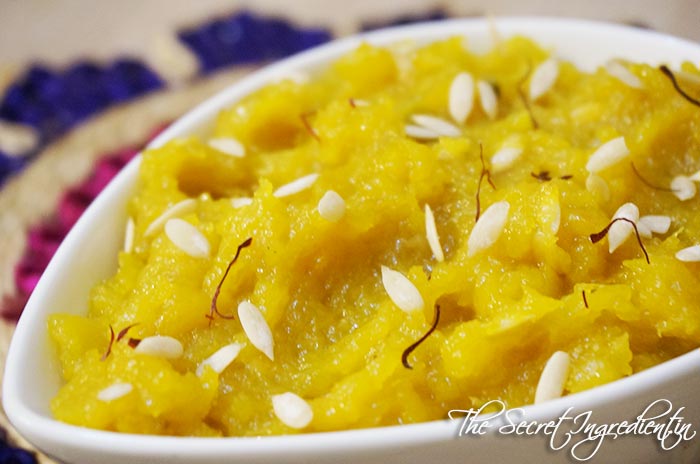
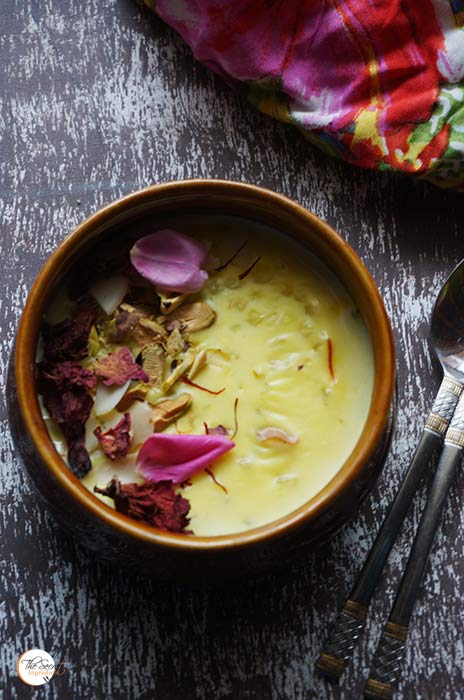
17.Refrigerate them for 3 hours before serving. I garnished them with Saffron and chopped pistachios. 

If you looking for more Navratri or Vrat recipes you can checkout Sabudana KhichdiMakhaney ki KheerSwang ke Chawal ki Khichdi, Gajar ka Halwa, Kaddu ka Halwa.

Rasgulla_Featured2

[whohit]Rasgulla[/whohit]

[yumprint-recipe id=’62’]

KadduKaHalwa_Featured2
Kaddu or Pethey ka halwa is very close to my heart because it reminds me of my Nani, my maternal grandmother. I used to spend a considerable time of my summer vacations as my Nani‘s house. Being the first grand daughter of my Grand Parents I was always given special attention. Not that my younger cousins were less loved. 

Okay coming back to the topic, during those summer vacations my grandmother would wash and dry the melon seeds in the sun and my favourite activity was to separate melon seeds from their husk using tweezers (ha! that was my secret weapon 😛 ).  It was a time consuming activity which kept me involved whole day and even late nights. Everyone, I mean all my uncle and aunts loved to eat melon seeds but no one wanted to make an effort, as I said separating melon seeds could be quite a cumbersome job. So, often they would stop by me and try to steal my stash of melon seeds (how mean!). I would shout and run away. It was only my Nani who consoled me and scolded my uncles and aunts for tormenting me . Now when I remember the instances it makes me laugh but at the same time sweetly remember the not so complicated childhood. 

In spite of all perils, at the end of those summer vacations I had a big container full of melon seeds. I was a very proud little girl. That was my last day at my Nani’s house, for the next day we were to return to my parent’s house which was in another city. So my Nani made her delicious Pethey ka Halwa loaded with Melon seeds. It was a celebration of my achievement. Everyone got to taste the halwa along with the melon seeds they had been eyeing for days 😛 This time I did not mind rather enjoyed it relishing the sweet halwa.

Today I share my grandmother’s recipe for Pethey ka Halwa. Some people also call it Kaddu ka Halwa. I miss her and love her. May her soul rest in peace.

Directions:

1. Choose a pumpkin which is most yellow from inside because they tend to be sweeter than the green ones.

KaduKaHalwa1

2. Remove its skin and seeds from inside. Cut them into small pieces. The smaller the better.

KaduKaHalwa2

3. Put ghee or clarified butter in the pressure cooker.

KaduKaHalwa3

4. Add the pumpkin pieces into the pressure pan.

KaduKaHalwa4

5. Toss them in ghee for a good 10-12 minutes till they start sweating and releasing some of its water.

KaduKaHalwa6

6. Add water and stir and close the lid. Let it cook for 5-6 whistles or about 10 minutes. Let it sit in it own pressure and open the lid once the steam has escaped. You are looking at a mashable consistency. If you feel the pumpkin has not cooked fully you should cook for a little time more. 


KaduKaHalwa7


KaduKaHalwa8


7. Put the flame on  and cook for 5 minutes till water starts evaporating. Add crushed cardamom pods. If you wish you can also use cardamom powder. Also add sugar.


KaduKaHalwa9


KaduKaHalwa10


8. Keep cooking till you find the pumpkin all mashed and ready to get creamy. The water should have almost evaporated. It will take good 10-15 minutes. Cook on medium low flame.

KaduKaHalwa11


9. Add melon seeds. You can use Musk melon seeds or water melon seeds. Both taste great.

KaduKaHalwa12
You can garnish with dried fruits. I chose to garnish with more melon seeds an saffron. Serve hot.

You can even try our Sooji Halwa and Gajar ka Halwa. 
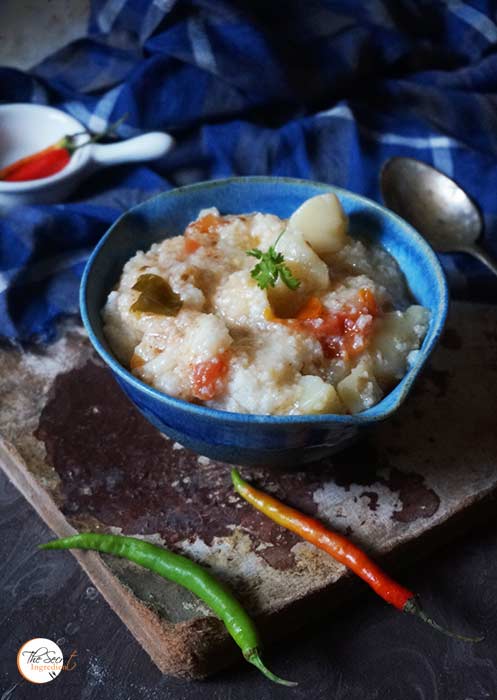
If you looking for more Navratri or Vrat recipes you can checkout Sabudana Khichdi, Makhaney ki Kheer, Swang ke Chawal ki KhichdiRasgullaAnaar Aloo ka Raita and Kachalu Aloo ki Chaat.

KadduKaHalwa_Featured1
[whohit]KadduKaHalwa[/whohit]

[yumprint-recipe id=’61’]


Chat is referred to a savoury tangy snack served usually as a street food in India. It can be a mix of fruits, spices, specially chat masala, lemon, tamarind and many other combinations. There are so many types of chats, probably every city will have its own specialty. This Kachalu Aloo Chat is a specialty from the ancient and historical city of Gaya.

Kachalu Aloo Chat is  made with boiled potatoes and yam. You can even eat it during Navratras or fasting period. Since it is not fried you can eat it as a healthy snack. I made this for the first time and it was hit in my family. If you do not find kachalu or yam, you can substitute it with sweet potato. It will taste good with both root vegetables.

If you are fasting and are looking for more Navratri or Satvik recipes you should try : Swang ke Chawal ki Khichdi, Makhane Ki Kheer, Vrat Wale Dahi-Paneer Kebabs. I am listing more recipes at the end of the page. In case you try any, give me a shout out on instagram or facebook.

 Directions:

1.Wash Yam and Potatoes and put them ina pressure cooker for 15 minutes or 6-7 whistles or until they are soft.

2. In the meanwhile julienne ginger into thin sticks and dip them in lemon juice and refrigerate.

KachaluAlooChat3

3. Peel the skin of potato and yam and dice them into cubes.

KachaluAlooChat4

KachaluAlooChat5

4. Slice a banana with the potatoes and yam.

KachaluAlooChat6

5. In a small bowl mix tamarind pulp, Lemon juice, chat masala , salt, red chili powder and sugar.

KachaluAlooChat7

KachaluAlooChat8

6. Pour it over the cubed potatoes and banana. Fold the sauce with the potatoes so that all cubes are evenly coated with tamarind sauce.

KachaluAlooChat9
  7. Add Pomegranate Pearls to the bowl along with fresh chopped coriander leaves and minced green chilies.

Transfer to a serving bowl and garnish with refrigerated ginger pickle. Serve at room temperature.

[yumprint-recipe id=’60’]


Eggless Walnut Pancakes
Two days back I posted the recipe of Blueberry Buttermilk Pancakes, they were a big hit and requests started pouring in for me to share recipe for eggless pancakes. The challenge was to come up with a recipe which makes similar soft and fluffy pancakes without the use of Eggs. I gave them a try yesterday and to my surprise they came out as good as pancakes with eggs. My kiddo was hovering over my plate and was asking for more more and more.

The walnuts gave it an extra kick. The flavour of pancakes, walnuts and maple syrup gives it an irresistible taste. If you are making for your little kids and fear they may choke on walnut pieces, you can even grind the walnuts and add them to the batter. 

Directions:

1. In a bowl combine all purpose flour and sugar. I used raw brown sugar. You can use simple white sugar if you like.

EgglessWalnutPanCakes1

2. Also add to it salt which gives it a slight savory touch.

EgglessWalnutPanCakes2

3. Take few spoons of flour mixture and toss walnut pieces in it. Keep aside.

EgglessWalnutPanCakes10

4. Add milk to rest of the dry mixture and also add melted butter. You can substitute butter with vegetable oil. I like the buttery taste.


EgglessWalnutPanCakes3


EgglessWalnutPanCakes5


4. Whisk everything together to form a lump free batter. 

EgglessWalnutPanCakes7

5. Add baking powder to the batter and combine. Let the mixture sit for another 5-7 minutes so that the baking powder starts working. *(Check Notes)

EgglessWalnutPanCakes8

6. Fold in the flour tossed walnuts. Do not over mix.

EgglessWalnutPanCakes11

7. Preheat a non stick griddle or flat bottom pan over medium high heat and brush it with butter or you can even spray with cooking oil. I used butter.

EgglessWalnutPanCakes9

8.  Pour about 1/3 cup of batter on the griddle using a ladle or a measuring cup. Do not spread. The consistency of batter should neither be thick nor runny . You can add little extra milk to make the consistency right. If the consistency is perfect the batter will spread evenly and form a perfect pancake circle. Even if they don’t, do not worry we eat for taste not for perfect shapes 😛 Mine were also not that perfect but tasted great.

EgglessWalnutPanCakes12
9. After about 2-3 minutes you will spot some bubbles on the top, specially around edges. This is the time to flip it and cook it on the other side.

EgglessWalnutPanCakes13

10. Cook the other side also for 2 minutes or till it has acquired golden colour.

EgglessWalnutPanCakes14

Serve hot with Maple Syrup or Honey or Caramel Sauce or Nutella or Chocolate Syrup. You can top it with additional walnuts if you desire.

Also try Blueberry Buttermilk Pan Cakes. You can even try our other Breakfast recipes like Shahi PohaCasserole EggsQuick Rava IdliRava Pizza BreadSoya Veggie Vermicelli or Wrapped French Toast.

EgglessWalnutPancakes_Featured2

[whohit]EgglessWalnutPanCakes[/whohit]


[yumprint-recipe id=’59’]


BlueberryPanCakes_Featured1
Pan Cakes are my all time favourite Breakfast. And when they are with Fresh Blueberries, I don’t need anything else. They are easy and soft and ready in no time. The buttermilk makes them extra fluffy. You can make instant buttermilk at home, You don’t need to plan in advance. Just put few ingredients together and you have a wholesome healthy breakfast. You can top your pancakes with Maple syrup, Honey, Caramel Sauce or simply butter. You can even put fresh chopped fruits before drizzling the syrup.

My kiddo is just like me he likes pan cakes but loves blueberries. So the combination of blueberry and pan cakes becomes irresistible.  

Directions:

1. In a bowl put together All purpose Flour, Baking Powder, Baking Soda, Sugar and Salt. Whisk them together and set aside.


BlueberryPanCakes4


BlueberryPanCakes5


2. In a smaller bowl dust the blueberries with few spoonful of flour mix. Set aside.

BlueberryPanCakes6

3. Separate the egg yolk from the egg whites.

BlueberryPanCakes7

4. In a third bowl combine egg yolk, melted butter and buttermilk. Whisk them together and set aside. You can make your own instant buttermilk at home. You can follow the recipe in link.

BlueberryPanCakes9

5. In another bowl whisk the egg whites to make stiff peaks. You can use a hand whisker or electric whisker. 

BlueberryPanCakes11

6. Pour the buttermilk mixture in the flour mix an whisk everything until evenly combined. Gently fold in egg whites and blueberries. You have be very gentle in folding as the egg whites should not deflate.


BlueberryPanCakes12


BlueberryPanCakes13


7. Preheat a non stick griddle or flat bottom pan over medium high heat and brush it with butter or you can even spray with cooking oil. I used butter. Pour about 1/3 cup of batter on the griddle using a ladle.

BlueberryPanCakes14

8. After about 2-3 minutes you will spot some bubbles on the top, specially around edges. This is the time to flip it and cook it on the other side.

BlueberryPanCakes15

9. Cook the other side also for 2 minutes or till it has acquired golden colour.

BlueberryPanCakes16

Serve hot with Maple Syrup or Honey or Caramel Sauce. Top it up with fresh fruits.

Also try Eggless Walnut Pan Cakes. You can even try our other Breakfast recipes like Shahi Poha, Casserole Eggs, Quick Rava Idli, Rava Pizza Bread, Soya Veggie Vermicelli or Wrapped French Toast.

BlueberryPanCakes_Featured2

[whohit]BlueberryPanCakes[/whohit]

[yumprint-recipe id=’58’]

RosemaryGarlicBakedPotatoes_Featured2

Ever since I have acquainted myself with Rosemary, I have used it left and right in every possible recipe. To my good fortune all experiments have come out delicious and fragrant. Rosemary combines so well with garlic. Its like a match made in heaven. This was my first venture with Rosemary Garlic. The Baked potatoes came out divine and intoxicating..pun intended!

Ever since then they are party favorites. All my friends would request this whenever they visit our place. And those first timers would fill their tummies with these leaving no space for main course. So watch out!! They can be very very addictive.

Directions:

1. Wash potatoes and scrub their skin well for we are going to bake them with their skins on. That’s how they taste good.

RosemaryGarlicBakedPotatoes1

2. Dry them with a kitchen towel and cut them into large wedges.


RosemaryGarlicBakedPotatoes4


RosemaryGarlicBakedPotatoes5


3. Line them up  on a single layer on a microwave proof plate. Cook them in microwave for 5-6 minutes on full power. This will cook them faster and make them crispier.


RosemaryGarlicBakedPotatoes6


RosemaryGarlicBakedPotatoes7


4. Once out of the microwave put them in a bowl and pour on top Olive oil.

RosemaryGarlicBakedPotatoes8

5. Also add  salt , black pepper, red chili powder.


RosemaryGarlicBakedPotatoes9


RosemaryGarlicBakedPotatoes11


RosemaryGarlicBakedPotatoes12


6. Add to it fresh rosemary chopped or dried,which ever is readily available and garlic powder.


RosemaryGarlicBakedPotatoes10


RosemaryGarlicBakedPotatoes13


7. Mix it well using both ur hands so that potatoes are evenly coated with oil mixture. Let it rest for fifteen minutes to half and hour, depends on your patience.

RosemaryGarlicBakedPotatoes14

8. Preheat the Oven to 200 degree Celsius. You can convert Oven Temperatures here. Line a baking sheet or tray with aluminium foil and put it in the Oven while it is preheating. When the sheet becomes piping hot, carefully remove it from the oven . 

RosemaryGarlicBakedPotatoes15

9. Line the potatoes on the sheet on a single layer. The potatoes must sizzle when you place them on hot baking tray. In between the potatoes put garlic cloves with their skin on.

RosemaryGarlicBakedPotatoes17

10. Bake it in oven for 30 minutes or till they become golden brown and crisp. Serve them with Pudina/Mint Chutney or Cream Cheese or simply Ketchup.

RosemaryGarlicBakedPotatoes_Featured1

[whohit]rosemarygarlicpotatoes[/whohit]

[yumprint-recipe id=’57’] 

This dish is made during Navratri or Navratras fasting. I remember fasting with my mother ever since I was a 9 year old girl. I fast all 8 days which means cereal grains, rice and many vegetables are abstained. The only food you can eat is fruits, all dairy products and mostly all root vegetables, with a few exception. Also many people take sendha namak instead of normal table salt. It varies from each person’s belief.

I love the days of fasting because it involves a lot of feasting. So many dishes are made which have a  special significance. Swang ke chawal is not rice but belongs to millet family. It is know by various names like, Samvat, Sama, Vari, Varai, Samwa, Jhangora, Samo, Morio, Mario, Moraiaya, Bhagar & Kuthirai Vaali. This cereal is gluten free and is usually cultivated on marginal lands where rice doesn’t grow. 

My mother makes this one pot khichdi which is delicious and filling. I wanted to share this recipe with you.

Directions:

1. Soak swang in water for 2 hours.


SwangKiKhichdi1


2. Boil potatoes and cut them in cubes. Keep aside.

SwangKiKhichdi2


3. In a pressure pan put some ghee and add cumin seeds

SwangKiKhichdi3

SwangKiKhichdi4

4. Add finely grated ginger and green chilies. If you eat Kadhi Patta during Navratri you can add a sprig of that too.

SwangKiKhichdi5


5. Add chopped tomatoes and toss them till they become soft and gooey.

SwangKiKhichdi6


6. Add cubed boiled potatoes.

SwangKiKhichdi7


7. Add soaked swang to the pressure pan.

SwangKiKhichdi8


8. Add water.

SwangKiKhichdi9


9. Add pink salt and red chili powder.

SwangKiKhichdi10

SwangKiKhichdi11

10. Close the lid and let it cook for 5 whistles or 5 to 7 minutes after pressure builds up. Open lid and serve hot . Pour on top spoonful of ghee.   

Other recipes for fasting you can try are: Healthy Kachalu Aloo ChatTangy Mint PotatoesKhajoor Til Ke LaddooVrat Wale Dahi-Paneer KebabsSwang Ke Chawal Ka HalwaSwang Ke Chawal Ki PhirniTapioca Coconut Milk Pudding with Strawberry PreservePaneer Ki KheerSabudana KheerKaddu Ka Halwa,  Sabudana Khichdi .


[yumprint-recipe id=’56’] 

[whohit]SwangKChawalKiKhichdi[/whohit]

BeetGarlicThymeBread_Featured1
I had been meaning to make Borsch, a classic Russian soup with chukandar or beetroot for a very long time and in my pursuit to cook it I bought more beetroots than I actually needed. I had to do something with them as they were sitting in the fridge for a week now. And to my good fortune I found this recipe of Beetroot bread with Garlic and Thyme. The beautiful pink colour of the bread caught my attention and it was decided then and there as to what is going to be the fate of my beetroots.

Baking this bread was a no mess business, as it required no kneading. All you have to do is simply mix it well with a spoon and let the batter sit to rise. After I baked the bread I realised that the bread was not only beautiful but very yummy and very healthy .

Directions:

1. Wash and peel Beetroots. Cut them roughly into pieces.


BeetGarlicThymeBread1


BeetGarlicThymeBread2


2. Put the beetroot pieces in a pressure pan along with a cup of water and cook for 2 whistles or 5-7 minutes or till they become a little soft. Put the flame off and let them cook in pressure and open the lid once the pressure has released.

BeetGarlicThymeBread3

3. Let the beetroots cool down for some time. Reserve the water and put them in a mixer to make a smooth paste. Use couple of table spoons of water if needed. Set aside. I use the beetroot water to make roti dough. It brings an amazing colour to the dough and makes the rotis more nutritious.


BeetGarlicThymeBread4


BeetGarlicThymeBread5


BeetGarlicThymeBread6


4. In a container take some lukewarm water. It should neither be hot nor cold, just hot enough to comfortably put your finger into it . The right temperature of the water is very important for yeast to activate. Put yeast into it.

BeetGarlicThymeBread7

5. Add some sugar along with yeast.

BeetGarlicThymeBread8

6. Give it a gentle stir with a fork and let it stand and activate for 5-7 minutes.

BeetGarlicThymeBread9

7. Pour the activated yeast mixture in a large bowl.

BeetGarlicThymeBread11


8. Chop some garlic and put it in the bowl.


BeetGarlicThymeBread10


BeetGarlicThymeBread12


9. Put olive oil.

BeetGarlicThymeBread13

10.  Add fresh chopped thyme or dried thyme. I used dried thyme. 

BeetGarlicThymeBread14

11. Add buttermilk. Learn how to make Instant buttermilk at home.

BeetGarlicThymeBread15

12. Add the beetroot puree and salt to the mixture. Give it a gentle stir to combine everything together.


BeetGarlicThymeBread16


BeetGarlicThymeBread17


13.  Add flour and give it a stir with a spoon or spatula that everything comes together in the form of a very sticky dough. Oh did you look at that beautiful pink color! Give it a moment to admire 😛


BeetGarlicThymeBread18


BeetGarlicThymeBread19


BeetGarlicThymeBread21


14. Cover the bowl with a cling wrap and let it rest in some warm place to double up in volume. It can take somewhere 1 and a half hour to two and a half hours.

BeetGarlicThymeBread22

15. After the dough has risen and doubled in volume. Deflate it again using wet hands. I used the same spoon because my dough was very sticky. Yes I did panic but the result was spectacular.


BeetGarlicThymeBread26


BeetGarlicThymeBread27


16. Grease a baking pan and pour the mixture into it. I used a a round spring form pan 7-Inch in diameter and 3-Inch deep with 6-cup capacity


BeetGarlicThymeBread25


BeetGarlicThymeBread28


17. Cover the pan with a wet kitchen towel and let it rest again to rise and double up for another half an hour or so.


BeetGarlicThymeBread29


BeetGarlicThymeBread30


18. Bake on 180 degree Celsius for 20 to 30 minutes on a preheated oven . Learn more about Oven temperatures and Conversions. Let the bread cool down completely on a wire rack before slicing it.

You can even try our Honey Oats Bread, Garlic Rosemary Focaccia Bread or Domino’s Garlic Breadsticks.

BeetGarlicThymeBread_Featured2
[whohit]BeetrootBread[/whohit]

[yumprint-recipe id=’55’]