Author

anshu

Browsing

My life in Mexico was surrounded by Avocados. Over my four year stay in the country I kinda got used to having this fruit around me. But then India happened and all of a sudden the craving for Avocados started. Whenever i would visit delhi I would buy a piece or two at atrociously high prices. Until couple of month ago my friend from Almora told me we get Avocados in here as they are locally grown.I couldn’t believe my ears until I saw them at the recommended places. Oh boy they were cheaply available and so very fresh. I have been enjoying Avocados since then and trying to create all possible type of recipes with it. Its simply not used in Guacamole but you can make so many things with it  This time I tried my hands on this Vegan Avocado Chocolate Brownies. 

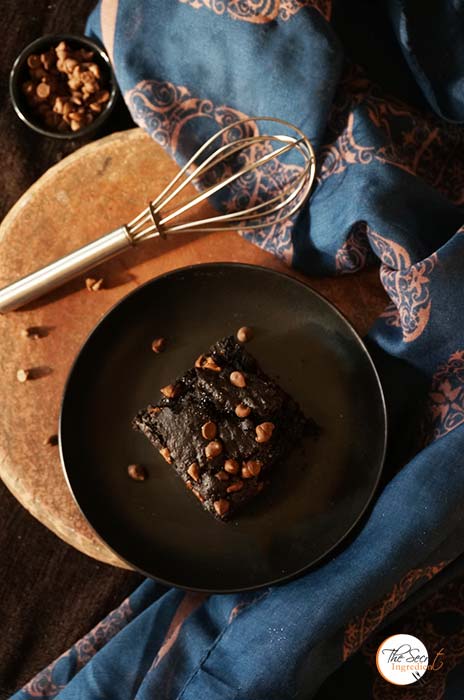
When I finished baking these brownies I realised all brownie recipes on my blog are the most weird types! Ranging from Yellow Zucchini Brownies, Ragi Brownies, Oats and Whole wheat Brownies and adding to the list is these Avocado Brownies! :O For sure I am a Health Weirdo! These Brownies are Vegan which means no dairy no eggs.. has Whole Wheat Flour and Organic Khandsari Sugar from SOS Organics. In spite of all these top notch healthy ingredients it tasted divine and it was hard for anyone to tell anyone if it had Avocados! You can call them Healthy Power Packed Brownies for Adults and Sneaky Chocolate Brownies for kids 😉

Directions:
1. Grease a 8×8 baking pan with oil and set aside. Preheat the oven to 180 degree Celsius. (Learn more about Oven Temperatures and Conversion).

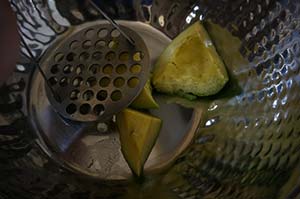
2. Peel a ripe avocado and remove its pit. Learn how to Peel and cut avocados  here. Place the avocados in a bowl and mash them.


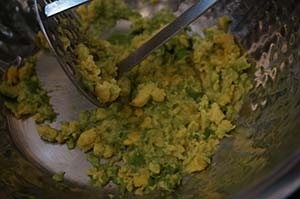
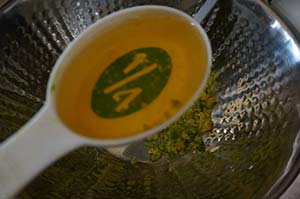
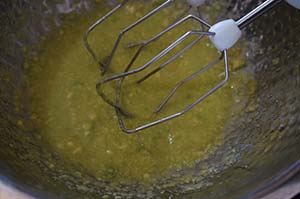
3. Add Oil to the avocados.

4. Whisk it well.


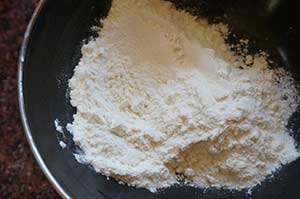
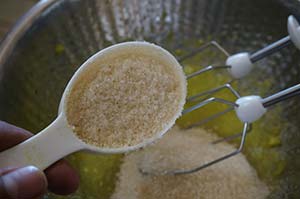
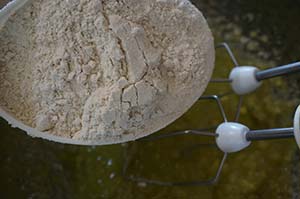
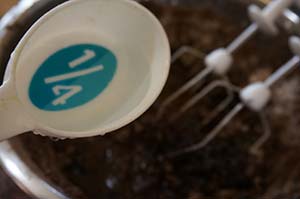
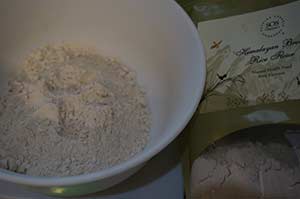
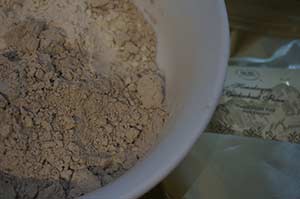
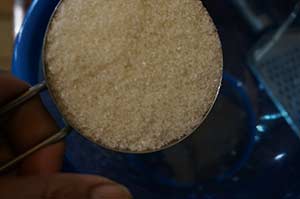
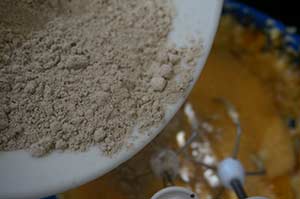
5. Add Khandsari Sugar and whole wheat flour. I have used SOS Organics Khandsari Sugar which is the best quality khandsari sugar I have come across.


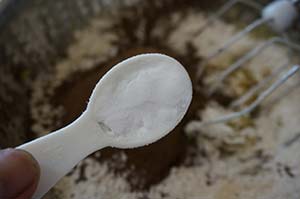
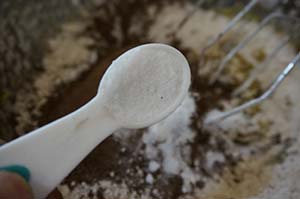
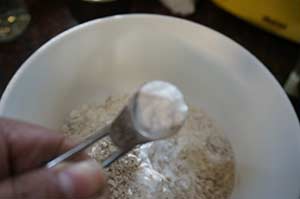
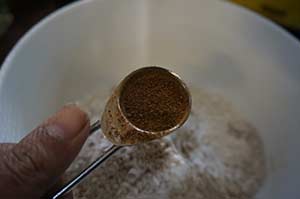
6. Add cocoa powder, baking soda and salt.


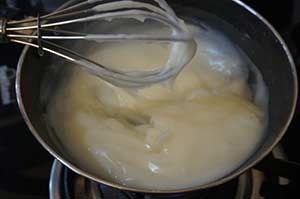
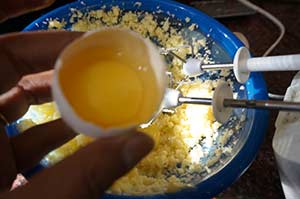
7. Add brewed espresso Coffee and Water.


8. Whisk everything well until smooth.
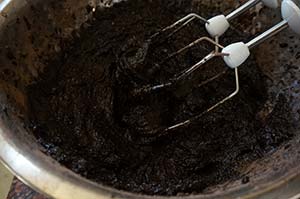
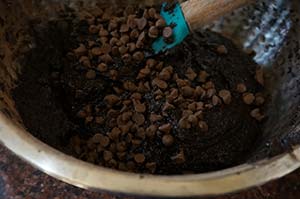
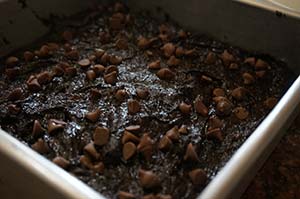
9. Add chocolate chips and fold into the batter. Reserve a little to distribute on top.

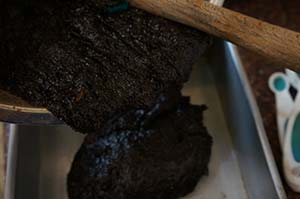
10. Pour the batter into the baking pan. Smoothen out the top with spatula.


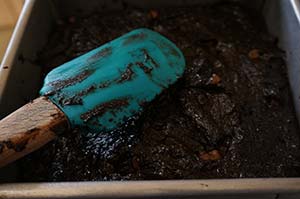
11. Spread the reserved choco chips on top and bake for 15-20 minutes until the toothpick inserted comes out almost clean. You may have a little melted chocolate stuck on the toothpick but thats okay. Do not bake further or the texture of brownies might become cakey. 


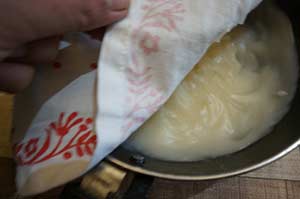
12. Remove from oven and let it come to room temperature for about 20 minutes before slicing them. You can store them upto three days.

Other Brownie Recipes you can find here: Gluten Free Chocolate Ragi BrowniesWhole Wheat Oats & Chocolate BrowniesVegan Yellow Zucchini Chocolate Brownies.

If you are looking for cakes you can try: Persimmon Buckwheat Gluten Free CakeCitrusy Sweet Lime CakeHoney Dates SquarePeach Upside Down CakeFresh Apricot and Almond CakeMango Vanilla Cake,  Festive Orange Blueberry Pound Cake, Vanilla & Pomegranate Cake,Lemon Cake with Lemon GlazePersimmon Rum Cake.

[yumprint-recipe id=’302′]

Paneer or Cottage Cheese is one of the most trusted and popular ingredient specially for vegetarians in India. It can be used in so many recipes and  the outcome is always rich, soft and creamy. Other paneer recipes I have posted on my blog require some sort of preparation and time. But this malai paneer recipe is quick. If you have guests coming and you want to cook  something in a jiffy this is what you should try. It’s not just a quick fix recipe but it will guaranteed leave them wooed.

I learnt this recipe from a very dear friend Harpreet. She had invited us to her house for dinner. Along with other to-die dishes she had made this delicious Malai Paneer. And oh Boy! we were all sold out. I asked her the recipe right there and since then I have been further wooing my guests with this. I wanted to share this recipe with my readers for a very long time but every time I have made this, the serving bowl has been polished off leaving it sparkling clean 😉 Thankyou Harpreet Bhabhi, this yummy post is dedicated to you. Cheers to our friendship :* and to many more delectable recipes.

Let me know if you try this recipe and like it. I’ll be eagerly waiting to hear from you. 

Directions:
1. Cut fresh Paneer into half inch cubes and set aside.


2. Finely chop onion and tomatoes and set aside. 


3.In a wok add ghee.

4. Add chopped onions and saute them till they turn soft and acquire pinkish colour.


5. Then add chopped tomatoes and salt and continue to cook till the tomatoes become mush and soft.


6. Add Kashmiri red Chilli which gives a vibrant colour.


7. Add Cream or use whisked malai or milk skim and stir everything together.  Add 1/4th cup water and simmer it for 2 minutes.


8. Add cubes of paneer to the creamy gravy and mix everything together.

9. Simmer for 5-7 minutes till desired consistency is reached. Add Kasuri Methi  and mix well. Kasuri Methi is the most important ingredient so should not be skipped.


10. Garnish with freshly chopped coriander leaves.


11. Transfer it to a serving bowl and serve with hot Rotis or Naan.

Other Paneer recipes you can try are: Restaurant Style Mughlai Shahi Paneer Achari PaneerPalak PaneerShahi PaneerPaneer Ki KheerBaked Paneer Corn KababsStuffed Buns with Spicy Paneer.

[yumprint-recipe id=’301′]

When you are married to a health freak, its quiet usual to try healthy recipes at home. Be it salads, high protein recipes and even homemade sauces and dressings which are preservative free and taste amazing. A few days back when my husband wanted to eat Tuna salad, we were out of Mayonnaise. To be honest we barely buy mayonnaise because I hate the taste of store bought mayonnaise. I would rather eat anything bland than to add packaged mayonnaise. My husband suggested if I could try making it at home. With a reluctant mind I gave it a try. To my astonishment it converted me into a mayonnaise lover and I was glad there are no inferior ingredients used in it and everything is fresh including organic eggs from Eggee.


If you make a small batch you can even whisk it with hand and it comes together easily and in a couple of minutes. But if you choose to make a huge batch handheld electric whisk can come in handy and save you all the manual labour. If you are a vegetarian and hate the taste of raw eggs in mayo you can try this Eggless Mayonnaise.

Directions:
1. Separate the egg whites and egg yolk. Oh do you see those yellow bright eggs from Eggee. For the recipe of mayonnaise we are going to use only egg yolk. You can use the egg whites to make Meringues. I will post the recipe super soon.


2. Add Dijon Mustard to egg yolks. I used the grainy one but you can use the smooth one also. I personally like the texture and taste of grainy dijon mustard. Also add salt and white vinegar to the bowl of egg yolks.


3. Add juice of lemon and black pepper.


4. Add sugar and whisk everything together.


5. Add Oil and keep whisking simultaneously. If you add oil in one go the mayonnaise may curdle. Therefore, keep adding little oil and keep whisking for five-seven minutes till desired consistency is achieved. If at all you curdle your mayonnaise do not fret, it can be fixed. Yes you heard me right. See the notes on the printable recipe as to how to fix curdled mayonnaise. Ofcourse you can thank me later 😉


6. Transfer it to a glass jar and refrigerate till further use. If kept covered and refrigerated mayonnaise stays good for 2-3 days. Do try it and keep me posted.

Other homemade dips and sauces you can make at home are: Eggless MayonnaiseArgentine Chimichurri SalsaGuacamoleItalian Basil PestoMuhammaraParsley Pistachio PestoSzechuan Sauce

[yumprint-recipe id=’300′]


When you have a health freak in your family, you have no choice but to make for them healthy dishes which satisfies their soul and makes you happy at the same time. My husband is a mountain cyclist. He loves to ride his bike in long trails which requires a lot of energy. He requires energy bars or granola bars which gives instant energy and keeps hunger at bay for a long time. A while back I had posted recipe of Gluten Free Energy bar made with Amaranth seeds which had received major response from my readers and loved by everyone who tasted it. 

Energy-Bars-Oats-Almond-Feaatured2
Therefore, I thought why not try another energy bar recipe which is easy to put together and relished by all. So when I made these Oats & Almond Energy Bars they came out amazing and in fact tasted like Snickers! Who minds healthy guilt free chocolate bars with goodness of oats, almonds, dates and peanuts. My kiddo loved it to the core for obvious reasons. I am sure you have no reasons to postpone making these for your loved ones. 

Directions:
1. Remove the pits of dates and grind them coarsely in a blender.


2. Transfer the dates in a bowl and add Rolled Oats , Almonds and roasted salted Peanuts. Set aside.


3. In a pan add peanut butter and honey and simply warm it till it becomes loose and a bit runny.


4. Add this honey peanut butter slurry into the oats and fried nuts bowl and mix well.


5. Line a 8×8 baking pan with Parchment Paper .


6. Transfer the mix into the baking pan and press it down with the help of spatula or the bottom of a glass. Cover it with a cling wrap and let it set in the refrigerator for couple of hours. 


7. Remove it from the baking pan along with parchment paper and cut them into bars using a sharp knife.


8. Store them in an airtight container at room temperature. 

Energy-Bars-Oats-Almond-Feaatured3
Other healthy dishes you can try are:  No Bake Amaranth Granola Bars , Ginger Papaya Mint SmoothieDetox Green SmoothieMusk Melon & Cucumber Smoothie with Mint Vegan Kiwi Chia Pudding

[yumprint-recipe id=’299′]


I know I have been posting after a very long time. Its been a hectic year with lots of work and lots of travel. Not that I am complaining but I feel guilty of neglecting my blog. But nonetheless, I have been overhauling my old recipes with fresh crisp pictures like capsicum zunka, kathal ki sabji, sooji ka halwa and many more. Do let me know if you liked them. 

We are in the middle of summers and I don’t feel like eating anything due to excessive heat. I am missing my hills and its pleasant weather. I am only surviving on Salads and liquids. I happen to have some fresh Spinach and Apples. I decided to make a delicious crisp Apple Spinach Pomegranate & Cranberry Salad with Honey Mustard Dressing.

It took me minutes to put this all together and the end resultant was light yet filling salad. The addition of cranberries imparted a magical touch to the whole platter. If you plan to try this salad do not skip the dried cranberries. 

Directions:
1. Wash and core apples. Chop them into bite size pieces. In a large mixing bowl add apples, washed leaves of Spinach, Pomegranate Arils, dried cranberries, walnuts and toss them together.

2. For the Honey Mustard Dressing. In a separate bowl or Jar add Red wine Vinegar and Olive Oil.

3.  Also add Honey and Dijon Mustard and whisk well. 

4. Season well with Salt and Pepper. Cover and refrigerate until you are ready to serve the salad. 

5. Drizzle the dressing over the salad and toss well. Top with crumbled Feta Cheese. Serve immediately.

Other Salad recipes you can try are:Watermelon and Feta Cheese SaladThai Green Papaya Salad RecipeCharred Peppers Salad with Anchovy White BeansCouscous Salad with Chickpeas in Lemon Olive Oil VinaigretteFresh Mexican Black Bean & Mango SaladSautéed Red Bell Pepper and Olive Pasta SaladSundried Tomatoes Pasta SaladGrilled Chicken SaladIndonesian Style Patni Red Rice Salad With Boiled Eggs in Pomegranate Molasses Sauce, Apple Celery Walnut Salad.

[whohit]Apple Spinach Cranberry Salad[/whohit]

[yumprint-recipe id=’298′]


Winters are retreating, still there is nip in the air. The winter bounty is in plenty and ever since I am at my parents place I am enjoying them to the fullest. I am having all the possible delicacies my mother cooks like Swanjhaney ke Phool ki Sabji, Gobhi Ke Danthal and Kali Gajar ki Kaanji. A lot of people are unaware as to what is kaanji. It is a fermented drink which has probiotic properties made with black carrots which appear in the market in winters. It has a strong pungent, tangy taste which I love it. It takes couple of days for the drink to become ready. The process is fairly simple and uses a very few ingredients.  

You can call this drink as the Indian Kombucha. But these Blackcarrots are not available every where, if you are one of those who doesnt have access to those black carrots you can use red carrots also along with beetroots for that colour. I personally dont like the taste of beetroot in kaanji but again I would say its an acquired taste. My father in law loves it but my husband and mother in law just dont like it. I’ll still say you must try it once, you never know if you might fall in love with its taste.

Directions:

1. Wash the black carrots and drain the water.


2. Wear gloves and peel the skin of carrots.


3. Cut them into slices.


4. In a large container add water and add coarsely ground rai or red mustard.


5. Also add the sliced pieces of black carrot and see the water change its colour.

6. Add Black Salt, cumin powder and red chilli powder. Stir with a ladle and cover with a lid. Let it sit for couple of days in the sun for the drink to ferment and develop its taste. Dont forget to stir atleast once a day.


7. When the taste has developed it will become a little pungent and the colour will become like wine. You can sieve the drink through a colander and discard the carrots after another 2 days. Transfer the drink in a glass jar with a lid and store at room temperature. Serve at room temperature and enjoy the bounty of winters along with nutrition.

[whohit]Kaanji[/whohit]

[yumprint-recipe id=’297′]


It’s been 15 days since my dad left us. He left behind a vaccum, some wonderful memories and his absence. I still can’t come to terms that he is no more with us. But life goes on.. and I know he would have wanted us to be happy and get on with our lives.  This post is dedicated to my loving father. The void he has left behind can never be filled. I can never match to his benevolence but all I can say he will live in my heart always. 

This Persimmon Buckwheat Cake with walnuts and currants is made using SOS Organics Himalayan Buckwheat Flour and Brown Rice. It is 100% gluten free and ideal for people with celiac diseases or those who want to avoid gluten.

Directions:

1. Scoop out the pulp of squishy persimmons with the help of  a spoon. Discard the peels and the seeds, if any. Preheat the oven on 180 degrees for 10 minutes. (Learn more about Oven Temperatures and Conversions).


2. In another bowl add brown Rice Flour and Buckwheat flour and combine together.


3. Also add Baking soda and nutmeg powder to the dry ingredients and combine.


4. In another bowl add butter at room temperature and sugar.


5. Cream together butter and sugar with a whisk and add eggs.


6. Add persimmon puree and whisk everything well.


7. Add the dry ingredients and whisk together the wet and the dry ingredients.


8. Fold in chopped walnuts and dried currants.


9. Pour the batter in a greased pan and bake for 35-40 minutes till the toothpick comes out clean. Place the cake on the wire rack and unmould after 2 hours. Slice and serve with your favourite cup of coffee.

If you are looking for other Cakes and desserts with fresh fruits you can try: Peach Upside Down Cake.  Fresh Apricot and Almond CakeApple CrispMango Vanilla CakeFestive Orange Blueberry Pound CakeSorghum and Wheat Flour Persimmon Cupcakes with Cream Cheese FrostingVanilla & Pomegranate CakeVegan Chocolate Banana CakeMascarpone Cherry Compote Cheesecake GlassesEggless Orange Cake with Candied Orange Peel FillingPersimmon Rum Cake,  Mango Tart with Vanilla Pastry Cream . Mosambi Cake.

[whohit]PersimmonBuckwheatCake[/whohit]

[yumprint-recipe id=’296′]


I like Red Bell Peppers  because they are cute, adorable and the most good looking vegetable  I also like their taste specially when they are charred. I have made with them Charred Red Bell Pepper and Pine Nut Pasta, Charred Bell Pepper and Black Eyed Peas Salad, Muhammara- Red Bell Pepper dip and now Cream of Roasted Red Bell Pepper Soup! This is the best soup I have ever had and I am not exaggerating! You have to try this to nod in affirmation. 

The winters have come in full swing. The days are pleasant but mornings and nights are fiercely cold. We need soups like this to keep our body temperature warm. It can also be an excuse to enjoy such an amazing soup. ;P 

Directions:
1. Roast bell Peppers and Remove their skin, seed and membranes. Learn how to Roast a Bell Pepper in Oven here. Chop the roasted bell peppers in one inch pieces. Also chop some onions and garlic.


2. In a soup pot add olive oil and add onions and garlic and saute till the raw smell  of garlic fades. You needn’t brown the onions or garlic.


3.  Also add fresh thyme sprig. If you dont have fresh thyme you can use dried thyme as well. Add water and a broth cube. Bring the mixture to a boil.


4. Add chopped roasted bell peppers. Let it simmer for a couple of minutes until the bell peppers have become soft and tender.

5. Turn the flame off and puree the soup with a hand blender. It should be smooth.


6. Add red wine vinegar to the soup for some acidity.


7. Add some cream and stir with a whisk.


8. Check for salt as the broth cube will already have some salt. Also add some red chilli powder.


9. Serve hot with some crunchy bread.

Other Soups you can try are: Consomé de Pollo con ArrozClassic Russian BorschCream of Asparagus SoupCream of Broccoli Soup with Chives Cream of Mushroom Soup RecipePeas and Mushroom Spicy SoupClassic French Potato Leek SoupSopa De FrijolTomato Soup , Zucchini Garlic Soup with Yak Cheese Shreddings.

[whohit]RedBellPepperSoup[/whohit]

[yumprint-recipe id=’295′] 

I think my ambition of posting 25 recipes with Bread will be accomplished soon the way I have been baking different kinds of breads and hogging them. Last week only I had posted recipe of my White sandwich bread with Tangzhong Method. But the hunger to try out new things keeps pushing me. It was a weekend and friends were coming over for drinks… I had some salami on hand so I decided to use this in a bread. I had initially imagined this recipe to be in a different manner but this turned out much more easier and tastier.  You just have to make a dough and rest mix a couple of ingredients and place them in a bundt pan.

I used a bundt pan because it looks very interesting and the dip bowl can be placed in the centre. If you do not have a bundt pan you can use any other baking pan. The shape of the pan does not alter the taste of the bread. Therefore, you have no excuse to bake this beautiful and delicious bread. I have mentioned a tip for my vegetarian followers, you can replace salami for veggies. Check out notes of the printable recipe card below.


You can choose any dip you like. I posted recipe of a cheesy easy dip when I posted recipe of Soft Pretzels, you cam try that or even  good old ketchup will work just fine! If you try this please send me a picture on facebook I would love to share on my page and dont forget to leave am honest feedback here under the recipe. It will help me grow and improve myself.

Directions:

1. In a container take some lukewarm water. It should neither be hot nor cold, just hot enough to comfortably put your finger into it . The right temperature of the water is very important for yeast to activate. Put yeast into it.

DSC02540
2. Along with yeast add some sugar.

DSC02541
3. Give it a gentle stir with a fork and let the mixture sit and activate for 10 minutes or until you see some bubbles on top and mixture has become frothy and milky.

DSC02548
4. Take all purpose flour in a bowl and add salt and olive oil.


DSC02549


DSC02551


5. Add the proofed yeast to the flour little by little and mix till it comes together.

DSC02553
6. Bring the dough to a flat counter or your kitchen platform and knead for good 10 minutes till it becomes soft and supple. Read more about Bread baking techniques in “Basic Steps to Bake a Perfect Bread

DSC02554
7. Transfer the dough to a greased bowl. And cover with a kitchen towel or cling wrap. Let it sit for an hour or so to double up in size.


DSC02560


DSC02562


8. Punch it down and deflate the dough. Knead for another 5-7 minutes.

DSC02563
9. Divide the dough into tiny golf size balls. Place these dough balls in a bowl. Preheat you oven for 10 minutes on 180 degree C.


10. Chop Salami into bite size pieces and grate some cheese. In the same bowl add chopped salami pieces, garlic powder and cheese.


10. Add red Chilli Flakes, Salt and ground black pepper.


11. Also add chopped parsley, some oil and Italian seasoning or any other herb mix like Oregano Seasoning Domino’s style. Mix everything well with your hands.


12.Grease a bundt pan with oil or melted butter. I am using a silicone bundt pan.


13. Transfer the dough ball mixture into the bundt pan and level it evenly.


14. Bake in a preheated oven for 30 minutes on 180 degree C (Learn more about Oven temperatures and Conversion) or till the top of the bread becomes golden brown and bubbly. Take it out of the oven and let it sit on the counter to set for 10 minutes.


15. Take the serving plate and place it inverted on the bundt pan and now flip the bundt pan carefully.


16. Place a dip bowl in the centre of the bundt pan and serve warm. Your guests will be utterly delighted.

Other Breads you can try are:Apple Cinnamon Swirl BreadBubliki,Cherry Rosemary & Sea Salt Focaccia Bread Chinese Steamed Black Sesame Custard BunsCinnamon Raisins BreadGarlic Rosemary Focaccia BreadHoney Oats Bread , Peter Reinhart’s Potato Rosemary BreadPumpkin BunsStuffed Mushroom Cheesy Crack BreadStuffed Buns with Spicy PaneerItalian Focaccia Bread with StrawberriesWhite Sandwich BreadWhite Sandwich Bread with Tangzhong MethodWhole Wheat Sandwich Bread 

[whohit]SalamiHerbedPullapartBread[/whohit]

[yumprint-recipe id=’294′] 

I am completely hooked to Sourdough breads and its been a long time I have baked a commercial yeast Bread. But then someone told me about Tangzhong method. The secret ingredient is the tangzhong, or water-roux, a method used for Asian breads. It’s a mixture of 1 part flour to 5 parts water, cooked until the starches in the flour gelatinize and the mixture thickens ( this happens at 150°F, or 65°C). Once it cools, you simply add it to the other ingredients and knead. 

When I tried this method the results were spectacular. It forced me to try baking with commercial yeast yet again. The crumb of the bread is to die for. The bread stays soft, supple and tender for longer than usual. The procedure is almost similar to White Sandwich Bread just that you require an additional ingredient which is water roux or tangzhong which can be made easily. I highly insist that you must try this out!

Directions:
1. Lets first make the water – roux for the bread dough. In a pan add All Purpose Flour and water. Mix it with a whisk so that no lumps are there.


2. Turn the flame on and keep whisking it on low till it begins to resemble a slurry. Turn the flame off and cover it and let it come to room temperature.


3. In a container take some lukewarm water. It should neither be hot nor cold, just hot enough to comfortably put your finger into it . The right temperature of the water is very important for yeast to activate. Put yeast into it.

DSC02540
4. Along with yeast add some sugar.

DSC02541
5. Give it a gentle stir with a fork and let the mixture sit and activate for 10 minutes or until you see some bubbles on top and mixture has become frothy and milky.

DSC02548
6. Take all purpose flour in a bowl and add salt and olive oil.


DSC02549


DSC02551


7. Add the roux at room temperature.

8. Add the proofed yeast to the flour little by little and mix till it comes together.

DSC02553
6. Bring the dough to a flat counter or your kitchen platform and knead for good 10 minutes till it becomes soft and supple. Read more about Bread baking techniques in “Basic Steps to Bake a Perfect Bread

DSC02554
7. Transfer the dough to a greased bowl. And cover with a kitchen towel or cling wrap. Let it sit for an hour or so to double up in size.


DSC02560


DSC02562


8. Punch it down and deflate the dough. Knead for another 5-7 minutes.

DSC02563
9. Grease your bread pan with oil and dust with some flour.


10. Roll the dough into a circle using a roller pin.

DSC02565
11. Take one end and roll it together . Fold in the sides and pinch the seam.


DSC02567


DSC02568


DSC02569


12. Place the rolled dough in the baking pan with seem side down.


13. Cover the dough loosely with a towel or cling wrap or incase you are using pullman loaf pan you can cover with lid and let it rest again for 30 minutes till it rises again. Preheat the oven to 180 degree Celsius for 10 minutes. Brush the top gently with glaze using egg or milk or cream. Sprinkle the top with Oat meal or seeds of your choice.


14. Bake it in the centre rack of your preheated oven for 35-40 minute. Change sides half way for even cooking. If you feel your bread is browning too fast tent it with aluminium foil and continue to bake. remove from Oven and let it sit in Baking pan for 10 minutes then remove from tip and let it rest on a wire rack and slice it when it is completely warm using a serrated knife.

Other bread recipes you can try :White Sandwich BreadVegetarian homemade PizzaRussian BubliciWhole Wheat Sandwich BreadChinese Black Sesame Steamed BunsCherry Focaccia Bread with Rosemary and Sea SaltRosemary Garlic Focaccia Bread, Cinnamon Raisin BreadBeetroot Bread with Garlic and ThymeHoney Oats BreadDomino’s Garlic Breadsticks.

[whohit]WhiteBreadTZM[/whohit]

[yumprint-recipe id=’293′]