Tag

BachelorFood

Browsing

RoastedBroccoli_Featured2
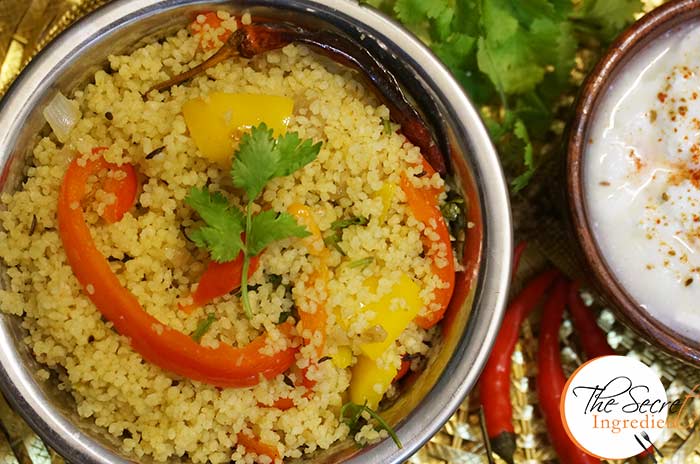
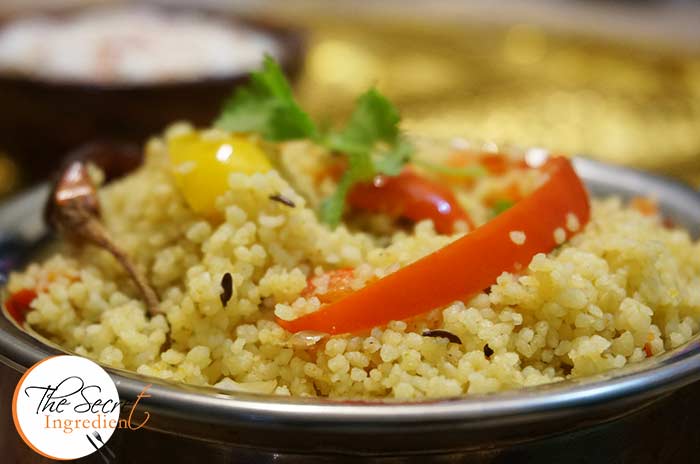
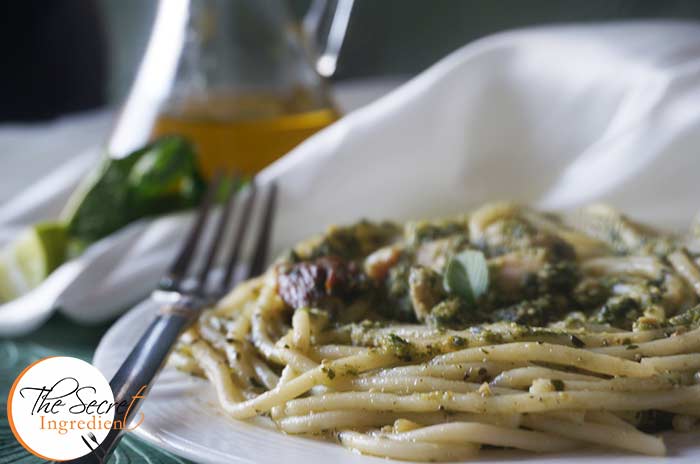
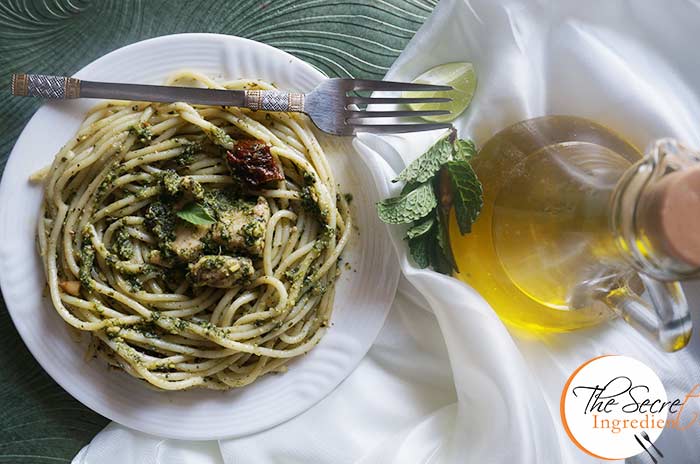
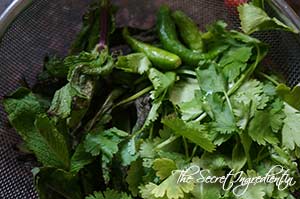
After months of consistent exercise regime and healthy eating I am ten kilos down. The irony of a Food Blogger is that you have to cook fancy schmancy food which is not always healthy. At the end of the day that ends up in your butt. But the only way to escape is to compensate all those calories with equal amount of exercise. In the past few months I also ended up cooking and baking healthy recipes which makes eating a guilt free experience. Addition of soups and salads in my diet has uplifted by energy level. 

RoastedBroccoli_Featured3

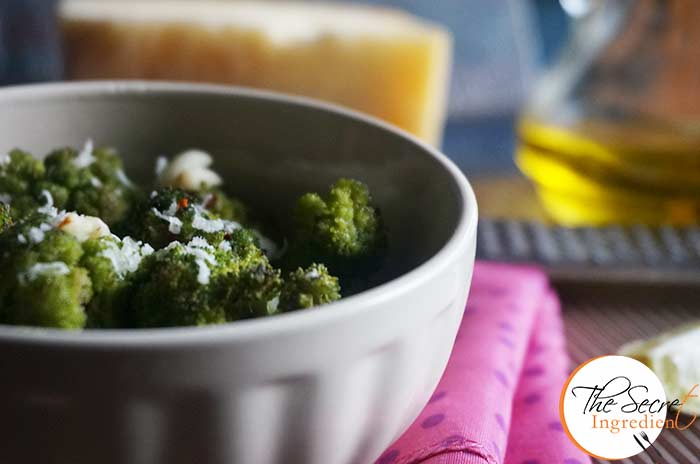
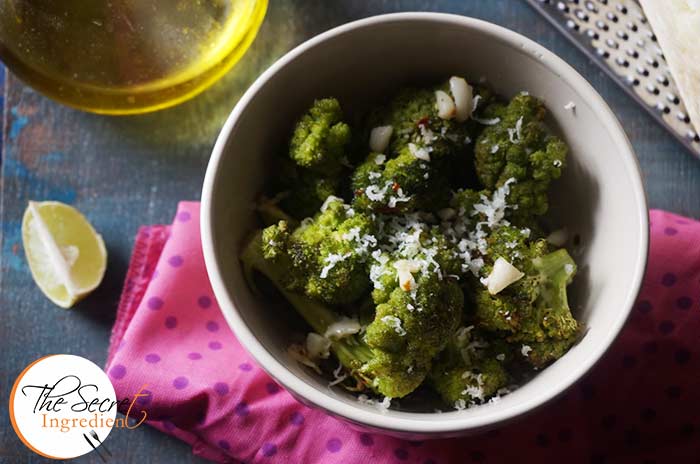
Boiling Vegetables is so underrated and cruel. Roasting them gives them that crisp coat and enhances its flavour. I love to roast vegetables and doing it with my favourite Broccoli makes it top notch delicious. The addition of Garlic to this makes it a lethal combination. You must try it to believe me. If you like a little spicy, pep it up with some red chilli flakes.

Directions:
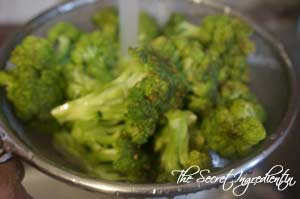
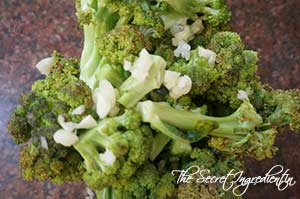
1. Preheat your Oven to 200 degree Celsius (Learn more about Oven temperatures and Conversion). Cut a Broccoli head into small sized florets. Place them in a colander and wash them thoroughly under running water for any grit. 


DSC06441


DSC06442


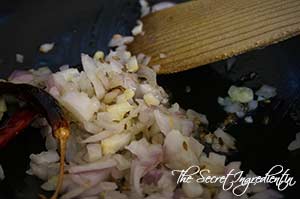
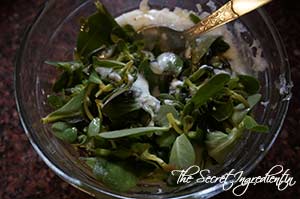
2. Chop some cloves of garlic finely and toss them with the broccoli florets.


DSC06444


DSC06445


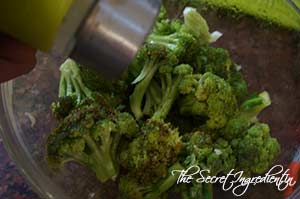
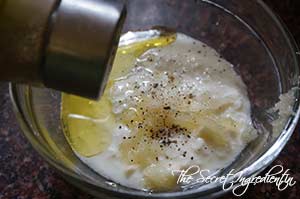
3. Add a drizzle of Olive oil.

DSC06446
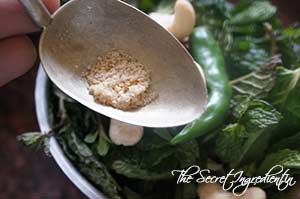
4. Season with Salt & Black Pepper. 


DSC06447


DSC06448


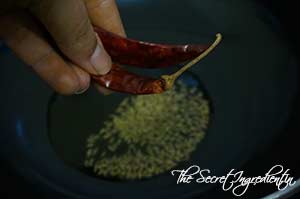
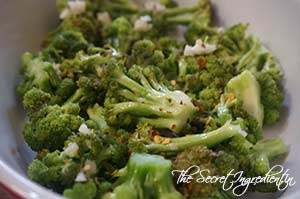
5. Transfer the broccoli in a baking dish and place in a single layer. Sprinkle some Red Chilli Flakes.


DSC06449


DSC06450


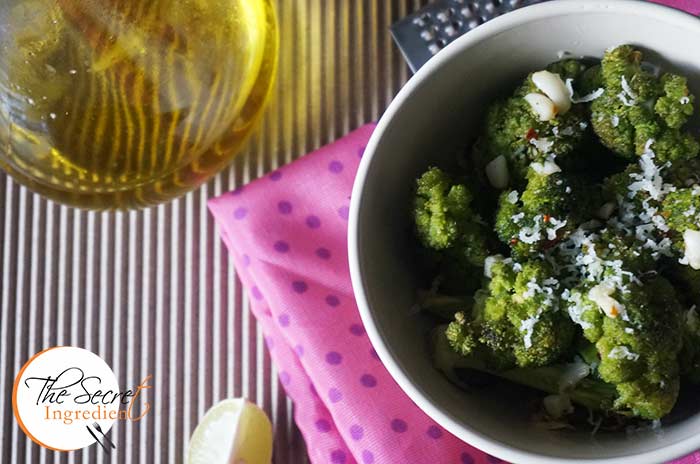
10. Bake in the oven for 20-25 minutes until the broccoli is tender. Toss in lemon juice, parmesan cheese, and 1 tablespoon olive oil; serve immediately.

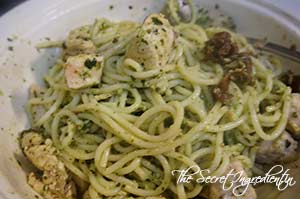
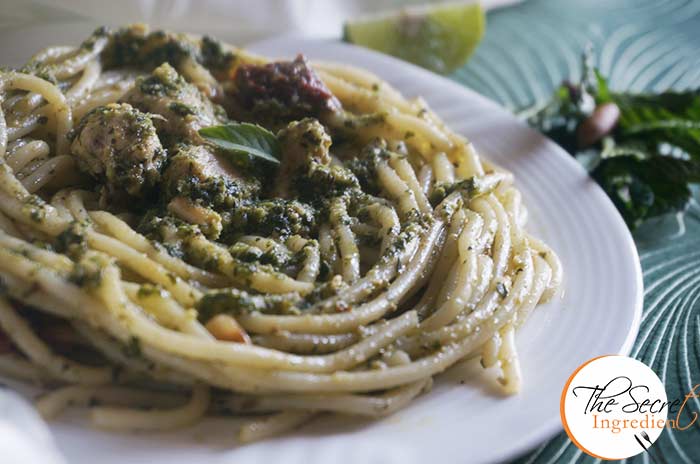
Other Broccoli recipe you can try here are: Healthy Broccoli PastaCream of Broccoli Soup with ChivesBaked Broccoli Cheese Patties.

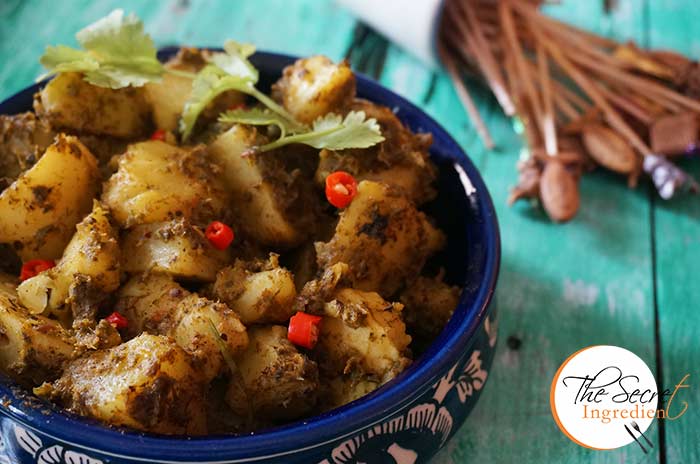
You can even try Roasted Potatoes with Garlic and Rosemary.

RoastedBroccoli_Featured1

[yumprint-recipe id=’218′] 


ChickenPestoPasta_Featured2
When it comes to Pastas, my heart skips a beat. I can eat pasta in any form, any sauce and even boiled 😛 But when you see an authentic Italian pasta on a platter that love transforms into madness. I made Italian Basil Pesto the other day and me and my husband were going gaga over it. We finished more than half the jar by simply smearing it on our breads and eating it. Then I gave an ultimatum to my husband that we are not eating it like this any more and that I needed to make something with this. 

ChickenPestoPasta_Featured1

I had some chicken breast and a jar of sun dried tomatoes. Believe it or not the pasta came together in fifteen minutes. By the time I finished boiling the spaghetti, the chicken was ready. I arranged everything together and served. What an amazing dinner it was. So refreshing, light and still filling. In my unconscious mind I took a small trip to Italy <3

Directions:

1. Boil the pasta of your choice till al dente and set aside. (Learn how to Boil Pasta perfectly). Take out the sundried tomatoes from the jar. And cut them into small bite size pieces. Set aside.


DSC05365


DSC05366


2. Cube the chicken breast. Also mince some garlic and set aside. You can always substitute Chicken with Mushrooms for the vegetarian twist.


DSC05368


DSC05369


3. In a pan add some Olive oil and add minced garlic to the pan and give it a toss.


DSC05370


DSC05371


4. Add Chicken and cook till it has turned white from pink. 


DSC05372


DSC05375


5. Season with Salt and Black pepper. Turn the flame off when it’s cooked.


DSC05376


DSC05374


6. Add the Basil Pesto to the Boiled pasta and also add the chopped sundried tomatoes.


DSC05377


DSC05378


7. Toss them together using a set of forks.

DSC05379

8. Transfer to a serving platter and drizzle some Lemon juice on it. Serve it hot or at room temperature. 

Other Pasta recipes you can try here are:  Avocado Parsley PastaHealthy Broccoli PastaItalian Chicken Meatballs with SpaghettiPasta Alla VodkaSautéed Red Bell Pepper and Olive Pasta SaladSautéed Red Bell Pepper and Olive Pasta SaladSundried Tomato Pasta SaladVegetarian Hakka Noodles

ChickenPestoPasta_Featured4[whohit]chickenPestoPasta[/whohit]

[yumprint-recipe id=’217′]

Shakshuka_Featured7

And then it happened! I have been meaning to try this recipe for such a long time, that it is crazy. Sometimes I dont have Red Bell Peppers, sometimes I am running out of fresh Parsley and then sometimes I am just pure lazy. This glorious day in my lifetime I had everything I needed to make Shakshuka or Shakshouka. First let me talk a little about what Shakshuka is. No No its not a Gujarati dish. Do not confuse Shaak for Veggies . Shakshuka is a Jewish Libyan recipe of Eggs with Red Bell Pepper, Tomatoes and Cumin. My sources (read Wikipedia) say, it was  believed to have originated in Libya, North Africa by the Jews. Wikipedia says, Shakshouka is a staple of Tunisian, Libyan, Algerian, Moroccan, and Egyptian cuisines, traditionally served in a cast iron pan or tajine with bread to mop up the sauce. It is also popular in Israel, where it was introduced by Tunisian Jews and Maghrebi Jews, hundreds of thousands of whom immigrated to Israel during the 1950s. 

Shakshuka_Featured5

That’s about its history, let me talk about its present. Its the most delightful, filling and balanced egg breakfast you can think of. I have plenty of other eggs for breakfast recipe on my blog including Italian Frittata, Wrapped French ToastMexican Casserole Eggs and soon coming Polenta with Eggs. But this one wins the race. Ever since I made it the first time I have been doing this every weekend. This seems to have been my husband’s favourite currently. 

But remember to use fresh eggs because they make a huge difference in the taste. I have used Eggs by Eggee. They deliver the best, freshest eggs handsdown. If you are really an egg lover like me and my family, you will fall in love with Eggee. 

Directions:
1. Chop some Onions finely and garlic.


DSC06064


DSC06067


2. Also chop some tomatoes and Red Bell Pepper and set aside.


DSC06066


DSC06065


3. In a cast iron Skillet or a normal pan, pour some Olive oil. You can always buy your Cast Iron Skillet at our Online Store The Gourmet Shop, cheaper than anywhere else on the web and we ship pan India 🙂

DSC06068

4. Add Red Bell Pepper, Onions and garlic and saute them, till they turn a little soft but hold its crunch.


DSC06069


DSC06070


5. Add tomato Puree and combine.

DSC06071

6. Add chopped tomatoes to the skillet.

DSC06072
7. Season with Salt, Paprika and Cumin Powder. 


DSC06073


DSC06074


DSC06075


8. Add Water to the skillet and cover the skillet with a lid and let it sit on low flame till the tomato goes all gooey.


DSC06076


DSC06077


DSC06078


9. Make little cavities in your skillet with the help of spoon and crack Eggee eggs into them. Cover the skillet again for next 5-6 minutes for the egg whites to set. 


DSC06079


DSC06080


10. Sprinkle some freshly chopped Parsley leaves on top and serve with bread to dig into that yummy sauce.

Other Breakfast Recipe with Eggs you can try out are:Apple & Cinnamon Pan CakesBlueberry Buttermilk Pan CakesMexican Casserole EggsItalian Frittata with Mushrooms and SpinachWrapped French Toast

If you are looking for Vegetarian Breakfast Options you may try: Eggless Walnut Pan CakesQuick Rava IdliRava Pizza BreadShahi PohaSoya Veggie Vermicelli.

Shakshuka_Featured2

[yumprint-recipe id=’212′]

PurslaneDip_Featured4

I had a Turkish employer in Mexico, the Studio me and my husband worked for. He introduced us to this Purslane Dip when he invited us for dinner at his place. I looked at the leaves and exclaimed “Kulfa!” It was native to my motherland. You dont know the feeling when you find something or someone from your country. I am glad my mother had made me try this vegetable so I instantly recognised it. But unlike Indians they dont make a saag with this. Instead they eat it like a dip with breads or crackers. The idea was new for me and all I can say it was a delicious idea.  

PurslaneDip3

Last time when I visited INA Market I found Kulfa. I instantly bought it. When I reached home I decided to make this dip. Oh it was healthy and so refreshing. If yo can lay your hands on kulfa do spare a little bunch for this different yet tasty dip. You can pull this together in minutes and doesn’t require any cooking.

Directions:

1. Separate the leaves of purslane from the stems.

DSC05738
2. Run it thorughly under water and check for any grit.Coarsely chop them. Set aside.

DSC05739

3. Whisk thick creamy Yogurt in a bowl. You can use Greek yogurt or hung curd. Grate garlic into the yogurt.

DSC05740

4. Add Olive Oil.

DSC05741

5. Season it with Salt and Pepper.


DSC05742


DSC05743


6. Add washed leaves of purslane to the yogurt and combine well.

DSC05744
7. Chill it in the refrigerator and serve with Crackers or Bread of your choice.

Other Raita or yogurt based dishes you can try are : Bathua ka Raita, Aloo Anaar ka Raita, Baigan ka Raita.

PurslaneDip_Featured2[whohit]PurslaneDip[/whohit]

[yumprint-recipe id=’209′]

MintPotatoes_Featured3

Its the third day of Navratras, the holy week of fasting for Hindus. Already I am tired of eating Sama Ke chawal ki Khichdi, Halwa, Phirni, Sabudana Khichdi, Sabudana Tikki and even the new Tapioca Pudding with Coconut Milk I tried a day back. The problem with me is I have to find something new to eat, whether fasting or not fasting. Its the kick which I get after trying new type of food. Of Course there are times I wanna stick to the traditional food which is where the comfort lies.

MintPotatoes_Featured5

Potato is one versatile vegetable which can be modified in any way you like. It makes great appetizers for parties, a fabulous main course option and even for desserts you can use it. And when you are fasting that’s one vegetable which saves the day 😉 I tried to make a minty tangy Potatoes which we can enjoy as a snack in the evening. They are without Garlic and Onion which makes it suitable for fasting as well. It has a very tangy flavour which will be simply fabulous for parties as a finger food.

Directions:
1. Wash and Boil some potatoes in water until al dente. Peel off their skin and cut them into cubes, set aside. You can also use baby potatoes for this.

DSC06134

2. In a blender add some washed coriander and mint leaves separated from their stems and also green chilies. Blitz them and make a smooth puree. Set aside.


DSC06132


DSC06133


3. In a pan or wok add some ghee or clarified butter. The vegans can substitute it with cooking oil.

DSC06135
4. Add Cumin seeds and wait for them to sputter.

DSC06136
5. Add the mint coriander puree and cook for a minute until the rawness fades away.

DSC06138
6. Season it with Salt, Red Chilli Powder.


DSC06139


DSC06140


7. Also add turmeric Powder and Amchur Powder. Combine them in the mint puree for another minute.


DSC06141


DSC06142


8. Add cubed boiled potatoes and toss them in the masala.


DSC06143


DSC06144


9. Add a little water and keep it on simmer till the potatoes absorb all the spice and the liquid evaporates.

DSC06145
10. Serve hot and enjoy the tangy minty Potatoes.

You said you love Mint? try this Mint Pulav or Mint Chutney you will thank me later.

Other Potato recipes you can try here are: Punjabi Style Dum Aloo, Rosemary Garlic Roasted PotatoesPomegranate Potato in Spiced YogurtYam Potato ChatPotato SmileysTapioca Potato in Indian Spices

MintPotatoes_Featured4
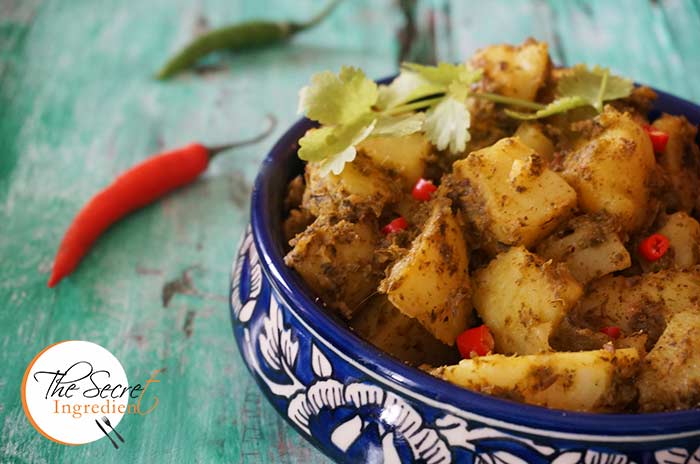
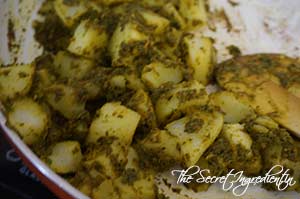
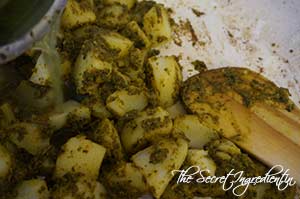
[whohit]MintPotatoes[/whohit]


[yumprint-recipe id=’206′]

PapayaSmoothie_Featured6
And then comes that unripe and not so sweet papaya! Its a common occuring event when you dont know what to do with that Papaya. Last time I baked them into my delicious Chocolate Papaya Muffins. Despite that I gathered some calories and was feeling guilty about it. Papaya is suppose to be healthy you see!

PapayaSmoothie_Featured5

So this time I blitz it with yogurt and some mint and some honey and some ginger and some lime… yeah yeah!! The choice of ingredients sounds weird. It happened with me also but the result was simply refreshing and guiltfree. What more can you ask from that unappealing Papaya. It simply does serve the purpose it came into existence. Now I am sounding like a spiritual guru! duh! You make this smoothie and dont forget to tell me if you liked it.

Directions:

1. In a blender add pieces of Papaya. Yes over ripe, unripe, sweet, unsweet all will work.

DSC06019
2. Add pieces of Ginger.
DSC06020

3. Add Cubes of Ice.

DSC06021
4. Add plain Yogurt and honey.

DSC06022
5. Add some mint leaves.

DSC06023
6. Add juice of Lemon.

DSC06024
7. And just a little water to help it blend and give it a pourable consistency.

DSC06026
8. Simply blitz this together until smooth and creamy.Pour them in your favourite tall glasses or a s mason jar and enjoy this refreshing drink. Its ideal for the scorching summers.  

Other summer drinks you can try here are: Plum SmoothieAam Ka PannaLitchi Lemonade and Musk Melon & Cucumber Smoothie with Mint .

PapayaSmoothie_Featured2
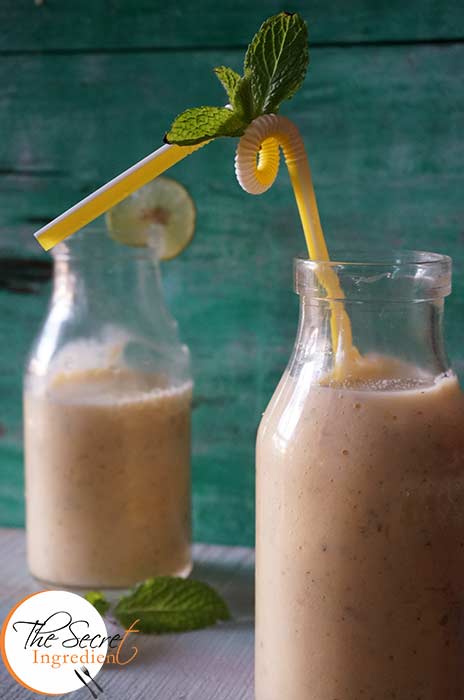
[whohit]PapayaGingerSmoothie[/whohit]

[yumprint-recipe id=’205′]

Green Ber ki Chutney I make every year because green ber is usually available at this time of the year. Yesterday was Maha Shivaratri, a Hindu festival  which is celebrated on the fourteenth day of every lunar month or the day before the new moon. It has a special significance for those who are on a spiritual path. A lot of Shaivas, devotees of Shiva observe fast on this day.  Around this time of the year the markets in India are flooded with some interesting fruits and vegetables, like the yellow ripe pumpkin, Cape gooseberry or Rasbhari in Hindi and also Ber or Indian Plum.

I have always loved eating Ber. It has a very peculiar taste not liked by everyone. This year on shivratri when I saw ber in the market I bought in abundance to munch all day long and tried to make this delicious chutney with mint. This recipe I had seen a while back and had been on my to-do list. I was a little skeptical about its taste but the end result was astonishing. Husband who doesn’t like ber also relished this chutney and asked for multiple servings with Samosa 🙂 Ha! what a happy end to ber.

Directions:
1. Wash and pit or destone the ber and  cut into pieces.

DSC05397

2. Separate the mint leaves from the stem and wash them well.

DSC05398

3. In a blender add the ber pieces along with mint leaves and Black Rock Salt and normal salt.


DSC05403


DSC05404


4. Also add sugar and roasted Cumin Seeds powder.


DSC05405


DSC05406


5. A green chilli, cashew nuts and a pinch of asafoetida


DSC05407


DSC05408


DSC05409


6. Blend them together to a smooth creamy paste.

DSC05410
7. Add Lemon juice and pulse again.

DSC05412
8. Serve with your favourite snacks and enjoy its deliciousness. You can refrigerate the chutney for later use.

Other Chutney Dips and Salsa you can try here are: Aalubukhara ChutneyArgentine Chimichurri SalsaCoconut ChutneySweet and Sour Raw Mango ChutneyPudina ChutneySpinach Coriander Salsa| Phalahari Chutney Coriander Chutney without Onion GarlicRaw Mango Chutney with Mint and Coriander


[yumprint-recipe id=’196′]


Often there is an urge to eat something sweet, chocolaty which simply melts in your mouth. These cravings go berserk if you try to suppress them. And the only solution is to feed them with what they want. One super duper quick recipe is Brazilian Brigadeiros . These are simple chocolate fudge balls which involves minimal cooking and excellent results. Roll them in Chocolate Sprinklers and you get this amazing dessert.

I made this for my mother in law who is fond of chocolates and sweets. She was to do a road trip and I thought to make this for her so that she can enjoy her trip. And when I gave her a box of these she was like “wooowww did you make these they look just like store bought chocolate truffles”. And that made me a happy chirpy soul 🙂 Try them for your kids, specially when they are appearing for their exams. They would love to get pampered this way 😉

Directions:

1. In a pan melt Butter.
DSC05227
2. Empty a can of Condensed Milk.

DSC05229

3. Also add Cocoa powder and mix well. 

DSC05230

4. Keep cooking chocolate on medium flame until you see it bubbling. Make sure the chocolate doesn’t burn from the bottom so you need to keep stirring. If your chocolate is undercooked you wont be able to roll them into balls  and if its overcooked it wouldn’t taste good. So it has to be perfectly cooked. Draw a line in the centre with the spatula if the line remains  as it is , then its a sign your chocolate is done.

DSC05232
5. Line a plate with Parchment Paper, I have used Oddy Uniwraps Parchment Paper because it doesn’t stick to the food and you need not grease it. Spread the chocolate on the plate and let it refrigerate in fridge for 2 hours.


DSC05233


DSC05234


6. Grease your hands with oil and take a little portion of your chocolate and roll into a ball. If your chocolate is rightly cooked it will form the shape without a problem, if not you need to cook it further.


DSC05235


DSC05236


7. Roll the balls in chocolate sprinklers.

DSC05237
8. You can place them on a muffin cup liner to avoid sticking to the plate. Serve and enjoy the sweetness.

Other quick recipe you can try here are : Coconut Macaroons,Coconut Milk Mango PuddingApple Lapsi .

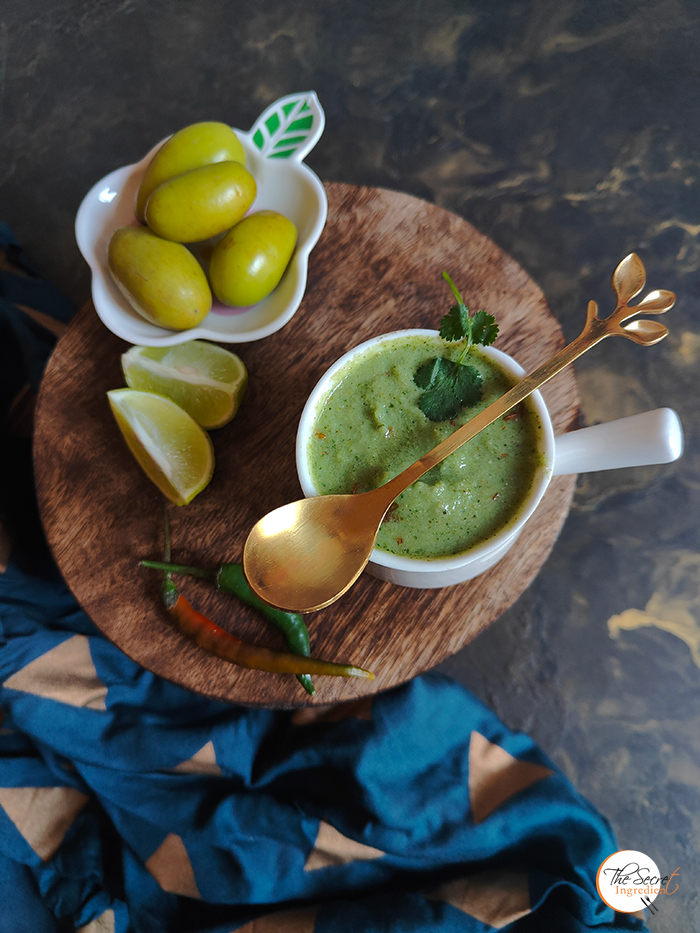
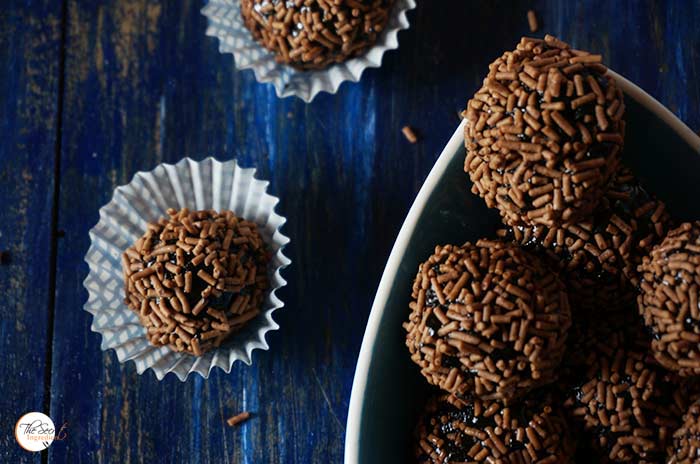
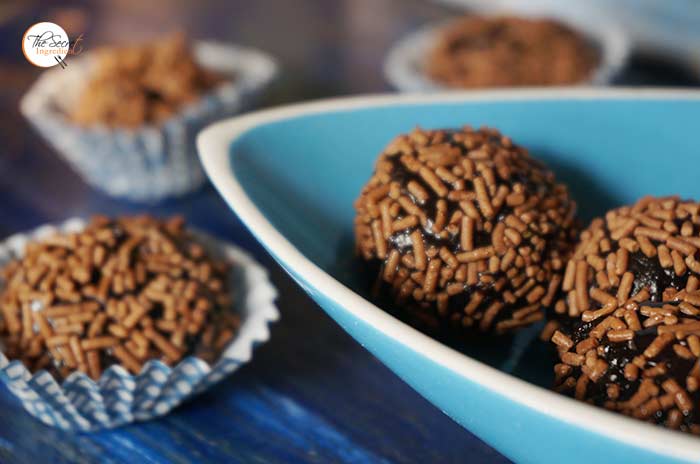
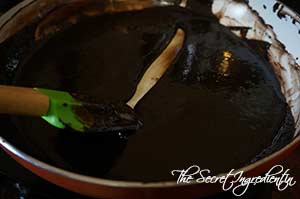
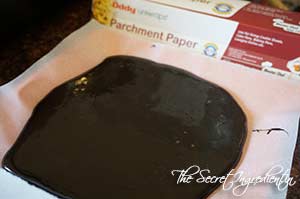
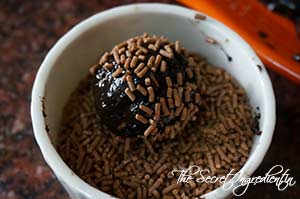
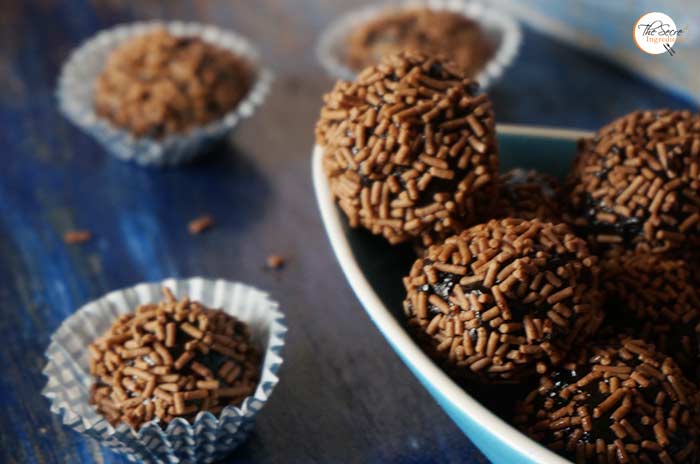
[whohit]Brigadeiros[/whohit]

[yumprint-recipe id=’195′]

MushroomBiryani_Featured1

I think someday my tastebuds will get salvation after constantly feeding them with different mushroom recipes. I hope that never happens in this lifetime. I get swayed when I see any new recipe with Mushrooms. Well I needn’t explain this again and again. If you follow my blog, you must have already known by now. I saw this amazing recipe on Beulah’s blog Full Scoops and I was infatuated. I tried and it turned out it was love at first bite.

MushroomBiryani_Featured2

Mushroom and rice married so well in the harmony of spices that the flavour was to die for. Who knew Mushroom rice could taste so well. It was a one pot recipe and I made a few changes to the original recipe by omitting the tomatoes and adding mint leaves directly. It was the best next rice recipe I have tried after Mint Rice. If you are looking for a quick fancy recipe for some guests , you have reached the right page. Don’t think twice just go for it 🙂

Directions:
1. Wash and soak rice for half an hour. I have used non basmati long grain rice. You can use any non sticky rice.

DSC02659

2. Wash and slice button mushrooms and keep aside. Also slice onions in length and finely chop some green chillies.


DSC02658


DSC02660


3. In a pressure pan add some ghee or clarified butter, bay leaf and cinnamon stick.


DSC02661


DSC02662


DSC02663


4. Also add green cardamom, cloves and star anise.


DSC02664


DSC02665


DSC02666


5. Saute sliced onions and green chillies in ghee. Also add ginger garlic paste and saute till the raw smell of ginger garlic fades away.


DSC02667


DSC02668


6. Also add to the pressure pan mint leaves, garam masala and ground cumin powder.


DSC02669


DSC02670


DSC02671


7. Add Salt and coconut milk to the pan and mix well.


DSC02674


DSC02675


8. Add soaked rice and water. Mix well.


DSC02676


DSC02677


9. Top it with freshly chopped coriander leaves. Close the lid and let it cook for 10 minutes or three to four whistles or till fully cooked. Dont open the lid immediately, let them cook in the pressure.

DSC02678
10. Fluff up with a fork and serve hot with Raita: Potato and Pomegranate Yogurt side dish.

Other Rice Biryanis and Pulao you can try are: Kathal Ki BiryaniPudina Pulao, Curd Rice.

You can try other Mushroom Recipes on The Secret Ingredient: Kadhai MushroomMalai Bell Pepper MushroomMushroom Do PyaazaChili MushroomGinger-Sesame Chicken with Bok Choy and Mushrooms Mushroom RisottoItalian Frittata with Mushrooms and SpinachMushroom MatarStuffed Mushroom Cheesy Crack BreadStuffed Mushroom and Spinach Braided Bread

MushroomBiryani_Featured3
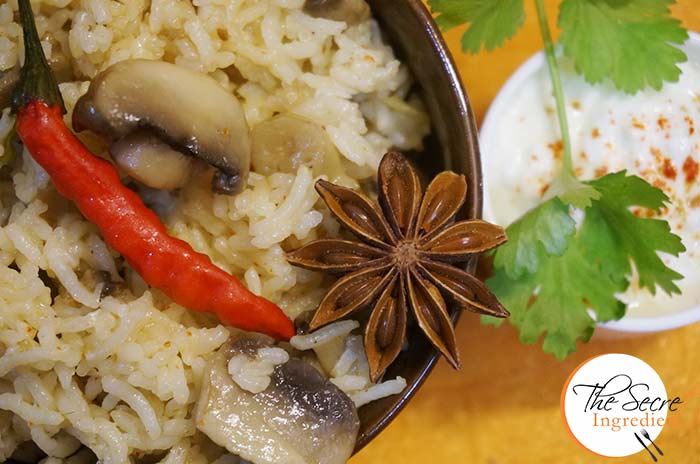
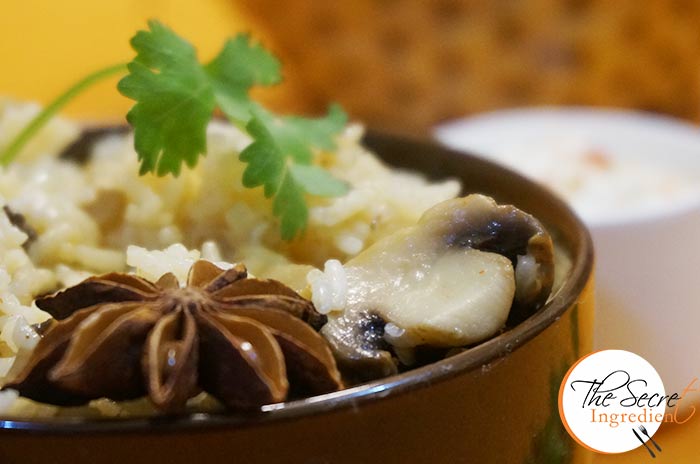
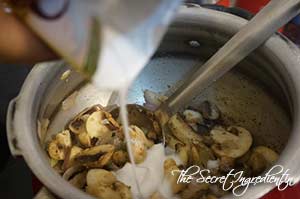
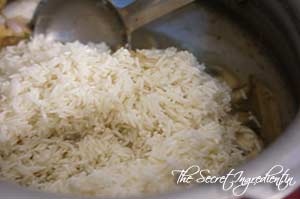
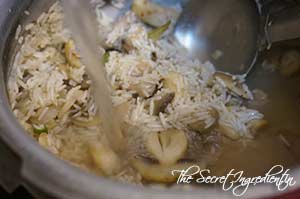
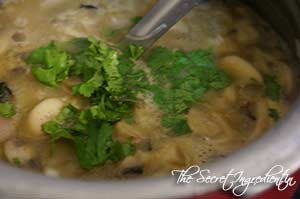
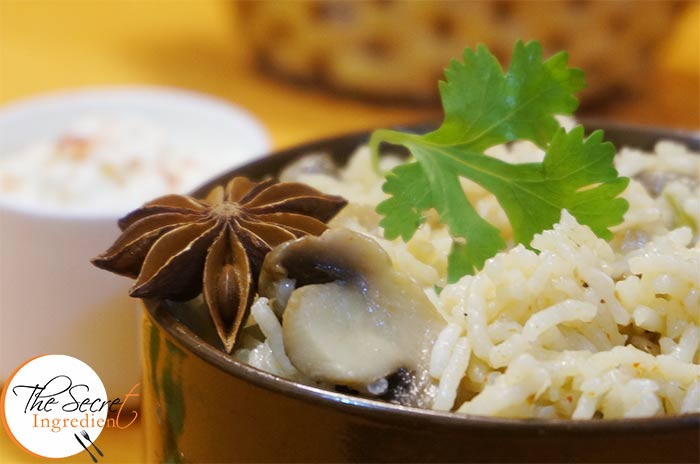
[whohit]MushroomBiryani[/whohit]

[yumprint-recipe id=’193′]

CousCousPilaf_Featured2

Its been a few months now I have been maintaining the regime to eat healthy and exercise daily. Luckily I have been able to shed a few kilos (Happy Dance!!) but a few kilos are still to go. I have been eating everything but in control and avoiding sugar and fried food as much as I can. I made Couscous Salad with Chickpeas some time back and it is a regular at my place.

Couscous Pilaf_Featured3
I wanted to try the couscous pilaf which tasted flavourful with some spices and vegetables. All I can say it was amazing, filling and gets ready in minutes.  If you are hungry and looking for quick dinner options, dont think twice make this healthy pulao which looks gorgeous and tastes divine. Its a good option when you want to avoid hi starch rice pulav.

Directions:

1. Chop Onions and Garlic Finely. Also chop Red and Yellow Bell Pepper in strips lengthwise. You can even add mushrooms, I did not have on hand. Set aside.

DSC03039

2. In a sauce pan add water and bring it to a boil. Turn the flame off.

DSC03040

3. Add Couscous to the boiled boiled and top it with ghee or clarified butter*. Cover and let it sit for 5-7 minutes or till the couscous gets cooked. Fluff it up with a fork and set aside.


DSC03041


DSC03042


4. In a pan add oil and heat it.

DSC03043

5. Add cumin seeds and let them crackle for a couple of seconds. Also add whole red chilies.


DSC03044


DSC03045


6.  Add garlic and saute. Also add onions and saute till it turns soft and translucent.


DSC03046


DSC03047


7. Add bell peppers and mushrooms if you are using. Saute them till they become cooked but still crisp.

DSC03048
8. Add turmeric Powder and salt. Combine.


DSC03049


DSC03050


9. Add cooked and fluffed couscous to the veggies and combine. Garnish with freshly chopped coriander leaves.


DSC03051


DSC03052


10. Serve hot with some Aloo Anaar Raita or plain yogurt.

Other Pulav or Pulao or Pilaf recipes you can try are: Mint Pulav, Mango Rice, Curd Rice, Kathal Ki Biryani,  Veggie Vermicelli Pulao.

If you are looking for other healthy recipes you can try, Couscous salad with Chickpeas, Mango Black bean Salad, Grilled Chicken Salad, Healthy Broccoli Pasta.

CousCousPilaf_Featured1[whohit]CouscousPilaf[/whohit]

CousCousPilaf_Pintrest

[yumprint-recipe id=’176′]