Tag

Baker’sDelight

Browsing


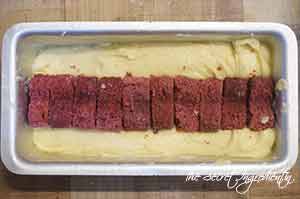
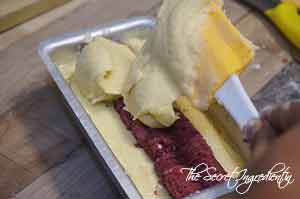
Usually when I bake my weekly bread at home I make two loafs. Its raining these days and the home made bread survives only 3 days so we have to ensure that we consume it within that time before it gets mouldy. Therefore, I bake one medium size loaf with half the dough and utilize the half to make different savouries and snacks for evening time tea. I make either pizzas or plain buns or sausage flower buns and cheese stuffed buns with the same dough.


My husband loves these paneer stuffed buns and so does my father. Last when we went for picnic I baked these for my father and he greedily ate them. It was a sheer pleasure to watch my father relishing something in spite of the fact he is a picky eater.


Directions:

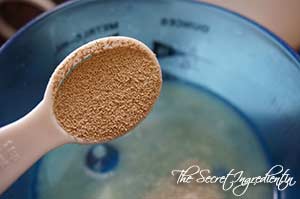
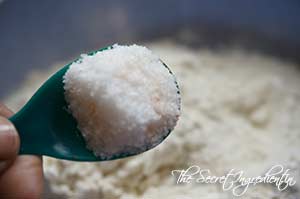
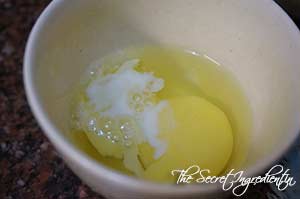
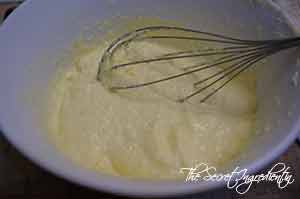
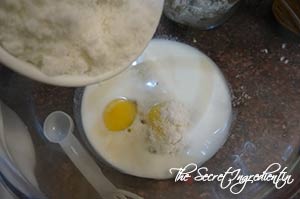
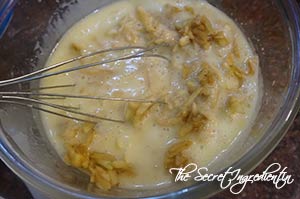
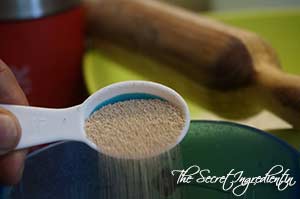
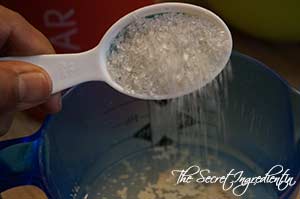
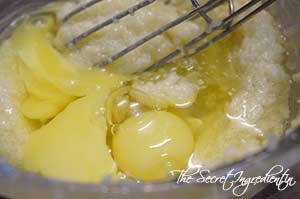
1. In a container take some lukewarm water. It should neither be hot nor cold, just hot enough to comfortably put your finger into it . The right temperature of the water is very important for yeast to activate. Put yeast into it.

DSC02540
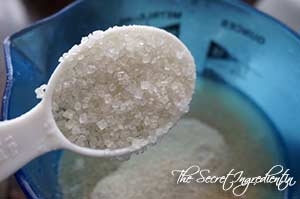
2. Along with yeast add some sugar.

DSC02541
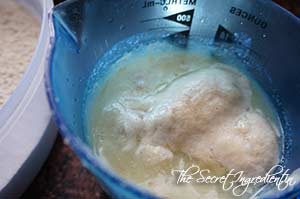
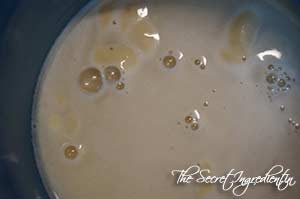
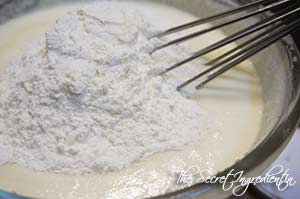
3. Give it a gentle stir with a fork and let the mixture sit and activate for 10 minutes or until you see some bubbles on top and mixture has become frothy and milky.

DSC02548
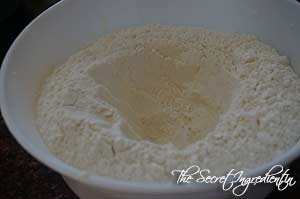
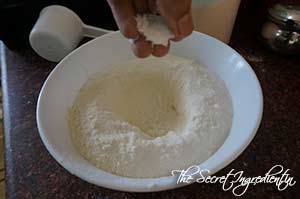
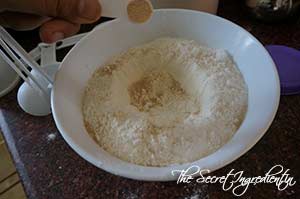
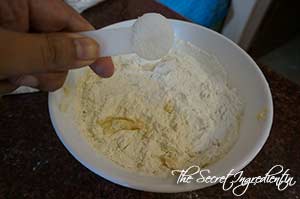
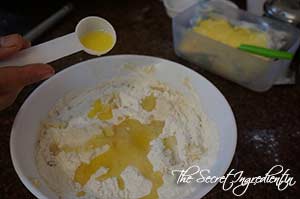
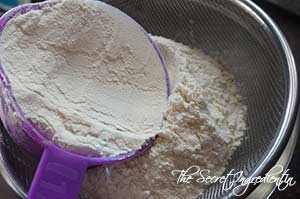
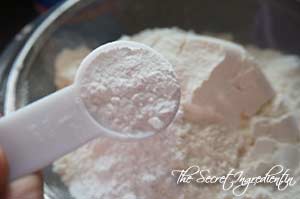
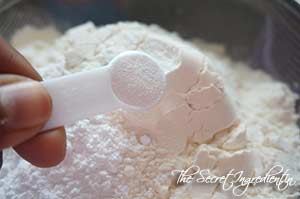
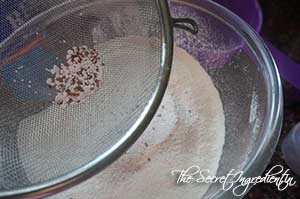
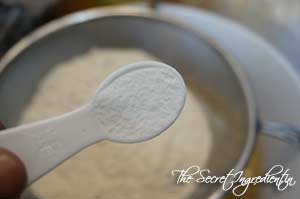
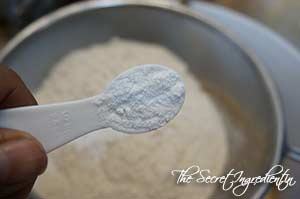
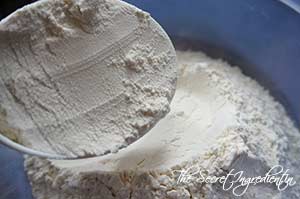
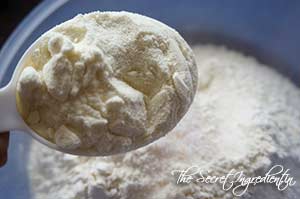
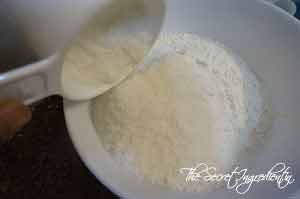
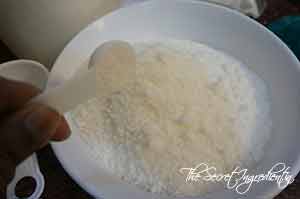
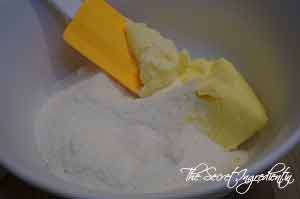
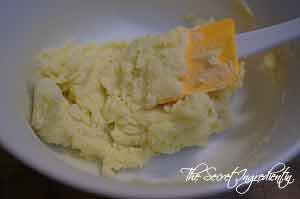
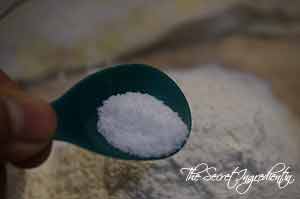
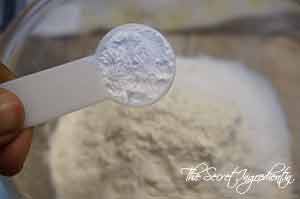
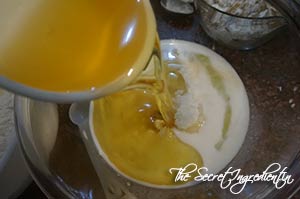
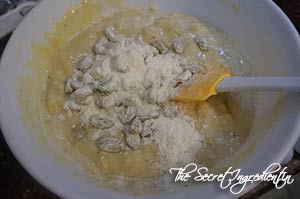
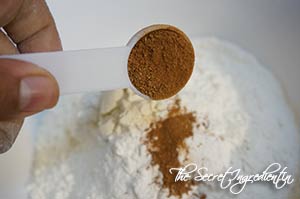
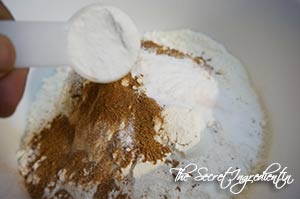
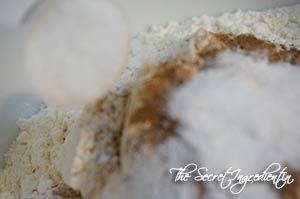
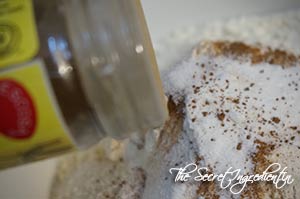
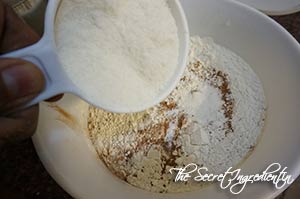
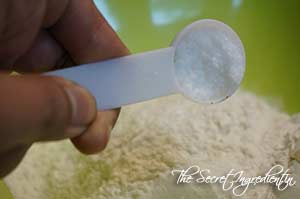
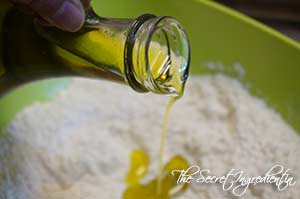
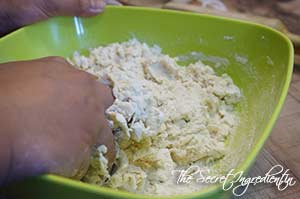
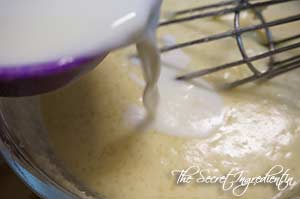
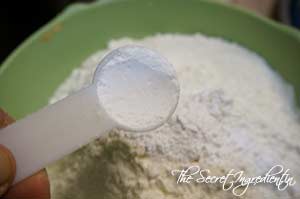
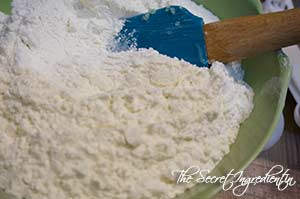
4. Take all purpose flour in a bowl and add salt and olive oil.


DSC02549


DSC02551


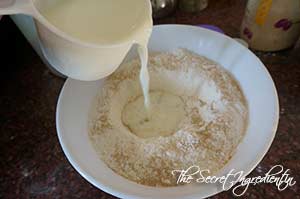
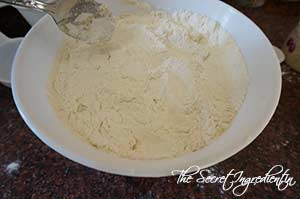
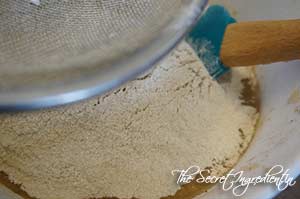
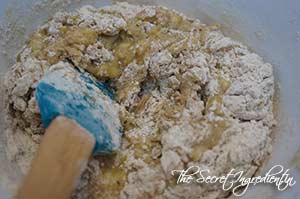
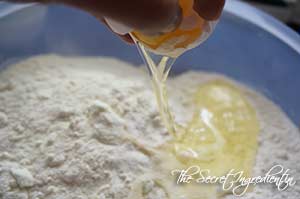
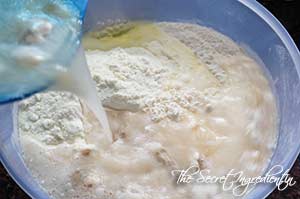
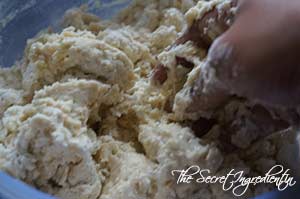
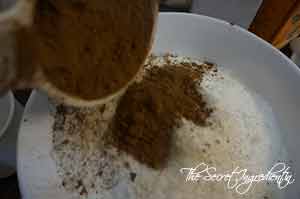
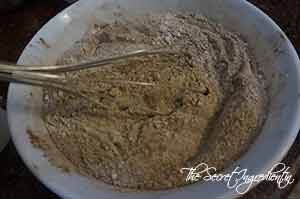
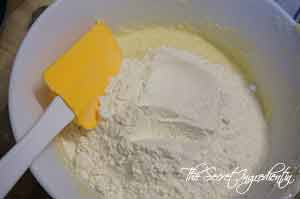
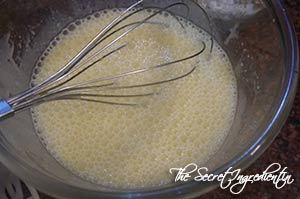
5. Add the proofed yeast to the flour little by little and mix till it comes together.

DSC02553
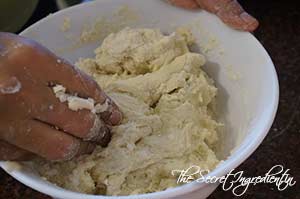
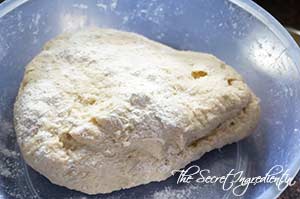
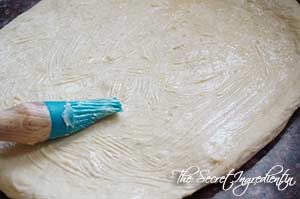
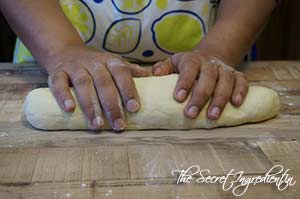
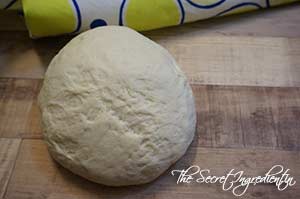
6. Bring the dough to a flat counter or your kitchen platform and knead for good 10 minutes till it becomes soft and supple. Read more about Bread baking techniques in “Basic Steps to Bake a Perfect Bread

DSC02554
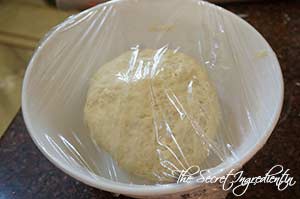
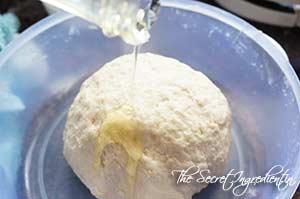
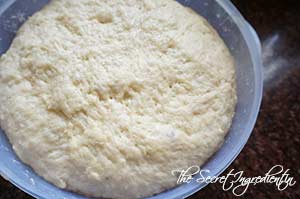
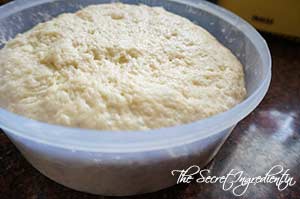
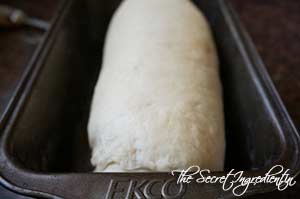
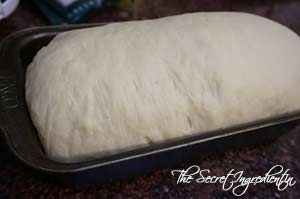
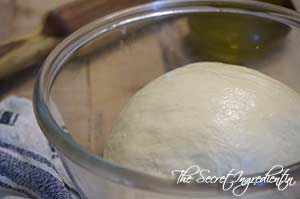
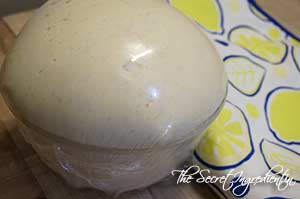
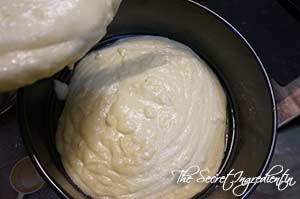
7. Transfer the dough to a greased bowl. And cover with a kitchen towel or cling wrap. Let it sit for an hour or so to double up in size.


DSC02560


DSC02562


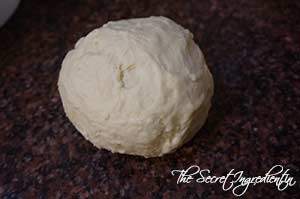
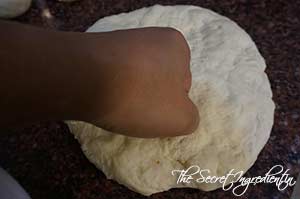
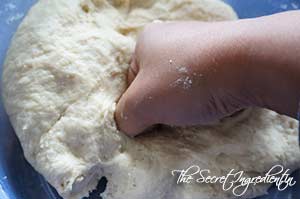
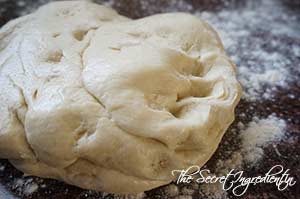
8. Punch it down and deflate the dough. Knead for another 5-7 minutes.

DSC02563


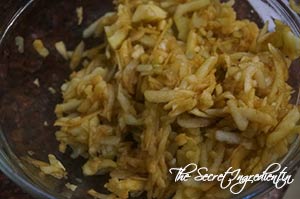
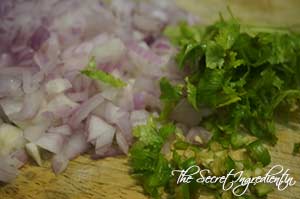
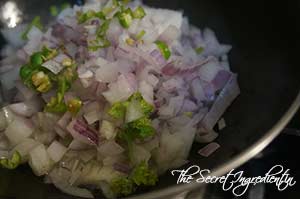
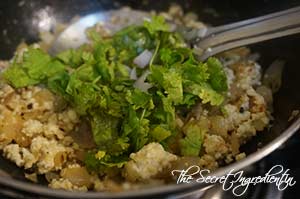
9. For the filling chop some onions, green chilies and fresh coriander leaves.

DSC02634
10. In a pan add some oil.

DSC02635
11. Add onions, green chilies and saute them till onions become soft and translucent.


DSC02636


DSC02637


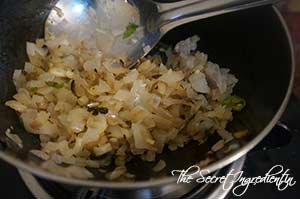
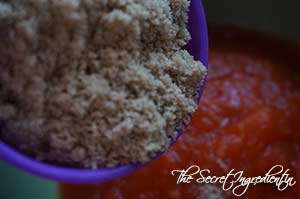
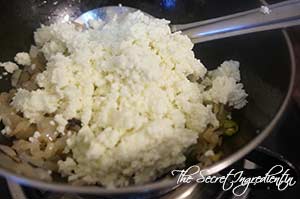
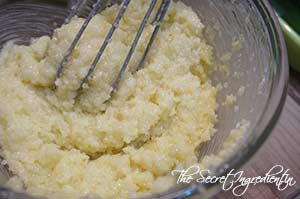
12. Add crumbled paneer and mix with onions.

DSC02638
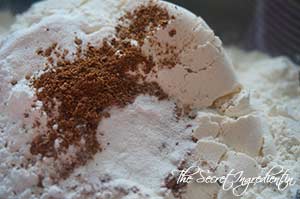
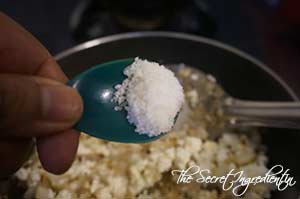
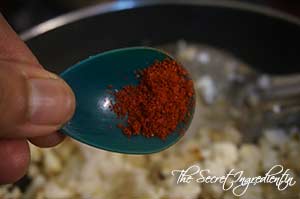
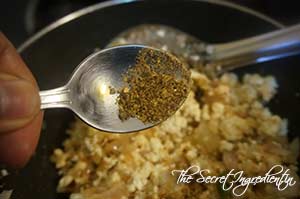
13. Add Salt, Red Chili Powder and Garam Masala.


DSC02639


DSC02640


DSC02641


14. Garnish with chopped green coriander leaves and turn the flame off. Let the filling cool down.

DSC02642
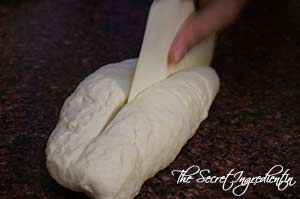
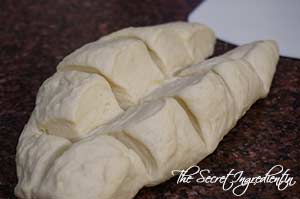
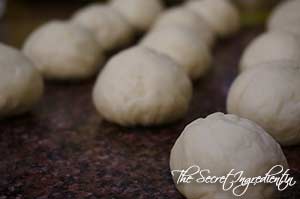
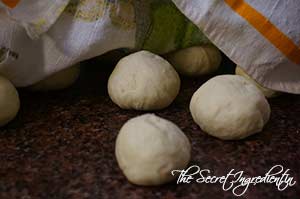
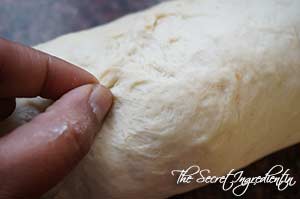
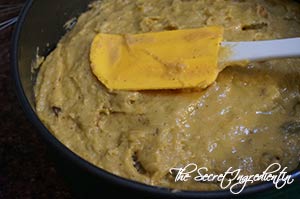
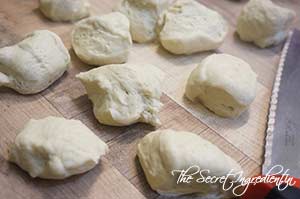
15. Divide the dough into 10 parts (I used half dough to make White Sandwich Bread). You can make the size bigger but its your choice. Roll them into small balls.

DSC02643
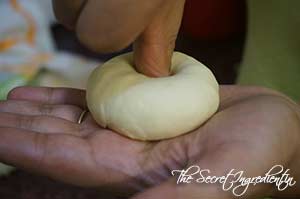
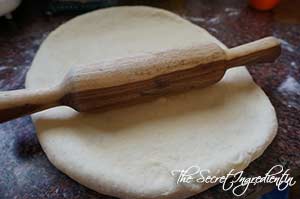
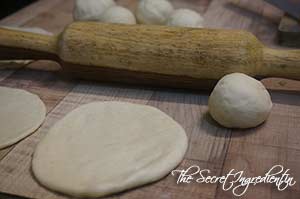
16. Roll each dough into small rotis using a roller pin. You can use dry flour to ease rolling.

DSC02644
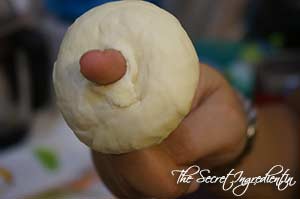
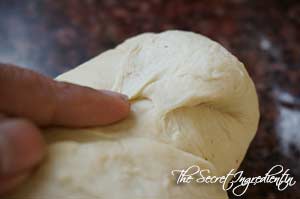
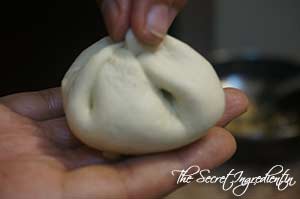
17. Place one table spoon Paneer mix in the centre of the rolled dough.

DSC02646
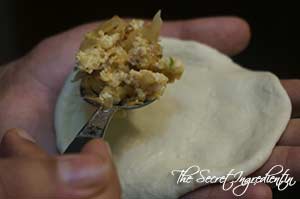
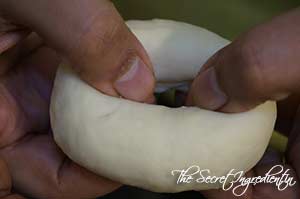
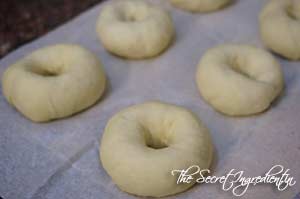
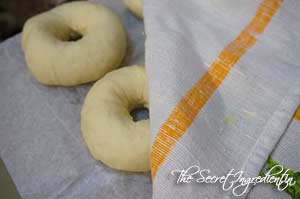
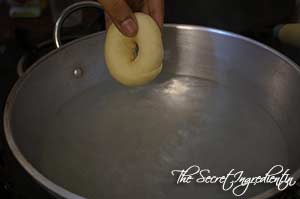
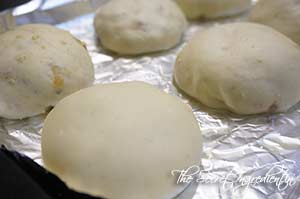
18. Pick the dough from the sides and close together to make a bag. Seal the edges and place on a greased baking sheet seam side down. Ensure there is ample distance between the buns, as they will expand on proofing and then on baking.


DSC02647


DSC02648


19. Cover the dough balls loosely with a kitchen towel and let them proof or expand for half an hour or so. Preheat your oven on 180 degree Celsius for 10 minutes. (Learn more about Oven temperatures and Conversions

DSC02649

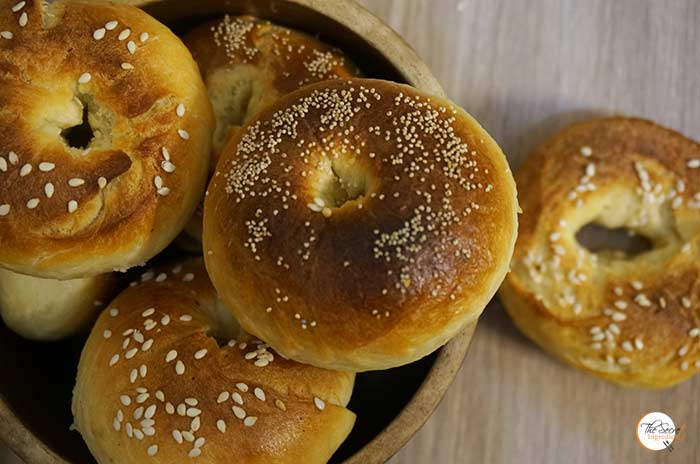
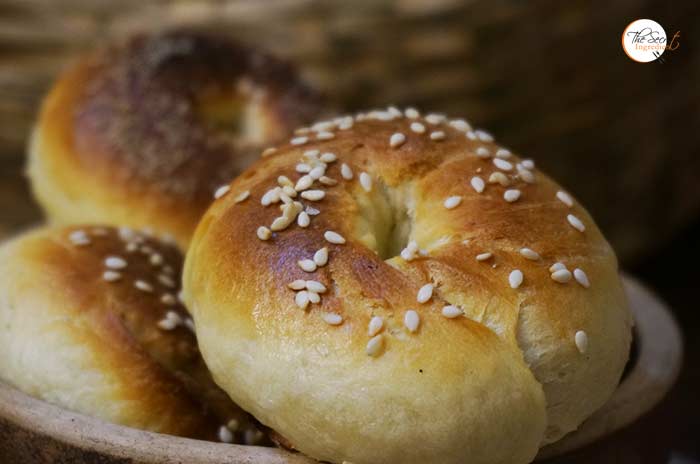
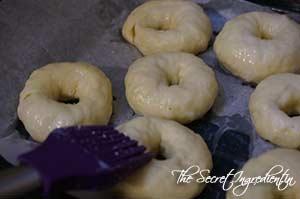
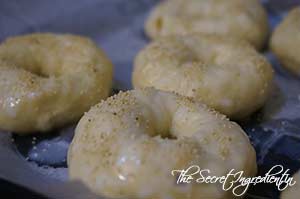
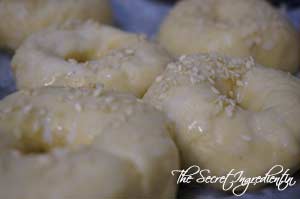
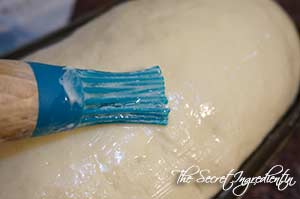
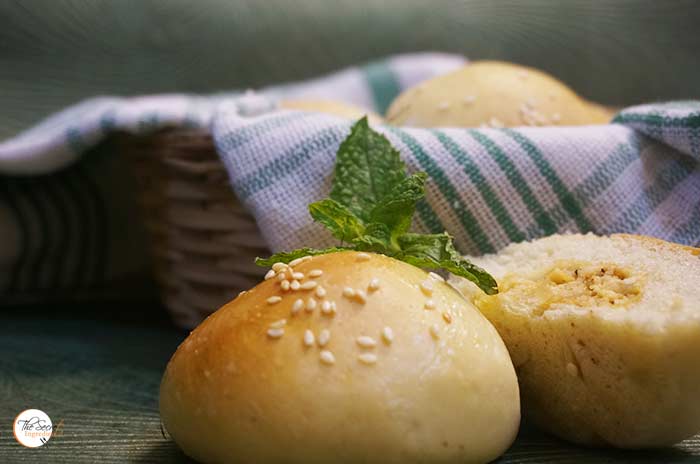
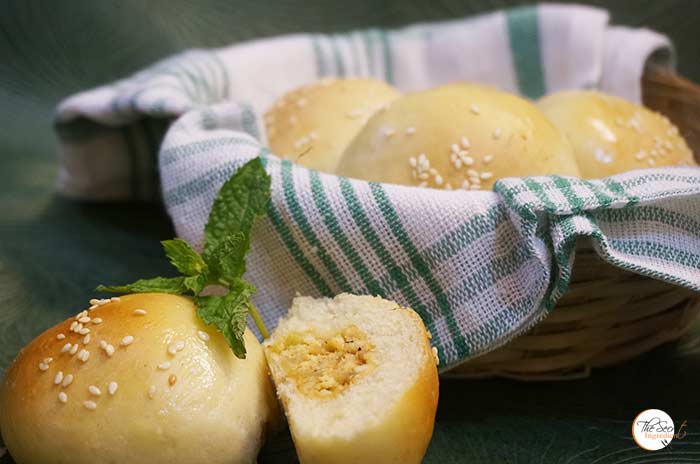
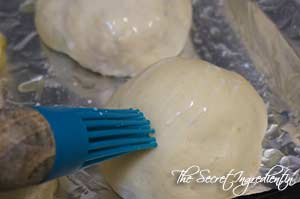
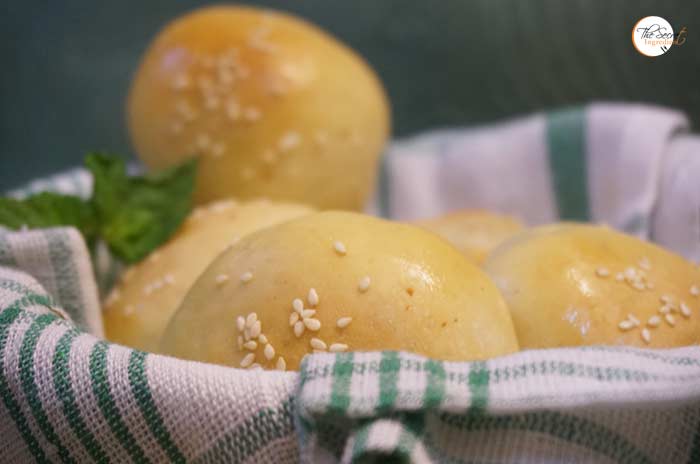
20. Brush them with milk and sprinkle some sesame seeds on top.


DSC02650


DSC02651


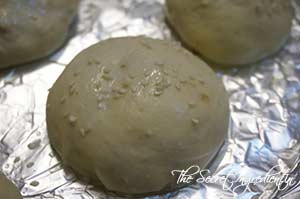
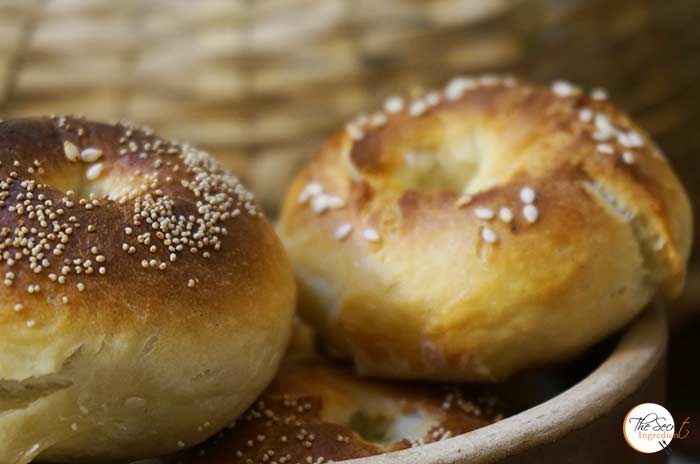
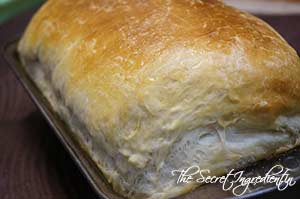
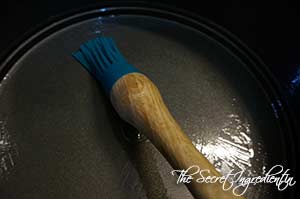
21. Bake it in the preheated oven for 20-25 minutes till the top gets slight golden colour. Do not bake beyond this time for your buns can get hard crust. As soon as they are out of Oven brush them with butter for that incredible shine and taste.

Few recipes you can try here are which uses yeast:
White Sandwich BreadVegetarian homemade PizzaRussian BubliciWhole Wheat Sandwich BreadChinese Black Sesame Steamed BunsCherry Focaccia Bread with Rosemary and Sea SaltRosemary Garlic Focaccia Bread, Cinnamon Raisin BreadBeetroot Bread with Garlic and ThymeHoney Oats BreadDomino’s Garlic Breadsticks.

[whohit]CheeseBuns[/whohit]

[yumprint-recipe id=’153′]


Last time I made this cake was for my Hommie’s Birthday in Mexico. That time I was a beginner. I still remember how I had rejoiced when it had come out soft and delicious. I wanted to make this again and was looking for occasions, And one day I just decided to heck to occasion I am gonna bake this without occasion! So here it was a delicious chocolate vanilla cake to quench my craving .


This recipe is simple, rich and sinful. If you are looking for an eggless, low calorie cake I must warn you, you are on the wrong page. You must look for Eggless Almond Vanilla Cake or Wacky Vegan Chocolate Cake or Eggless Banana Bread with Melon Seeds or Orange Cake with Candied Orange Peel Filling. This cake is buttery and for the very reason irresistible. 

Directions:

1. Preheat your oven to 180 degree Celsius (Learn more about Oven Temperatures and Conversions). Grease a baking tin thoroughly with cooking oil and set aside.

DSC01568
2. In a bowl add some vegetable oil and butter at room temperature. (Learn how to bring butter at room temperature instantly).


DSC01555


DSC01556


3. Add sugar and cream them together using a whisk.


DSC01557


DSC01558


4. Add eggs and keep whisking till you get a pale yellow colour creamy batter. This till take good 5 minutes if you are using a hand whisk. 

DSC01559

5. Add vanilla essence and milk. Combine. Set aside.


DSC01560


DSC01566


6. In another bowl add All purpose Flour, Baking Powder and Salt.


DSC01561


DSC01563


DSC01564


7. Gently combine the dry ingredients using a spatula.

DSC01565

8. Add dry ingredients little by little to the wet ingredients and combine until everything is moistened. Do not over mix please.

DSC01567


9.  Pour 2/3 of the batter in the greased pan.

DSC01569

10. Add Cocoa powder in rest of the batter and mix well.


DSC01570


DSC01571


11. Pour the chocolate batter on top of the vanilla batter and cover the surface.

DSC01572
12. Use a toothpick or spatula to make random swirls for the marble effect. Do not go crazy.

DSC01573
13. Bake it in the preheated Oven for 1 hour and 15 minutes or until the toothpick inserted comes out clean. Let it cool completely before slicing the cake or it will crumble. You can ice if you like or just decorate the top with chocolate shavings. Serve with chocolate sauce.

You can try other cake  and sweet bread recipes from The Secret Ingredient : Eggless Almond Vanilla Cake, Wacky Vegan Chocolate Cake, Eggless Banana Bread with Melon Seeds , Orange Cake with Candied Orange Peel Filling, Persimmon Rum Cake, Apple Raisins Streusel BreadSpiced Raisins Bread, Pumpkin Cake Rolls.

[whohit]MarbleCake[/whohit]

[yumprint-recipe id=’130′]

Bublici_Russian Bagels
Some time back I had posted recipe of Classic Russian Borsch on my blog. I had also mentioned how my husband was fond of Bubliki, a Russian style Bagel during his early years in Russia. I wanted to make this bagel bread for him to unite him to his favourite childhood snack.

Bublici_Russian Bagels
I looked for recipes over the net and found that there is largely no basic difference between Bubliki and American Bagel. They are both made with boiled dough. Just that the Bubliki has much larger holes than bagels. Mine also ended up looking like American Bagels. Bubliki are also considered to be more denser and much chewier than bagels. But my husband enjoyed them to the fullest. I do not claim this to be an authentic recipe. But its much closer to the real one 😉

Directions:

1. Take All Purpose Flour in a bowl and make well in the center.

DSC07692
2. Add Sugar and Instant yeast.


DSC07694


DSC07695


3. Pour Milk in the well.

DSC07696
4. Close the well by flicking flour on the surface of the milk.  Let it sit for one hour.

DSC07698
5. After an hour of resting add salt and butter.


DSC07699


DSC07701


6. Combine everything and knead into a soft dough. It should take good 15 minutes. The softness of bagels depends on this.

DSC07702
7. Cover the kneaded dough with a cling wrap and let it rest for 2 hours.

DSC07703

8. After two hours bring the dough on a non- floured surface and deflate. Knead again for 5 minutes.


DSC07704


DSC07705


9. Divide the dough into 10 equal size using a pastry scrapper or sharp knife.


DSC07707


DSC07708


10. Roll each part into seam less balls. Cover these balls under a lint free kitchen towel.


DSC07709


DSC07710


11. Poke a hole in each piece by pinching it through the middle with your thumb and first finger and then poke your finger through the hole and gently stretch out each piece from the center so that it is a circle.


DSC07711


DSC07712


DSC07713


12. The holes have to be made 4 cm in diameter because they have a tendency to stretch back and close. Therefore, they need to be stretched and placed on a slightly floured kitchen towel for 30 minutes before proceeding further. Do not forget to cover them from top.


DSC07714


DSC07716


13. In the meanwhile preheat your oven to 220 Degree C. (Learn more about Oven temperatures and Conversions).  Line a baking sheet with Oddy Uniwraps parchment paper. Also boil water in a large wide vessel. Place the bagels in water for thirty seconds. Do not over crowd the vessel.  


DSC07717


DSC07718


DSC05503


14. Remove them with  slotted spoon on a wire rack to drip off extra water. I placed them directly on the baking sheet lined with parchment paper and they got stuck on baking. I don’t want you to commit the same mistake.

DSC07719

15. Once the extra water is dripped off, place them on the parchment paper lined baking sheet and glaze them with eggwash and sprinkle them with poppy seeds and Sesame seeds. I made two batches one with either one of them.


DSC07720


DSC07721


DSC07722


16. Bake them in oven for 25-30 minutes or until you see them golden brown in colour. Cool them completely before indulging. Apply some butter and enjoy with your favourite cup of coffee or tea.

Other Russian Recipe you can try is Borsch, Russian Beetroot Soup.

You may also like to try : Whole Wheat Sandwich BreadChinese Black Sesame Steamed BunsCherry Focaccia Bread with Rosemary and Sea SaltRosemary Garlic Focaccia Bread, Cinnamon Raisin BreadBeetroot Bread with Garlic and ThymeHoney Oats BreadDomino’s Garlic Breadsticks.

Bublici_Russian Bagels

[yumprint-recipe id=’128′]

PapayaMuffins_Featured3


Having Ripe Bananas and unfinished Papayas can cause equal amount of stress. All we do is throw them down the bin. Few days back I came up with a solution to use overripe bananas in the form of Whole Wheat Banana Bread with Melon Seeds.

But then I had a Papaya which was huge in size and not sweet at all. So as a result no one touched it.  My husband kept insisting to throw it away. I was hell bent not to waste food. Then I suddenly remembered by Friend and Fellow Blogger Priti from Indian Khana had posted a recipe of Papaya Muffins some time back. It sounded adventurous because I wasn’t sure if Papayas in muffins will taste good. But I trust Priti and her cooking. I went ahead and wola! No body could tell the muffins had papaya. It tasted great. I shared with teachers and staff in the school, they all loved it. 

PapayaMuffins_Featured2
What a happy ending to Mr. Papaya. After trying them out I agree with what Priti says about these muffins, you do not smell papaya at all. The lemon zest covers it so well and tastefully. This recipe is going to take a permanent place in my kitchen. Thanks to Priti for this incredible idea and recipe. This one is for you dear friend 🙂

Directions:
1. Preheat the oven for 10 minutes on 180 degree C (Learn more about Oven temperatures and Conversions). Line a muffin tray with muffin cups or liners. Set aside.

DSC01036
2. Peel and cut the papaya in cubes. Put them in a blender and make a smooth puree. Keep aside.

DSC01017
3. Coarsely grind some flax seeds in a coffee or dry grinder and transfer it in a small bowl.


DSC01018


DSC01019


4. Add 4 table spoon of water in the flax powder and let it rest for ten minutes of until needed.

DSC01020
5. In a large bowl sieve All purpose Flour, Baking powder and Baking Soda.


DSC01021


DSC01025


DSC01026


6. Also add salt and cinnamon powder. Sieve the dry ingredients and throw the lumps away.


DSC01027


DSC01028


7. In the meanwhile Pour Papaya Puree in an other bowl and add sugar to it. I used brown sugar you can use white if you please or mix of both. Whisk it together until sugar melts.


DSC01029


DSC01030


8. In the same bowl add oil and flax seed mix. Combine using the whisk.


DSC01031


DSC01032


9. Add lemon zest, just the yellow green portion. mix well.

DSC01033
10. Mix dry and wet ingredients little by little and keep folding using a spatula. You should not beat hard just gently till the flour is all wet and moistened.

DSC01034
11. Add chocolate chips and fold gently. Leave a few for the topping.

DSC01035
12. Using an ice cream scooper put the batter in the muffin cups. Fill them only 3/4 of the cup. Leave room for it to rise.

DSC01037

13. Sprinkle some choco chips on top and bake it in the preheated oven for 20-25 minutes. Keep an eye on them after 15 minutes. The cooking time can vary with ingredients and oven temperature. Keep checking by inserting a tooth pick, if it comes out clean its ready.

DSC01038

14. After baking let them rest on a wire rack for fifteen minutes or till they become cool. Enjoy with your favourite cup or Coffee or Tea.

PapayaMuffins_Featured1

[yumprint-recipe id=’122′]

EgglessBananaBread_Featured1

Every once in a while we have dying, over ripe bananas and do not know what to do with them. The easiest is to throw them away but that would not be wise thing to do. These overripe bananas get sweeter as they age and become more nutritious. I combined them with whole wheat flour and hand husked melon seeds. It made a divine, delicious bread.

EgglessBananaBread_Featured2

I made them two weeks back when my in laws and parents visited us in the hills. Since they are vegetarians I had to make this bread without eggs. Inspite of no eggs the bread came out super moist because it had these delicious over ripe bananas.

Directions:

1. Peel bananas and cut them into slices.


DSC00124


DSC00125


 3. Add sugar and mash them using a potato masher or you can even use a fork. 

DSC00126

4. The bananas should be well mashed leaving no chunks of bananas. It should be of pourable consistency.


DSC00127


DSC00128


5. Add oil and give it a good mix with spatula.


DSC00129


DSC00130


6. Add cinnamon powder and nutmeg powder for a little spiciness and aroma.


DSC00131


DSC00132


7. Add vanilla extract.

DSC00133

8. Add baking powder and baking soda and combine everything evenly.


DSC00134


DSC00135


9. Sift  whole wheat flour using a wired mesh or sieve and add little by little. Combine till everything is moist.


DSC00136


DSC00137


10. Add melon seeds and fold gently using a spatula.

DSC00138

11. Brush a bread pan with oil or butter and dust with some flour. Preheat the oven to 180 degree Celsius (Learn more about Oven Temperatures and Conversions).


DSC00139


DSC00140


12. Pour the batter into the pan and gently level from top.

DSC00141


13. Bake in the preheated oven for 30-40 minutes in medium rack until the toothpick inserted comes out clean.

DSC00142

14. Cool it completely before slicing it . Serve with your favourite cup of tea or coffee.

You can even try Apple Raisins Streusel Bread, Garlic Rosemary Focaccia Bread and Dominos Style Garlic Breadsticks

EgglessBananaBread_Featured3
[whohit]BananaBreadWithMelon[/whohit]


[yumprint-recipe id=’115′]

Its such a proud feeling for me when I say this is the best bread I have baked till date. Its so soft and moist, has a perfect crust and a tender crumb. The thing which makes it so amazing is the inside layering with Cinnamon Sugar and Raisins. While I was baking the fragrance of this bread took me back in Mexico’s LeCaroz Panaderia or Bakery. I cant stop talking about this bread. You have to try to believe me . 

You know what!! I just went back in kitchen to grab myself a slice of this bread. I was literally salivating writing description of this moist cinnamony bread. 

I baked this bread before in Mexico for the first time and at that time I was a new baker. Ever since then I have matured and improved my skills. Today looking at this bread has made me realise that my patience and hard work has paid off. Behind this success story are numerous unsuccessful trials but I thank them which made me learn more.

Directions:

1. In a Small bowl or measuring jar take lukewarm water. It should not be very hot and neither cold. The test is you should be able to insert your finger comfortably without burning. Add melted vegetable shortening into it. See notes to know more about Vegetable Shortening.

DSC00583

2. Add yeast. You can use either instant yeast or dry active yeast. Both will work just fine. I am using instant yeast for this bread.

DSC00584


3. Add sugar to the lukewarm water. And let it rest for 5-8 minutes so that the yeast activates. 

DSC00585

4. The water will turn milky and frothy. This is a sign of yeast activation. If it doesn’t turn milky and frothy you know there is something wrong with your yeast.

DSC00591

5. In a very large bowl add All purpose Flour.

DSC00586

6. Add to it salt and Milk Powder.


DSC00587


DSC00588


 7. Break in an egg.

DSC00589


8. Add the yeasty water to the dry mixture little by little and knead using your hand.


DSC00592


DSC00593


 9. When the entire dough comes together take it on a slightly floured counter top and knead rigorously.  I prefer to do it in the bowl itself. The dough should become soft and supple. You can sprinkle little dry flour to make it non sticky.


DSC00594


DSC00595


 10. Form a dough ball and place it in a greased large bowl. Also sprinkle the dough with some oil so that it doesn’t turn dry from top. Cover with a cling wrap or lint free kitchen towel or even a lid.


DSC00596


DSC00622


 11, Keep it in a warm dry place for atleast an hour and a half or even two. The proofing depends on the temperature of the place. It proofed soo well for me.


DSC00620


DSC00621


 12. Punch it down using your fists and knead again for another five minutes before we roll it into a bread. Bring it on a slightly floured counter.


DSC00623


DSC00624


13. Grease a 9×10 bread load with some butter or oil and set aside. 

 14. Using a roller pin roll it into a rectangle which should be 10 inches wide and 20 inches in length . 

DSC00625


15. Smear the surface with butter.

DSC00626


 16. Make a mix of Cinnamon Powder and Sugar. You can use any sugar powder, I used raw brown sugar. Sprinkle it over the butter.


DSC00617


DSC00627


 17. Also spread out raisins.

DSC00628

 18. Now start rolling it from one end. Preferably the shortest in the far end. Make sure you roll them as tightly as possible.

 19. After it has rolled, pinch the seam to lock it.

DSC00631

 20. Fold the sides in and pinch again to seal it.

DSC00632

21. Place it in the greased bread pan, seam side down.

DSC00633

22. Cover with a lint free kitchen towel and let it proof for the second time. This should take another hour or so. Keep it in a dry warm place.

DSC00634

23. After it has risen, brush it with egg wash. Be gentle do not deflate  the bread. Preheat the oven for 10 minutes on 180 degree Celsius (Learn more about Oven temperatures and Conversions).


DSC00635


TDSC00636


DSC00637


 24. Place it in the preheated oven and bake for 40 minutes. Changing sides in half time. If the top of the bread starts getting too dark too quickly cover it with Aluminium Foil.

DSC00639

25. Let the bread cool down completely before slicing it, otherwise the bread with crumble. Serve with your favourite cup of coffee.

Other bread recipes you can try are: Italian Focaccia Bread with Strawberries , Rosemary Garlic Focaccia Bread, Garlic Cheesy Bread, Dominos Style Garlic Bread Sticks, Honey Oats Bread, Cinnamon Raisins Bread. Whole Wheat Sandwich Bread, Beetroot Bread.

 Sending this to YeastSpotting

[yumprint-recipe id=’114′]

There are many who say they cant bake. After numerous failed attempts they have given up on baking. This recipe is for those who have lost all faith in baking and for those who want to debut in baking muffins. Do not worry this is the basic recipe to make that perfect moist cake without the use of eggs. What can be more perfect than baking these moist chocolate muffins for your Valentine this Valentine’s Day.

Directions:

1. Line the Muffin Tray with Muffin Liners and Preheat the Oven to 180 Degree Celsius for ten minutes. (Learn more about Oven Temperatures and Conversions).

DSC06923

2. In a bowl add All Purpose Flour and Sugar.

DSC06916
3. Add Baking Soda and Cocoa Powder.


DSC06920


DSC06921


4. Give it a gentle whisk to combine. Set aside.

DSC06922

 5. In an another bowl add warm water and vegetable oil.


DSC06924


DSC06925


6. Add Vanilla Extract and White Distilled Vinegar.


DSC06926


DSC06927


7. Mix dry ingredients to the wet ingredients.

DSC06928

8. Whisk together till everything moistens and the batter is lump free. Do not over mix.

DSC06929

9. Using a spoon fill 2/3 of the muffin cup with batter.

DSC06930

10. Bake in the preheated oven for 10-12 minutes or until the toothpick inserted comes out clean.Let them cool down before you dig in. You can ice it, glaze it or eat just like that.

You can try Other Cake recipes like Surprise Heart inside Cake, Pumpkin Cake Rolls, Persimmon Rum Cake and Apple Raisins Streusel Bread.

[whohit]EgglessChocolateMuffins[/whohit]

[yumprint-recipe id=’100′] 

SurpriseHeartInsideCake_Featured2

Valentine’s Day is right across the corner. What can be more exciting to surprise your Valentine with this Surprise Heart inside Cake. This cake has been on my mind for a long time. Finally I gathered courage and patience to bake this delicious cake. Its a wonderful DIY project you can do with your kids. Specially when the result is enthralling. The ordinary looking cake when cut open has a cute heart in every slice! How romantic! Isn’t it?

 Directions:

1. Preheat the oven to 180 degree Celsius and grease a bread loaf 7 cm long and 2 inches deep pan with oil or butter. Line it with a parchment paper and set aside.

DSC09461

2. In a bowl combine sugar and butter, till it turns creamy.


DSC09455


DSC09456


3. Add eggs and keep mixing.


DSC09457


DSC09458


4. Add vanilla extract and mix.

DSC09459

 5. In an other bowl add All purpose flour, Salt and Baking powder. Whisk everything together.


DSC09460


DSC09462


6. Add dry ingredients to the wet ingredients and combine using a spatula.

DSC09463

7. Add food colour as per your choice. I am using red and blue to make pink.


DSC09465


DSC09466


DSC09467


8. Pour the batter in the greased loaf pan and bake for 40 minutes or till the toothpick inserted comes out clean.

DSC09472

9. Let the cake cool down completely.

DSC09474


10. Cut the cooled loaf into slices . About seven slices.

DSC09480

11. Take a cookie cutter and cut heart from each slice. Don’t throw the trimmings away, they can be used to make cake pops or truffles. Place the hearts of a tray lined with parchment paper freeze the hearts for 30 minutes.


DSC09481


DSC09483


12. Re grease the loaf pan with oil . Sift flour, baking powder,salt and mix with creamed butter and sugar.


DSC09484


DSC09485


 13. Thickly spread some of the cake mixture over the bottom and sides of the tin, making sure it is completely covered.

DSC09486

14. Arrange the sponge hearts, upright, down the length of the tin, closely together so that they support each other.


DSC09487


DSC09488


 15. Carefully spoon the remaining cake mixture on top of the hearts, gently tapping the tin on the work surface to help the mixture settle round the hearts. Make sure the hearts are well covered in cake mixture to help create the surprise. Bake the cake in preheated oven on 180 degree Celsius for 40 minutes or so or till the toothpick inserted comes out clean. Cool it on a wire rack. 


DSC09490


DSC09493


 16.For the chocolate sauce melt butter in a saucepan on a low flame. Once the butter is melted add chocolate chips and keep stirring till the chocolate melts and becomes thick in consistency.


DSC09495


DSC09496


DSC09499

 17. Place the cake on a wirerack with a plate under it. When the chocolate mixture starts to thicken, spoon over the top of the loaf. Gently tap the wire rack on the tray to spread and smooth the icing on top, letting it drip down the sides of the cake. Leave to stand in a cool place for several minutes to allow the icing to set before transferring to a serving plate. 


DSC09503


DSC09504


 18.Your cake is ready to slice and surprise!

You can try other Valentine’s Day recipe like Blueberry Bars, Wacky Vegan Chocolate Cake, Persimmon Rum Cake.

[whohit]SurpriseHeartCake[/whohit]

SurpriseHeartInsideCake_Featured1


[yumprint-recipe id=’99’]

AppleBread_Featured1

When apples are in abundance you look haywire for some interesting apple recipes. This is in continuation to my post of Apple Cinnamon Pancakes. I made this very delicious cake with streusel or crumple topping. It gives this bread such an amazing texture. The bread has a lovely flavour of fresh apples and raisins. You can have a slice with your warm cup of Coffee or tea. Its perfect when you invite some friends over for an evening tea or serve it for dessert at dinner table with a scoop of Vanilla Ice cream.

Directions:

1. In a bowl combine All Purpose Flour, Cinnamon Powder,baking powder and Salt.


DSC07080


DSC07081


DSC07082


2. In a small bowl add raisins and 1/4 cup of Flour mix and toss them together. Set aside.

DSC07084


3. In another bowl add milk and eggs.


DSC07085


DSC07086


4. Add Vanilla Extract, Orange Zest and Sugar.


DSC07087


DSC07088


5. Add Oil and whisk everything together to form a frothy mixture.


DSC07089


DSC07090


6. Peel, core and grate apples and add to the wet ingredients.


DSC07091


DSC07092


7. Add dry ingredients to the wet ingredients and fold them using a spatula until every thing is moist. Also add the raisins and combine.

DSC07093

8. Preheat the oven on 350 degree Fahrenheit (Learn more about Oven temperatures and conversions). Grease a 9×5 loaf pan and line it with Oddy Uniwrap Parchment paper. Pour the batter into the pan and keep aside.

DSC04629


9. For the streusel or crumble in a bowl add cold butter cubes, all purpose flour salt and sugar. Using your finger tips or a fork combine them to form a crumbly mix.


DSC07095


DSC07096


DSC07097


10. Sprinkle the crumble on top of the bread batter evenly leaving no space.

DSC07098


11. Bake it in oven for an hour or until the toothpick inserted comes out clean without any wet batter. Let it cool down completely before slicing. Enjoy!

You can even try our Persimmon Rum Cake, Spiced Raisin Bread and Pumpkin Cake Rolls.

[whohit]AppleBread[/whohit]

AppleBread_Featured-2


[yumprint-recipe id=’97’]

persimmonrumcake_featured1
Some days back the food groups on facebook were infested with posts to guess this new kind of fruit ultimately revealed as Ram Phal, Japani Phal and in English Persimmon. I couldn’t restraint myself when I saw these babies in the market. They were at a throw away price so I bought them a kilo. Now after eating a few I was thinking where else can I utilise them. I found this incredible recipe  to make a spiced cake with persimmon, just perfect for the cold weather.

persimmonrumcake_featured2

The persimmons were sitting on my shelf for a few days now so they had become super ripe just the way they are needed for this cake. The cake came out so moist and delicious that my husband declared it the best cake baked by me so far. 

Directions:

1. Wash and Cut the persimmons into half.

DSC09219


2. Scoop out the pulp with the help of a spoon and throw away the peels.

DSC09221

3. Put the pulp in a blender and make a smooth puree. Set aside.


DSC09222


DSC09223


4. In a small saucepan pour some rum and raisins and bring them to a boil on medium low heat. Remove from heat and cover. Let them come to a room temperature.


DSC09224


DSC09226


5. In a bowl add All purpose Flour, Cinnamon powder, Baking Soda and salt.


DSC09227


DSC09228


DSC09229


6 . Also add nutmeg powder for that extra spice.

DSC09230
7. In the same bowl add castor sugar and mix everything. Set aside.

DSC09231

8. In a different bowl crack eggs and add the persimmon puree and also add rum soaked raisins.


DSC09232


DSC09233


DSC09234


9. Also add to this vanilla extract. Combine everything making sure everything mixes evenly.

DSC09235


10.  Grease a ten cup pan spring pan or bundt pan. Also preheat your oven to 175 degree Celsius.

DSC09236
1
1. Make a well in the center of the flour mixture and pour the wet ingredients into it.

DSC09237

12. Also add melted butter. Also add toasted walnuts or pecans.


DSC09239


DSC09240


 13. Combine everything using a spatula till everything is moistened. But do not overmix.

DSC09241

14. Transfer it to a greased pan and even out from the top by tapping the pan.

DSC09243 

15. Bake in preheated oven between 40 minutes to 1 hour or until the inserted toothpick comes out clean. Remove from Oven and let it cool completely. Invert the cake into a serving plate.

DSC09244
Slice it like that only or you can top it with Cream Cheese Icing.

You can even try Persimmon Sorghum Cup Cakes with Cream Cheese FrostingPumpkin Cake Rolls and  Spiced Raisin Cake.

[whohit]PersimmonCake[/whohit]

persimmonrumcake_featured3


[yumprint-recipe id=’94’]