Author

anshu

Browsing


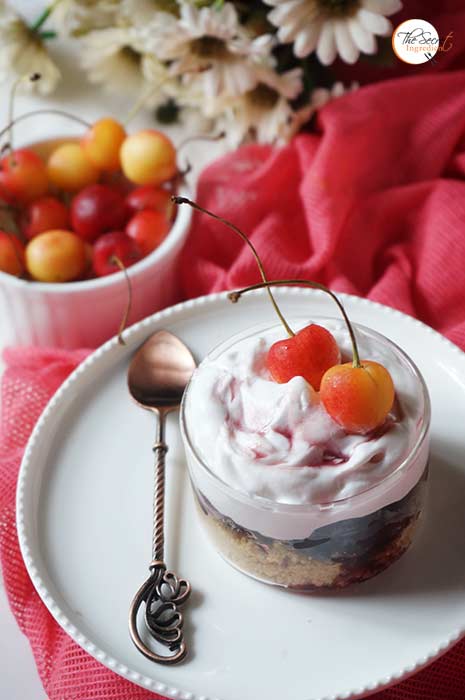
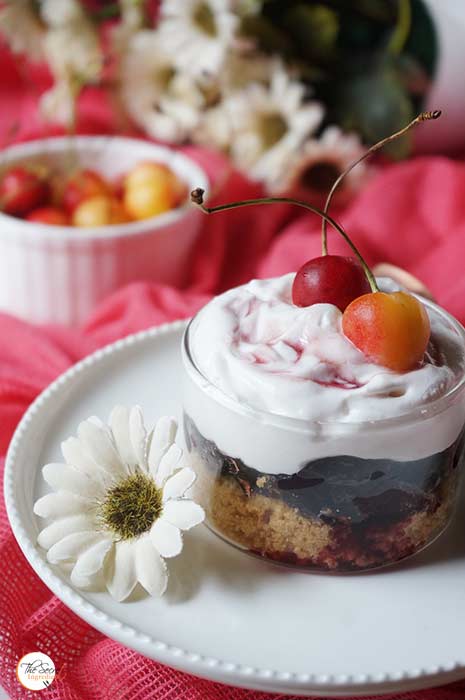
Cherries are in season and that makes me very happy. My Love for cherries is unprecedented. It is my favourite fruit. It is not a common fruit in India and shows in markets for a brief period, but I ensure I enjoy it to the fullest before I have to wait for it the next year 🙂 To celebrate my love for these gorgeous looking cherries I made these Mascarpone Cherry Compote Cheesecake Verrines and Cherry Rosemary Focaccia Bread with Sea Salt, the recipe I will share super soon


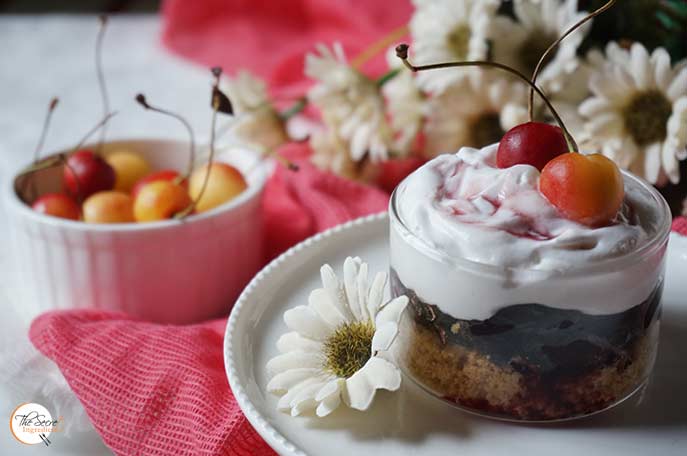
This cherry cheesecake was a pure bliss and indulgence. It had a perfect harmony of flavors from sweet and sour cherries, Vanilla and Cookie base. It not only looked beautiful but tasted divine. The recipe is adapted from Life’s a feast. Its a simple treat and can be pulled in little time if unannounced guests surprise you.

This cherry saga doesn’t end here, I have even tried Cherry and Lychee Ice Cream and results were phenomenal. You may also like to try the very French Cherry Clafoutis which is a custard based dessert with fresh cherries.

Directions:
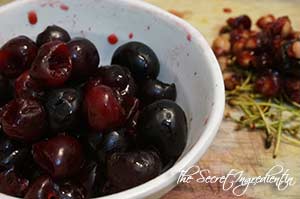
1. Gently wash cherries and pat them dry. Pit them using a cherry pitter or find out how to remove cherry stones easily without using a pitter.

DSC01897
2. In a saucepan transfer the pitted cherries along with brown sugar or mascabado.


DSC01898


DSC01899


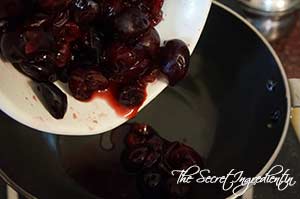
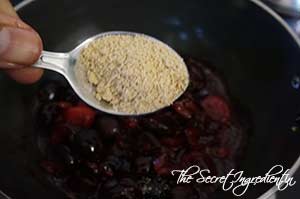
3. Heat both of them over low medium  heat for 6-7 minutes , stirring occasionally. You want juices to run out. Remove from flame and set aside to cool down. Your cherry compote is ready.

DSC01900
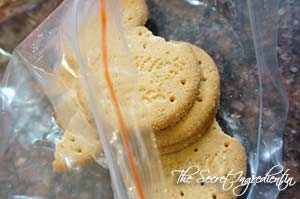
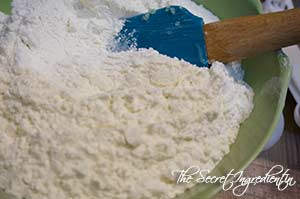
4. In the meanwhile add digestive biscuits to a ziplog bag and crush them using a roller pin.


DSC01901


DSC01902


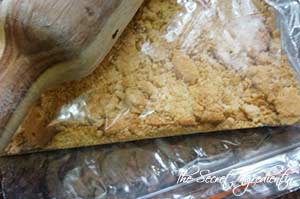
5. Distribute the biscuit crumble in the base of serving glasses or tumblers. Settle them down with the help of pestle.


DSC01903


DSC01904


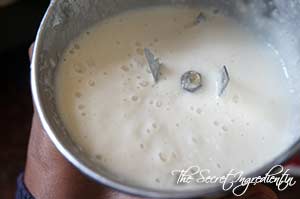
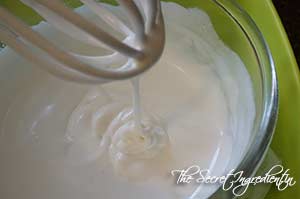
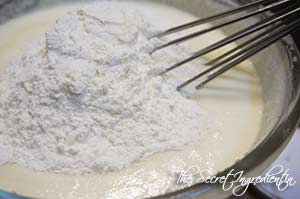
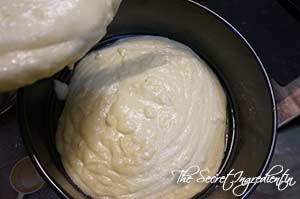
6. In a bowl transfer chilled mascarpone cheese and chilled whipping cream. The bowl should also be chilled in fridge before pouring them.


DSC01905


DSC01906


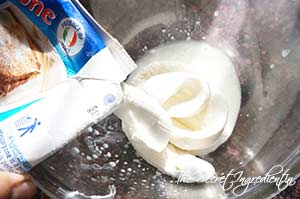
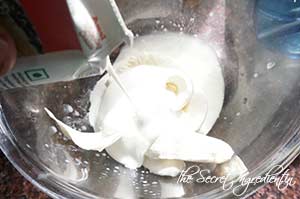
7. Place the bowl inside a larger bowl with ice in it. This will help with quick whipping. You can use a hand whisk or electric whisk to whip the cream and cheese into stiff peaks.


DSC01907


DSC01908


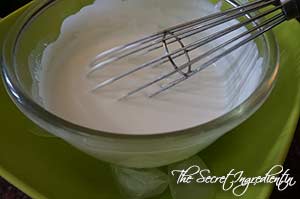
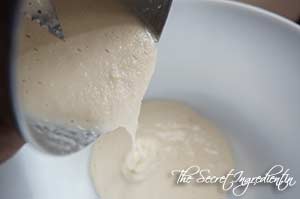
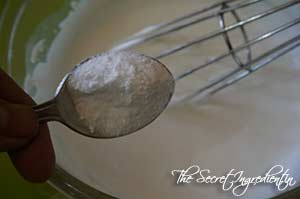
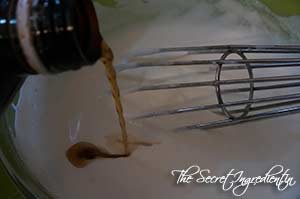
8. When it is about to get stiff add confectioner’s sugar and vanilla essence and continue to whip. Set aside.


DSC01909


DSC01910


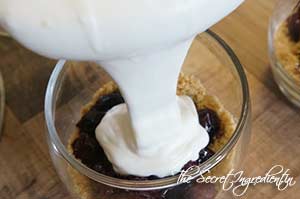
9. Spoon the cherry compote into the glasses over the cookie crumble. Let the juices seep into the crumble and make it more delicious. You can Leave a little to be poured on top for garnish.

DSC01911
10. Top it up with Whipped cream as much as you like.

DSC01912 
11. Serve it cold with a drizzle of leftover cherry compote and a cherry to make it more inviting.

You can even try Coconut Milk Mango Pudding and Blueberry Bars.

Related Post: Learn How to remove Cherry Stones without Cherry Pitter.

[yumprint-recipe id=’136′]


Summers in India can be treacherous. You have to constantly hydrate yourself specially if you are going out any good day. I am lucky to be living in the hills where the temperature is still tolerable, Where the plains have transformed into furnaces hills are a soother. To keep yourselves cool we regularly need something to drink and if it is healthy, its an icing on the cake.


Last week when my parents sent us musk melons or as we call them kharbooja in hindi, we had to finish them before they start perishing. I decided to do this smoothie. I wasn’t sure if it will taste right, but anyways I went ahead and tried it. It tasted just wonderful and guiltfree. Since then it has been a regular feature in my daily routine.

Directions:
1. Wash and peel a cucumber. Take a small bite to check for bitterness. It should not be bitter as it will spoil the taste of smoothie.

DSC01719
2. Cut it into half and further half and scoop out the seeds with the help of a spoon. Cut it into cubes.

DSC01720

3. Cut open a musk melon and dice it into cubes.

DSC01721 
4. Place the cucumber pieces and melon pieces into a blender along with few leaves of mint.

DSC01722
5. Add a drizzle of honey.

DSC01723
6. Squeeze in juice of a lemon and blend it into a smoothie.

DSC01724
7. Pour it into glasses and serve cold.

You can try other things to beat the heat like Mango Coconut Pudding, Quick Pista Badam Kulfi.

Other Smoothies and Beverages  you can try are: Plum Smoothie Raw Mango Drink with Mint and Roasted CuminGinger Papaya Mint Smoothie Central Himalayan Wild Bayberry SyrupLitchi LemonadeMango Chamomile-Mint Tea LemonadeKiwi Chia PuddingPeach LemonadeSpiced Mango Lassi

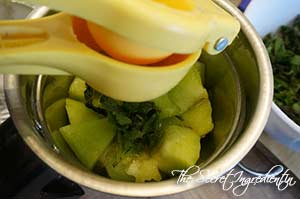
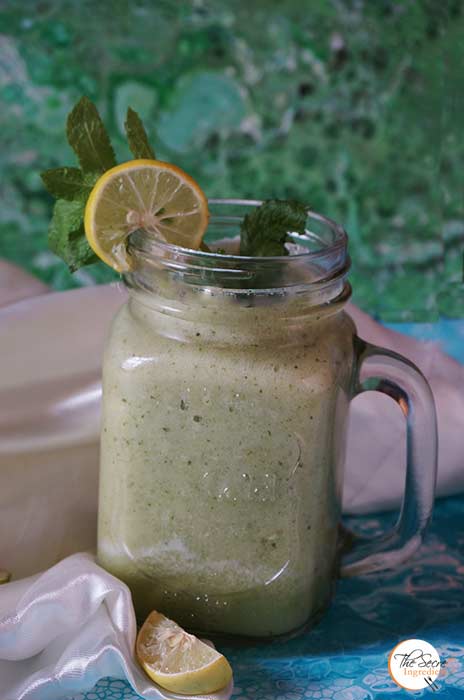
[whohit]MelonCucumberSmoothie[/whohit]

[yumprint-recipe id=’135′]

BharwanTinda_Featured2
Do you belong to the clan of LTT (Lauki, Tinda, Touri) repellents ðŸ˜› ? Well Try this spicy recipe of stuffed tindey, plural of tinda, this will change your opinion and you will love eating these tasty vegetable. I also posted the recipe of Touri waddiyan some time back which was well appreciated by you. This encouraged me to post this delicious recipe given to me by my mommy.

BharwanTinda_Featured3

Tinda is also known as Apple Gourd or Indian Round Gourd or Indian Baby Pumpkin. In Marathi it is known as dhemase, Tindsi in Rajasthan and Meha in Sindhi. But it is popular vegetable in North India specially Punjabi Cuisine. I grew up eating this dish and it is one of the comfort foods made by my mommy. The way the spices marry the gourd creates such amazing taste that its difficult to express in words. You must choose baby tindey for this, which has soft center and tender seeds.

Directions:
1. Choose Baby tindey, usually smaller in size. Wash them and peel their skin using a peeler. If you find the seeds like this then the seeds should be scooped out.


DSC01425


DSC01426


DSC01427


2. Make a cross section insertion on top using a sharp knife. Make sure the cut does not cut the tinda into pieces. Oops I cut this one into half 😛 Never mind still good to use.


DSC01428


DSC01429


3. In a bowl mix Salt, Turmeric powder, Red Chili powder.

4. Also add to this Amchur, Coriander powder, Sambhar Masala.


DSC01433


DSC01434


DSC01435


5. Also add Garam Masala and Asafoetida.


DSC01436


DSC01437


6. Mix the spices well and stuff them using a spoon inside the insertions made on tindey.

DSC01438
7. Chop some Onions, Grate some ginger and chop some green chilies.

DSC01439

8. Add ghee or clarified butter in a wok.

DSC01440

9. Add cumin seeds to the warm ghee and let them sputter.

DSC01441

10. Add ginger and green chilies and saute for a minute. Add onions and saute them till soft and tender.


DSC01442


DSC01443


11. Add the stuffed tindey to the wok and carefully toss them to coat them with ghee. Also add the tindey pieces if cut into pieces accidentally 😛 Saute for a minute or two.


DSC01444


DSC01445


12. Take a steel lid just big enough to cover the tindey well. Do not use big ones, we want less space inside and more pressure to cook them.

DSC01446
13. Keep tossing and turning in between and cook for 15 minutes on medium high heat or until the tindas have cooked thoroughly. Insert a knife to check. Turn the flame off. Serve hot with Roti and Raita.

You can even try other summer dishes from Indian Cuisine : Touri Waddiyan, Bharwan Karela, Baingan Ka Bhartha, Baingan ka Salan. Dahi Wala Karela.

BharwanTinda_Featured1
[whohit]StuffedTinda[/whohit]

[yumprint-recipe id=’134′]


Butter Chicken or Murg Makhani Needs no introduction. It is one of the most popular dishes world over. When I was in Mexico and I was introduced to someone as an Indian, they would say Oh I love India! Taj Mahal, Butter Chicken and Mahatma Gandhi are the three key things they know about India 🙂 Whenever I would invite my Mexican friends home for dinner, they insisted I would cook for them butter chicken.


That time I was naive to non veg cooking so never tried cooking it. After coming to India I gathered the courage and decided to choose a no fail recipe of Mr. Narula, a renowned and respected member of Chef at Large on FB. The Chicken was out of the world. Even the restaurants would fail in front of this. I know I should be modest but I am not because it was truly sinful and finger licking and I am proud of it 🙂

As the name suggests its laden with butter so if you are looking for a low calorie chicken recipe you need to make Pan Grilled Chicken Salad. This butter chicken recipe is intricate but totally worth it! The results will amaze you.

Directions:

1. Take boneless chicken*(See Notes) and wash it thoroughly and remove if any skin on top. Cut it into cubes or bite size pieces.

DSC01311
2. Place the chicken in a bowl and marinate by adding ginger garlic paste. Also add Salt and fresh lemon juice.


DSC01312


DSC01313


DSC01314


3. Mix everything thoroughly and let it sit for fifteen minutes. In the meanwhile soak some dry red chilies in some hot water for ten minutes. I deseeded the dry chilies as they were very hot. Grind the chilies into a paste. Set aside.

DSC01315
4. After first marination, add curd to the marinade along with Coriander powder, Cumin powder.


DSC01316


DSC01317


DSC01318


5. Also add red chili powder or degi mirch for amazing colour. Add Chicken Masala and Vegetable oil.


DSC01319


DSC01321


DSC01320


6. Lastly add red chili paste we made before. Mix thoroughly and let it marinate well in refrigerator for minimum 4 hours. I marinated it for almost 24 hours because I wanted to make it the next day for some guests. 


DSC01322


DSC01323


7. After marination transfer the marinated chicken to a broad baking dish. Spread it evenly without overlapping chicken pieces. Baste it with vegetable oil so that the chicken roasts well and remains moist. 


DSC01334


DSC01335


8.Bake it in a preheated oven on 200 degree C for 30 minutes or until partially cooked. (Learn more about Oven temperatures and Conversions). In the meanwhile Soak some cashews in water for a few hours and grind them to paste.


DSC01338


DSC01308


9. While the chicken is roasting, chop some tomatoes and make a smooth puree.


DSC01336


DSC01337


10. Add half of the butter in a wok or kadhai. Add Ginger Garlic Paste.


DSC01339


DSC01340


11. Saute the ginger garlic paste for a minute or until the raw smell fades away. Add tomato puree and combine.

DSC01341

12. Add Red Chili powder, salt and sugar to balance the sourness of tomatoes.


DSC01342


DSC01343


DSC01344


13. Let it cook on medium high flame for 15 minutes or until the butter starts floating on top. Keep aside in a separate bowl till further use. 

DSC01345
14. In the same emptied kadhai add remaining butter.

DSC01346
15. Add chopped green chilies. Saute them for a minute.

DSC01347
16. Add roasted chicken. Leave out the juices for now to be used later. Mix them with butter on high heat for 3-4 minutes.

DSC01348

 17. Add tomato puree base and mix well.DSC01349

 18. Add Cumin Powder and little Red Chili Powder.


DSC01350


DSC01351


19. Add the juices from the roasted chicken along with 1/4 cup water.

DSC01352
20. Add cashew paste and combine. Bring it to a boil and then simmer with lid on till chicken is cooked. It should take 5-7 minutes.

DSC01353
21. Turn the flame off and add cream and garnish with Garam Masala and Kasuri Methi. Cover and let it sit for 4-5 minutes.


DSC01354


DSC01355


DSC01356


22. Serve hot with Tawa Naan or Roti or Laccha Parantha.

You can try other Popular dishes from India : Dal Makhni, Palak Paneer, Shahi Paneer, Mushroom dou Pyaaza, Pindi Cholley.

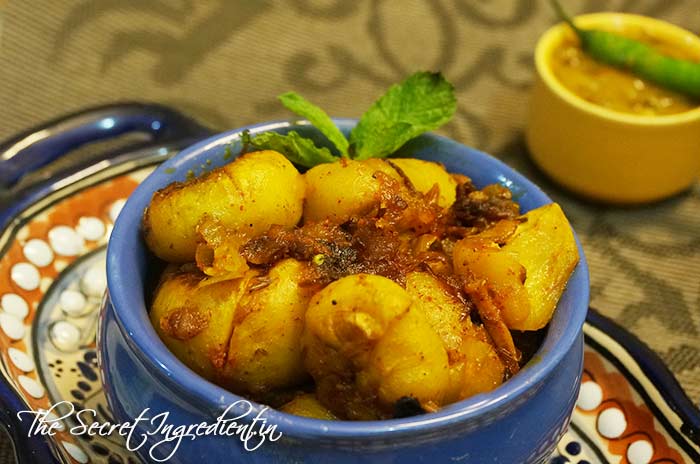
[whohit]ButterChicken[/whohit]

[yumprint-recipe id=’133′]


I first ate Arbi Ke Patte Ke Patode when my friend brought this in office during lunch. I relished its taste so much that the memory stayed fresh in my mind in spite of all these years. Then the other day my maid asked me if I use colocassia leaves or arbi k patte for cooking. I felt overwhelmed on hearing this and said yes yes!! She brought me some the next day from someone’s abandoned farm (my meaner self says I don’t mind ;))

I called my friend and quickly asked her the recipe. I planned to make this for evening snacks. My husband seemed not so excited and the idea sounded weird to him. Its a normal phenomena with him, things he hasn’t tried he doesn’t trust. When I finished making them he couldn’t stop eating them. Infact my little boy also ate couple of them. What a bliss it was 🙂

They are made in many ways in different part of India and known by various names. In Maharashtra its known as Alu Wadi, in Gujarat it is known as Patra, in North India it is known as Arbi Ke Patore or Patode.

Directions:

1. Select the softest and youngest leaves, they taste the best. I had no option of selecting.. you see beggars are not choosers 😛 Cut the central stem and remove the hard membranes using a knife.


DSC01473


DSC01474


DSC01487


2. Wash them thoroughly and pat dry with a kitchen towel. Set aside.

DSC01475
3. In a bowl add besan or chickpea flour. Also add salt and red chili powder.


DSC01476


DSC01477


DSC01478


4. Also add Coriander powder, Amchur and Cumin Powder.


DSC01479


DSC01480


DSC01481


5. Add Ginger Garlic paste.

DSC01482
6. Add a little water and make a paste. Do not add all water at once, add little by little and keep stirring to make a lump free batter. The batter should not be thick nor runny. Just right.

7. Place one leaf on a flat surface. The glossy and smooth part facing down. Spread the batter generously on top .

DSC01489
8. Place another leaf on top of it and keep doing this for 5-6 times. If you have large leaves you can stop after placing 4 leaves.

DSC01490
9. Fold the ends from both sides as depicted in the picture.

DSC01491
10. Now start rolling them from one end. Keep applying the batter in the inner side also.


DSC01492


DSC01493


DSC01494


11. Now repeat this with another set of leaves. And keep them ready to be steamed. Heat water in a vessel.

DSC01495

12. I placed the rolls on my dhokla stand. But you can use a wire mesh or steel plate with holes too. 

DSC01496

13. Cover with a lid and let it steam for 15 minutes on high heat.

DSC01497
14. Once steamed they will look like this with all the batter steamed and non sticky.

DSC01498
15. Let them cool down and come to room temperature. Now cut them into slices using a sharp knife. If you try cutting them while still hot they might break.

DSC01499
16. Heat oil in a wok or kadhai. and fry them for a minute on both sides till crisp and brown. The browner the crispier.


DSC01501


DSC01500


17. Remove them on a paper towel to absorb extra oil.

DSC01502
18. Sprinkle some chat masala on it and serve hot with lemon wedges and mint chutney

You can try other snacks such as Roasted Rosemary Garlic Potatoes, Sabudana Wada, Healthy Kachalu Chaat.
Other Chutneys you can club with these snacks are Pudina Chutney, Coriander Spinach Chutney, Coriander Chutney without Onion Garlic.

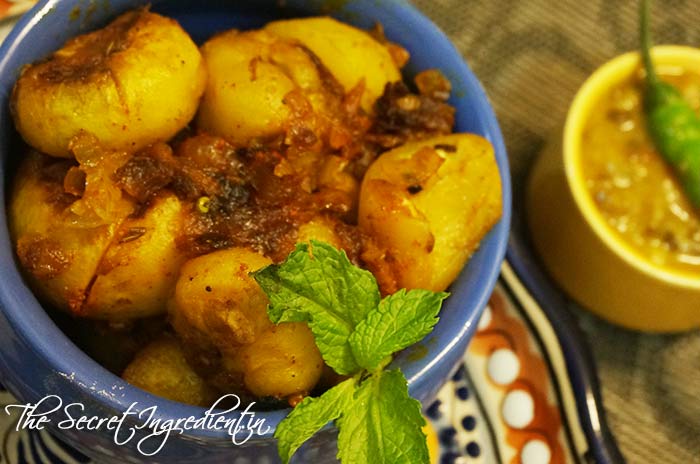
[whohit]ArbiKPatore[/whohit]

[yumprint-recipe id=’132′]


Last week I spoke to my parents and they sounded very low. On asking the reason they said 6 buckets of raw mango fell down from our mango tree after a fierce storm. They were distributing them to our neighbors, friends and family. I told them my friend is visiting us the following day and they were suddenly excited. I knew what this excitement was all about. When my friend came she brought in about 10 kgs of raw mangoes along with other produce. So after she left I am busy utilising the raw mangoes. I finished making Raw Mango Chutney, this South Indian Achaar and Aam Panna is on cards!


T
he beauty of this pickle is that it takes absolutely no time to put it together. My friend Sonu posted this recipe sometime back and I knew it then and there that I will be making this. Not to mention even my Mommy made this pickle! My husband who is not very fond of pickles could not resist eating this. We love this specially with Curd Rice.

Directions:
1. Wash and peel raw mangoes.


DSC01631


DSC01633


3. Chop them into small pieces eliminating the seed inside.


DSC01634


DSC01635


3. Add salt and mix well. Let it sit for an hour  undisturbed in a colander until the juices run out. Squeeze out extra water. Set aside.


DSC01636


DSC01637


4. Add mustard seeds and Fenugreek seeds in handy mortar and pestle and coarsely grind them. You can even use a dry grinder or coffee grinder for this purpose. Keep aside.


DSC01638


DSC01639


DSC01643


5. In a wok add some mustard oil.

DSC01640

6. Add mustard seeds and let them crackle.

DSC01641
7. Add kaddhi Patta and coarsely ground mustard and fenugreek seed mix.


DSC01642


DSC01644


8. Add Red Chili Powder, Asafoetida and little Salt. Rememeber the mangoes are already salty.


DSC01645


DSC01646


DSC01647


9. Turn the flame off and add the raw mangoes. Mix thoroughly until the spices are well coated on mangoes.

DSC01648

10. Let the pickle cool down completely then transfer it to a glass container and refrigerate and enjoy with your favourite meal. This stays good for 4-5 days.

You can try this pickle with Curd Rice. You can even make Bharwan Lal Mirch ka Achar.

[whohit]InstantMangoPickleSouthIndianStyle[/whohit]

[yumprint-recipe id=’131′]


Last time I made this cake was for my Hommie’s Birthday in Mexico. That time I was a beginner. I still remember how I had rejoiced when it had come out soft and delicious. I wanted to make this again and was looking for occasions, And one day I just decided to heck to occasion I am gonna bake this without occasion! So here it was a delicious chocolate vanilla cake to quench my craving .


This recipe is simple, rich and sinful. If you are looking for an eggless, low calorie cake I must warn you, you are on the wrong page. You must look for Eggless Almond Vanilla Cake or Wacky Vegan Chocolate Cake or Eggless Banana Bread with Melon Seeds or Orange Cake with Candied Orange Peel Filling. This cake is buttery and for the very reason irresistible. 

Directions:

1. Preheat your oven to 180 degree Celsius (Learn more about Oven Temperatures and Conversions). Grease a baking tin thoroughly with cooking oil and set aside.

DSC01568
2. In a bowl add some vegetable oil and butter at room temperature. (Learn how to bring butter at room temperature instantly).


DSC01555


DSC01556


3. Add sugar and cream them together using a whisk.


DSC01557


DSC01558


4. Add eggs and keep whisking till you get a pale yellow colour creamy batter. This till take good 5 minutes if you are using a hand whisk. 

DSC01559

5. Add vanilla essence and milk. Combine. Set aside.


DSC01560


DSC01566


6. In another bowl add All purpose Flour, Baking Powder and Salt.


DSC01561


DSC01563


DSC01564


7. Gently combine the dry ingredients using a spatula.

DSC01565

8. Add dry ingredients little by little to the wet ingredients and combine until everything is moistened. Do not over mix please.

DSC01567


9.  Pour 2/3 of the batter in the greased pan.

DSC01569

10. Add Cocoa powder in rest of the batter and mix well.


DSC01570


DSC01571


11. Pour the chocolate batter on top of the vanilla batter and cover the surface.

DSC01572
12. Use a toothpick or spatula to make random swirls for the marble effect. Do not go crazy.

DSC01573
13. Bake it in the preheated Oven for 1 hour and 15 minutes or until the toothpick inserted comes out clean. Let it cool completely before slicing the cake or it will crumble. You can ice if you like or just decorate the top with chocolate shavings. Serve with chocolate sauce.

You can try other cake  and sweet bread recipes from The Secret Ingredient : Eggless Almond Vanilla Cake, Wacky Vegan Chocolate Cake, Eggless Banana Bread with Melon Seeds , Orange Cake with Candied Orange Peel Filling, Persimmon Rum Cake, Apple Raisins Streusel BreadSpiced Raisins Bread, Pumpkin Cake Rolls.

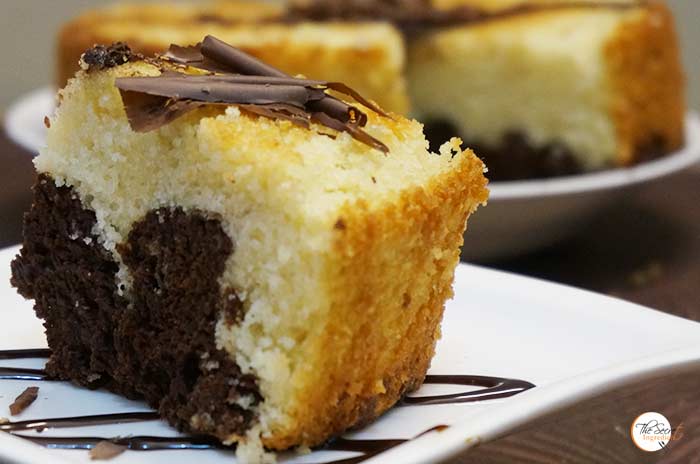
[whohit]MarbleCake[/whohit]

[yumprint-recipe id=’130′]

RagiDosa_Featured2
Finger Millet also known as Ragi or Manduwa or Maddua is a gluten free cereal which is very widely consumed in Uttrakhand where I live now. Other than Uttrakhand it is a popular millet used in South Indian Cuisine. It is a rich source of amino acid methionine. 

In Kumaoni Cuisine Maddua plays a very important role for it is used in variety of dishes. It is also believed to keep you warm in thick cold. So I  was tempted to try this super cereal and got its flour from the local market. I debuted my adventure with Ragi by making this Instant Ragi Dosa. I saw Malar Muthu’s post one fine day and could not resist trying it. It was quick and required no fermentation. Luckily I had Sambar and Coconut Chutney to accompany this. The dosa came out crisp and so delicious. Even my kiddo loved them to the core.

Directions:

1. In a bowl add urad dal or split black gram. Add water and let it get soaked for atleast an hour.


DSC00597


DSC00598


2. Transfer the soaked lentils with little water in a blender. Make a fine paste.


DSC00600


DSC00602


3. Transfer the paste to a larger bowl and add to it. Ragi Flour and Rice Flour.


DSC00603


DSC00604


DSC00605


4. Add water and salt. Combine to make a dosa consistency batter. It should neither be thick nor thin.


DSC00606


DSC00607


DSC00608


5. Heat a flat griddle or dosa tawa. Add oil. Wipe it with a kitchen towel.

DSC00609

6. Add a ladle full of batter in the center and spread in circular motions evenly. Drizzle some oil on dosa and flip after 2-3 minutes. Cook on the other side.


DSC00610


DSC00611


7. Serve hot with Coconut Chutney and Sambar.

You can even try this dosa with Tomato Onion Garlic Chutney.
Other dishes from South Indian Cuisine which you can try here: Curd Rice, Quick Rava Idli

RagiDosa_Featured3[whohit]RagiDosa[/whohit]

[yumprint-recipe id=’129′]

Bublici_Russian Bagels
Some time back I had posted recipe of Classic Russian Borsch on my blog. I had also mentioned how my husband was fond of Bubliki, a Russian style Bagel during his early years in Russia. I wanted to make this bagel bread for him to unite him to his favourite childhood snack.

Bublici_Russian Bagels
I looked for recipes over the net and found that there is largely no basic difference between Bubliki and American Bagel. They are both made with boiled dough. Just that the Bubliki has much larger holes than bagels. Mine also ended up looking like American Bagels. Bubliki are also considered to be more denser and much chewier than bagels. But my husband enjoyed them to the fullest. I do not claim this to be an authentic recipe. But its much closer to the real one 😉

Directions:

1. Take All Purpose Flour in a bowl and make well in the center.

DSC07692
2. Add Sugar and Instant yeast.


DSC07694


DSC07695


3. Pour Milk in the well.

DSC07696
4. Close the well by flicking flour on the surface of the milk.  Let it sit for one hour.

DSC07698
5. After an hour of resting add salt and butter.


DSC07699


DSC07701


6. Combine everything and knead into a soft dough. It should take good 15 minutes. The softness of bagels depends on this.

DSC07702
7. Cover the kneaded dough with a cling wrap and let it rest for 2 hours.

DSC07703

8. After two hours bring the dough on a non- floured surface and deflate. Knead again for 5 minutes.


DSC07704


DSC07705


9. Divide the dough into 10 equal size using a pastry scrapper or sharp knife.


DSC07707


DSC07708


10. Roll each part into seam less balls. Cover these balls under a lint free kitchen towel.


DSC07709


DSC07710


11. Poke a hole in each piece by pinching it through the middle with your thumb and first finger and then poke your finger through the hole and gently stretch out each piece from the center so that it is a circle.


DSC07711


DSC07712


DSC07713


12. The holes have to be made 4 cm in diameter because they have a tendency to stretch back and close. Therefore, they need to be stretched and placed on a slightly floured kitchen towel for 30 minutes before proceeding further. Do not forget to cover them from top.


DSC07714


DSC07716


13. In the meanwhile preheat your oven to 220 Degree C. (Learn more about Oven temperatures and Conversions).  Line a baking sheet with Oddy Uniwraps parchment paper. Also boil water in a large wide vessel. Place the bagels in water for thirty seconds. Do not over crowd the vessel.  


DSC07717


DSC07718


DSC05503


14. Remove them with  slotted spoon on a wire rack to drip off extra water. I placed them directly on the baking sheet lined with parchment paper and they got stuck on baking. I don’t want you to commit the same mistake.

DSC07719

15. Once the extra water is dripped off, place them on the parchment paper lined baking sheet and glaze them with eggwash and sprinkle them with poppy seeds and Sesame seeds. I made two batches one with either one of them.


DSC07720


DSC07721


DSC07722


16. Bake them in oven for 25-30 minutes or until you see them golden brown in colour. Cool them completely before indulging. Apply some butter and enjoy with your favourite cup of coffee or tea.

Other Russian Recipe you can try is Borsch, Russian Beetroot Soup.

You may also like to try : Whole Wheat Sandwich BreadChinese Black Sesame Steamed BunsCherry Focaccia Bread with Rosemary and Sea SaltRosemary Garlic Focaccia Bread, Cinnamon Raisin BreadBeetroot Bread with Garlic and ThymeHoney Oats BreadDomino’s Garlic Breadsticks.

Bublici_Russian Bagels

[yumprint-recipe id=’128′]

Eggplant or Brinjal or Aubergine is the most versatile vegetable available all across the globe. It is found in different colours ranging from white to green to purple and the sizes and shape also varies from small. big and long. The big sized eggplant is used for this dish because it has maximum pulp. This is a North Indian version of this dish. The variants are found all over the world, in the form of Baba Ghanoush, Muttabal from Mediterranean Region,  Patlıcan salatası from Turkey, Aubergine caviar from Southern France, Salată de vinete from both Romania and Hungary and the list is endless.

In India it is served with Roti or Parantha and a Yogurt dish or raita is often accompanied. My mother makes the best Baingan ka Bharta. Its simple recipe without much effort but many things have to kept into mind to bring out the best of its flavour. Its Spicy and absolutely a comfort food. I am including this recipe specially for those who are new to cooking. I also learnt this from my mother one of the first few dishes 🙂

Directions:
1. Roast the Brinjal and peel its skin off. Learn how to Roast an Eggplant on your stovetop? Make sure the brinjal is properly roasted otherwise it effects the taste and texture of bhartha.

DSC09305

2. Mash it roughly using your knuckles. It will resemble a slimy semi solid paste. Keep aside.

DSC09307

3. Chop Onions, Green Chilies and Ripe Tomatoes*.

DSC09308
4. Add ghee or clarified butter in the wok or pan.

DSC09309

5. Add Onions and green chilies and let them saute till the onions become transparent and soft.

DSC09310

6. Once onions are sauteed add chopped tomatoes.

DSC09311

7. Add salt to the tomatoes so that they cook faster.

DSC09312

8. Cook the tomatoes till they are soft and gooey. This till take good 5-8 minutes.

DSC09313

9. Once tomatoes are in mashable consistency add the roasted brinjal and mix.

DSC09314

10. Add red chili powder and check if more salt is needed. Combine thoroughly until the eggplant has mixed well with onion tomato. Cook for another 5 minutes.

DSC09316

11. Garnish with freshly chopped Coriander Leaves and Garam Masala.


DSC09317


DSC09318


12. Serve hot with Rotis and Raita of your choice.

You can even try simple everyday dishes from Indian platter like Tori Wadi, Curd Rice.
Some of the Raita recipes you can try, Aloo Anaar ka Raita, Bathua Ka Raita , Chukandar ka Raita

Other dishes made with brinjal are Hyderabadi style Baingan Ka Salan. Bharwan Baingan, Baingan ka Raita , Begun Bhaja


[whohit]BainganKaBhartha[/whohit]

[yumprint-recipe id=’127′]