Author

anshu

Browsing

MushroomRisotto_Featured1
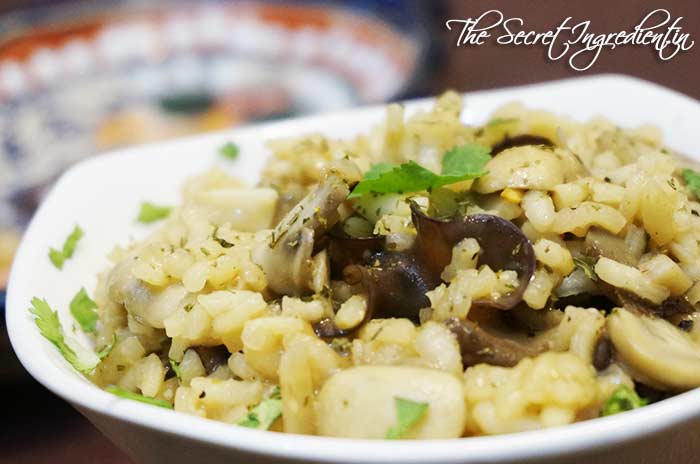
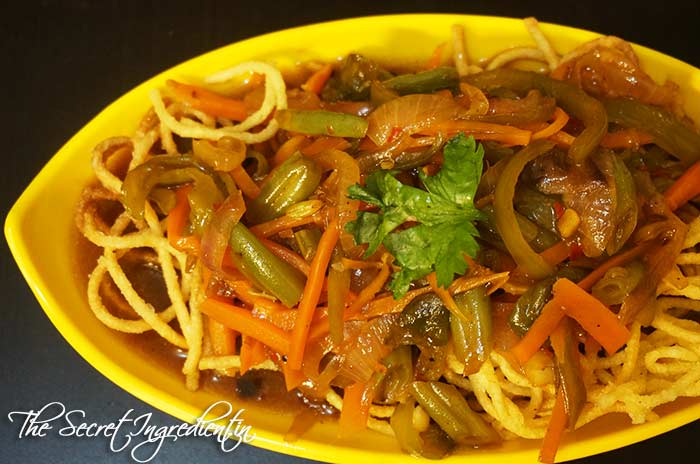
We recently started a group Spatula Force on Facebook. Its a coming together of  like minded people who are food enthusiast and want to learn and try new things. Each month one member hosts the event and gives out a theme, which could be regional or international. This month’s theme was Italian Cuisine hosted by me. So here is my contribution to the event – Mushroom Risotto.

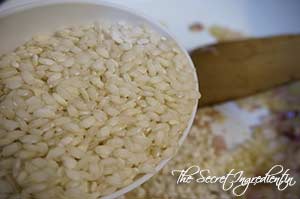
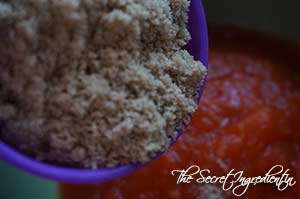
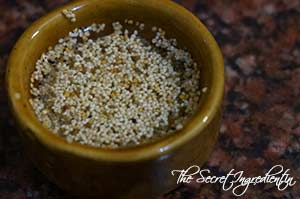
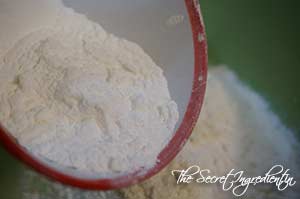
Risotto is a north Italian dish cooked in a broth to a creamy consistency. This is the most common way of cooking rice in Italy. The rice used for this dish are different. Such rices have the ability to absorb liquids and to release starch and so they are stickier than the long grain varieties. Arborio, Baldo, Carnaroli, Maratelli, Padano, Roma, and Vialone Nano are some of the varieties of rice used in Italy to make Risotto. I used Arborio for this.

Directions:

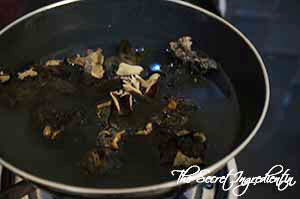
1. Heat one cup of water and  turn the flame off. Add dried porcini mushrooms to it and let it sit for 10 minutes.

DSC00017
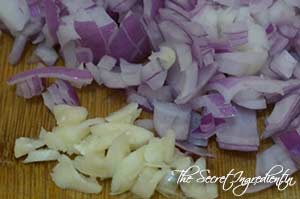
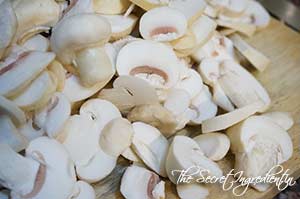
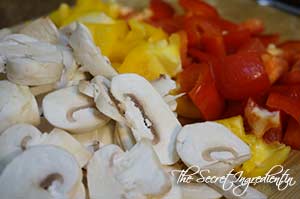
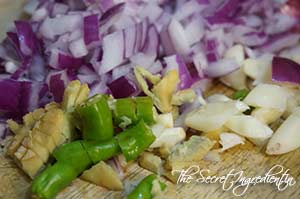
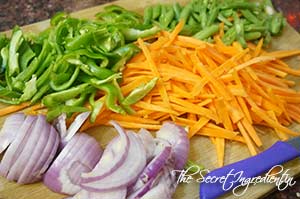
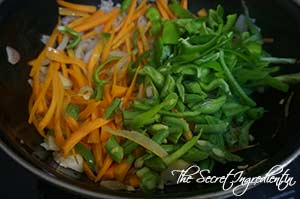
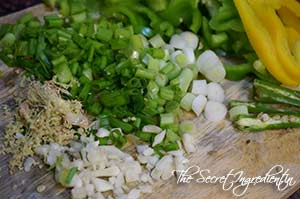
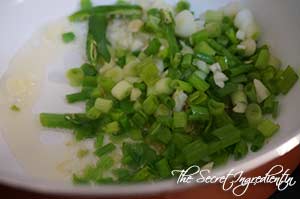
2. Chop Onion, garlic and Mushrooms. Set aside.


DSC00022


DSC00023


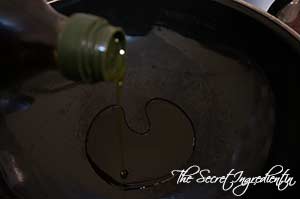
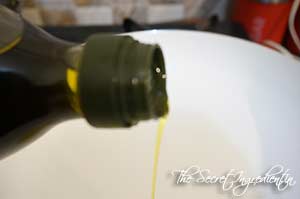
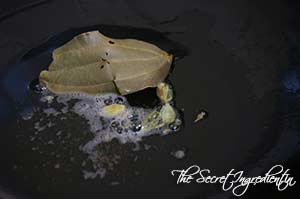
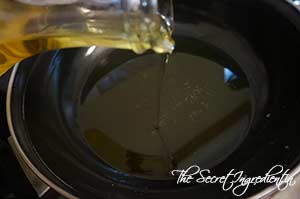
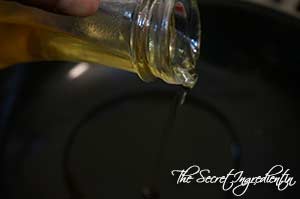
3. In a flat bottom pan pour some olive oil.

DSC00024

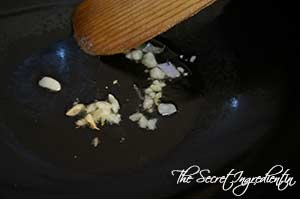
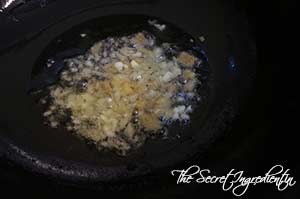
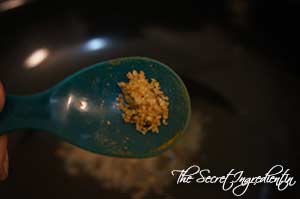
4. Add chopped garlic and saute.

DSC00025
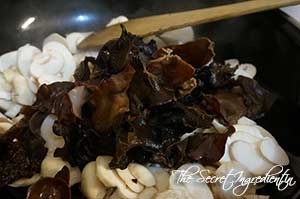
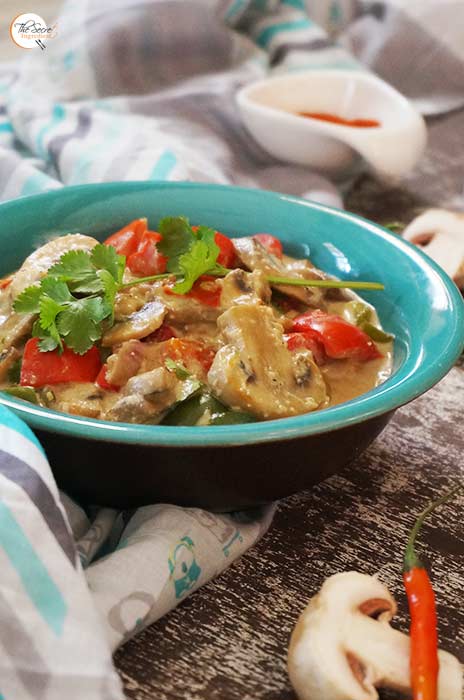
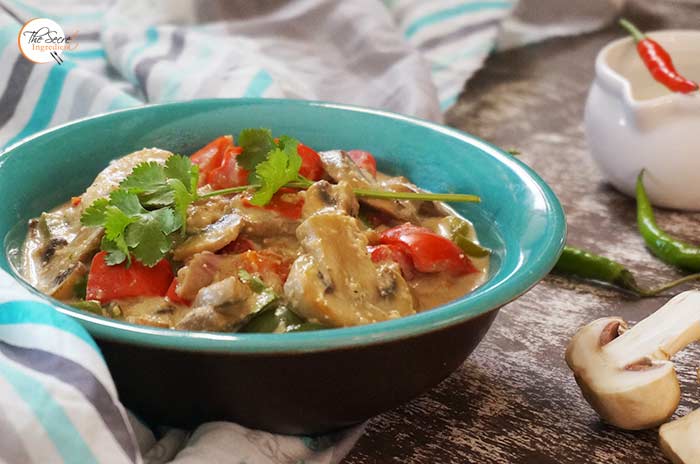
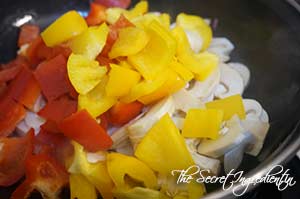
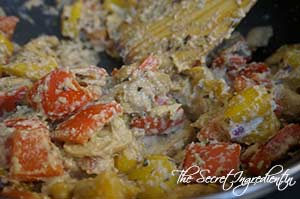
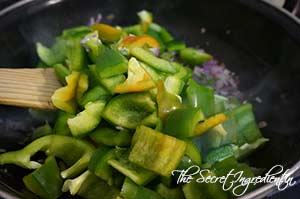
5. Add chopped fresh mushrooms and season them with some salt. Let it release its water and cook till they reduce in size.

DSC00026

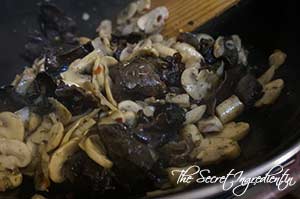
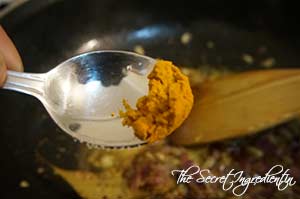
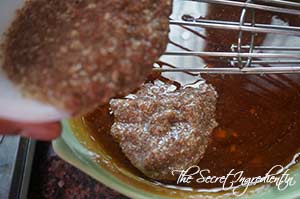
6. Drain the dried porcini mushrooms from the water. Do not throw the water away! Roughly chop the porcini mushrooms and add to the pan.

DSC00027
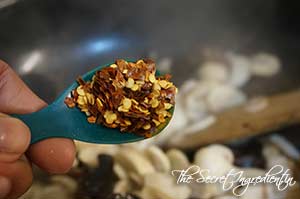
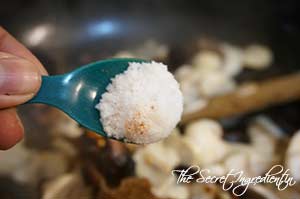
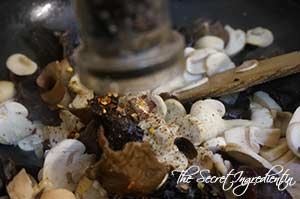
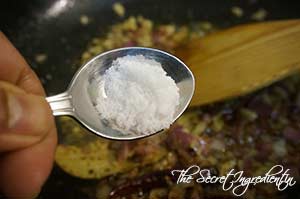
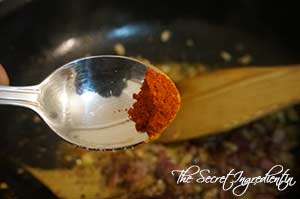
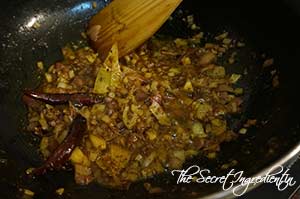
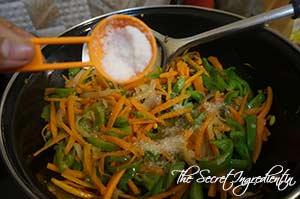
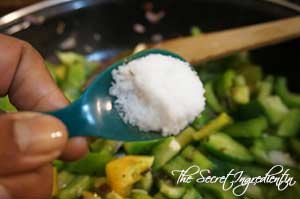
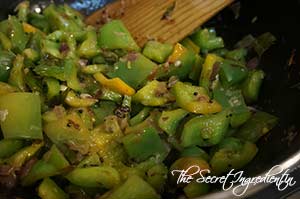
7. Add red chili flakes, salt and black pepper. Let it cook for ten minutes till it has cooked down.


DSC00028


DSC00029


DSC00030


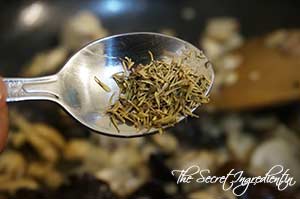
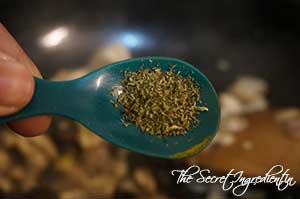
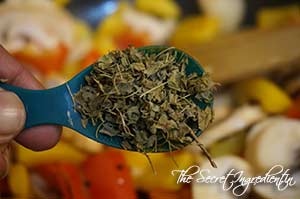
8. Add chopped parsley and thyme . I am using dried parsley and thyme. Set aside.


DSC00031


DSC00032


DSC00033


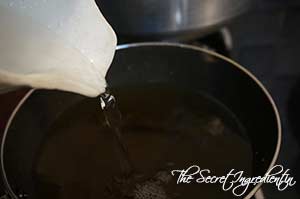
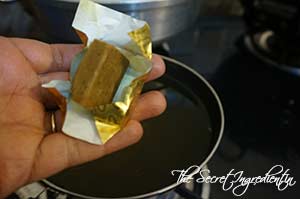
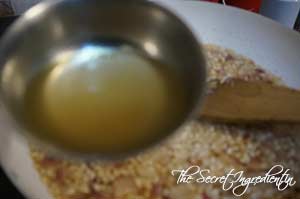
9. Heat Broth in a sauce pan. Add to it the reserved water from dried porcini.  If you are using broth cubes, add water in a sauce pan and add broth cube to it. Let them simmer on low flame.


DSC00034


DSC00036


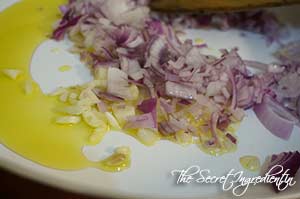
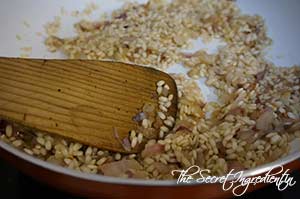
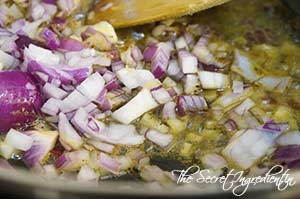
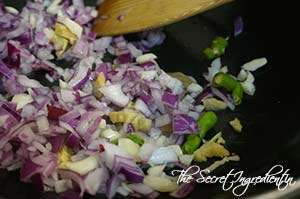
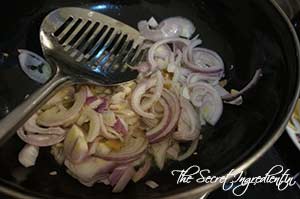
10. In a large skillet add  olive oil and saute onions and garlic over medium heat for 5 to 7 minutes.


DSC00037


DSC00038


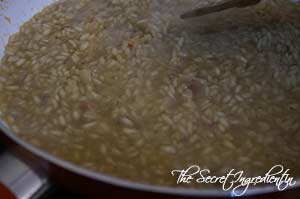
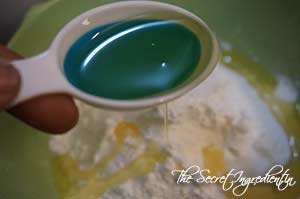
11. Add Arborio rice to it. Saute rice along with onions for a minute. Let the rice get well coated with oil.

DSC00039

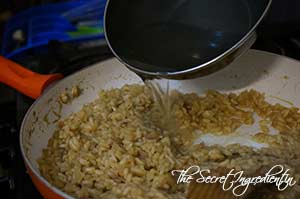
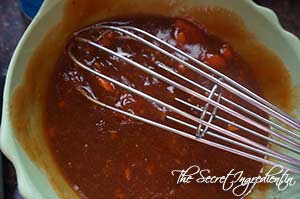
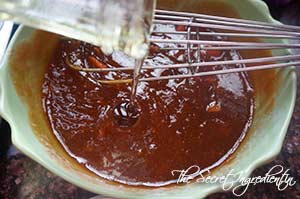
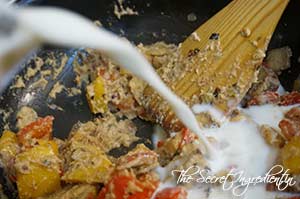
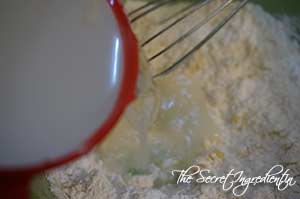
12. Add wine and a ladle full of broth. Keep stirring.


DSC00042


DSC00043


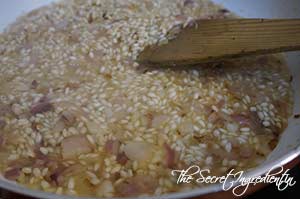
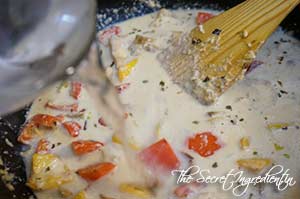
13. Once the liquid broth has been absorbed add another ladle to it and stir again.


DSC00045


DSC00048


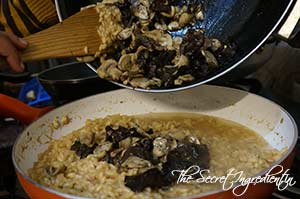
14. Repeat this for atleast 18-20 minutes or until the rice is 5 minutes away from cooking. When the rice is just fully cooked, add the last ladle of broth along with mushrooms we had cooked earlier.


DSC00050


DSC00051


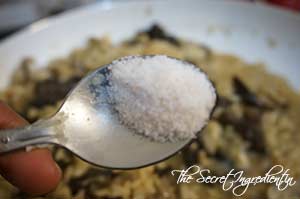
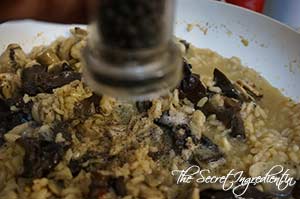
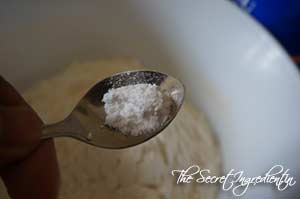
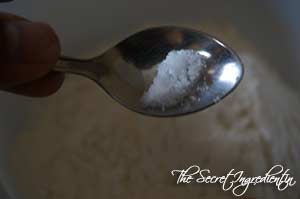
15. Season with Salt and pepper.


DSC00052


DSC00053


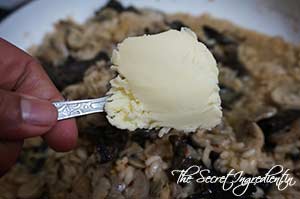
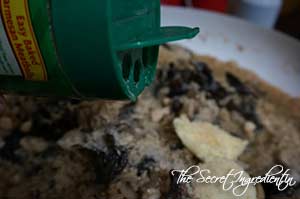
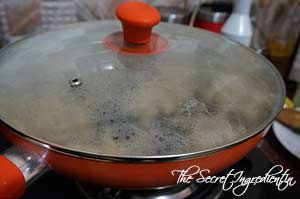
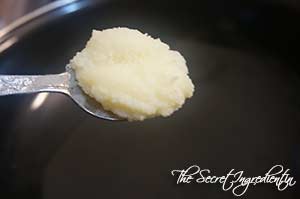
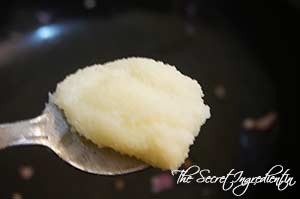
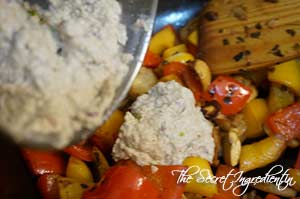
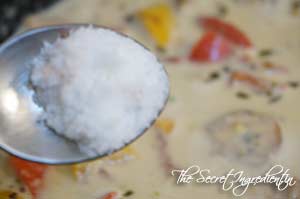
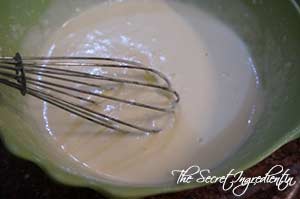
16. Add butter and Parmesan Cheese. Turn the flame off and put the lid on the skillet. Let it sit for for 5 minutes covered.


DSC00054


DSC00055


DSC00056


17. Garnish with fresh parsley and serve immediately.

You can try other dishes from Italian Cuisine like Roasted Rosemary Garlic Potatoes, Garlic Rosemary Focaccia Bread, Mushroom Spinach FrittataMushroom Lasagna in White Sauce.

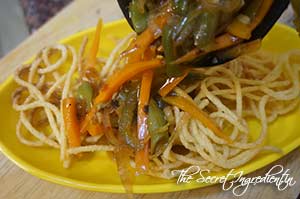
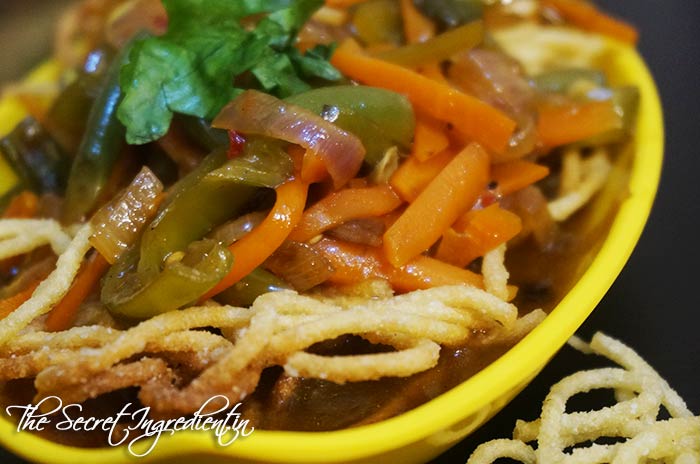
Other Mushroom Dishes you can try are Mushroom Do Pyaaza, Mushroom Bell Pepper in White SauceChili Mushroom.

MushroomRisotto_Featured_2[whohit]MushroomRisotto[/whohit]

[yumprint-recipe id=’126′]

Darsaan_Featured1

Darsaan is a popular Chinese Dessert made with fried wonton noodles. The noodles are drizzled with Honey and Sesame seeds and accompanied with a scoop of  Vanilla Ice cream . I remember eating this dessert at Berco’s, time and again. Infact me and my husband loved eating this during our dating time 😉

Darsaan_Featured3

Out of the blue one afternoon my husband said we have ice cream in freezer lets eat Darsaan, I was zapped by his unexpected request   demand. I did a quick google and found it can be made readily without much effort. If you have wonton noodles you can make it in a jiffy but nevertheless wonton noodles can be made from scratch. Within no time it was ready to be devoured and it tasted cent percent like the way they serve at Chinese restaurants, On the occasion of Mother’s day make this for your mommy and express your love to her.

Directions:
1. In a bowl add some, all purpose Flour, baking powder and  salt. 


DSC00955


DSC00958


DSC00957


2. Add oil and water and knead a soft dough. Let it rest covered for 20 minutes.


DSC00959


DSC00960


DSC00961


3. Divide the dough into half. Roll each dough into 9 inch circle using a roller pin. You may use dry flour to ease rolling.


DSC00962


DSC00963


DSC00964


4. Cut it into thin strips. Make sure the strips are thin otherwise they will puff up and will not be crunchy.

DSC00968

5. Heat the oil in a wok and gently put the stripes to fry on medium low flame. Once they have achieved golden colour remove them on a paper towel to absorb extra oil.


DSC00969


DSC00970


DSC00971


6. For the honey sauce add water and sugar in a sauce pan. Bring it to a boil. 


DSC00973


DSC00974


7. Once the sugar syrup comes to a boil add honey and sesame seeds. Turn the flame off. Do not heat further for the sauce can thicken very fast.


DSC00975


DSC00976


8 . Place the fried noodles on a serving platter and pour the honey sauce over it. Serve with a scoop of Vanilla Ice cream.

You can even enjoy more summer delights like Mango Coconut Milk Pudding. Pista Badam Kulfi.

Darsaan_Featured2[whohit]Darsaan[/whohit]

[yumprint-recipe id=’125′]

PistaKulfi_Featured2
Kulfi is a traditional popular frozen dairy dessert from Indian Subcontinent. This ice cream is much more creamier and denser than usual ice creams and can be made in variety of flavors like Mango, cardamom, saffron and many many more.. The distinct feature of kulfi is that it is not whipped during making so it has much longer melting time. I have always enjoyed eating Kulfis all my life. I prefer them over regular ice creams any day.

Traditionally Kulfi is made by boiling and reducing milk for long hours and then flavoured using rose,  cardamom and saffron. It is a a time consuming process and a tedious one for sure. When I was in Mexico I was introduced to evaporated milk, which is reduced milk without sugar in a can. This changed my life forever. You can make kulfis in 5 minutes.. yes 5 minutes! Just put all the ingredients in a blender, pulse, pour in moulds and freeze. Its that simple. Even a kid can do it,

PistaKulfi_Featured1
No one on earth could say they were not authentic in taste. I grabbed the evaporated cans from the INA market in Delhi and have stacked them in my pantry for the summer season ahead. Afterall our house hold is a kulfi freak!

Directions:
1. In a blender add a can of condensed milk.

DSC01163
2. Also add evaporated milk. You can buy Evaporated milk from our The Gourmet Shop.

DSC01164
3. Add cream.

DSC01165
4. Add some Almonds and Pistachios along with Cardamom. You can even use cardamom powder if you don’t like the shell of cardamom in your mouth. 


DSC01166


DSC01167


5. Add two slices of bread. Yes any normal bread, don’t frown, trust me.

DSC01168

6. Blend this all together into a fine runny mixture.

DSC01169

7. Add saffron strands and mix.

DSC01170
8. Pour them in Kulfi moulds, or popsicle moulds or even small earthen pots. I used age old kulfi moulds gifted to me by my dear Mother in law 🙂

DSC01173

9. Cover with its lid or cap or you can even use a aluminium foil to cover it. Dont forget to insert a popsicle stick or wooden stick for ease of handling and eating it later.

DSC01174

10. Freeze for 2-4 hours. It took me 2.5 hours.

DSC01175

11. Run them under or dip them in hot water for a few seconds and pull out the popsicle out of the mould. You are ready to enjoy your kulfi. We like to eat with rose sugar syrup. It tastes divine!

You can even try our Mango Coconut Milk Pudding.

PistaKulfi_Featured3[whohit]BadamPistaKulfi[/whohit]

[yumprint-recipe id=’124′]


Egg Curry defies the rule that eggs are only for breakfast. When boiled eggs are tossed in aromatic spiced curry it makes an incredible lunch or dinner option. All this while I was making egg curry without following any particular way.. simply make curry and throw in boiled eggs. I would sometimes cut eggs into half.. the yolk would mix with the curry and if I let the eggs be just like that they seemed bland. They were good but not extra ordinary. I knew there has to be a better way at making this curry amazing.


And as I was on the quest of finding a perfect recipe I spoke to a friend who guided me and asked to try a particular recipe of her’s. Ohhh Lord! the egg curry was beyond perfection. Apart from the method I followed the most scintillating part of the recipe was the curry. I used Eastern Egg Curry Masala which defined the gravy and made it finger licking. 

Directions:
1. Boil eggs and peel their skin off. Make a plus intersection on the tip of the egg using a sharp knife. The cut should be gentle and should only open the top. Keep aside.


DSC01125


DSC01126


2. In a pan add cumin and cloves.


DSC01118


DSC01119


3. Also add peppercorns and dried coriander seeds. Toss them on medium low flame for a few minutes till the aroma starts coming. Put the flame off.


DSC01120


DSC01121


DSC01122


4. As the toasted spices cool down transfer them to a dry grinder or coffee grinder and and coarsely grind them. Set aside.


DSC01123


DSC01124


5. In a wok or karahi add Ghee or clarified butter.

DSC01127
6. Add a pinch of turmeric, salt and asafoetida.


DSC01128


DSC01129


DSC01130


7. Add the boiled eggs to the ghee and toss them gently on a low flame that they are evenly coated with ghee mixture and turn slight golden from all sides. We are basically shallow frying them so that their crust gets a little crunchy.


DSC01131


DSC01132


8. Transfer them to a plate. Look! you have to be careful while tossing I injured an egg 🙁

DSC01133

9. In a blender add tomatoes and make a smooth puree. Set aside.


DSC01134


DSC01136


10. Also make a smooth paste of ginger garlic and green chilies. Set aside.


DSC01138


DSC01140


11. In the same wok or karahi add dried red chilies and bay leaf.

DSC01139

12. Add the roasted coarse ground spice mix we made earlier.

DSC01141

13. Add chopped onions and saute them till they become soft and transparent.

DSC01142
 14. Add salt, turmeric and red chili powder.


DSC01143


DSC01144


DSC01145


15. Combine everything and add ginger garlic chili paste. Saute till the raw smell of ginger garlic fades away.


DSC01146


DSC01147


16. Add tomato puree and mix.

DSC01148
17. Now comes the star of the recipe which is Eastern Egg Curry Masala. Add it to the masala.

DSC01149

18. Keep sauteing the masala till it has reduced and oil has separated from the gravy.

DSC01150

19. Add the eggs and coat them with masala without moving them much. Let them absorb the spice for a minute.


DSC01151


DSC01152


20. At this stage add water.

DSC01154

21. Cover with a lid and let it cook and reduce on medium low flame for good seven to ten minutes. Keep checking in between as to how much curry you will like.

DSC01155

22. My husband likes the gravy thick so it took me around 10 minutes to get this. Garnish with fresh coriander leaves.

DSC01156

23. Serve hot with Roti or even Naan or Kulcha .

You can try other dishes from Indian Cuisine like Dal Makhani, Shahi Paneer, Palak Paneer, Bharwan Karela and Dum Aloo


[whohit]EggCurry[/whohit]

[yumprint-recipe id=’123′]

PapayaMuffins_Featured3


Having Ripe Bananas and unfinished Papayas can cause equal amount of stress. All we do is throw them down the bin. Few days back I came up with a solution to use overripe bananas in the form of Whole Wheat Banana Bread with Melon Seeds.

But then I had a Papaya which was huge in size and not sweet at all. So as a result no one touched it.  My husband kept insisting to throw it away. I was hell bent not to waste food. Then I suddenly remembered by Friend and Fellow Blogger Priti from Indian Khana had posted a recipe of Papaya Muffins some time back. It sounded adventurous because I wasn’t sure if Papayas in muffins will taste good. But I trust Priti and her cooking. I went ahead and wola! No body could tell the muffins had papaya. It tasted great. I shared with teachers and staff in the school, they all loved it. 

PapayaMuffins_Featured2
What a happy ending to Mr. Papaya. After trying them out I agree with what Priti says about these muffins, you do not smell papaya at all. The lemon zest covers it so well and tastefully. This recipe is going to take a permanent place in my kitchen. Thanks to Priti for this incredible idea and recipe. This one is for you dear friend 🙂

Directions:
1. Preheat the oven for 10 minutes on 180 degree C (Learn more about Oven temperatures and Conversions). Line a muffin tray with muffin cups or liners. Set aside.

DSC01036
2. Peel and cut the papaya in cubes. Put them in a blender and make a smooth puree. Keep aside.

DSC01017
3. Coarsely grind some flax seeds in a coffee or dry grinder and transfer it in a small bowl.


DSC01018


DSC01019


4. Add 4 table spoon of water in the flax powder and let it rest for ten minutes of until needed.

DSC01020
5. In a large bowl sieve All purpose Flour, Baking powder and Baking Soda.


DSC01021


DSC01025


DSC01026


6. Also add salt and cinnamon powder. Sieve the dry ingredients and throw the lumps away.


DSC01027


DSC01028


7. In the meanwhile Pour Papaya Puree in an other bowl and add sugar to it. I used brown sugar you can use white if you please or mix of both. Whisk it together until sugar melts.


DSC01029


DSC01030


8. In the same bowl add oil and flax seed mix. Combine using the whisk.


DSC01031


DSC01032


9. Add lemon zest, just the yellow green portion. mix well.

DSC01033
10. Mix dry and wet ingredients little by little and keep folding using a spatula. You should not beat hard just gently till the flour is all wet and moistened.

DSC01034
11. Add chocolate chips and fold gently. Leave a few for the topping.

DSC01035
12. Using an ice cream scooper put the batter in the muffin cups. Fill them only 3/4 of the cup. Leave room for it to rise.

DSC01037

13. Sprinkle some choco chips on top and bake it in the preheated oven for 20-25 minutes. Keep an eye on them after 15 minutes. The cooking time can vary with ingredients and oven temperature. Keep checking by inserting a tooth pick, if it comes out clean its ready.

DSC01038

14. After baking let them rest on a wire rack for fifteen minutes or till they become cool. Enjoy with your favourite cup or Coffee or Tea.

PapayaMuffins_Featured1

[yumprint-recipe id=’122′]


I needn’t say again and again that how much I love mushrooms. My unconscious mind plans to make all possible mushroom recipes on earth 😛 . When I am surfing the net my hand stops where my eyes are fixed and my heart skips a beat, you know I am looking at a new mushroom recipe which I want to try. This happened when Suganya Hariharan a fellow blogger from Relish the Bite  posted recipe of Mushroom Bell Pepper in White Sauce on a food group. Without wasting time I tried it and it was a masterpiece. It not only looks tempting it is one of my favourites now.


The fusion of gooey Mushrooms and crisp Bell peppers creates an interesting melody. Not to mention the white sauce is not bland but rather full of flavours. Oh! I cant stop talking about this dish, why don’t you just follow the recipe and make it for your self 🙂

Directions:

1. Slice Mushrooms and cut Bell Peppers in bite size pieces. I had on hand red and yellow.

DSC00531
2. In a small bowl soak poppy seeds in a table spoon of water. Set aside.

DSC00533

3. Also chop some onions, ginger, garlic and green chilies.

DSC00534
4. In a wok add some ghee.

DSC00535
5. Add bay leaf and green cardamoms.

DSC00536
5. Once the aroma starts coming add onions, ginger, garlic and green chilies. Saute them till onion turns soft and transparent.

DSC00537
6. Turn the flame off and add cashews once the sauteed onions have cooled a bit.

DSC00538
7. Add the soaked poppy seeds with its water and onion mixture to the grinder. Pulse it together to make a smooth paste. You can leave out the bay leaf.


DSC00539


DSC00540


DSC00541


8. In the same wok add a little more ghee or clarified butter.

DSC00542

9. Add the chopped onions and mushrooms. Also add kasuri methi or dried fenugreek leaves. Saute them on medium high heat till they become little soft but still crisp. 


DSC00543


DSC00544


10. Add the onion cashew paste to the wok.

DSC00545

11. Keep tossing the sauce with the mushrooms and peppers on low flame till the raw aroma of the paste fades away.

DSC00546
12. Add milk, salt and water. Let it simmer for  about 5 minutes. The sauce will gradually thicken up.


DSC00547


DSC00548


DSC00549


13. When the sauce has thickened add cream or whisked malai. Let it cook for a couple of minutes more on low heat.

DSC00550

14. Garnish with Garam Masala and Chopped fresh Coriander.

DSC00551
15. Serve hot with Rotis. 


You can try other Mushroom recipes from The Secret Ingredient : Mushroom Do Pyaaza, Chili Mushroom, Vegetarian Mushroom Lasagna in White Sauce, Mushroom Spinach Frittata, Baby Corn Mushroom MasalaClassic Cream of Mushroom SoupMushroom Lasagna in a MicrowaveCreamy Spinach Curry with Stir Fried Mushrooms, Mushroom Rice PilafPeas and Mushroom Spicy Soup Cheesy Mushroom Pull Apart BreadMushrooms in Dry Spicy GravyItalian Arborio Rice with Mushrooms

,

[yumprint-recipe id=’121′]

MangoCocoPudding_Featured2
Summers are here and so are Mangoes. They are refreshing , delicious and everyone’s favourite, specially my father. He LOVESSSSSS Mangoes. He is a mango addict. I am not kidding! I have seen my father hunting for mangos at 2’o clock at night. Huh! My father’s pantry is often full of boxes of Mangoes. He is a diabetic but he cannot leave Mangoes. What can I say! 

So coming back to mangoes, we are surrounded by mangoes everywhere these days and making delicious mango puddings makes the experience even more exciting. I came across this Korean blogger who had made this coconut milk Mango Pudding. I was simply awestruck. I had all ingredients on hand I made it immediately. This was soo delicious!

Directions:

1. Slice one mango and cut it into cubes. Put the cubes in the serving jars or glasses.


DSC00697


DSC00698


DSC00699


2. Scoop out the pulp of the other two mangoes and put them in the blender.

DSC00700

3. Add Condensed Milk and Evaporated milk to the blender. 


DSC00701


DSC00702


4. Pulse the blender to make a smoothie.

DSC00703
5. In the meanwhile, in a pan add some water, Coconut milk and  gelatine or agar agar for vegetarian option. 


DSC00705


DSC00706


DSC00707


6. On low heat dissolve the gelatine using a spoon. Put the flame off. Add the mango smoothie to the coconut mix and stir till well combined.


DSC00708


DSC00709


DSC00710


7. Pour them in the jars or glasses with mango cubes. Give it a gentle stir and chill till set. It should take 2 hours.


DSC00712


DSC00713


8. Serve chilled with more mango Cubes on top or may be some Pomegranate seeds.
You can even try our Orange Cake, Apple Streusel Bread, Pumpkin Cake Rolls and Persimmon Rum Cake.

MangoCocoPudding_Featured1[whohit]MangoCocoPudding[/whohit]

[yumprint-recipe id=’120′]


American-Chopsuey_Featured1
Okay! All this while I thought what they serve in the Indo Chinese restaurants was American Chop suey, because the menu card said so. But its amusing to find out that this particular Chop suey is actually Indianized version of American Chopsuey. Well stop rolling your eyes! Lemme explain again. Chop suey literally means odds and ends or assorted pieces. Its a recipe where all kind of leftovers are put together with noodles. However, supposedly in America some American Chinese started serving this dish with fried noodles. That is what named it American Chop Suey!

Traditionally this dish has a lot of sea food or meat or both but in India since we have a lot of vegetarians the Chinese living in India gave it an Indian look by replacing the meat with vegetables. This adaptation varies and holds good where ever Chop suey is loved like Filipino Chinese Cuisine, German Chinese Cuisine, Canadian Chinese Cuisine and the list is growing.

American-Chopsuey_Featured2
I remember the time I was dating like decade and a half back..(yeah I am ancient!) when me and my then boyfriend who is my husband used to hang out in Dilli HaatHe introduced me to Chop suey. Dilli Haat has some delicious Indo Chinese Food, whenever you get a chance to go do try it! 

Well coming back to the topic, in nutshell my husband is a big fan of Chop Suey, hands down. He will religiously order Chop Suey at every Chinese restaurant we go. So one day he was like make Chop Suey for me  and I was like whattt!!! I had no idea how to go about it. I mean had a basic idea that its fried noodles with vegetables and sauce. Mr. Google came to my rescue and I read some recipes. When I fried the first batch of noodles they became sticky and laced. It was a disaster. I kept searching and found a video of a humble lady who gave a tip as to how to fry the noodles so that they come out crisp and non sticky. The video is now taken down or the link doesn’t work. 🙁 The rest was easy and I came up with this delicious Indo Style Vegetable Chop suey.

Directions:

1. Boil the noodles till al dente. Learn here how to boil pasta perfectly. Drain the water and run them under cold water. Let them rest so that they become little dry.

DSC07579
2. Chop some vegetables like carrots, capsicum, green beans, spring onions or normal red onions, whichever you have on hand. Set aside.

DSC07580

3. In a wok or frying pan add some oil and heat it.

DSC07581
4. Place the boiled noodles in a large plate. and Sprinkle on it some corn flour. 

DSC07584
5. Mix gently so that each noodle is coated with corn flour.

DSC07585
6. When the oil is hot add the noodles together into the wok. When one side is fried and turn golden you can flip it using a slotted spatula.

DSC07586
7. Remove them on a paper towel so that extra oil can be absorbed. Keep them aside till we make the sauce for the chop suey.

DSC07588
8. Remove the oil from the wok leaving only a tablespoon of it. Add ginger garlic paste and saute for couple of seconds.

DSC07590
9. Add chopped onions and saute them.

DSC07591
10. Add carrots, beans and capsicum and saute them on high flame till they become a little cooked but still crisp.

DSC07592
11. Add salt and sugar. 


DSC07594


DSC07593


12. Add some black pepper.

DSC07595
13. Add some Szechuan Sauce. You can make it at home  and here is the recipe Szechuan Sauce.

DSC07596
14. Add tomato ketchup and Soya Sauce.


DSC07598


DSC07599


15. Also add white distilled vinegar.
DSC07600
16. Add Water and bring it to a simmer. You can add vegetable stock instead of water or add stock cube with the water.


DSC07601


DSC07604


17. In a small bowl mix cornflour and water. Add this to the wok.


DSC07602


DSC07603


DSC07605


18. Let the sauce thicken up a bit and then switch the flame off. In the meanwhile line the serving platter with fried noodles.

DSC07606
19. Top it with Sauce and Vegetables.

DSC07607
Enjoy 🙂
You can even try other dishes from Indo Chinese Cuisine like Chili Mushrooms, Chili Honey Crisp Potatoes, Hakka Noodles, Szechuan Sauce, Vegetable Momos, Gobhi Manchurian.

American-Chopsuey_Featured3[whohit]Chopsuey[/whohit]

[yumprint-recipe id=’119′]

I have always liked Capsicum be it in pastas or simple Indian style Aloo or Potato Capsicum. When I came across this recipe I was a little skeptical in trying owing to its different ingredients. But to my surprise this dish, Capsicum Zunka from Maharashtrian Cuisine came out absolutely delightful. It not only has a unique blend of flavours but has a very interesting texture.

The Black Bengal Gram Flour or besan as it is commonly known as gives this dish a phenomenal treatment.  Not to mention the symphony of flavours created by Curry Leaves, Mustard Seeds, Asafoetida and Garlic is worth mentioning. This might be a humble dish but very flavoursome.

Directions:
1. Wash the capsicums and cut them into cubes.


DSC00274


DSC00275


2. Also Chop Onions, green chilies and peel Garlic cloves. Set aside.

DSC00284
3. In a wok add Besan or Black Bengal Gram Flour and dry roast it on low flame. Keep stirring it continuously to avoid burning from the bottom. The colour of the flour should not change but by the fragrance you will know when its ready. Transfer it to a plate.


DSC00277


DSC00278


DSC00279


4. In the same wok add oil. Heat the oil.

DSC00280
5. Once the oil is hot add the mustard seeds. When they begin to crackle add Cumin seeds and asafoetida. Saute them for couple of seconds.


DSC00281


DSC00282


DSC00283


6. Add chopped Onions, Garlic, Kaddhi Patta and Chopped Green Chilies.

DSC00285
7. When the onions become soft and tender add cubed capsicum and combine. Add salt. Let the capsicum cook on medium low flame till it becomes partially soft and releases its water. This should take 6-7 minutes.


DSC00286


DSC00287


DSC00288


8.  Now to this add red chili powder, turmeric powder & Coriander powder.


DSC00290


DSC00291


DSC00292


9. Once the spices are combined with the capsicum sprinkle roasted besan over it. Do not put it in one go. Use one spoon at a time and then combine. This will ensure that the flour is evenly mixed and there are no lumps.


DSC00293


DSC00294


DSC00295


10. Cover the wok partially with the lid and cook for another 2 minutes on low flame.

DSC00296
11. Sprinkle with fresh Coriander Leaves.

DSC00297
Serve hot with Chapatis and Pranthas.

You can even try Baked Stuffed Capsicum for variation.

For more Indian Dishes you can check out Aloo Anaar ka Raita, Gobhi Danthal, Swanjhane Ke Phool.

[whohit]CapsicumZunka[/whohit]

[yumprint-recipe id=’118′]

ChiliPotatoes_Featured1

My love for Indo Chinese Cuisine is increasing with growing years. To my surprise I do not like the food they serve at restaurants in the garb of Chinese food. The same gravy is poured over all dishes and they all taste alike. But making them at home has introduced me to different flavours and styles. I love to make Chili Mushrooms, Veg Manchurian, Gobhi Manchurian, Veg Momos with Szhezuan Sauce, Chili Baby Corn and now the latest and crispiest Chili Potatoes with Honey Glaze.

I always remember eating these potatoes but they were always frail and soggy simply smeared in the sauce. But when I tried making them at home they came out crispy with a crunch. Ohh Lord it was shere food porn. There are a few things which you must follow to make them crisp. It may look like a long procedure but the results will speak for themselves. I bet you will never go back making them the way you usually do.

Directions:

1. Wash and Peel Potatoes.


DSC00448


TDSC00449


 2. Cut them into half and further cup them into small fingers of more or less equal size.


DSC00450


DSC00451


 3. Pour water in a sauce pan and bring it to a boil. Add salt.

DSC00452

4. Put the finger potatoes into the water and submerse  for 5 minutes. Once blanched remove them from the water using a skimmer.

DSC00455

5. Run them under cold water for a minute so that they stop cooking. Set aside.

DSC00456

6. In a bowl add All purpose Flour, Corn Flour and Salt.


DSC00457


DSC00458


DSC00459


7. Now add salt and mix everything using your fingers. Take little flour in your fist and press lightly. If it comes together you know its correct.


DSC00460


DSC00463


DSC00464


8. Add blanched potatoes and mix. Coat the potatoes with flour using your hand.

DSC00465
9. Now  in a different bowl add more All Purpose Flour, Corn Flour and salt.


DSC00466


DSC00467


DSC00468


10. Now add oil and water and whisk the batter to make it lump free.


DSC00469


DSC00470


DSC00471


11. Heat Oil in a wok for frying.

DSC00472

12. Dip the flour coated potato fingers in the batter and fry them partially on medium high flame for 5 minutes.


DSC00473


DSC00474


DSC00475


13. Remove them from oil once you see them turn slight golden.

DSC00476
14. Separate fingers if they stick together.

DSC00477

15. Now fry them for the second time on low flame till they turn golden and crisp. This step is very important because this will ensure you have very crisp fries.


DSC00478


DSC00480


16. Remove them on a paper towel to absorb any extra oil. 

DSC00481
17. For the sauce chop some spring onions, ginger, Garlic, green chilies and capsicum. You can even use bell pepper. I have used yellow.

DSC00483


18. In a pan pour some oil and heat it. Add spring onions, slit green chilies, ginger & Garlic and saute them. 

DSC00484


19. Now add Capsicum and bell peppers and saute them as well.

DSC00485


20. Dissolve Cornflour in some water and set aside.


DSC00486


DSC00487


21. Add to the sauteed onions some soy sauce, szechuan sauce (not in pics) and Tomato Ketchup.


DSC00488


DSC00489


 22. Also add Freshly ground Pepper, salt and Sesame seeds .


DSC00490


DSC00492


DSC00493


23. Add the cornflour mixture we made before. Keep stirring on high flame till the sauce has reduced and thickened.

DSC00491
24. Turn the flame OFF and then add Honey for the glaze.

DSC00494
25. Wait for 5 minutes to let the sauce cool down a bit. Now add the fried potatoes. If you add the potatoes before it will make them soggy.

DSC00496

26. Transfer to a serving platter and sprinkle some more sesame seeds and onion greens.

You can even try Roasted Rosemary Garlic Potatoes.

You can also try more dishes from Indo Chinese Cuisine like Chili Mushroom, Szechuan Sauce, Vegetarian Momos. Vegetarian Hakka Noodles.

ChiliPotatoes_Featured2


[whohit]ChiliPotatoes[/whohit]

[yumprint-recipe id=’117′]