Author

anshu

Browsing

ChiliesEnNogada_Featured1
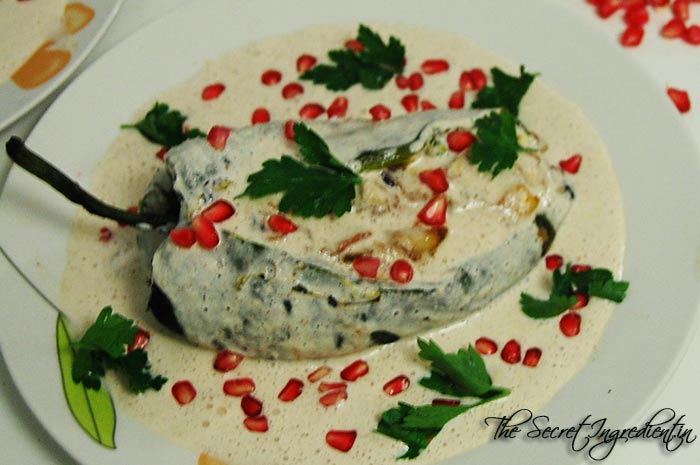
Chilies en Nogada is a dish from Mexican Cuisine, made from milder variety of Chilies known as Chili Poblano. The Chilies are stuffed with filling made from meat and fruits and walnut sauce is poured on top. Therefore, the term Nogada comes from Nogal which in Spanish means Walnut Tree.  This dish has a historical significance and is made in and around the day of Mexican Independence, 16th September, which is right around the corner and that is when Pomegranates appear in the markets of Central Mexico. Significantly, it uses the three colours of Mexican Flag; Red, White and Green.

Traditionally, Chilies en Nogada is from the State of Puebla. During our three year stay in Mexico we visited Puebla many times and our friends introduced us to this delicious delicacy on our trip to Tepotzotlan. We fell in love with its flavour so much that I decided to learn how to cook this before returning to my homeland. Thanks to youtube, google and my friends in Mexico who guided me to perfect this recipe. On one occasions I invited a Mexican friend for dinner and served Chilies en Nogada. She was so surprised and happy that it tasted just the way they serve in restaurants. Today, I share this recipe with you as a tribute to my Son’s Country: Mexico on its day of Independence. Viva Mexico!

Directions:

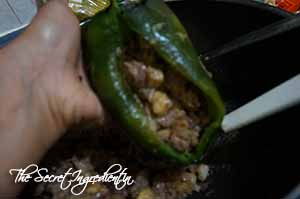
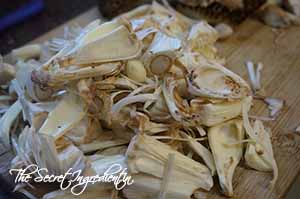
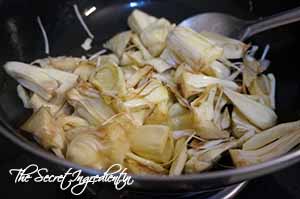
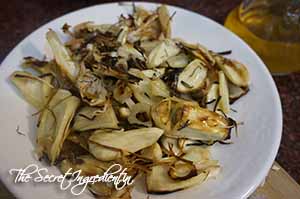
1. Wash and pat dry Chili Poblano and peel its skin. Learn How to roast and peel Chili Poblano. Make a slit in length from the side till the bottom and gently remove all the seeds. Keep aside.

CasseroleEggs3

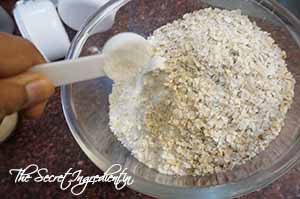
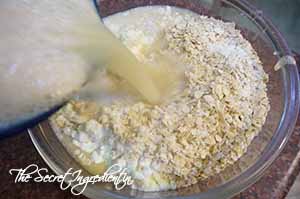
2. Soak walnuts in milk for overnight or at least 3 to 4 hours to make a smooth paste.

ChiliesEnNogada3

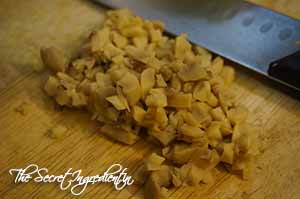
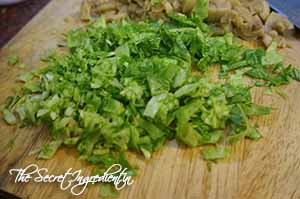
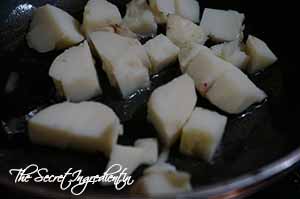
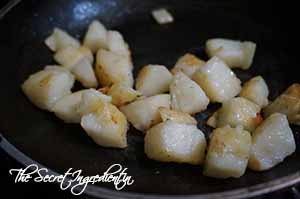
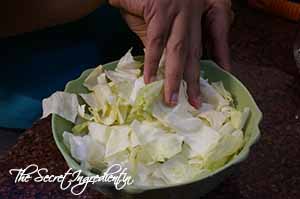
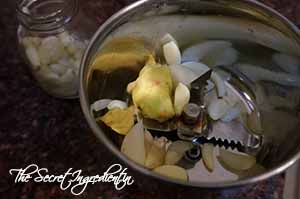
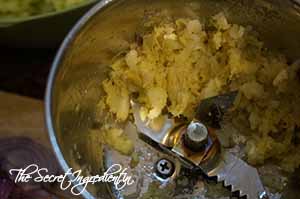
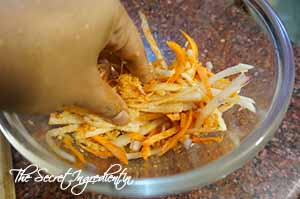
3. Peel the skin of Pear, Apple and Banana and chop them in cubes. Keep aside.

ChiliesEnNogada4

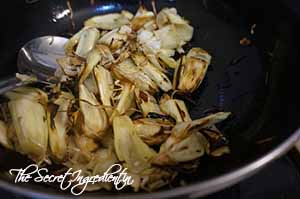
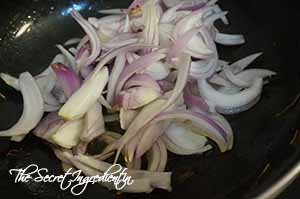
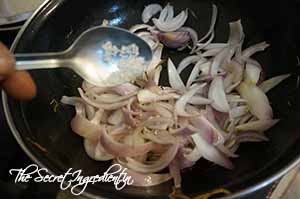
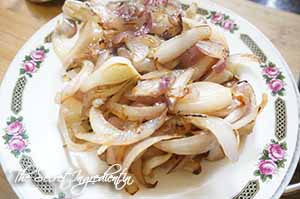
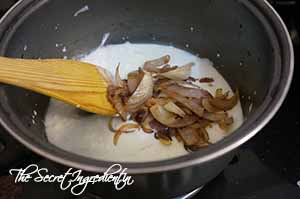
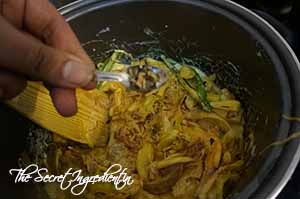
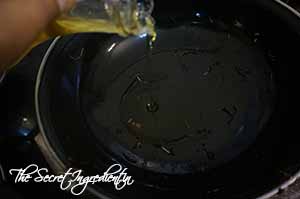
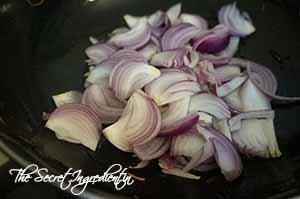
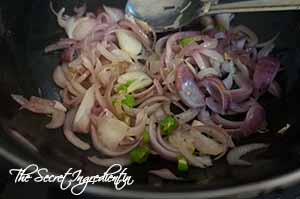
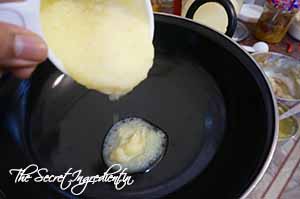
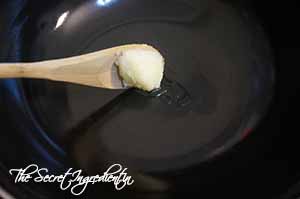
4. In a skillet add some oil and saute some onions till they become translucent.

ChiliesEnNogada5

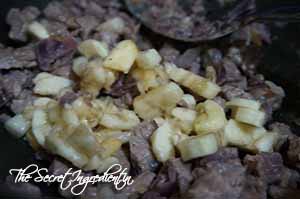
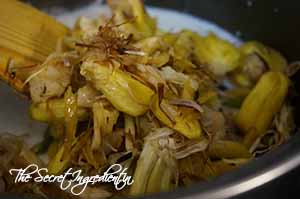
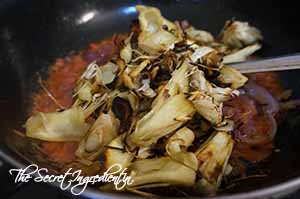
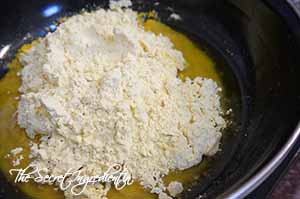
5. Add ground or finely chopped meat. Traditionally they use pork and beef but I used lamb. Cook it till it gets some colour.

ChiliesEnNogada6
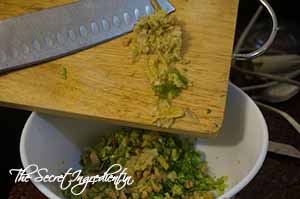
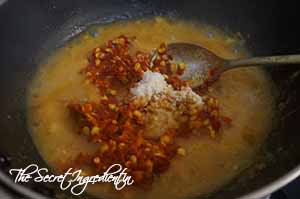
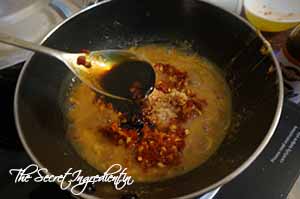
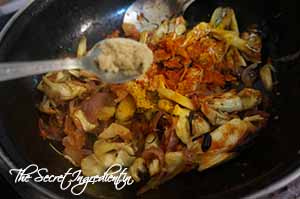
6. Add chopped tomatoes, banana, apple and pear.

ChiliesEnNogada8

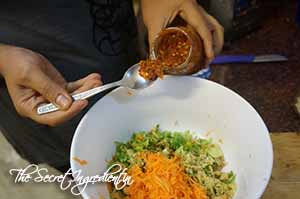
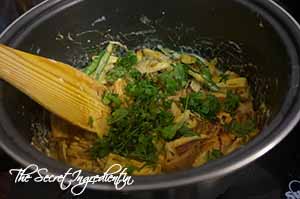
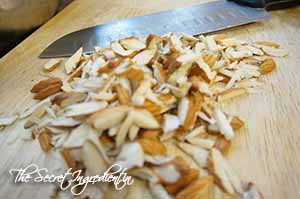
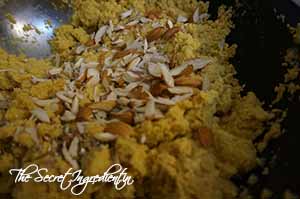
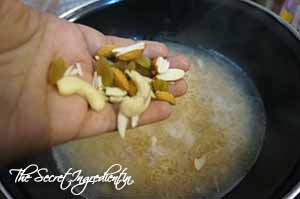
7. When the meat and fruits are cooked add raisins and ground almonds. You can also add candied pineapples. I did not have any so I skipped.

ChiliesEnNogada7

ChiliesEnNogada9

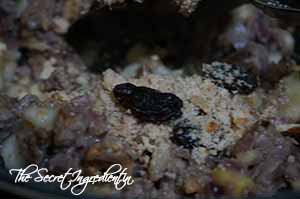
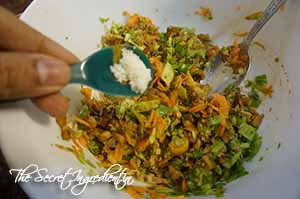
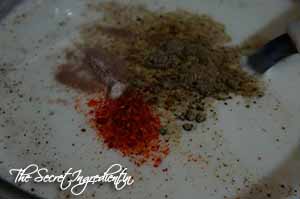
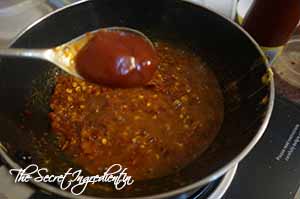
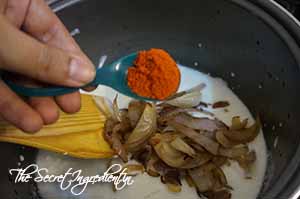
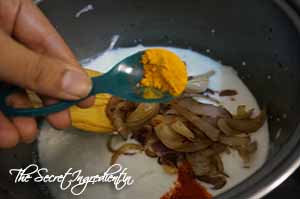
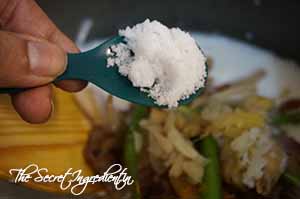
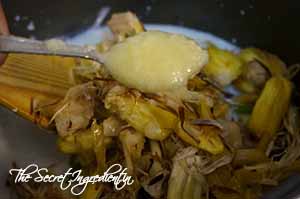
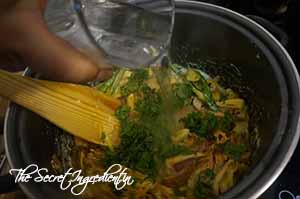
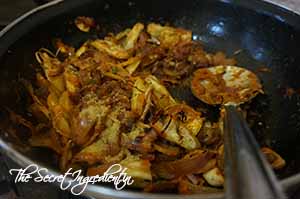
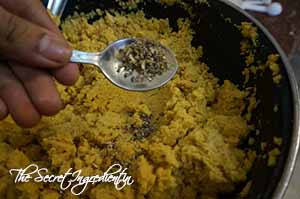
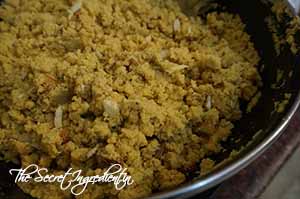
8. Add a pinch of ground cinnamon, salt, sugar and ground black pepper. Cook till the mixture is coarse and appropriate for stuffing.

ChiliesEnNogada10

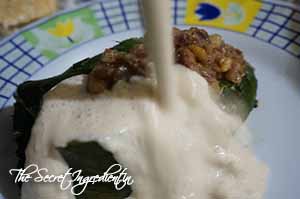
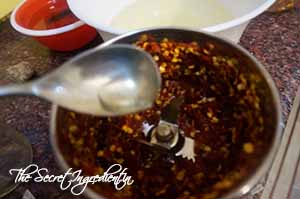
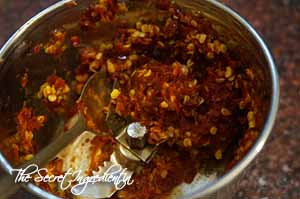
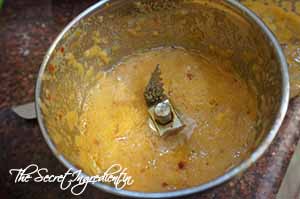
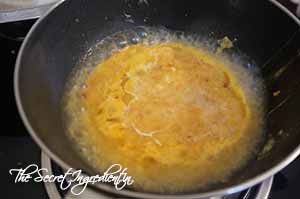
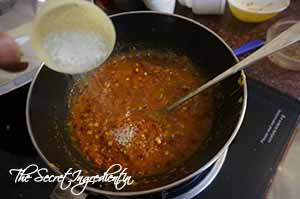
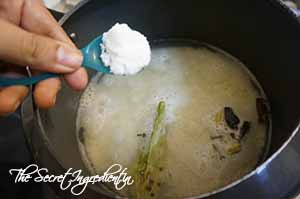
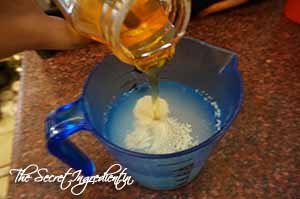
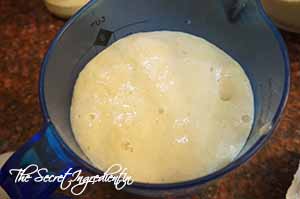
9. For the sauce add soaked walnuts in a blender along with milk, fresh cream, goat cheese and cream cheese. I added simply cream cheese. Also add sugar and pinch of white pepper. Run it together to make a very fine sauce.

ChiliesEnNogada11

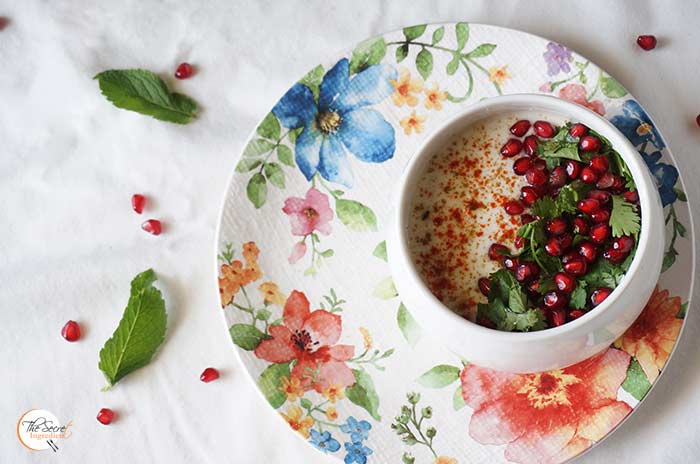
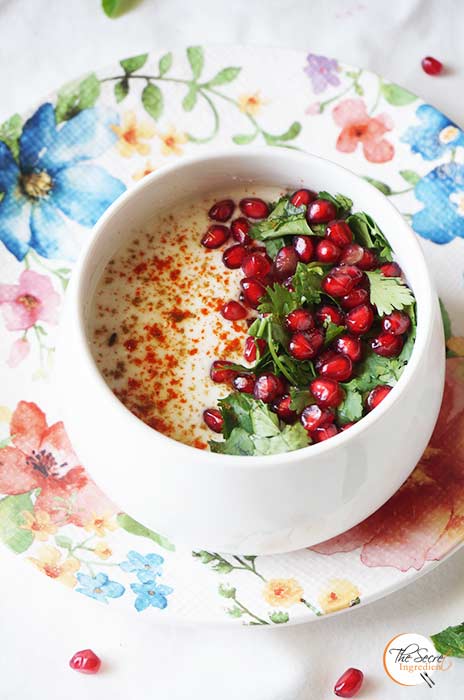
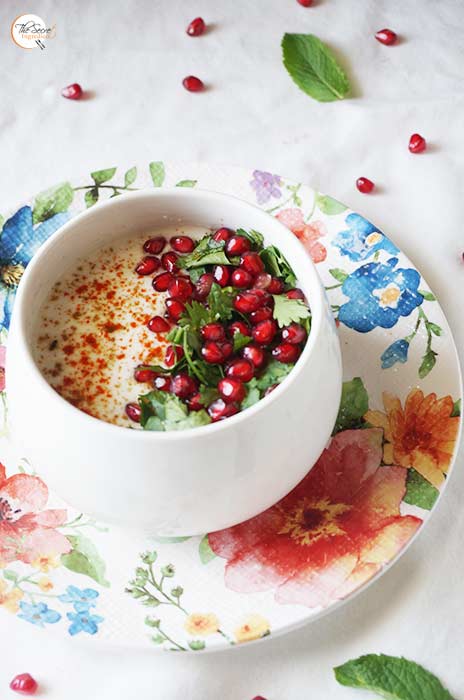
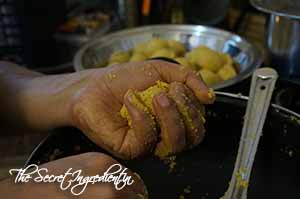
10. Stuff the Poblano Chilies with Stuffing using a spoon and place them in a serving plate.

ChiliesEnNogada12

11. Pour on top the walnut sauce to cover the chilies and sprinkle some parsley leaves along with pomegranate seeds.

ChiliesEnNogada13

Serve at room temperature.

You can even try other dishes from Mexican Cuisine like Guacamole, Sopa de Frijol-Red Kidney Bean Soup, Huevos en Cazuela-Casserole Eggs.

 [whohit]ChilesEnNogada[/whohit]

ChiliesEnNogada_Featured2

[yumprint-recipe id=’54’]

VegMomos_Featured1


Momos is a type of dumpling native to Bhutan, Nepal and Tibet. Similar type of dumplings are found in various other countries. This is the most popular form of fast food or street food found in India. It is fondly devoured with a very spicy salsa called as Szechuan Sauce.

These momos can be made with filling of all sorts ranging from meat to chicken to vegetables to cheese and even khoya, milk solids.  They can be steamed for fried. In this recipe I used vegetables and mushrooms and then steamed them. You can make any filling combo of your choice. Generally, the vegetables are not precooked before stuffing them in therefore, great care has to be taken to wash them thoroughly before chopping and stuffing them. 

Directions:

1. In a bowl combine All purpose flour and salt.


VegMomos1


VegMomos2


2. Add oil and little water and knead it into a soft dough ball.


VegMomos3


VegMomos4


VegMomos5


3. Cover the bowl with a cling wrap or kitchen towel and let it rest for 30 minutes till you make the filling.

VegMomos6

4. Chop mushrooms finely. I used canned which are already pre-cooked. You can use fresh mushrooms and saute them  in little oil for a couple of minutes.


VegMomos7


VegMomos9


5. Separate a few leaves of cabbage from the root and wash them thoroughly. Chop them finely using a chopper or you can even use a knife or grater.


VegMomos8


VegMomos11


VegMomos12


6. Put the chopped mushrooms and cabbage in a bowl. Also add minced ginger. 

VegMomos13

7. Add chopped carrots to the bowl and mix.

VegMomos14

8. Add soya sauce.

VegMomos15

9. Add Szechuan Sauce. You can get the recipe of homemade Szechuan Sauce here.

VegMomos17

10. Add Salt and black pepper powder to taste, combine all the ingredients and keep aside.

VegMomos18

11. In a steamer put water for boiling and place a greased perforated plate or sieve for steam to escape. You can do the same with an Idli stand as well. Cover with a lid and let the water boil.


VegMomos19


VegMomos29


VegMomos21


12. In the meanwhile divide the dough into 20 equal sized balls. Keep them covered until you roll them.


VegMomos22


VegMomos23


13. Roll them into thin small size circles using dry flour.


VegMomos24


VegMomos25


 14. Place on top spoonful of filling. Apply water at the ends and gather the edges in the center and pinch in the center to seal. If you have extra dough on the top, you can remove that. You can choose to make any shape you desire.


VegMomos26


VegMomos27


VegMomos28


15. Arrange the momos for steaming on the greased perforated plate  in a single layer and cover with a lid. Do not crowd the momos. You can do it in batches.


VegMomos30


VegMomos31


16. Steam them for 10-12 minutes and serve them hot with Szechuan Sauce.

VegMomos_Featured2

  [whohit]VegMomos[/whohit]

[yumprint-recipe id=’52’]


Pomegranate or Anaar is in season. The unusual combination of pomegranate and boiled fried potato with yogurt makes a delicious and hearty side dish with your meal. Its refreshing and full of flavour. I am sure once you taste it you will want it more and more. I tried it for the first time for a dinner party at our place. It was a huge success. The enchanting colors makes it even more inviting.


The beauty of this refreshing dish is that you can eat this even in Navratri Fasting. I pair it with my Barnyard Millet khichdi. Its simply delicious. if you are looking for other Fasting recipes you can try Healthy Kachalu Aloo ChatTangy Mint PotatoesKhajoor Til Ke LaddooVrat Wale Dahi-Paneer KebabsSwang Ke Chawal Ka HalwaSwang Ke Chawal Ki Phirni. For this recipe follow the instructions below.

Directions:

1. Boil potatoes and peel their skin. Cut them in cubes and fry them with little oil in the pan.

AlooAnaarRaita5

2. Fry them till they get a slight golden colour. Remove them on a paper towel to absorb extra oil. Set aside to cool down.

AlooAnaarRaita7

3. In a bowl whisk some yogurt, so that no lumps remain and add little milk to give it a smooth liquid texture. Also milk will reduce the thickness of yogurt.

AlooAnaarRaita2
4. Add Salt, chat masala and red chili powder . Give them a gentle stir to combine.

AlooAnaarRaita3

5. Add little sugar and mix.

AlooAnaarRaita4

6. Add roasted cumin seeds powder.

AlooAnaarRaita6

7. Add pomegranate to the yogurt mix. Along with freshly chopped coriander leaves.

AlooAnaarRaita8

8. Now add cooled fried  potatoes to yogurt.

AlooAnaarRaita9

Garnish with roasted cumin powder, red chili flakes or powder and coriander or mint. Serve as a side dish with Kathal Biryani or any of your favourite dishes.

Other recipes for fasting you can try are: Healthy Kachalu Aloo ChatTangy Mint PotatoesKhajoor Til Ke LaddooVrat Wale Dahi-Paneer KebabsSwang Ke Chawal Ka HalwaSwang Ke Chawal Ki PhirniTapioca Coconut Milk Pudding with Strawberry PreservePaneer Ki KheerSwang ke Chawal ki KhichdiKaddu Ka Halwa,  Sabudana Khichdi .


[yumprint-recipe id=’51’]

SzechuanSauce_Featured1

Szechuan or Szechwan Sauce is a super hot and spicy sauce  from Szechuan , a province in China. It has a distinct pungent taste which makes it very popular all across the globe. It is made with few ingredients and can be stored in refrigerator for a good period. In India it gained popularity because it is served with Momos or Vegetarian Dumplings, which is the new indo chinese street food. Apart from this you can make plenty of dishes with it like Szechuan Rice, Szechuan Noodles, Szechuan Pinwheels and the list is endless. 

Directions:

1. In a bowl take some water and soak dry red chilies for couple of hours. I soaked them for 2 hours. Ensure that you remove their stems before soaking. If you cannot stand very hot sauce you can always remove the seeds from inside. This will make the hotness much milder.

SzechuanSauce1

2.  Peel Garlic and Ginger.

SzechuanSauce2

3. In a grinding jar add the pre soaked chilies, just drain the water away.

SzechuanSauce3

4. Run it and make a coarse or smooth paste (as per your preference). You can add few spoons of water to make the blending easy. Keep aside.


SzechuanSauce4


SzechuanSauce5


5. Now make a smooth paste of ginger garlic. Set aside.

SzechuanSauce6

6. In a pan pour some oil and add ginger garlic paste and keep cooking for a coupe for a minutes or until the raw smell of ginger garlic disappears.

SzechuanSauce7

7.Add the chili paste to the pan. Also add salt.

SzechuanSauce8

8. Add Soya Sauce.

SzechuanSauce9

9. Add  Sugar and combine everything.

SzechuanSauce10

10. Add little tomato ketchup to even the flavour.

SzechuanSauce11


11. Cook till you spot tiny bubbles. Turn the flame off. Let it cool transfer it to glass jar. You can refrigerate and store upto a month. Use this to make Szechuan Rice, Szechuan Rolls, Szechuan Noodles or simply use as a dip for momos.

SzechuanSauce_Featured2
 
[whohit]SzechuanSauce[/whohit]

[yumprint-recipe id=’50’] 

KathalKiBiryani_Fetured1

Few days back I had posted my mother’s recipe of Kathal ki Sabji. My obsession for Kathal or Jackfruit is getting deeper. So I happened to try my luck with Kathal ki Biryani. It came out interestingly delicious. The fried flavor of jackfruit along with other blended spices makes this biryani delicious. This was simply an experiment but now this recipe is definitely for keeps.

Directions:

1.Apply Mustard Oil on your palms and even the knife you are going to use for cutting the jackfruit.


KathalKiSabji1


KathalKiSabji2


2. Now you can easily remove the tough skin and chop the fibrous inside of the fruit into small pieces. Remember inside the fibrous pulp you will find big sized hidden seeds or bulbs. If the fruit is still baby, which means it has been plucked early the seeds will be softer and can be cooked. But if you cannot cut them its better to remove them. Do not throw them away. I made a delicious sabji with Kathal seeds. Will post the recipe soon.


KathalKiSabji3


KathalKiSabji4


KathalKiSabji5


3. In a wok pour some oil.

KathalKiSabji11

4. Add chopped jackfruit pieces and deep fry them till they start attaining golden colour.


KathalKiSabji12


KathalKiSabji13


5. Remove them on the paper towel to absorb extra oil.

KathalKiSabji14
6. In the same wok or skillet add little more oil and add sliced onions. 

KathalKiBiryani3

7. Add little sugar so that they caramelize faster. Let the onions fry on high heat till they turn brown in colour. Remove them on a plate.


KathalKiBiryani4


KathalKiBiryani6


8. In the meanwhile wash rice and put in pressure pan with water, Bay leaf, Black Cardamom, Cloves and Cinnamon stick and Salt. Cook for four whistles or for 5 minutes after the pressure builds up. Keep aside after cooking.


KathalKiBiryani7


KathalKiBiryani8


KathalKiBiryani19


9. In a flat bottom casserole pot add some curd or yogurt. Also add half of fried onions. You don’t have to put on the flame.


KathalKiBiryani9


KathalKiBiryani10


10. Add red chili powder and turmeric powder.


KathalKiBiryani11


KathalKiBiryani12


11. Add julienned ginger and slit green chilies.


KathalKiBiryani13


KathalKiBiryani14


12. Add salt to the marinade.

KathalKiBiryani15

13. Add the fried jackfruit to the marinade.

KathalKiBiryani16

14. Add some ghee on top, some garam masala  and ginger garlic paste. Now combine the entire ingredients.


KathalKiBiryani17


KathalKiBiryani18


15.  Add Cardamom powder on top and sprinkle some fresh coriander leaves. You can even add mint but I dint have any.


KathalKiBiryani21


KathalKiBiryani22


16. Add half cup hot water so that ghee melts and spreads evenly.

KathalKiBiryani23

17. In a small take some warm milk and add few strands of saffron and also add rose water.

KathalKiBiryani24

18. Now spread one layer of cooked rice on top of the marinade, half of it. Do not press simply spread them to cover the top.

KathalKiBiryani25

19. Now sprinkle some garam masala, mint and coriander leaves, cardamom powder,  1 tsp ghee and half of saffron milk.


KathalKiBiryani26


KathalKiBiryani27


20. On top of this, layer the rest of the rice.

KathalKiBiryani28

21. Again Sprinkle some fresh coriander leaves and mint, rest of the fried onions, rest of the saffron milk and  1 tsp ghee.


KathalKiBiryani29


KathalKiBiryani30


22. Close the lid so that the steam cannot escape. We will cook on high flame for 2 minutes and then reduce the flame and cook on low flame for ten minutes.

KathalKiBiryani33

23. Serve hot with raita of your choice.

KathalKiBiryani_Fetured2
  [whohit]KathalKiBiryani[/whohit]

[yumprint-recipe id=’49’]


Kimch_Featured-2

Kimchi also spelled as Kimchee or Gimchi is a National Dish of Korea. This traditional dish is made with fermented vegetables along with variety of Seasonings. It is spicy and red red hot because of a lot of red chilies. If you cannot bear chilies, this dish is not for you. The Koreans are believed to literally live on this. I read on Wikipedia that During South Korea’s involvement in Vietnamese war, its government requested American help to ensure South Korean troops ‘desperate’ for the food, could obtain it in the field. Not only this it was even sent to space on board after a multi million dollar research effort to kill bacteria and lessen the odor without effecting taste. So now you understand what Khakhra is to Gujaratis,  Kimchi is to Koreans. 😉 

I remember eating Kimchi in Delhi in Lajpat Nagar where there is a Oriental Restaurant which serves Noodles and Fried rice with Kimchi. Today I had a cabbage lying in my refrigerator which I wanted to utilise. I thought of trying Kimchi. Although, traditional Kimchi is made with Napa Cabbage , which is a different variety of Cabbage and not very commonly found in India. Surprisingly, Kimchi came out very well. We have stored this in a jar and have been using since then with Schezwan Rice, Momos, Vegetable Hakka Noodles. It makes the meal complete and delightful.

Directions:

1. Cut the cabbage lengthwise into quarters and remove the core. Cut each quarter into crosswise into 2 inch wide strip.


Kimchi1


Kimchi2


2. Place these chopped cabbage in a large tub and add a lot of salt.

Kimchi3

3. Add little water.

Kimchi4

4. Now using both your hands mix salt with cabbage so that all pieces are coated with salt. Keep them aside to release water for at least 2 hours. You can even let it rest overnight. Keep flipping its side after every half an hour or few hours.

Kimchi5
5. In the meanwhile  julienne some carrots, radish and green onions. I could not find green onions so I used regular red onions. I chopped them roughly. Combine them together in a mixing bowl.


Kimchi6


Kimchi9


6. In a blender roughly chop garlic cloves and ginger. You can even use a mortar and pestle.


Kimchi7


Kimchi8


7.  After minimum 2 hours you will see the cabbage has released all its water and has lost its firmness. Put the cabbage in a colander and rinse it rigorously using your hands to remove all the salt. This had to be done 3-4 times. This step is very important so make sure you do rinse it 3 to 4 times.

Kimchi10

8. Add chopped garlic ginger to the mixing bowl along with chopped vegetables. At this stage you can add fish sauce and if you are vegetarian you can substitute it with plain water.

Kimchi11

9. Add red chili powder. The quantity varies from each individual’s ability to take chilies. Also add little sugar.

Kimchi13

10. Mix everything with your hands.

Kimchi15

11.  Drain any extra water and add washed cabbage to the spice mix. Combine with your hands.

Kimchi17
12. Transfer the contents to a jar  and let it stand at room temperature for 4-5 days and after that you can refrigerate. You can even eat immediately but it tastes best after fermentation. Serve as a side with your favourite fried rice or hakka noodles.

Kimch_Featuredi1


  [whohit]Kimchi[/whohit]

[yumprint-recipe id=’47’]


Baking a perfect bread was always my dream endeavor. With this recipe that dream has been accomplished. My household does not buy any commercial bread now. The home made bread is not only hygienic but also full of flavour and nutrition. This honey oats bread recipe is a keeper. Its been so many years I have been following this and it has never failed me.

Its no rocket science just follow the recipe and you will have the most beautiful bread loaf ever. I bet you will never go back to the market baked bread ever. I am pairing this with my delicious 3 ingredient Strawberry Jam, which is like the best thing ever.

Directions:

1. In a container take some lukewarm water. It should neither be hot nor cold, just hot enough to comfortably put your finger into it . The right temperature of the water is very important for yeast to activate. Put yeast into it.

HoneyOatsBread1
2. Along with yeast add honey.

HoneyOatsBread2
3. Give it a gentle stir with a fork and let it stand and activate for 5-7 minutes.

HoneyOatsBread3
4. In the meanwhile in a bowl add All purpose Flour, Oats, Salt and Milk Powder.


HoneyOatsBread4


HoneyOatsBread5


5. You know your yeast is activated when you see the mixture all frothy and spot some bubbles on top. Add melted butter.


HoneyOatsBread6


HoneyOatsBread7


6 . Now Add this to the dry ingredients little by little and combine to form a little sticky dough. You can bring it on your counter and knead it for another 5- 7 minutes till it forms a smooth dough. 


HoneyOatsBread8


HoneyOatsBread9


7. Grease a big sized bowl with vegetable oil and place the dough ball into it. Oil the dough top as well so that it does not form a crust.


HoneyOatsBread10

HoneyOatsBread11

8. Cover the bowl with a plastic wrap or a wet kitchen towel.

HoneyOatsBread12

9. Place the bowl undisturbed to rise in a warm place for atleast an hour and a half preferably in an unplugged microwave. The dough should double up in volume.

HoneyOatsBread13

HoneyOatsBread15

10. After the dough has proofed up. Remove it from the bowl, sprinkle some flour and place it on your counter top and knead for couple of minutes.

HoneyOatsBread16
11. Roll the dough with your finger tips to form a not so perfect circle and start folding from one end.

12. Fold it from from other end as well and pinch to seal the ends.


HoneyOatsBread19

HoneyOatsBread21

13. Grease a 9×5 inches bread pan and carefully place the folded dough into it, seam side down.


HoneyOatsBread14


HoneyOatsBread22


14. Cover it loosely with a cling wrap or wet kitchen towel and let it stand for another one hour till it doubles up once again.


HoneyOatsBread23


HoneyOatsBread24


15. Now without deflating the risen dough, brush honey generously on the top face of the bread.

HoneyOatsBread26

16. Sprinkle some oats on top.

HoneyOatsBread27

17. Let the bread bake for 40 minutes or so or until the bread turns golden brown in colour on preheated oven on 350 F (Learn about Oven Temperatures and Conversions). See the notes if the bread starts getting more darker colour. Let it cool completely on wire rack before slicing it.

Other bread recipes you can try : White Sandwich BreadVegetarian homemade PizzaRussian BubliciWhole Wheat Sandwich BreadChinese Black Sesame Steamed BunsCherry Focaccia Bread with Rosemary and Sea SaltRosemary Garlic Focaccia BreadCinnamon Raisin BreadBeetroot Bread with Garlic and ThymeHoney Oats Bread, Domino’s Garlic Breadsticks.


Sending to YeastSpotting

[yumprint-recipe id=’46’] 


Kathal or Jackfruit as it is called in English is native to South and Southeast Asia and is believed to have originated in southwestern rain forest of India. It is this season when this vegetable hits the market for a brief period. Not a lot of people like cooking this because its a tough task to peal and cut this vegetable. The skin is tough and hard and secrets a starchy liquid when cut. It sticks to your hands and makes it all messy. But thanks to mommy’s effective tips on peeling and chopping it, that I am able to enjoy eating Kathal ki Sabji

I tried cooking this on my own for the first time because I member eating this almost a decade back. My husband ate this for the first time.  I still remembered its flavour. So I called my mommy for the recipe and since then I have been making this twice in a week fearing it will soon be over for the season . Its delicious!

Directions:

1. Here is the undisputed tip for peeling and cutting jackfruit. Apply Mustard Oil on your palms and even the knife you are going to use for cutting the jackfruit.


KathalKiSabji1


KathalKiSabji2


2. Now you can easily remove the tough skin and chop the fibrous inside of the fruit into small pieces. Remember inside the fibrous pulp you will find big sized hidden seeds. If the fruit is still baby, which means it has been plucked early the seeds will be softer and can be cooked. But if you cannot cut them its better to remove them. 


KathalKiSabji3


KathalKiSabji4


KathalKiSabji5


3. Roughly chop some tomatoes and put them in a blender to make a puree. Keep aside


KathalKiSabji7


KathalKiSabji8


4. Slice some onions in length. The caramelized onions enhance the overall flavour of this dish. So use it abundantly. Also finely chop some green chilies. Set aside.

KathalKiSabji9

5. In a wok pour some oil.

KathalKiSabji11

6. Add chopped jackfruit pieces and deep fry them till they start attaining golden colour.


KathalKiSabji12


KathalKiSabji13


7. Remove them on the paper towel to absorb extra oil.

KathalKiSabji14

8. In the same wok add a little extra oil and add cumin seeds and sliced onions.


KathalKiSabji15


KathalKiSabji16


9. Add chopped green chilies and cook till the onions have caramelized.

KathalKiSabji17

10. Add tomato puree and cook for couple of minutes. 

KathalKiSabji19

11. Add fried jackfruit.

KathalKiSabji20

12. Add turmeric powder, red chili powder and salt. 

KathalKiSabji21

13. Add ginger garlic paste.

KathalKiSabji22

14. Add coriander powder.and combine everything together.

KathalKiSabji23

15. Cover the wok with a lid and cook on low flame till all the liquid is absorbed.

KathalKiSabji24

16. Sprinkle some Garam Masala and serve with Rotis.


[whohit]KeathalKiSabji[/whohit]

[yumprint-recipe id=’45’] 


Rakshabandhan or Rakhi is the festival of Brothers and Sisters, where the sister ties a thread or rakhi on the wrist of his brother asking him to protect him. This is sacred festival of Hindus when special food and sweets are made.  

I spent the last three years in Mexico away from my brothers on this occasion. This year I wanted to be with them in person but unfortunately circumstances are different. So I’ll be celebrating the festival at home with my husband and my little one. Also tomorrow is my little one’s Mundan, a hindu ceremony where the first hair of the babies is shaved. It has a great significance so I decided to make Besan Laddoos for this ocassion. If you follow my blog you will know I come from a family of Halwais, sweetmakers. My Grandfather whom I called Bauji was a proud owner of a famous sweet shop. I can never match the quality and taste of ‘Matta Sweets’ but I still tried. The outcome surprised me. The laddoos came out top notch. I am sure Bauji will be very proud of me wherever he is. 

Directions:

1. In a large wok melt ghee on low flame.


BesanRavaLaddoo1

2. Add Besan and Semolina.


BesanRavaLaddoo3


BesanRavaLaddoo4


3. Combine them evenly to make a thick paste. Keep roasting besan in ghee on LOW FLAME by continuously stirring for at least 15 minutes or the besan has started turning little darker in colour. The aroma of roasted besan will fill your home. Stirring continuously my sound like a lot of work but the outcome depends on how well the besan has roasted. It is advised to be patient and continuous.

BesanRavaLaddoo5


4. In the mean while, sliver the almonds in length and keep aside.

BesanRavaLaddoo2

5. Take some almonds and pistachios and grind them coarsely in a dry blender or coffee bean grinder. Keep aside.


BesanRavaLaddoo6


BesanRavaLaddoo7


6. After fifteen minutes when the besan is fully roasted and has started to become little creamy and gooey turn off the flame. 


BesanRavaLaddoo8


7. Add castor sugar while besan is still warm, otherwise it would not mix properly. Mix thoroughly and evenly.

BesanRavaLaddoo10

8. Add coarsely ground Cardamom powder and slivered almonds.


BesanRavaLaddoo11


BesanRavaLaddoo12


9. Mix well to combine. Let the mixture cool down little bit. Cool enough to make laddoos or round balls with it.

BesanRavaLaddoo13

10. Take the mixture in your fist and press it. The mixture will come together. Give it a round shape using both your hands.It will require a little practice but after two three  trials you will master it. 🙂


BesanRavaLaddoo14


BesanRavaLaddoo15


11. Melt little ghee in a bowl and dip one end of the laddoos in ghee.

BesanRavaLaddoo16

12. Rub the buttered face with ground almond pistachios.
 
BesanRavaLaddoo17

13. That is how we garnish the Laddoos.


BesanRavaLaddoo18


14. Store them in an air tight container and thank me with each bite. 😉 Wish you all a Happy Rakshabandhan!

Other Festive Indian Sweets you can try are: Ragi Khus Khus Laddoos , Atta Halwa Gurudwara StyleGurr Gajar Ke Meethey ChawalGajar Ka HalwaKaddu Ka HalwaKesari SeviyanMango Saffron Phirni Paneer Ki KheerRasgulla.


   [whohit]BesanLaddoos[/whohit]

[yumprint-recipe id=’43’]


Kesari Seviyan is the most easy breezy recipe when some unannounced guests come over. Its ready in minutes with ingredients you probably will have at home. Traditionally, Seviyan or Sewai or Semiyan or Vermicelli in English or Pasta Fideo in Spanish were made at home with whole wheat dough and then sun-dried in the open. 

I remember I used to sit with my mother and grandmother during summer days and try help making these. Although my little hands wouldn’t be of much help but it was fun imitating the ladies. They made them with sugar syrup or with milk. Both of them tasted phenomenal. I thought to make with sugar syrup the other day and my little one loved it.  Thought to share the recipe with you as Rakshabandhan is around the corner. I used store bought vermicelli pasta which was pre roasted. You can use home made sewai or the nylon vermicelli both roasted or unroasted. You can also made Savoury Vermicelli Upma or Pulao also with the same Sewai. Its an incredible breakfast option.

Directions:

1. In a wok add some ghee or clarified butter and add roasted Vermicelli to it. Toss them around for a minute so that vermicelli absorbs the flavour of ghee.


KesariSeviyan1


KesariSeviyan2


2. In a separate pan heat some water. It should be boiling hot.

KesariSeviyan4

3. Now pour this water into the vermicelli wok.

KesariSeviyan5

4. In the meanwhile chop some dry fruits of your choice and put them with the water into the pan.


KesariSeviyan6


KesariSeviyan7


5. Cover the lid and let it cook for 5 minutes or until water has slightly but not fully reduced.

KesariSeviyan8

6. Add crushed or powdered Cardamoms.


KesariSeviyan9


KesariSeviyan10


7. Add sugar and combine well.

KesariSeviyan13

8. Add few strands of Saffron and continue to cook by stirring till all the water has absorbed. Keep stirring for it can stick to the bottom of the wok.

KesariSeviyan14

9. Serve hot in small bowls and relish it.


[yumprint-recipe id=’42’]