Author

anshu

Browsing


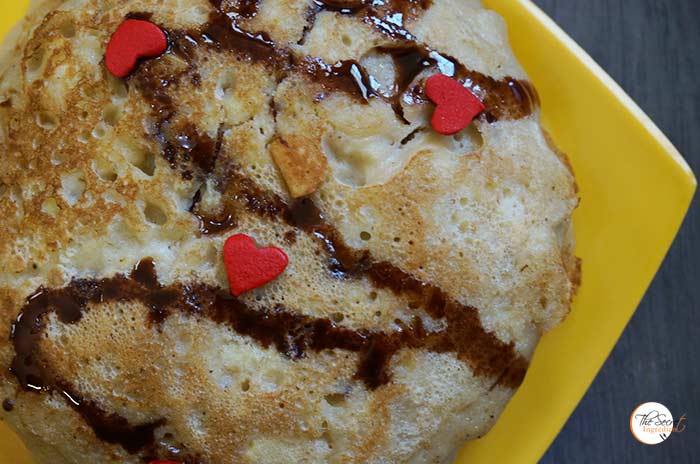
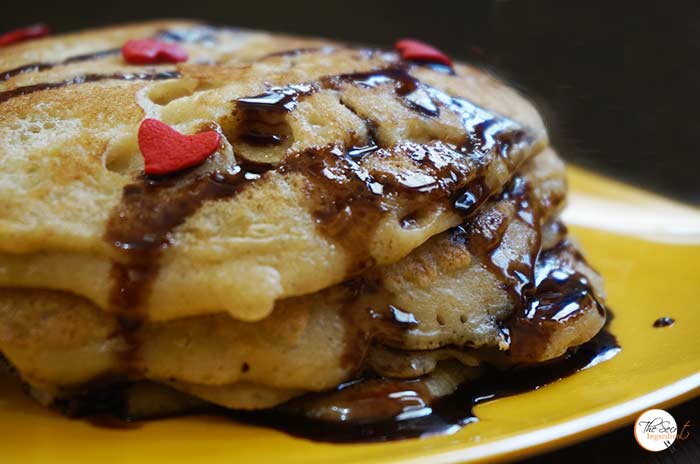
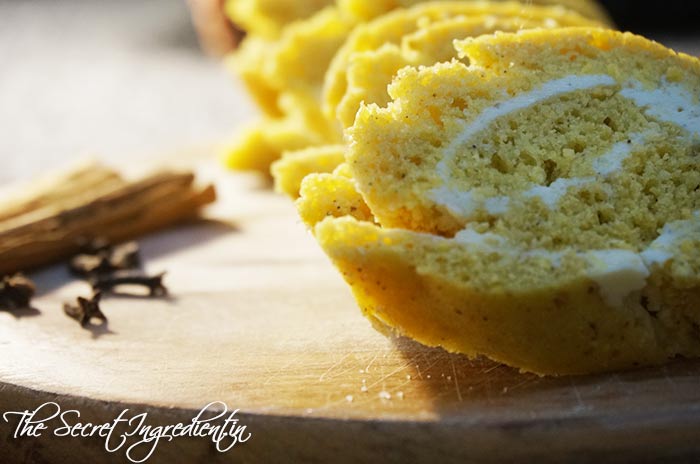
Pancakes are the most delicious breakfast which can be made in a jiffy. They are also known as Hotcakes, Griddlecakes or Flapjacks. They can be sweet or savoury. Each country has its own style of making them with unique toppings or ingredients. Apple Cinnamon Pancakes are a classic combination. Filling, Fast and yet so tasty.

I had so many apples which needed to be put to some use. I made apple bread, apple chutney, Apple Lapsi and what not still they were plenty. So I utilized few of them to make these amazing pancakes. The cinnamon gives the pancakes that divine flavour that its difficult to describe in words. You must try to understand it.

This is kid’s favourite. Its a good nutrition for them and they even relish the taste. Oh before I forget recently, I contributed few of my recipes to Indusladies to an event for 100 Kids Lunch Box Recipes. They got published in an e-book. You can download the e-book here for some delicious recipes.

Directions:

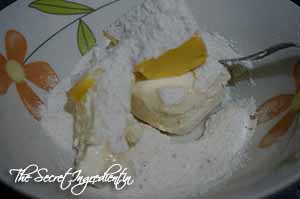
1. Whisk an egg in a bowl.

DSC08454


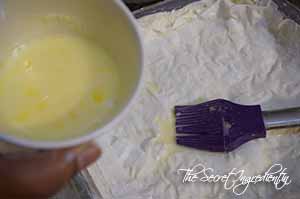
2. Add melted butter to the whisked egg.

DSC08455

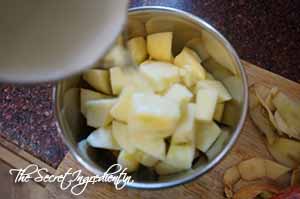
3. Add milk and combine. Keep aside.

DSC08456

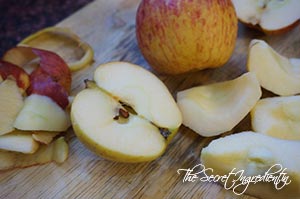
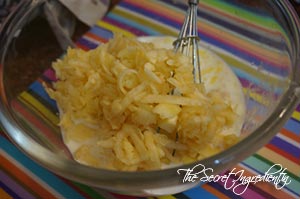
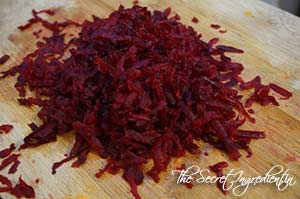
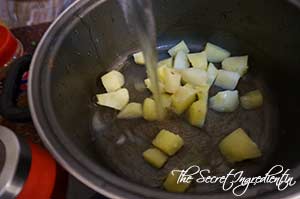
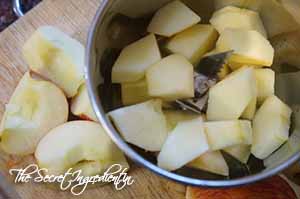
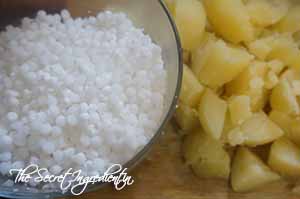
4. Wash, core and peel apples. Grate them using a grater. Add them to the wet ingredients. Keep aside.

DSC08464

DSC08465

DSC08466

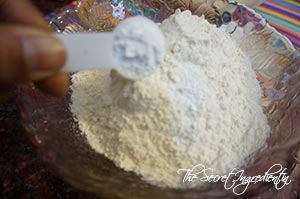
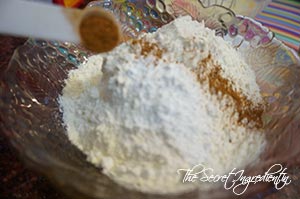
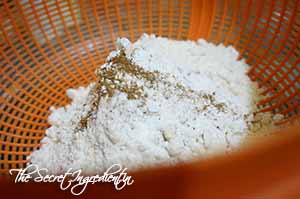
5. In a separate bowl add All purpose Flour and Baking Soda. Combine evenly.

DSC08457

DSC08458

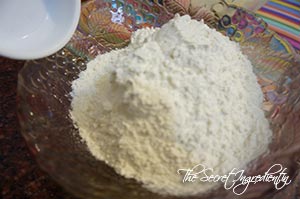
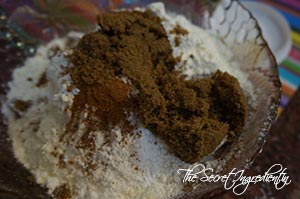
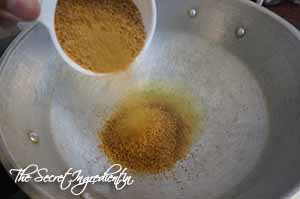
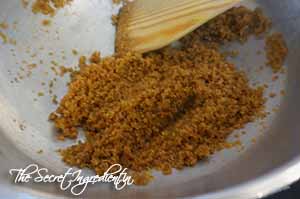
6. Add ground cinnamon and brown sugar. Combine.


DSC08461


DSC08462


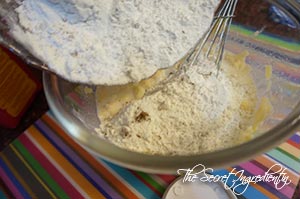
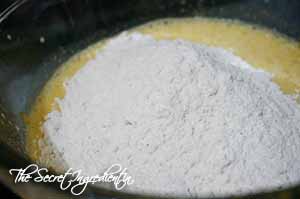
7. Add the dry ingredients to the wet ingredients and whisk to combine.


DSC08467


DSC08469


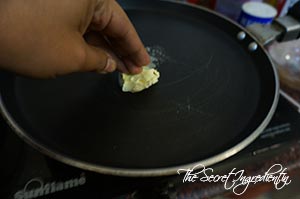
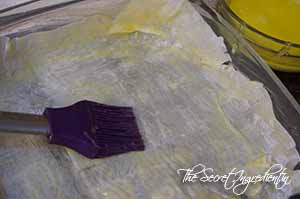
8. Heat a griddle and butter it well.

DSC08468

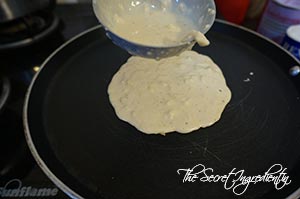
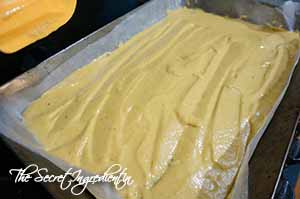
9. Pour one ladle or 1/4 cup of pancake batter in the center of the griddle. Do not spread, it should spread on its own. If it doesn’t, it needs more milk to liquefy it further to achieve perfect consistency.

 DSC08470

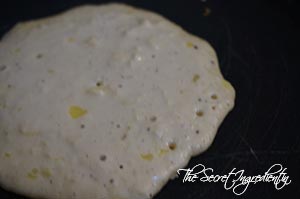
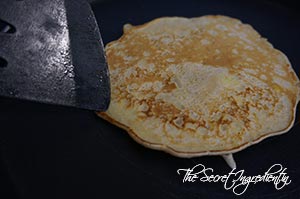
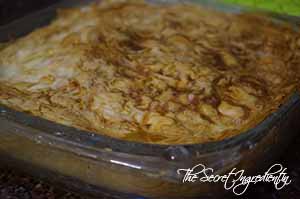
10. When you see holes appearing on the surface of cakes its time to flip. It should take somewhere between 3-4 minutes. Transfer to a serving platter, loosely cover with some Aluminium Foil so it doesn’t get dry and cold. Repeat with remaining batter.


DSC08471


DSC08472


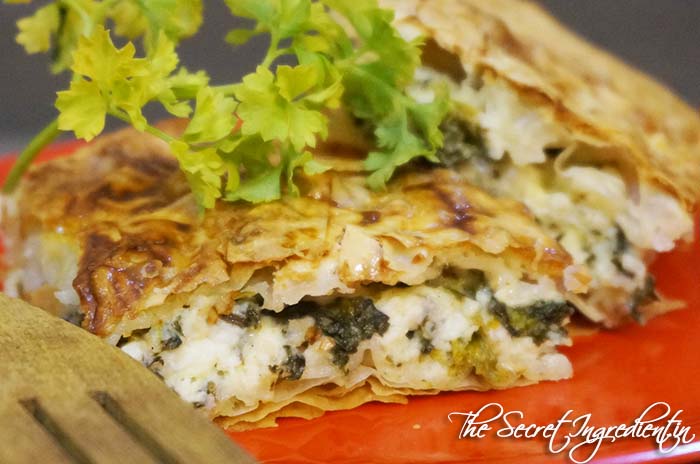
11. Serve hot with maple syrup, chocolate syrup, whipped cream or even custard. You can even throw in some nuts or fruits.

You can even try Blueberry Buttermilk Pancakes and Eggless Walnut Pancakes.

Other breakfast recipes you can try here are: Quick Rava Idli, Mexican Style Casserole Eggs, Wrapped French Toast, Soya Veggie Vermicelli, Rava Pizza Bread ,Italian Frittata, Shahi Poha.

Other Apple Recipes you can try: Apple Cinnamon Swirl BreadApple Cider Spiced DoughnutsApple Spiced ButterApple CrispApple Raisins Streusel Bread


[yumprint-recipe id=’74’] [whohit]appleCinnamonPancakes[/whohit]

Borek_Featured2
During my years in Mexico I met a wonderful Turko-Chino friend Manly. She was a big support when I was expecting a baby in a foreign land. How can I ever forget her selfless love and kind deeds. This post is dedicated to you Manly!  

After I delivered a healthy baby with God’s grace, she invited us including my parents, who were visiting us from India, to her house for evening tea.  She was a great host, so warm and elegant. I can never forget that she served us Turkish Tea along with a turkish delicacy Börek, its a Pie made with Feta cheese filling under sheets of Phyllo Pastry or known as Yufka in Turkish. I fell in instant love with it and wanted to make on my own. With many trials and error finally I perfected the art of baking this beautiful pie.

This pie can be made with simply cheese or spinach and cheese or meat stuffing. I made this with feta cheese, Mozzarella Cheese and Spinach. The herculean task in this entire recipe is to work efficiently with phyllo or filo sheet. The phyllo sheet has to be carefully handled and has to be worked diligently and quickly.

Directions:

1. First we will prepare the spinach cheese filling. For which you need to blanch cleaned leaves of spinach in a vessel with few spoons of water. Do not cover it with a lid to retain its green colour. Put on the flame and simmer it till the leaves have become soft.It should take 5-7 minutes. Let it cool down and now collect all the leaves in your hand and squeeze out entire water. The spinach leaves should be dry and easy to work with. Set aside.


DSC09072 copy


DSC09074 copy


2. Crumble feta cheese in a large bowl.

 DSC09073 copy

 
3. In the same bowl add blanched and dried spinach leaves. You can shred them using your hands or cut them with a knife.

DSC09075 copy

4. Add eggs and mix it well.

DSC09077 copy


5. Add to it shredded Mozzarella Cheese.

DSC09079 copy

6. Add chopped parsley and dill to the bowl. I only had parsley so I skipped adding dill.

DSC09080 copy

7. Season it with salt and pepper. Be careful with salt as feta cheese is brined and already has good amount of salt in it. Combine and set aside.


DSC09082 copy


DSC09083 copy


8. In a second bowl we will prepare the glaze. Add egg in the bowl and also add milk to it. Beat it lightly to combine.


DSC09084 copy


DSC09085 copy


9. In the same bowl add Olive oil and melted butter. Combine and set aside.


DSC09088 copy


DSC09089 copy


10. In a third small bowl add  an egg and milk. Bet lightly and set aside. This will be used for top glaze.


DSC09090 copy


DSC09091 copy


DSC09092 copy


11. Now unfold the thawed phyllo sheets on a dry surface. In order to avoid their drying up, place on top a damp kitchen towel. Always ensure to take out the sheet you are working with and cover rest of them. 


DSC09093 copy


DSC09094 copy


12. Grease a 9×13 baking pan with glaze with a brush. Ensure that you cover the bottom along with the sides. Preheat the oven at 350 degrees F (Learn more about Oven temperatures and Conversions).

DSC09095 copy

13. Now place one phyllo sheet on the bottom and if the shoulders are little bigger you can fold them in or cut them. I left them just like that.

DSC09096 copy

14. Evenly glaze the sheet with the prepared glaze mix and place another sheet on top. Keep doing this till you have placed about 10 sheets on top of each other with glaze in between.

DSC09097 copy

15. Spread the stuffing on top of 10 layers of phyllo. Do it as evenly as possible.

DSC09098 copy

16. Place on top of this stuffed layer another sheet of phyllo and continue with glazing. Add another 10 sheets of phyllo on top with glaze in between. At the end you have 10 sheets below the stuffing and 10 sheets above the stuffing.

DSC09099 copy

17. The final glazing should be done with the top glaze we prepared before.

DSC09100 copy

18. Bake it in preheated oven for 40 minutes or until the top becomes slightly golden.

DSC09102 copy

19. Cut them into squares using a sharp knife after it has cooled down a little.

DSC09104 copy

20. Serve hot the utmost flaky and delicious Turkish Spinach Pie.

For more International Cuisines you can try Classic Russian Borsch, Sopa de Frijol, Rosemary Garlic Roasted Potatoes, Kimchi, Rosemary Garlic Focaccia Bread, Chilies en Nogada.

 Borek_Featured1

[yumprint-recipe id=’73’]

[whohit]borek[/whohit]


Stuffed Chili pickle is a delicious Indian pickle made with red fresno chilies. Indians go bonkers over pickles. No Indian meal is complete without a tangy spicy piece of pickle and pappad. Pickle may be understood as baby cucumbers sliced and dipped in brine to any person other than an Indian. However, in India pickle is much more than just some humble vegetables soaked in vinegar. Its a blast of spices rubbed over vegetables with oil and sundried on open terraces where the spices can marry the vegetables. It gives the pickle that Oooh wow soo yummy factor!! 😛

We Indians make pickle out of any thing under the sun, yes literally! We have pickle of mangoes. carrots, turnip. jackfruit and even chicken! Winter is approaching so markets are flooded with red fresno chilies or peppers. This variety of chilies is not same as red bell pepper. They are mildly hot and similar in taste to mild Jalapenos and spanish pimientos rojo found in other part of the world. If you cant find these red chilies you can substitute them with Jalapeno or Red Pimiento peppers. In India they are also known as bharwan mirch or achar wali mirch.

This stuffed red chill pickle used to be my favourite and still is. My mother loves to make pickles like any Indian housewife 😛 So this year I asked her to give me the recipe instead of sending the pickle itself. The pickle came out amazing, simply tasting like hers. Its easy and ready in minutes. You need to sun dry it for three days and you can enjoy it with your supper.

Directions:

1. Wash chilies and pat them dry with a kitchen towel. You can  even put them in the sun for an hour to dry it completely.


DSC08878


DSC08879


2. Make a slit on one side of the pepper with a knife ensuring that the other end is intact.


DSC08880


DSC08881


3. Slightly toss the peppers to see if any seeds come out from the inside. Do not throw them away for we will add them to the stuffing.Need not remove the seeds which are attached to the peppers.

DSC08882

4. In a dry grinder or coffee grinder put red mustard seeds also known as Raai, fenugreek seeds also known as methi dana and fennel seeds also known as saunf. Coarsely grind them. psssssss… I forgot to take picture of raai. 🙂


DSC08900


DSC08901


DSC08902


5. Put the ground spices in a medium sized bowl and also add salt, turmeric powder, asafoetida and amchur.


DSC08904


DSC08905


DSC08903


6. Also add to this White Vinegar and Mustard Oil.


DSC08907


DSC08908


7. Add pepper seeds to it and combine them using a spoon.


DSC08910


DSC08909


8. Take a spoonful of spice and stuff it inside pepper.

DSC08911
9. Once you are done stuffing all peppers transfer them to a clean and dry, glass air tight container with a lid.

DSC08914

10. Keep the glass container in sun for atleast three days till the otter skin of the peppers has become little soft. Enjoy with your favourite meal.

Other pickles and condiments you can try are : Jalapeno Pickle  Fresh Turmeric Pickle with Green Mangoes, Ginger Garlic Pickle,Instant Raw Mango Pickle South Indian Style.

You can also try Red Chilli and Red Bell Pepper Jam  and Thai sweet Chili Sauce with Fresno Chilies.


[yumprint-recipe id=’72’]


RussianBorsch_Featured2
My husband spent four years in Moscow,Russia when he was a little boy. My Father in law was posted in the embassy of India in Moscow. Although that was very many years back still he talks about few dishes which remained in his heart like Bubliki, russian style bagels and Borsch, russian beetroot soup. My Mother in law makes this occasionally. I looked on the web to find a recipe which is authentic and still workable. Since I myself have never tried the authentic Borsch I really cannot comment on the authenticity of this recipe but I know for sure that it was damn tasty, healthy and fulfilling. 

Borsch is a soup from Ukrainian Origin that is very popular in many Eastern European Cuisine including those of Poland, Russia, Ukraine and Belarus. It is largely made with Beetroot as the main ingredient, which explains the deep red colour. Nevertheless, there are many non beet versions also. It is served both hot and cold. Today I am sharing the beetroot hot version with you. Borsch is also known as Borscht, Borsh, Borshch, Bortsch, Borstch.

Some times even Bacon is added to give that smoky flavour. But we will stick to complete vegetarian variant.

Directions:

1. Soak red kidney beans over night or atleast 7-8 hours and boil them till they are soft and tender. You can even use canned beans.

DSC07493
2. Finely shred cabbage,grate carrot and chop onions. Set aside.

DSC07487

DSC07488


3. Cube some boiled potatoes and shred boiled beetroot. Set aside.

DSC07491

DSC07492

4. In a wok add some olive oil and add onions and carrots.

DSC07489

DSC07490

5. Saute them for 7 to 10 minutes or until they are soft. Add tomato ketchup and combine. Set aside.

DSC07496
6. In a large soup pot or saucepan add water and boiled potatoes.

DSC07494
7. Throw in shredded cabbage and beetroot. Keep boiling it till the crunch of the cabbage has disappeared and it has become soft and tender.

DSC07497

DSC07498

8. Add boiled red kidney beans along with its water.

DSC07499

9. Add a bay leaf to the simmering pot.

DSC07501

10. Add vegetable broth. I used broth bullion along with water. Also add pepper and Lemon juice. You can even add fresh or dried dill if you like. I did not have any so I skipped.

DSC07506


DSC07505


DSC07503


11. Add sauteed carrots and onions to the soup pot.

DSC07507

12. Add salt to taste. Keep simmering till it has reached perfect consistency as per your taste.

DSC07509

13. Serve hot with a dollop of sour cream and beetroot garlic bread

If you are looking for more soup recipes you can try Mexican Chicken Consome with Rice, Classic Tomato Soup, Mexican Soup of Red Kidney Beans.

RussianBorsch_Featured1
[whohit]Borsch[/whohit]

[yumprint-recipe id=’71’] 

AppleLapsi_Featured2

Few weeks back when my in laws visited us they got us 5 kgs of fresh apples. After they left it was just the three of us to finish the entire booty. Since then I have been on a pursuit to use them wisely in different recipes. I made Apple bread, Apple Chutney and now Apple Lapsi.

Apple Lapsi is a famous Rajasthani and Gujarati dessert which is nutritious and full of flavour. I zeroed down on this recipe because I thought this will be a nutritious treat for my little boy. As thought it came out delicious. The fruity taste of apple and cardamom made it yummilicious.

Lapsi refers to broken wheat which is more commonly known as Dalia or Daliya, Bulgar or Bulgur or Bulghur or Burghul, Cracked wheat, Fada, Godhumai Rava. The simplicity of this dessert makes it even more inviting.

Directions:

1. Peel and Core apples. Cut them into small pieces and put them in a blender.

ApppleLapsi1

ApppleLapsi2

2. Put a little water in the blender. ApppleLapsi3
3. And make a smooth puree of it. Keep aside.

ApppleLapsi4
4. In a wok add some ghee or clarified butter.

ApppleLapsi5
5. Add broken wheat and roast it till it gets aromatic and changes the colour to darker brown. It should take 5-8 minutes.

ApppleLapsi6

ApppleLapsi7

6. To this add some water and on a medium flame cook the bulgar, stiring occasionally for 10-15 minutes till it is tender and cooked.. After that add sugar along with Crushed Cardamom pods. Cook further for 5 minutes.

ApppleLapsi8

ApppleLapsi9

7.  In the meanwhile roast some almonds and cashews in ghee in a separate pan. Keep aside.

ApppleLapsi10
8. Add apple puree to the cooked bulgar. Cook for 5 minutes. 

ApppleLapsi11
9. Add roasted dry fruits and combine. Save a few for garnishing.

ApppleLapsi12
10. Cook further till it starts leaving the sides.

ApppleLapsi13
Serve hot and enjoy.

You can try other Halwa recipes of Sooji Halwa, Gajar ka Halwa and Pumpkin ka Halwa

AppleLapsi [whohit]appleLapsi[/whohit]

[yumprint-recipe id=’70’] 


Punjabi Cuisines are famous for it finger licking, hot and spicy food. They use ordinary Indian spices to make their dishes extra ordinary. Born and brought up in a Punjabi Family, the thought of eating spicy and rich food brings happiness in my life. This particular dish is my Mother’s speciality. I have seen my mother serve this frequently whenever guests come over for dinner. It looks good and tastes amazing.

The Secret Ingredient which makes this soo delicious is the home made Dry Choley Masala Mix. It gives it that incredible deep dark colour and the aroma of spices makes the dish ohh so irresistible. It is highly recommended to use this masala mix if you are looking for lip smacking Punjabi Pindi Choley. 

Directions:

1. Wash and Soak Choley or Garbanzo or Kabuli Channa in water overnight or atleast 8-10 till they become swollen and double in size.


PindiCholey1

2. In a pressure pan put the pre soaked garbanzo along with water. 

PindiCholey2

3.Also add dry whole spices like Bay leaf, Cloves, Green Cardamom, Black Cardamom and Cinnamon sticks.

PindiCholey3

4. The black tea helps bring an interesting colour to the dish. I am using a tea infuser and filing it with tea leaves. Since this is made up of silicon I am putting it directly inside the pressure pan. If you do not have tea infuser you can use tea bags or a small muslin cloth with tea leaves inside. You must close it with a knot. It should resemble a small bundle. The purpose of this is to boil the garbanzo in water released by tea leaves and to ensure the leaves do not mix with garbanzo.


PindiCholey4


PindiCholey5


PindiCholey6


5. Add enough water to the pressure pan. Also add salt. Close the lid and boil the garbanzo for 25-30  minutes or until tender. Let them cook in the pressure till the steam releases. 


PindiCholey7


PindiCholey8


6 . Please ensure not to over boil garbanzo as they will loose their shape and become mushy. They should look firm in shape and soft on a bite.

PindiCholey10

7. Remove the tea infuser from the pressure pan. 

PindiCholey9

8. Slice the onions in length along with Ginger and Garlic. This is an interesting way to maximize flavour  so do not skip this. Also slit some green chilies.

PindiCholey11

9. In a wok add some ghee or clarified butter.

PindiCholey12

10. Add Cumin seeds and let them sputter for a minute.

PindiCholey13

11. Add thinly sliced garlic along with slit green chilies. Saute for a minute.

PindiCholey14

12. Add Ginger to it and saute them till they start acquiring some colour. Do not burn them.

PindiCholey15

13. Now all thinly sliced Onions and saute the till it becomes tender and translucent. Add to it tomato puree.


PindiCholey16


PindiCholey17


14. Add Punjabi Choley Masala, Red Chili Powder and Salt.


PindiCholey18


PindiCholey19


PindiCholey20


15. Keep cooking till everything has combined. You are looking at a thick spicy mix.

PindiCholey21

16. Add boiled garbanzo without the water and gently toss them in the masala. Do not throw the water away.

PindiCholey22

17. You can add couple of spoons of water from garbanzo if you think they are too dry. Cook further till right consistency is achieved. 

PindiCholey23

18. Sprinkle some Garam Masala and fresh Coriander Leaves.


PindiCholey24


PindiCholey25


Serve hot with Kulcha, Naan, Bhatura or simply roti.

You can get the recipe of Punjabi Dry Choley Masala here. You can even try Punjabi Besan Kaddhi , Punjabi Style Shalgam Ka Saag, Dal Ghiya with Punjabi VadiyanPunjabi Pethey Ki SabziPunjabi Style Bharwan TindaPunjabi Style Gobhi DanthalLangar Wali DalPunjabi Style Dum AlooPunjabi Dal MakhaniPunjabi Style Aloo Methi, and Punjabi Bharwan Karela.


[whohit]PunjabiPindiCholey[/whohit]

[yumprint-recipe id=’69’]

CholeyMasala_Featured1
My Mother’s homemade Punjabi Choley Masala takes Punjabi Pindi Choley to a new level all together. It infuses the Choley or Garbanzo with Authentic Punjabi Flavour as well as gives it a dark enriching colour. I have inherited this recipe from Mommy and it never fails me.  Simply dry roast the spices and to perfection. You can store this for a long time, a must for your kitchen cabinet.

Directions:

1. Put Cumin, Pomegranate dry seeds or Anardana, Coriander Seeds, Cloves, Whole Black Pepper, Black Cardamom, Nutmeg or Jaiphal and Cinnamon or Dalchini in a flat bottom pan for dry roasting.

CholeyMasala2

2. Dry roast them on medium low flame for 5-8 minutes. Keep stiring so that the spices are not over roasted.

CholeyMasala4

3. Let the spices cool down a bit. Transfer them to a dry grinder or coffee grinder to grind it into a semi coarse powder.

CholeyMasala3

Transfer it into an air tight container. Stays good for a very long time.

Use them to make your favourite Punjabi Pindi Choley.

CholeyMasala_Featured2
[whohit]CholeyMasala[/whohit]

[yumprint-recipe id=’68’]

PumpkinRolls_Featured1
Honestly, my love for Pumpkin was never sudden. Infact I always considered pumpkin as a vegetable to make Indian cuisines or my Grandmother’s delicious Kaddu ka Halwa . Until Mexico happened and that is were I discovered that pumpkin is more than we think it to be. My respect for pumpkin grew overnight as I  started experimenting with Pumpkin Puree. I learnt to make this Puree at home which made it a ready to make ingredient which can be used to make Pumpkin Rolls, Pumpkin Muffins, Pumpkin Bread and much much more.

In the west Pumpkins are symbolic to Halloween, a famous festival to remember saints, martyrs and all departed souls. Pumpkin is used to make feasts and even used for carving. The warmth of Pumpkin Puree along with spices makes the winter cozy and comfortable. So how are you celebrating your halloween. Treat or Trick? 😉 

Directions:

1. Line a Large rectangular baking tray with Parchment Paper  and brush it with Vegetable Oil . Set aside. Pre heat the Oven to 375 Degree Fahrenheit. Learn more about Oven Temperatures and Conversions

PumpkinRolls1
2. Sift All Purpose Flour, Salt, Baking Powder and Pumpkin Pie Spice (Learn to make homemade Pumpkin Pie Spice) using a sifter, so that the flour becomes lump free.

PumpkinRolls2

3. In  a large bowl whisk together eggs and sugar so that the mixture becomes thick and pale in colour.


PumpkinRolls3


PumpkinRolls4


4. Add in Pumpkin Puree and Vanilla essence together to the egg mixture and combine together. You can make Pumpkin Puree at home or you can use canned pumpkin puree.

PumpkinRolls5

5. Add the sifted flour mixture to it and combine to get an even batter. Do not over mix.


PumpkinRolls6


PumpkinRolls7


6. Spread the batter on the baking sheet lined with Baking Sheet. I have used Oddy Uniwraps Parchment Paper, because it makes baking a breeze. It ensures the cake bakes perfectly without sticking to the paper or tray and makes cleaning hassle free.You can use spatula to evenly spread the batter.


PumpkinRolls8


PumpkinRolls9


7. Bake it in preheated oven for 12 to 14 minutes or until the cake has cooked thoroughly.Let it cool for 5-7 minutes.

PumpkinRolls10

8. On your counter spread a kitchen towel and dust it with Confectioner’s Sugar generously. Remove the cake from the baking tray along with parchment paper and place on kitchen towel with parchment paper facing upwards and cake downwards. Now carefully remove the parchment paper.


PumpkinRolls12


PumpkinRolls13


9. Roll up the cake along with towel into a jelly roll starting from the shorter side. Let it cool completely for an hour or so.


PumpkinRolls14


PumpkinRolls15


10. Now for the filling you need butter and cream cheese at room temperature. Cream them together using a whisk. Add to it confectioner’s sugar or powdered sugar and little vanilla essence.


PumpkinRolls16


PumpkinRolls17


11. Add zest of orange or clementine to it and mix.

PumpkinRolls18

12. Now unroll the cake and spread the cheese filling on top using a spatula.

PumpkinRolls19

13. Now roll the cake again but this time without the towel. Try not to crack the cake. But if you get cracks never mind. 🙂

PumpkinRolls20

14. Wrap this with the kitchen towel from top and let it set in refrigerator for couple of hours. You can even do it over night. 

PumpkinRolls22

15. After refrigeration for several hours unwrap the cake roll on a tray .

PumpkinRolls23

16. Cut it diagonally into half from the center.

PumpkinRolls24
17. Keep slicing it on an angle into smaller pieces.

PumpkinRolls25
18. Serve with your favourite cup of Coffee or simply like that.

Other things you can try with Pumpkin are: Pumpkin ka Halwa, Pumpkin Puree Buns.

PumpkinRolls_Featured2
[whohit]PumpkinRolls[/whohit]

[yumprint-recipe id=’67’] 

ArbiMasalaCurry_Featured1
Arbi or Arvi is a close kin of potato, widely available in Indian Vegetable Market during summers. Its known as Colocasia, Taro and even Eddo in English. It is much more starchy than potato and cooked in various ways. I typically like Sookhi Arbi Fried and Arbi Ajwaini, the way my mom makes it.  Last three years I was deprived of eating this vegetable, which happens to be one of my favourites, because in Mexico it wasn’t available. So this summer we made this at least once every single week.

This is for the first time I was trying my hand on Arbi Masala Curry. I never had Arbi ever in a curry or gravy before, so I was a little skeptical. But to my surprise it came out delicious. I would love to make this again.

Directions:
1. Thoroughly wash arbi with water. I am using a different variety of arbi found on hills during this time. Therefore, it is longer and slender in size.

ArbiMasalaCurry1

2. Put arbi in a pressure pan and add water. Close the lid and let it cook for 5-6 whistles or 8-10 minutes or till arbi is cooked. Don’t let the arbi get mushy. 

ArbiMasalaCurry2

3. Once the arbi has cooled, gently remove its skin and cut it into half lengthwise. Keep aside.

ArbiMasalaCurry3

4. In a blender add tomatoes , ginger and green chilies to make a fine puree.


ArbiMasalaCurry4


ArbiMasalaCurry5


5. In a wok pour oil and add Cumin seeds and Carom seeds.


ArbiMasalaCurry6


ArbiMasalaCurry7


6. After tossing them for a minute add tomato puree to the wok.

ArbiMasalaCurry8

7. Add salt, red chili powder and turmeric and combine.


ArbiMasalaCurry10


ArbiMasalaCurry11


ArbiMasalaCurry9


8. Let the curry thicken and reduce till you see oil separating the masala. It should take 6-9 minutes on high flame.

ArbiMasalaCurry12

9. Add water and bring it to a boil.

ArbiMasalaCurry13

10. Add boiled arbi slices and let it simmer for a couple of minutes till right consistency is reached.

ArbiMasalaCurry14

11. Sprinkle some Garam Masala and Fresh chopped Coriander.


ArbiMasalaCurry15


ArbiMasalaCurry16


Serve hot with Chapati or Swang ke Chawal.

You can even try other recipes for Vrat Makhaney ki KheerSwang ke Chawal ki KhichdiGajar ka Halwa RasgullaAnaar Aloo ka Raita, Sabudana Khichdi, Sabudana Tikki and Kachalu Aloo ki Chaat.

ArbiMasalaCurry_Featured2
[whohit]ArbiMasalaCurry[/whohit]

[yumprint-recipe id=’66’]


Sabudana-Tikki_Featured2
Sabudana Tikki or Croquettes are simple to make and taste simply delicious. They make a perfect Party entree. You can serve them with Pudina Chutney. The mixture can be made well in advance and cooked just before serving. Since they are without Garlic Onion, they can be enjoyed even during Navratas and other fasts. 

The fusion of various ingredients gives it a addictive flavour and crispy texture. Its even popular among kids. All you have to do is control the spice and chilies. I make it for my kiddo as an evening snack and tea time snack for us.

Directions:

1. Soak Sabudana in water for 2-3 hours . The water should be enough to cover the sabudana. If you add more water they will become mushy. Also boil and peel potatoes.

SabudanaTi1

2. Put the potatoes in a bowl and mash them using a potato masher or simply with your clean hands.

SabudanaTikki1

3. Add pre soaked sabudana to potatoes. Drain water before adding to potatoes, if any.

SabudanaTikki2

4. Add red chili powder.

SabudanaTikki3

5. Add chopped coriander leaves, chopped green chilies and finely grated ginger.

SabudanaTikki4
6. Add salt or sendha namak and amchur.


SabudanaTikki5


SabudanaTikki6


7.  Combine them together using your fingers.

SabudanaTikki7
8. Pour Oil in a pan and let it heat on a medium low flame. I plan to use little oil to fry them so Iam using a flat bottom pan. I f you wish to deep dry them you can pour oil in a wok byall means. Also you can use Paniyaram or Appe Maker Pan for oil free sabudana vada.

SabudanaTikki8

9. Take little mixture in your palms and shape it into a croquette or tikki. Make them thin so that they cook till inside even on frying. Remember we are not deep frying them. You can roll them into balls, if you like.

SabudanaTikki9

10. Put them on the pan to fry with hot oil.

SabudanaTikki10

11. Cook on both sides till they acquire golden brown colour.

SabudanaTikki11
12. Transfer them on a kitchen paper towel so that extra oil can be absorbed by paper. Remove them after a minute or else the paper might stick to the croquettes.

SabudanaTikki12

13. Serve them hot with Pudina Chutney or Spinach Coriander Chutney without onion garlic.

You can even try other recipes for Vrat Makhaney ki KheerSwang ke Chawal ki KhichdiGajar ka Halwa RasgullaAnaar Aloo ka Raita and Kachalu Aloo ki Chaat.

SpinachCorianderChutney_Featured3


[yumprint-recipe id=’65’]

 Sending this post to:Recipe-Contest-Logo