Tag

SweetTooth

Browsing


Last time I made this cake was for my Hommie’s Birthday in Mexico. That time I was a beginner. I still remember how I had rejoiced when it had come out soft and delicious. I wanted to make this again and was looking for occasions, And one day I just decided to heck to occasion I am gonna bake this without occasion! So here it was a delicious chocolate vanilla cake to quench my craving .


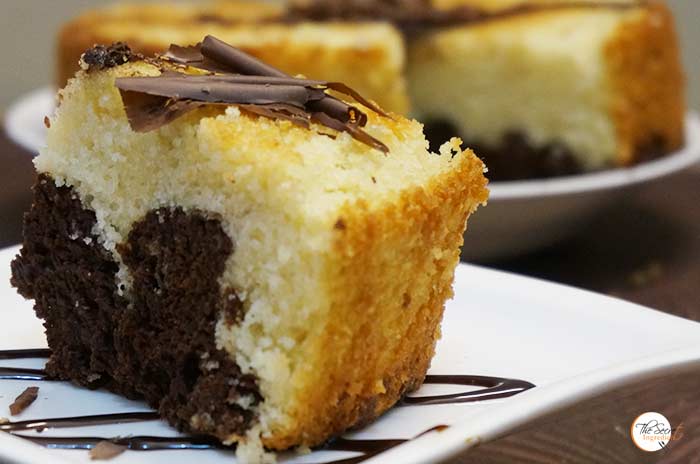
This recipe is simple, rich and sinful. If you are looking for an eggless, low calorie cake I must warn you, you are on the wrong page. You must look for Eggless Almond Vanilla Cake or Wacky Vegan Chocolate Cake or Eggless Banana Bread with Melon Seeds or Orange Cake with Candied Orange Peel Filling. This cake is buttery and for the very reason irresistible. 

Directions:

1. Preheat your oven to 180 degree Celsius (Learn more about Oven Temperatures and Conversions). Grease a baking tin thoroughly with cooking oil and set aside.

DSC01568
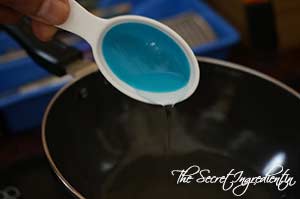
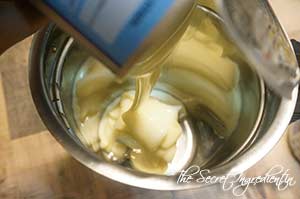
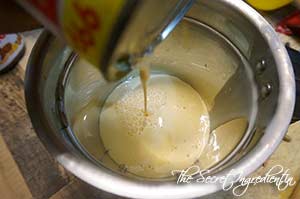
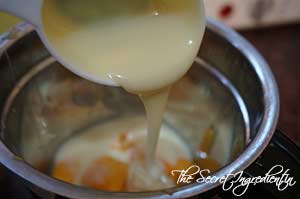
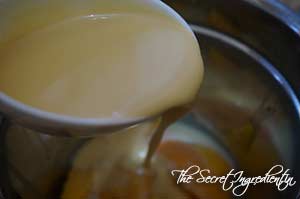
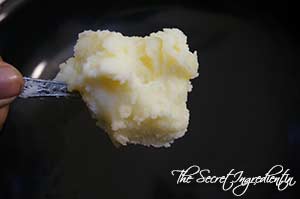
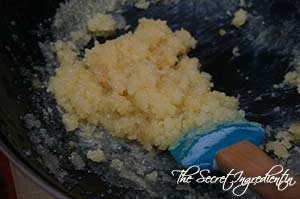
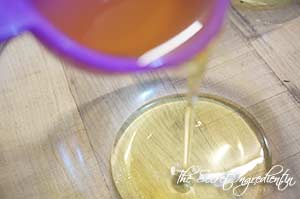
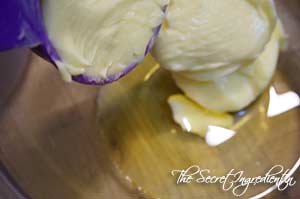
2. In a bowl add some vegetable oil and butter at room temperature. (Learn how to bring butter at room temperature instantly).


DSC01555


DSC01556


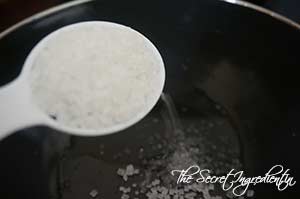
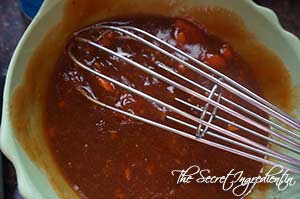
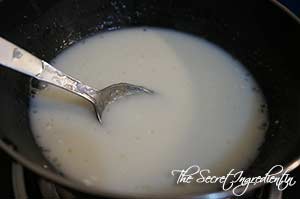
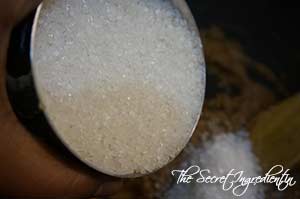
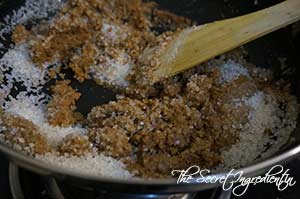
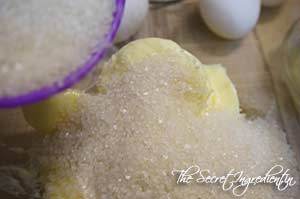
3. Add sugar and cream them together using a whisk.


DSC01557


DSC01558


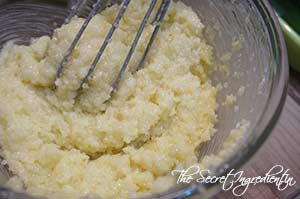
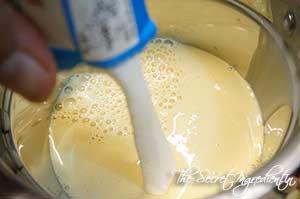
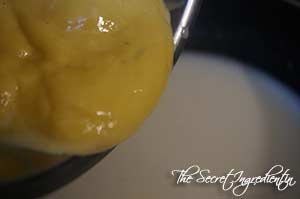
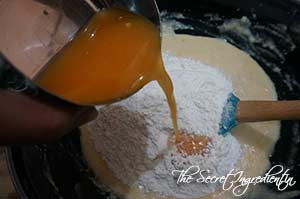
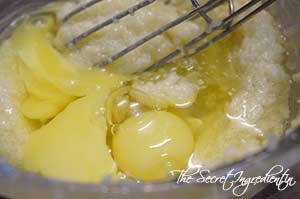
4. Add eggs and keep whisking till you get a pale yellow colour creamy batter. This till take good 5 minutes if you are using a hand whisk. 

DSC01559

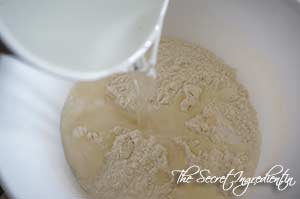
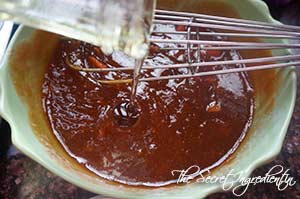
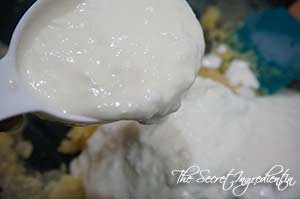
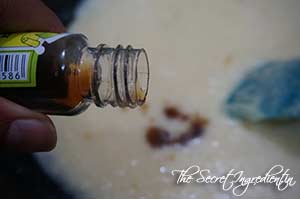
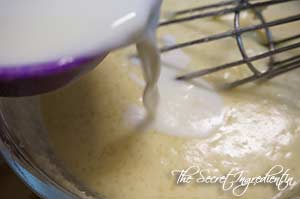
5. Add vanilla essence and milk. Combine. Set aside.


DSC01560


DSC01566


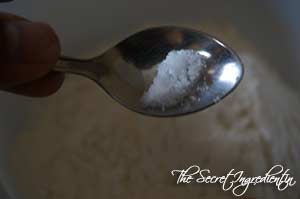
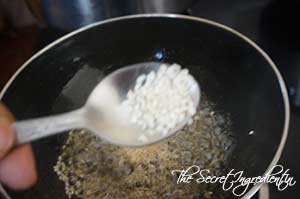
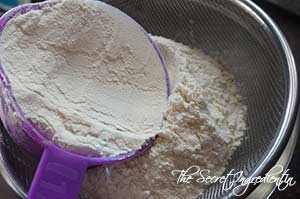
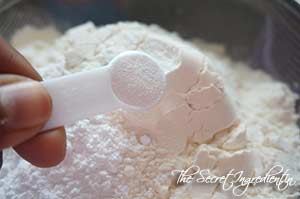
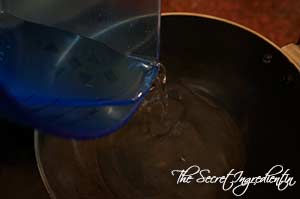
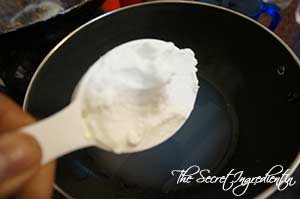
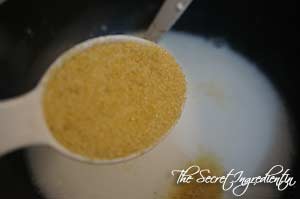
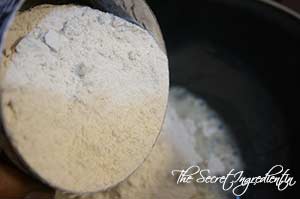
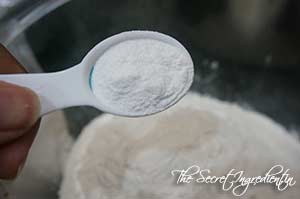
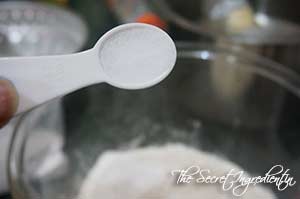
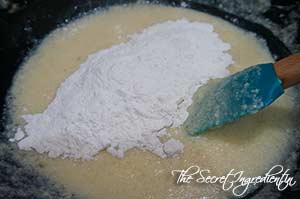
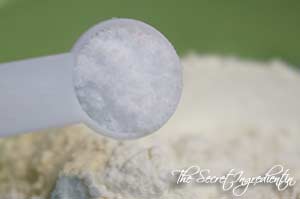
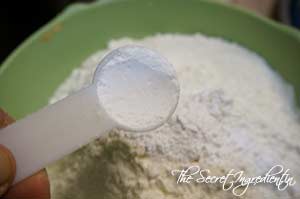
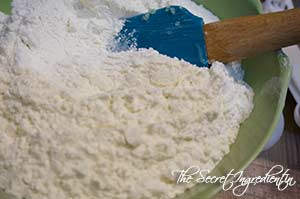
6. In another bowl add All purpose Flour, Baking Powder and Salt.


DSC01561


DSC01563


DSC01564


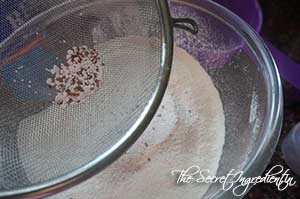
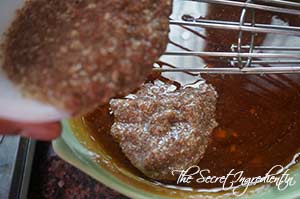
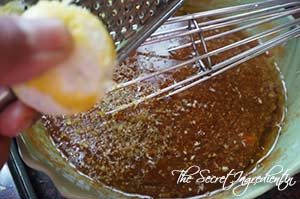
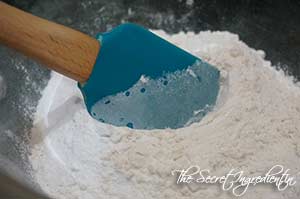
7. Gently combine the dry ingredients using a spatula.

DSC01565

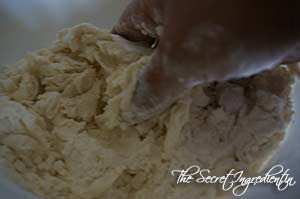
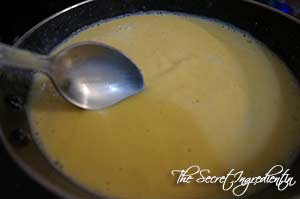
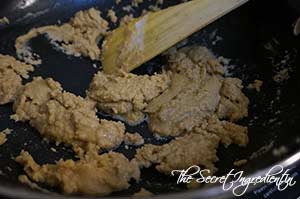
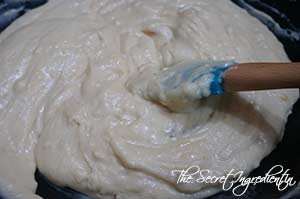
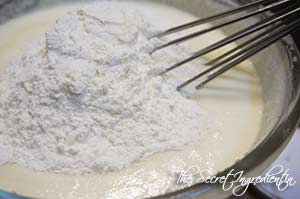
8. Add dry ingredients little by little to the wet ingredients and combine until everything is moistened. Do not over mix please.

DSC01567


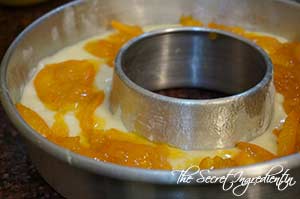
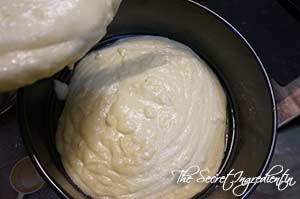
9.  Pour 2/3 of the batter in the greased pan.

DSC01569

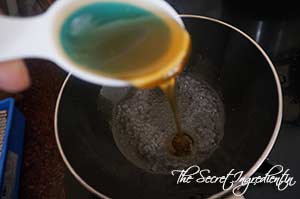
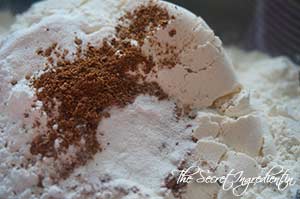
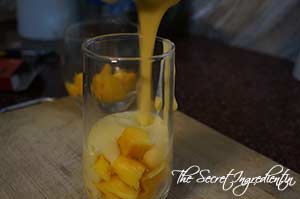
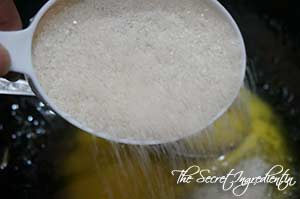
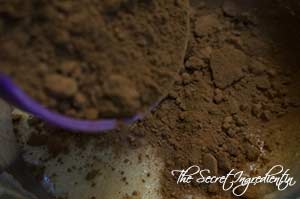
10. Add Cocoa powder in rest of the batter and mix well.


DSC01570


DSC01571


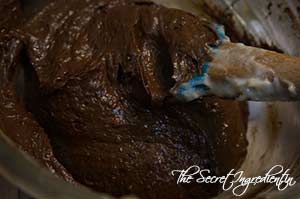
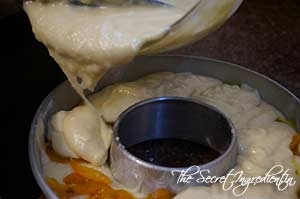
11. Pour the chocolate batter on top of the vanilla batter and cover the surface.

DSC01572
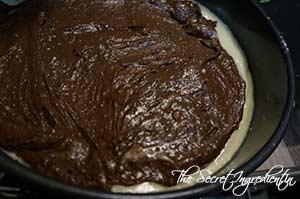
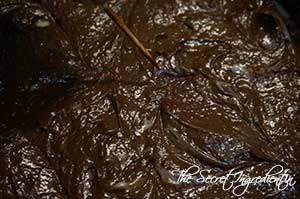
12. Use a toothpick or spatula to make random swirls for the marble effect. Do not go crazy.

DSC01573
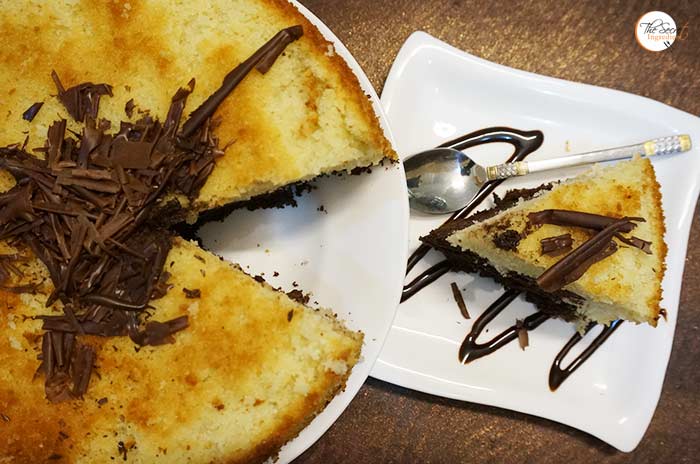
13. Bake it in the preheated Oven for 1 hour and 15 minutes or until the toothpick inserted comes out clean. Let it cool completely before slicing the cake or it will crumble. You can ice if you like or just decorate the top with chocolate shavings. Serve with chocolate sauce.

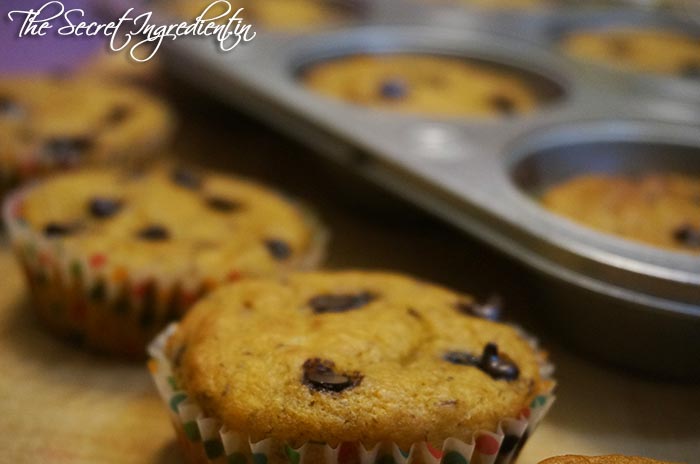
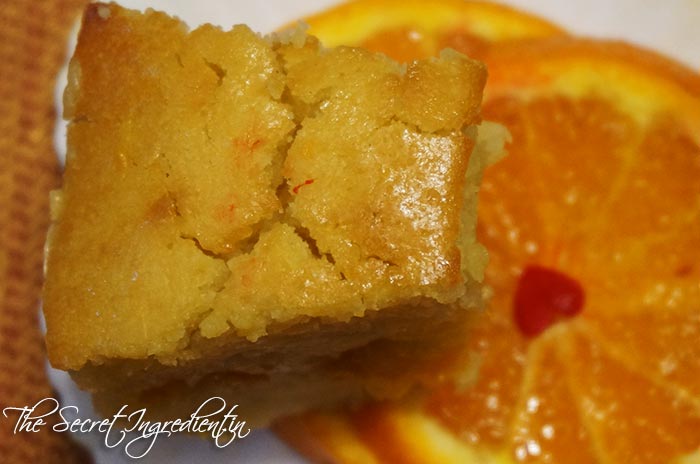
You can try other cake  and sweet bread recipes from The Secret Ingredient : Eggless Almond Vanilla Cake, Wacky Vegan Chocolate Cake, Eggless Banana Bread with Melon Seeds , Orange Cake with Candied Orange Peel Filling, Persimmon Rum Cake, Apple Raisins Streusel BreadSpiced Raisins Bread, Pumpkin Cake Rolls.

[whohit]MarbleCake[/whohit]

[yumprint-recipe id=’130′]

Darsaan_Featured1

Darsaan is a popular Chinese Dessert made with fried wonton noodles. The noodles are drizzled with Honey and Sesame seeds and accompanied with a scoop of  Vanilla Ice cream . I remember eating this dessert at Berco’s, time and again. Infact me and my husband loved eating this during our dating time πŸ˜‰

Darsaan_Featured3

Out of the blue one afternoon my husband said we have ice cream in freezer lets eat Darsaan, I was zapped by his unexpected request   demand. I did a quick google and found it can be made readily without much effort. If you have wonton noodles you can make it in a jiffy but nevertheless wonton noodles can be made from scratch. Within no time it was ready to be devoured and it tasted cent percent like the way they serve at Chinese restaurants, On the occasion of Mother’s day make this for your mommy and express your love to her.

Directions:
1. In a bowl add some, all purpose Flour, baking powder and  salt. 


DSC00955


DSC00958


DSC00957


2. Add oil and water and knead a soft dough. Let it rest covered for 20 minutes.


DSC00959


DSC00960


DSC00961


3. Divide the dough into half. Roll each dough into 9 inch circle using a roller pin. You may use dry flour to ease rolling.


DSC00962


DSC00963


DSC00964


4. Cut it into thin strips. Make sure the strips are thin otherwise they will puff up and will not be crunchy.

DSC00968

5. Heat the oil in a wok and gently put the stripes to fry on medium low flame. Once they have achieved golden colour remove them on a paper towel to absorb extra oil.


DSC00969


DSC00970


DSC00971


6. For the honey sauce add water and sugar in a sauce pan. Bring it to a boil. 


DSC00973


DSC00974


7. Once the sugar syrup comes to a boil add honey and sesame seeds. Turn the flame off. Do not heat further for the sauce can thicken very fast.


DSC00975


DSC00976


8 . Place the fried noodles on a serving platter and pour the honey sauce over it. Serve with a scoop of Vanilla Ice cream.

You can even enjoy more summer delights like Mango Coconut Milk Pudding. Pista Badam Kulfi.

Darsaan_Featured2[whohit]Darsaan[/whohit]

[yumprint-recipe id=’125′]

PistaKulfi_Featured2
Kulfi is a traditional popular frozen dairy dessert from Indian Subcontinent. This ice cream is much more creamier and denser than usual ice creams and can be made in variety of flavors like Mango, cardamom, saffron and many many more.. The distinct feature of kulfi is that it is not whipped during making so it has much longer melting time. I have always enjoyed eating Kulfis all my life. I prefer them over regular ice creams any day.

Traditionally Kulfi is made by boiling and reducing milk for long hours and then flavoured using rose,  cardamom and saffron. It is a a time consuming process and a tedious one for sure. When I was in Mexico I was introduced to evaporated milk, which is reduced milk without sugar in a can. This changed my life forever. You can make kulfis in 5 minutes.. yes 5 minutes! Just put all the ingredients in a blender, pulse, pour in moulds and freeze. Its that simple. Even a kid can do it,

PistaKulfi_Featured1
No one on earth could say they were not authentic in taste. I grabbed the evaporated cans from the INA market in Delhi and have stacked them in my pantry for the summer season ahead. Afterall our house hold is a kulfi freak!

Directions:
1. In a blender add a can of condensed milk.

DSC01163
2. Also add evaporated milk. You can buy Evaporated milk from our The Gourmet Shop.

DSC01164
3. Add cream.

DSC01165
4. Add some Almonds and Pistachios along with Cardamom. You can even use cardamom powder if you don’t like the shell of cardamom in your mouth. 


DSC01166


DSC01167


5. Add two slices of bread. Yes any normal bread, don’t frown, trust me.

DSC01168

6. Blend this all together into a fine runny mixture.

DSC01169

7. Add saffron strands and mix.

DSC01170
8. Pour them in Kulfi moulds, or popsicle moulds or even small earthen pots. I used age old kulfi moulds gifted to me by my dear Mother in law πŸ™‚

DSC01173

9. Cover with its lid or cap or you can even use a aluminium foil to cover it. Dont forget to insert a popsicle stick or wooden stick for ease of handling and eating it later.

DSC01174

10. Freeze for 2-4 hours. It took me 2.5 hours.

DSC01175

11. Run them under or dip them in hot water for a few seconds and pull out the popsicle out of the mould. You are ready to enjoy your kulfi. We like to eat with rose sugar syrup. It tastes divine!

You can even try our Mango Coconut Milk Pudding.

PistaKulfi_Featured3[whohit]BadamPistaKulfi[/whohit]

[yumprint-recipe id=’124′]

PapayaMuffins_Featured3


Having Ripe Bananas and unfinished Papayas can cause equal amount of stress. All we do is throw them down the bin. Few days back I came up with a solution to use overripe bananas in the form of Whole Wheat Banana Bread with Melon Seeds.

But then I had a Papaya which was huge in size and not sweet at all. So as a result no one touched it.  My husband kept insisting to throw it away. I was hell bent not to waste food. Then I suddenly remembered by Friend and Fellow Blogger Priti from Indian Khana had posted a recipe of Papaya Muffins some time back. It sounded adventurous because I wasn’t sure if Papayas in muffins will taste good. But I trust Priti and her cooking. I went ahead and wola! No body could tell the muffins had papaya. It tasted great. I shared with teachers and staff in the school, they all loved it. 

PapayaMuffins_Featured2
What a happy ending to Mr. Papaya. After trying them out I agree with what Priti says about these muffins, you do not smell papaya at all. The lemon zest covers it so well and tastefully. This recipe is going to take a permanent place in my kitchen. Thanks to Priti for this incredible idea and recipe. This one is for you dear friend πŸ™‚

Directions:
1. Preheat the oven for 10 minutes on 180 degree C (Learn more about Oven temperatures and Conversions). Line a muffin tray with muffin cups or liners. Set aside.

DSC01036
2. Peel and cut the papaya in cubes. Put them in a blender and make a smooth puree. Keep aside.

DSC01017
3. Coarsely grind some flax seeds in a coffee or dry grinder and transfer it in a small bowl.


DSC01018


DSC01019


4. Add 4 table spoon of water in the flax powder and let it rest for ten minutes of until needed.

DSC01020
5. In a large bowl sieve All purpose Flour, Baking powder and Baking Soda.


DSC01021


DSC01025


DSC01026


6. Also add salt and cinnamon powder. Sieve the dry ingredients and throw the lumps away.


DSC01027


DSC01028


7. In the meanwhile Pour Papaya Puree in an other bowl and add sugar to it. I used brown sugar you can use white if you please or mix of both. Whisk it together until sugar melts.


DSC01029


DSC01030


8. In the same bowl add oil and flax seed mix. Combine using the whisk.


DSC01031


DSC01032


9. Add lemon zest, just the yellow green portion. mix well.

DSC01033
10. Mix dry and wet ingredients little by little and keep folding using a spatula. You should not beat hard just gently till the flour is all wet and moistened.

DSC01034
11. Add chocolate chips and fold gently. Leave a few for the topping.

DSC01035
12. Using an ice cream scooper put the batter in the muffin cups. Fill them only 3/4 of the cup. Leave room for it to rise.

DSC01037

13. Sprinkle some choco chips on top and bake it in the preheated oven for 20-25 minutes. Keep an eye on them after 15 minutes. The cooking time can vary with ingredients and oven temperature. Keep checking by inserting a tooth pick, if it comes out clean its ready.

DSC01038

14. After baking let them rest on a wire rack for fifteen minutes or till they become cool. Enjoy with your favourite cup or Coffee or Tea.

PapayaMuffins_Featured1

[yumprint-recipe id=’122′]

MangoCocoPudding_Featured2
Summers are here and so are Mangoes. They are refreshing , delicious and everyone’s favourite, specially my father. He LOVESSSSSS Mangoes. He is a mango addict. I am not kidding! I have seen my father hunting for mangos at 2’o clock at night. Huh! My father’s pantry is often full of boxes of Mangoes. He is a diabetic but he cannot leave Mangoes. What can I say! 

So coming back to mangoes, we are surrounded by mangoes everywhere these days and making delicious mango puddings makes the experience even more exciting. I came across this Korean blogger who had made this coconut milk Mango Pudding. I was simply awestruck. I had all ingredients on hand I made it immediately. This was soo delicious!

Directions:

1. Slice one mango and cut it into cubes. Put the cubes in the serving jars or glasses.


DSC00697


DSC00698


DSC00699


2. Scoop out the pulp of the other two mangoes and put them in the blender.

DSC00700

3. Add Condensed Milk and Evaporated milk to the blender. 


DSC00701


DSC00702


4. Pulse the blender to make a smoothie.

DSC00703
5. In the meanwhile, in a pan add some water, Coconut milk and  gelatine or agar agar for vegetarian option. 


DSC00705


DSC00706


DSC00707


6. On low heat dissolve the gelatine using a spoon. Put the flame off. Add the mango smoothie to the coconut mix and stir till well combined.


DSC00708


DSC00709


DSC00710


7. Pour them in the jars or glasses with mango cubes. Give it a gentle stir and chill till set. It should take 2 hours.


DSC00712


DSC00713


8. Serve chilled with more mango Cubes on top or may be some Pomegranate seeds.
You can even try our Orange Cake, Apple Streusel Bread, Pumpkin Cake Rolls and Persimmon Rum Cake.

MangoCocoPudding_Featured1[whohit]MangoCocoPudding[/whohit]

[yumprint-recipe id=’120′]


Attey Ka Halwa is a dense pudding made with whole wheat flour and clarified butter or ghee. And when this same halwa is made by Gurudwaras, Sikh Temple as an offering it becomes pious and is known as Kaddha Prasad or Babaji ka Prasad.  Its offered to devotees at all Sikh Gurudwaras across the globe. It is deliciously sinful but also very easy to make. Its laden with ghee and has a lot of calories but once in a while its okay to indulge in it. Right? πŸ˜› Like any halwa it requires the right proportion of ingredients and gets ready in no time. It is also known as degh, tribhavli for equal measures of sugar, flour and ghee.

My mother has always made Sooji ka Halwa but I never had Attey ka Halwa at home except Gurudwaras. I got this authentic recipe from a friend, Sonu Mahajan whom I met on a food group on FB. We have never met in real life and talked once on phone but I feel I have some relation with her , may be prior birth :). Whenever I talk to her on web I feel she is my sister from another Mother. I thank Almighty for making us friends and for the bond we share. This post goes out to you Sonu! Love you Partner :*

Directions:

1. Add Ghee or Clarified butter in a wok or kadhai.

DSC00646

2. Add Whole Wheat Flour to the melted ghee.

DSC00647

3. Keep tossing it on medium low flame till it turns dark brown in colour. You can moderate the temperature of flame from high to medium to low. But ensure to keep tossing continuously for it can burn. It should take good 15 minutes.


DSC00648


DSC00649


4. In the meanwhile heat water in a container and bring it to a boil.


DSC00652


DSC00654


 5. Once the flour has roasted and achieved the dark brown colour add sugar and combine.


DSC00650


DSC00651


DSC00653


6. At this stage add water and turn the Flame OFF. No sim no low but OFF.

DSC00652

7. Now keep stirring it till the water and flour has become dense into a semi solid, gooey form. Ensure there are no lumps. The test of doneness is when the halwa has centred and leaves the sides.


DSC00655


DSC00656


 8. Serve hot and enjoy.

You can even try the Langar wali Dal served at Sikh Gurudwaras.

Try other Halwa recipes of Sooji Halwa, Kaddu ka Halwa, Gajar ka Halwa, Swang ke Chawal ka Halwa, Seb Dalia Halwa.


[yumprint-recipe id=’116′]

My fasts are on and I barely want to cook specially for myself. I guess the joy of cooking comes when you have a company. My husband knows my habit and he often volunteers to eat whatever I cook for myself during Navratras. So I have a company and I wanted to make this phirni with Swang Ke Chawal. Barnyard Millet Saffron Milk Pudding will be a more better of knowing this.

Swang ke chawal is not rice but belongs to millet family. It is know by various names like, Samvat, Sama, Vari, Varai, Samwa, Jhangora, Samo, Morio, Mario, Moraiaya, Bhagar & Kuthirai Vaali. This cereal is gluten free and is usually cultivated on marginal lands where rice doesn’t grow. Making this phirni is super simple all you need is little patience . I have experimented so much with barnyard millet that I call myself a pro πŸ˜‰ . I have made with this Swang ke chawal ki khichdi and Swang ke chawal ka halwa .

Directions:

1. Soak the millets in water for at least an hour or so.

DSC08042


2. Drain the water and wash the millets till you get clear water.

DSC08046

3. Add Milk in the wok or Heavy bottom Pan. Bring it to a boil and keep simmering it on low till reduced to half. Keep stirring in between.

DSC08047

4. Once the milk is reduced to half add the soaked Millets into the milk.

DSC08049

5. Add Sugar and combine.

DSC08050

6. Heat little milk and saffron strands in it and let it rest for some time.

DSC08051

 7. Mix this saffron milk to the millets in the pan.

DSC08052


8. Add crushed cardamom to the milk.

DSC08053

10. Chop some Cahews or any nuts of your choice and add to the simmering milk.


DSC08054


DSC08055


11. Keep simmering till the milk reaches thick consistency. It should take 3-4 minutes,

DSC08056

12. After the phirni has cooled down a bit, transfer to serving bowls and refrigerate for 2-3 hours before serving. I  like to garnish it with some fresh rose petals, saffron strands, crushed pistachio and love.

Other recipes for fasting you can try are: Healthy Kachalu Aloo ChatTangy Mint PotatoesKhajoor Til Ke LaddooVrat Wale Dahi-Paneer KebabsSwang Ke Chawal Ka HalwaSwang Ke Chawal Ki PhirniTapioca Coconut Milk Pudding with Strawberry PreservePaneer Ki KheerSabudana KheerKaddu Ka Halwa,  Sabudana Khichdi .

[yumprint-recipe id=’110′]

Barnyard Millets or Swang Ke Chawal are mostly used during the fasting period when cereals and other grains are abstained. Swang ke chawal is not rice but belongs to millet family. It is know by various names like, Samvat, Sama, Vari, Varai, Samwa, Jhangora, Samo, Morio, Mario, Moraiaya, Bhagar & Kuthirai Vaali. This cereal is gluten free and is usually cultivated on marginal lands where rice doesn’t grow.  

I shared my mother’s recipe of Swang Ke Chawal ki Khichdi sometime back, which was well appreciated by all my readers. So I decided to share Halwa recipe with Swang ke Chawal. It is very easy to make, simply proportions have to be correct just like the Sooji Halwa. The texture of this halwa is a little grainy but that is the beauty of it πŸ™‚

Directions:

1.In a wok add ghee also known as clarified butter and add Swang ke Chawal. Keep roasting Swang ke Chawal in ghee by continuously stirring it till it turns slight golden brown. Keep an eye and do not let the Swang ke Chawal burn.


DSC00357


DSC00358


2. In a separate vessel take water which should be four times the sugar. Add two opened pods of cardamoms and sugar. Give it two to three boils till the sugar is dissolved in water. We do not intend to make a thick sugary syrup, just some sugar dissolved water. Keep it aside.


DSC00359


DSC00361


DSC00362


 3. In the meanwhile chop almonds and cashews. If you wish to use any other dry fruits you can always go ahead.

DSC00364


4. Add the dry fruits to the Wok to get roasted all with swang ke chawal. If you like you can roast it separately and then add to the wok.

DSC00366


5. Now as your swang ke chawal are roasted add the light sugar syrup. Continue to stir so that no lumps are formed. Do not worry if you see the mixture has turned watery.

DSC00369


6. Keep stirring on high flame till it becomes dense and swang ke chawal has absorbed entire syrup. Keep stirring till you see halwa has left the sides and centered itself.


DSC00370


DSC00371


 Serve hot.

You can try our other halwas like Sooji Ka Halwa, Kaddu Ka Halwa, Gajar Ka Halwa, Seb Daliye ka Halwa.

Other recipes for fasting you can try are: Healthy Kachalu Aloo ChatTangy Mint PotatoesKhajoor Til Ke LaddooVrat Wale Dahi-Paneer KebabsSwang Ke Chawal Ki PhirniTapioca Coconut Milk Pudding with Strawberry PreservePaneer Ki KheerSabudana KheerKaddu Ka Halwa,  Sabudana Khichdi .

[whohit]SwangKChawalHalwa[/whohit]

[yumprint-recipe id=’108′]

OrangeCake_Featured3

I have never been fond of Orange Flavour specially the artificial flavour in ice lollies, squashes, sweet orange candies. But when I saw the recipe of this cake it enticed me. The recipe said it is made with fresh orange juice and candied orange peels. The idea itself was so inviting that I took a plunge and decided to bake this cake.

To my surprise the cake came out delicious, fluffy and moist in spite of being eggless. The most impressive thing about this cake was the center filling with candied orange peel. It  took this cake to the next level of deliciousness. Now you will understand why I chose this special cake for my 100th post on my blog πŸ™‚ πŸ™‚

Directions:

1. Make Candied Orange Peels and keep aside. You can follow this recipe. Grease a Bundt pan or any pan of your choice. Do not forget to dust it with flour so that the cake can come out easily after baking. Preheat your oven for 10 minutes on 180 degree Celsius. Learn More about Oven temperatures and Conversions.


DSC09849


DSC09850


2. In a bowl add All purpose flour, salt and baking powder. Combine  them together and keep aside.


DSC09740


DSC09741


DSC09742


3. In another bowl add melted butter and sugar, Whisk them together. You can even use an electric whisker,


DSC09743


DSC09744


4. Add Yogurt or curd and keep whisking together till everything is smooth and lump free.

DSC09745


5. Add Vanilla extract and combine.

DSC09746

6. Pour half of wet ingredients in dry ingredients and combine.

DSC09747

7. Add Orange juice and mix everything. Add rest of the flour mix and combine. 

DSC09749


8. Add little milk to make the batter runny. Gently mix until everything is moistened. Do not over mix.

DSC09752


9.Pour half the batter in a greased pan and spread the candied orange peel all over the surface.

DSC09851

10. Now pour rest of the batter on top of the candied peels.

DSC09855

11.Bake in preheated oven on 180 degree Celsius  for 40-50 minutes or until the toothpick inserted comes out clean. Let the cake cool down completely before you invert it on a tray. Otherwise the cake will break. Cut into slices and enjoy the delicious, moist orange cake.

You can even try our other cakes and breads like Apple Raisin Streusel Bread, Persimmon Rum Cake, Pumpkin Cake Rolls. You can learn how to make Candied Orange Peel at home.

OrangeCake_Featured1

 [whohit]OrangeCake[/whohit]

[yumprint-recipe id=’102′]

DatesLaddoo_Featured1

This post is specially for diet conscious people or people who are watching their weight. These dates ball are quick and easy to do with minimal ingredients. When you want to snack on to something guilt free or quench your mid night cravings this is a perfect treat. Store them in air tight jar and these go a long way. They look small but they are very filling, so ensure you make small sized balls.

When I made them last time I never got an opportunity to store them for they were gone by the evening. Yes me and my husband had 6 each ;). A little dieting never hurts anyone πŸ˜›

Directions:

1. Remove the seeds from the dates.

DSC08289
2. Dry roast the almonds and walnuts or pecans in a pan in batches. You can use any nut of your choice. Ensure you keep tossing them for you don’t want to burn them. Coarsely grind them in a grinder leaving a few chunky pieces to give texture to the balls.


DSC08290


DSC08291


DSC08298


3. In the same pan add the sesame seeds and toss them to get a slight colour and crunch on them. Roast them on a low medium flame.


DSC08292


DSC08293


4.  Add the pitted dates in a coffee grinder or normal grinder and make a sticky paste.


DSC08294


DSC08295


5. In a pan add little butter or ghee or if you are vegan add coconut oil or any neutral oil.

DSC08296

6. Add the dates and cook them in ghee for about 2-3 minutes. The dates will absorb all the butter.

 DSC08297

7. Now add the ground chunky nuts and mix them to combine evenly using a spatula. Soon everything will be well combines in one thick paste.


DSC08299


DSC08300


8. Let the mixture cool down a bit. Take a spoon full of it in your palm and make a smooth ball with it.


DSC08301


DSC08302


9. Place all the balls in a plate and one by one roll them in roasted sesame seeds.


DSC08303


DSC08304


 10. Store them in an air tight jar and enjoy them whenever you feel like snacking!

DatesLaddoo_Featured2


[whohit]DatesLaddoo[/whohit]

[yumprint-recipe id=’101′]