Tag

BachelorFood

Browsing


TomYum_Featured2
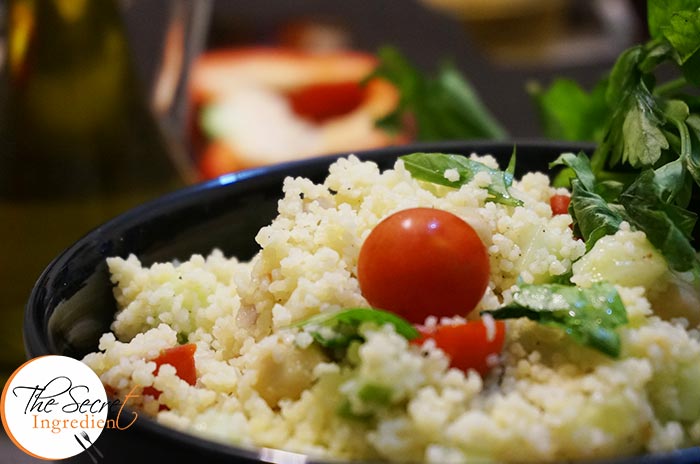
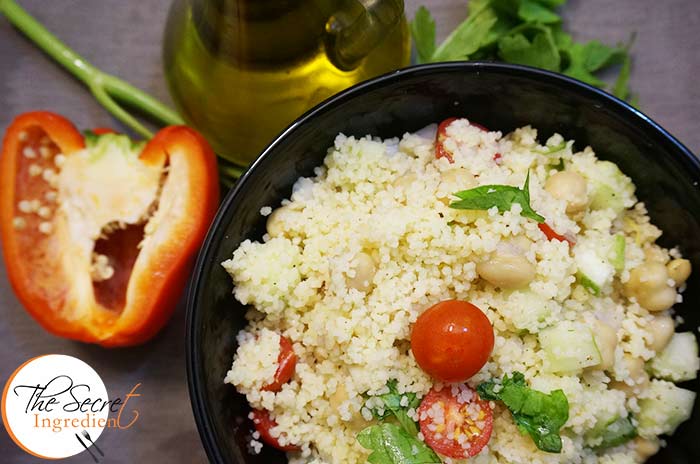
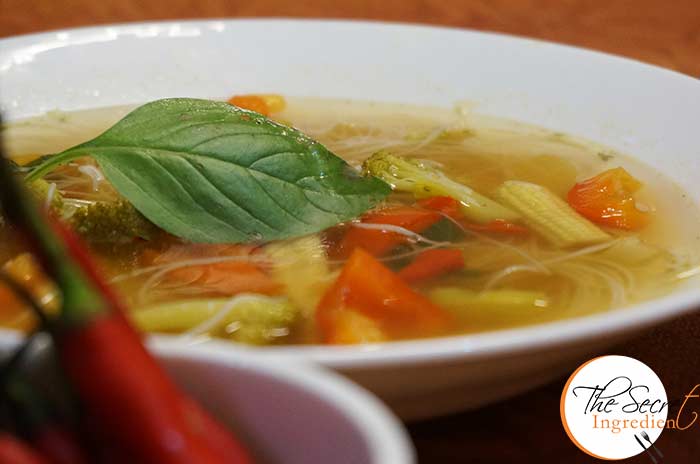
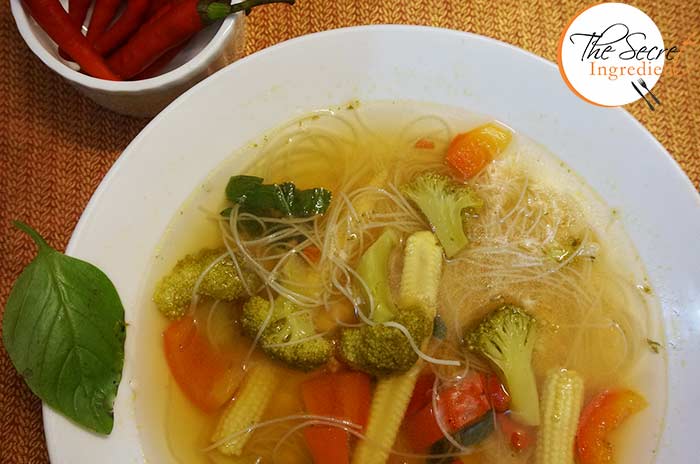
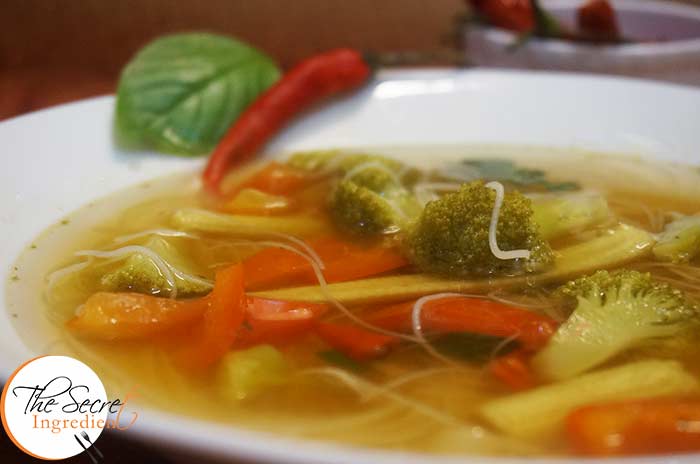
I have always been fond of clear soups. They are flavourful, light and don’t make you feel overly full. One day I was surfing on web to look for some delicious clear soup options. I was spell bound by the description of Thai Tom Yum Soup. It was spicy, sour and loaded with veggies. I planned to give it a try as I had lemongrass growing in my kitchen garden and galangal I had just got from my recent Delhi trip. I wanted to make a vegetarian version of this without shrimps. There are so many variations available. This is without coconut milk and tomatoes. Also I haven’t used any Thai Red Curry Paste.

TomYum_Featured3

Tom Yum soup was followed by Thai Red Curry and Sticky rice in main course. That night’s dinner was unforgetful. I am still recovering from the blast of flavours I had in my mouth. If you have never tried this soup before I would say go for it. Its a weight watcher’s haven.

Directions:

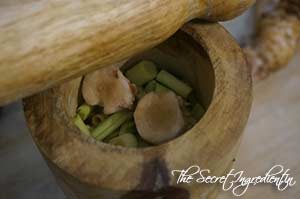
1. Chop lemongrass into small pieces. Last three inch you can trim and discard.

DSC02979
2. Peel off Galangal root and roughly cut into pieces.

DSC02981
3. Put both chopped lemongrass and galangal in a mortar and crush it with a pestle. You want it to release its juices.

DSC02982
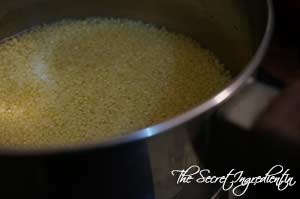
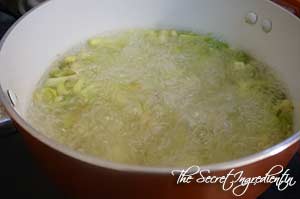
4. Bring water to a boil in a dutch oven or any pot. Add crushed lemongrass and galangal.

DSC02983

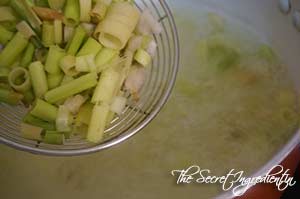
5. Let the water boil further along with lemongrass and galangal. Reduce heat to low and simmer 15 minutes. Remove galangal and lemongrass.


DSC02984


DSC02985


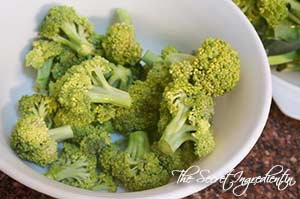
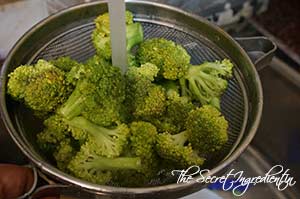
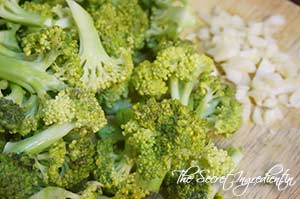
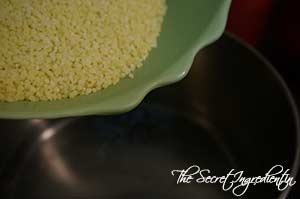
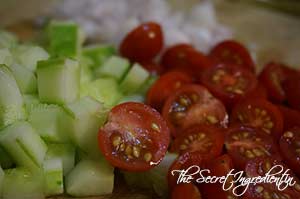
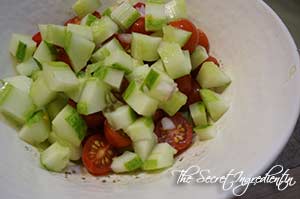
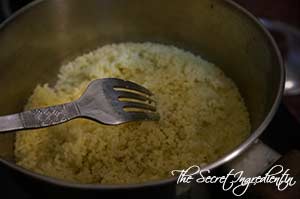
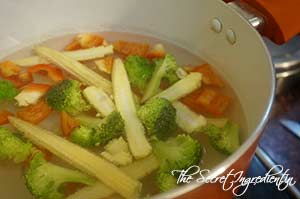
6. Chop some veggies . I used Baby corn, Broccoli, Red & yellow bell pepper and mushrooms.

DSC02986

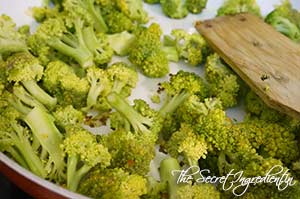
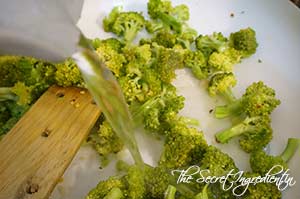
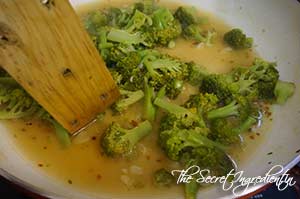
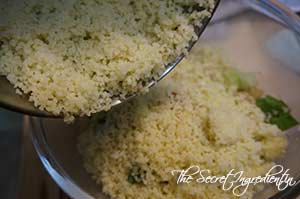
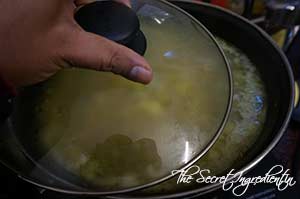
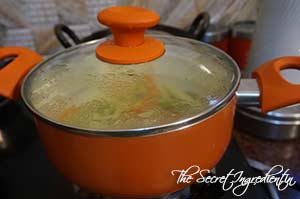
7. Add them to the pot of aromatic water. Put the lid on. Boil them till the vegetables are tender.


DSC02987


DSC02990


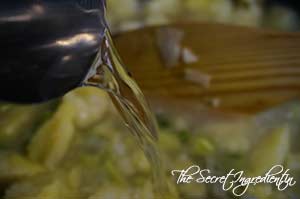
8. Add Fish sauce. If you are a vegetarian skip this altogether. 
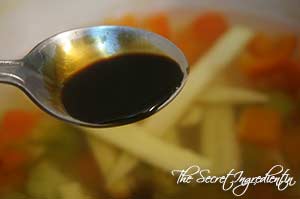
DSC02991
9. Add Soy Sauce.
DSC02992 
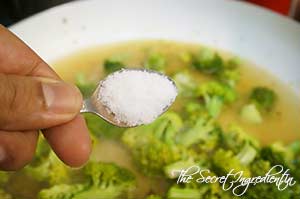
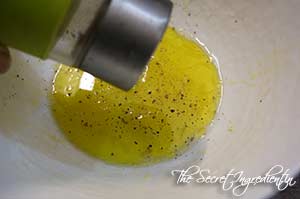
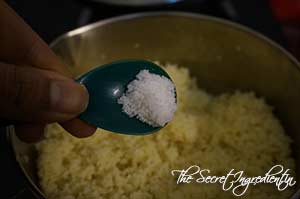
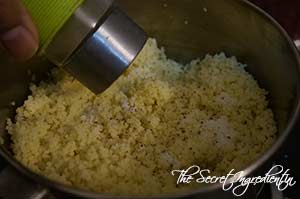
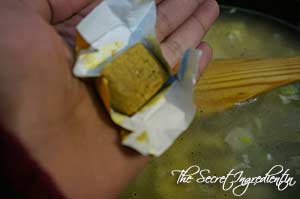
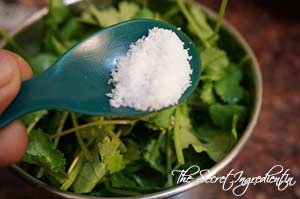
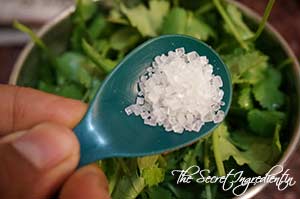
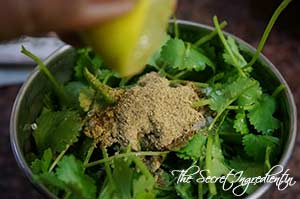
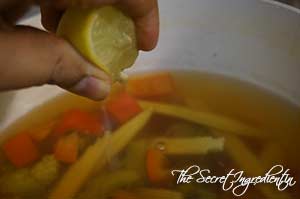
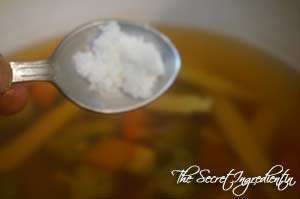
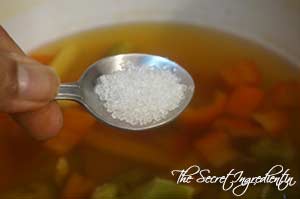
10. Squeeze in a juice of lemon. Season with salt and also add sugar to balance the acidity.


DSC02994


DSC02995


DSC02996


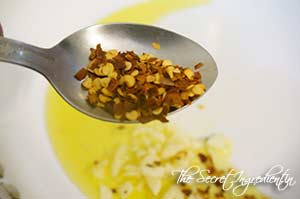
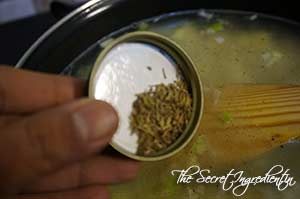
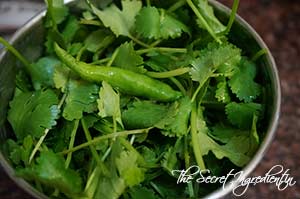
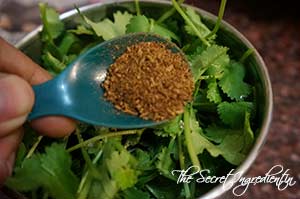
11. Add chopped red chilli .

DSC02989
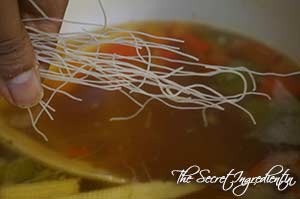
12. Add Rice Noodles and give the soup a boil.

DSC02997
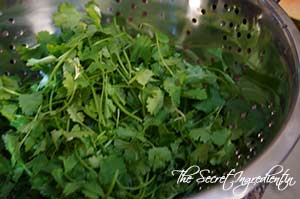
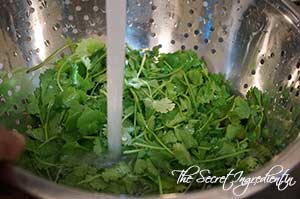
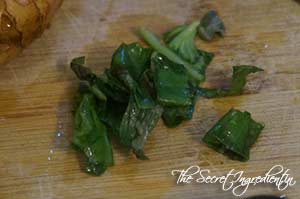
13. Garnish with torn basil leaves and chopped coriander leaves.

DSC02998

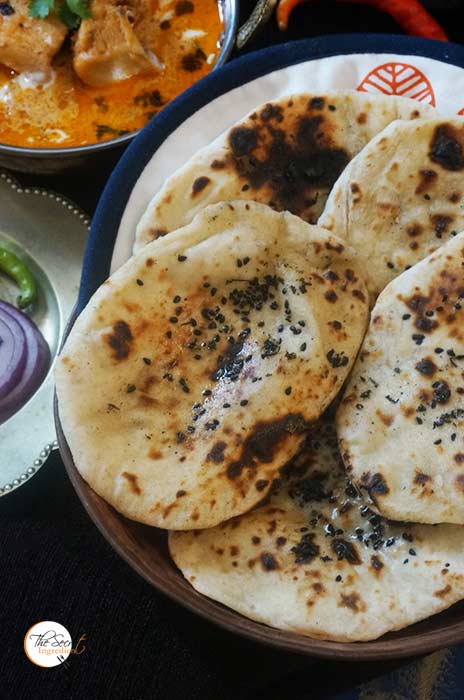
 Serve hot and enjoy the freshness of flavours.

Other International Cuisines you can try here are: Italian Frittata, Chinese Steamed Baos with Custard Filling, Mexican Black Bean Salad with Mangoes, Argentine Chimichurri.

If you are looking for more healthy soups : Russian Beetroot & Vegetable Soup , Zucchini Garlic Soup with Yak Cheese ShreddingsClassic French Potato Leek Soup Chicken Soup With RiceTomato SoupSoup of Red Kidney Beans.

TomYum_Featured1[whohit]TomYumVeg[/whohit]

[yumprint-recipe id=’174′]

BrocolliPasta_Featured1

I have mentioned time and again that I am a die hard fan of pasta in all its forms. I don’t mind if its cheesy, boozy, creamy or simply loaded with veggies. Pasta holds a sacred place in my heart. As my little up is growing up I have seen similar or more violent streak to devour pasta. This makes the matter serious since we are a complete pasta loving family and I  have to come up with more and more pasta recipes. Sigh!

BrocolliPasta_Featured3

Well  lately my husband and me are on a load shedding spree, which means creamy and cheesy pastas have to be kept at bay. 🙁 I decided to make this healthier pasta with Broccoli which uses no cream and very little cheese and that too is purely optional. I have always loved such simple pastas. You can enjoy them without feeling very guilty ;). I had earlier posted Sauteed Red Bell Pepper & Olive Pasta which was also without cream and cheese. 

Directions:

1. Cut the broccoli into florets and wash them under running water to make it dirt free. Boil pasta as per packet instructions. You can choose any shape you like. Learn how to boil pasta perfectly.


DSC01649


DSC01650


2. Drain water and keep the florets aside. Also finely chop some garlic or you can even mince it. 

DSC01651

3. In a pan add some olive oil.

DSC01652
4. Add chopped garlic and Red chilli Flakes to the oil. Let the oil get infused with garlic and red chili flakes while it heats up.


DSC01653


DSC01654


5. Add broccoli florets and give it a toss in the oil. 

DSC01655
6. Add water and stock bullion. Or you can use vegetable stock only.


DSC01656


DSC01657


7. Season with salt and let it cook covered on low medium heat till broccoli is partially cooked. You will be able to cut the broccoli with a spatula.


DSC01658


DSC01663


8. Add boiled pasta to the broccoli and combine.

DSC01664
9. Season it with Ground Black pepper.

DSC01665
10. Add little butter to make it smoother.

DSC01666
11. Top it up with Parmesan Cheese.

DSC01668
12. Serve it hot with Cheesy Garlic Bread on the side.

Other Pasta recipes you can try here are: Pasta Alla Vodka, Sauteed Red Bell Pepper & Olive Pasta, Avocado Parsley Pasta, Sundried Tomatoes Pasta Salad, Spaghetti Vegetable Pasta , Chicken Lasagna, Mushroom Lasagna in Bechamel Sauce.

BrocolliPasta_Featured2[whohit]BroccoliPasta[/whohit]

[yumprint-recipe id=’173′]


BrocolliPasta_Pintrest


CousCousSaLad_Featured1

I was introduced to Couscous in Mexico. Couscous is a traditional North African dish made with semolina and cooked by steaming it. Its a staple food throughout the North African cuisines of Tunisia, Algeria, Morocco, Mauritania and Libya. But owing to its nutritional benefits its becoming very popular all across the globe. Couscous is made by sprinkling semolina with water and rolled with hands to form small tiny balls. It is then sprinkled with dry flour to keep them from sticking. These small balls or pellets are then steamed and cooked.

CousCousSaLad_Featured2

In a modern scenario couscous is available as instant couscous which requires soaking in hot water for 5 minutes. For this salad I have used Instant Couscous. The salad featured in Laura Vitale’s Webspace and I was so determined to try it. I found couscous and made it. It was sooo delicious, filling and refreshing. Its a boon for all weight watchers. The salad can be made with any fresh vegetable you like. You can use green onions, boiled beans even blanched beans.

Directions:

1. In a sauce pan add some water and bring it to a boil. Turn the flame off.

DSC03006
2. Now add equal quantity of couscous to the water. Let it get soaked and cooked for 5 minutes. Put the lid on and let it rest.


DSC03007


DSC03008


DSC03009


3. Peel a fresh cucumber. I partially peeled it for an amazing texture. Also deseed it using a spoon.


DSC03010


DSC03011


4. Chop Cucumber into bite size pieces. Also chop onions and tomatoes. I have used cherry tomatoes you can use any. Set aside.

DSC03012
5. For the vinaigrette, in a bowl add zest of a lemon. Also add lemon juice.


DSC03013


DSC03015


3. Add Extra Virgin Olive Oil and season it with salt and pepper.


DSC03016


DSC03017


DSC03018


4. Add chopped veggies to the  vinaigrette along with boiled chickpeas.


DSC03019


DSC03020


5. Top it with fresh chopped parsley and combine everything.

DSC03021
6. Fluff up the soaked couscous with a fork.

DSC03022
7. Season it with salt and pepper.


DSC03023


DSC03024


8. Add couscous to the veggies and combine. Check for additional salt and pepper.

DSC03025
9. Serve at room temperature or refrigerate overnight to enhance the flavours. Its a full meal in itself.

You can even try Fresh Mexican Black Bean Salad with Mangoes, Avocado Parsley Pasta, Sundried tomatoes Pasta Salad, Thai Green Papaya Salad Recipe.
[whohit]CouscousSalad[/whohit]

CousCousSaLad_Featured3

[yumprint-recipe id=’158′]


There is a story behind this Andhra Style Mango Rice. This year I have been lucky for I made so many recipes with raw mangoes which I received from my home tree from my parents. I went crazy and made Instant Raw Mango Pickle South Indian Style, Sweet and Sour Mango Chutney, Aam Ka Panna, Raw Mango and Mint Chutney. When a few mangoes were left almost turning yellow I decided to do this Andhra style Manga Sadam or Mango Rice. It was incredible!!!


There is another version of this rice and also from Andhra Pradesh which uses freshly grated Coconut. It is often made on the occasion of Maavinakayi Chitranna. But the recipe I am posting is simpler and you would probably have all the ingredients at home.

Directions:
1. Wash and soak rice in a bowl for 15 minutes. Cook in a pressure pan that every rice grain remains separate. Keep aside. In the meanwhile peel some raw mangoes and grate them using a grater.


DSC01819


DSC01820


2. In a wok or karahi add some oil. And heat it up.

DSC01821
3. Add mustard seeds and let them crackle. 

DSC01822
4. Add Urad Dal and Channa Dal. Toast them in oil for a few seconds on low flame till they are nice and golden.


DSC01823


DSC01825


5. Add Kaddhi Patta and saute for a second.

DSC01826
6. Add peanuts and dry red chilies. Toss them in the oil.


DSC01827


DSC01829


7. Add asafoetida and turmeric powder.


DSC01830


DSC01831


8. Add grated raw mango and mix well for a few seconds. 

DSC01832
9. Add red chili powder and Salt. Mix well and turn the flame off.


DSC01833


DSC01834


10. Gently mix the Mango Masala  to the cooked rice.

DSC01835 
11. Serve hot with Instant Mango Pickle South Indian Style and some Papads.

Other Rice recipes you can try here : Curd Rice, Kathal ki Biryani, Mint Pulav , Mushroom Risotto

[yumprint-recipe id=’157′]

PotatoLeeksSoup_Featured1
Its the same time of the month when Spatula Force member and my fellow blogger Stuti Baxi challenged us to do French Cuisine. I wanted to do something fancier but then this Classic Potato Leeks soup was on my to-do list for a very long time. I grabbed the opportunity and hurriedly made this soup.

In India you do not find Leeks, so I used the close kin to Leeks which is green onions. Leeks are sweeter and have a subtle flavour but on the other hand Green Onions are a little strong in taste. This did not stop me from making this french classic and that too Julia Child’s recipe. The soup turned out much more delicious than I have initially thought. The incredible taste of thyme with soft creamy potatoes and butter sauteed green onions gave this soup an amazing texture and divine taste. 

Directions:

1. Wash Potatoes and boil them in a pressure pan for 10 minutes or for three to four whistles depending upon the size of potatoes. Peel the skin and set aside.

2. In the meanwhile wash * and chop green onions or leeks if you are using. 

DSC09517
3. Finely chop Garlic. Set aside.


DSC09518


DSC09519


4. In a pot add some butter and add chopped garlic and saute for a minute.


DSC09521


DSC09522


5. Add chopped green onions to the butter. Reserve a few greens for  the garnish. Let it cook for  8-12  minutes until they sweat, soften and acquire some colour. Stir occasionally. 

DSC09523
6. Add slightly mashed potatoes to the pot.

DSC09524
7. Add Bay Leaf, Salt and Pepper.


DSC09526


DSC09527


DSC09528


8. Add vegetable stock. I have used stock cube and have added water.


DSC09529


DSC09530


9. Add thyme. I used dried thyme. And cover with a lid. Let it simmer for ten to twelve minutes on medium high flame.


DSC09531


DSC09532


10. Remove the bay leaf and turn the flame off.  Puree the soup with hand held blender when it has cooled off.


DSC09533


DSC09534


DSC09535


11. Turn the flame on and cook for a few minutes more. Add a little Cream and turn the flame off.

DSC09536
112. Serve hot and garnish with some reserved greens or fresh chives. I paired this soup with some paneer stuffed oven fresh buns. What a meal it was 🙂

Other soups you can try on The Secret Ingredient are: Borsch: Classic Russian Beetroot Soup, Tomato Soup, Mexican Chicken Soup with Rice, Mexican Black Bean Soup, Zucchini Garlic Soup with Zak Cheese Shreddings.

PotatoLeeksSoup_Featured2[whohit]potatoLeekSoup[/whohit]

[yumprint-recipe id=’151′]

Naan, nan or Khamiri is a leavened oven baked flat bread popular all over the world. Traditionally, yeast is used to leaven this bread and it is cooked in open fire tandoor or ovens. But this modern technique makes perfect naans using no yeast and can be quickly made on your stove top without much hassle. 

This flat bread is common to West, Central and South Asia. Indians are believed to have learnt this recipe from the Arabs who ruled India in ancient times. There are a lot of variations of Naan, they can be smeared with Butter or Ghee or Stuffed with filling and some seasoned with sesame or nigella seeds and many many more variatons. This recipe features the basic version of Naan. I shall be posting more naan recipes in future 🙂

Directions:

1.  In a bowl add All purpose flour.

DSC01324
2. Make a well in the center and add curd and sugar.


DSC01325


DSC01326

3. Also add salt and baking soda.


DSC01327


DSC01328


3. Combine the ingredients in the bowl using your fingers. Add little lukewarm water and knead into a supple soft dough. Do not use a lot of water.


DSC01329


DSC01330


4. Add oil and knead again for 5 minutes.


DSC01331


DSC01332


5. Cover the dough ball and let it rest for 1 to 2 hour for fermentation.

DSC01333
6. After resting knead the dough again.

DSC01357
7. Roll the dough into oval shape using a rolling pin and dry flour. You can choose to do any shape. Sprinkle on top sesame seeds or nigella seeds if you like and roll again.


DSC01358


DSC01359


8. Heat an iron tawa with slight curved surface or iron skillet. Take the rolled naan in your palm  and wet the surface with slight water.

DSC01360
 9. Immediately place it on the hot tawa, wet side down. You will notice the naan will stick to the surface and the top surface will start rising at different places.

DSC01361
10. That is when you should lift the tawa with your sturdy hands and flip it on the burner flame. You can move the tawa over the flame to cook the naan evenly. You should see naan browning in patches.

DSC01364 
11. Once naan has evenly browned place the tawa on the flame and remove the naan using a metal spatula.

DSC01365
12. This is how your naan should look from behind, just perfectly cooked.

DSC01371

13. Smear the top surface with Ghee or Clarified butter. Naan pairs great with any dry gravy or curry. Try this with Butter Chicken, Shahi Paneer, Palak Paneer or even Dal Makhani.

Other Breads you can try from Indian Cuisine: Kulcha, Matar ka Parantha.

 [whohit]TawaNaan[/whohit]

[yumprint-recipe id=’141′]

RagiDosa_Featured2
Finger Millet also known as Ragi or Manduwa or Maddua is a gluten free cereal which is very widely consumed in Uttrakhand where I live now. Other than Uttrakhand it is a popular millet used in South Indian Cuisine. It is a rich source of amino acid methionine. 

In Kumaoni Cuisine Maddua plays a very important role for it is used in variety of dishes. It is also believed to keep you warm in thick cold. So I  was tempted to try this super cereal and got its flour from the local market. I debuted my adventure with Ragi by making this Instant Ragi Dosa. I saw Malar Muthu’s post one fine day and could not resist trying it. It was quick and required no fermentation. Luckily I had Sambar and Coconut Chutney to accompany this. The dosa came out crisp and so delicious. Even my kiddo loved them to the core.

Directions:

1. In a bowl add urad dal or split black gram. Add water and let it get soaked for atleast an hour.


DSC00597


DSC00598


2. Transfer the soaked lentils with little water in a blender. Make a fine paste.


DSC00600


DSC00602


3. Transfer the paste to a larger bowl and add to it. Ragi Flour and Rice Flour.


DSC00603


DSC00604


DSC00605


4. Add water and salt. Combine to make a dosa consistency batter. It should neither be thick nor thin.


DSC00606


DSC00607


DSC00608


5. Heat a flat griddle or dosa tawa. Add oil. Wipe it with a kitchen towel.

DSC00609

6. Add a ladle full of batter in the center and spread in circular motions evenly. Drizzle some oil on dosa and flip after 2-3 minutes. Cook on the other side.


DSC00610


DSC00611


7. Serve hot with Coconut Chutney and Sambar.

You can even try this dosa with Tomato Onion Garlic Chutney.
Other dishes from South Indian Cuisine which you can try here: Curd Rice, Quick Rava Idli

RagiDosa_Featured3[whohit]RagiDosa[/whohit]

[yumprint-recipe id=’129′]

Darsaan_Featured1

Darsaan is a popular Chinese Dessert made with fried wonton noodles. The noodles are drizzled with Honey and Sesame seeds and accompanied with a scoop of  Vanilla Ice cream . I remember eating this dessert at Berco’s, time and again. Infact me and my husband loved eating this during our dating time 😉

Darsaan_Featured3

Out of the blue one afternoon my husband said we have ice cream in freezer lets eat Darsaan, I was zapped by his unexpected request   demand. I did a quick google and found it can be made readily without much effort. If you have wonton noodles you can make it in a jiffy but nevertheless wonton noodles can be made from scratch. Within no time it was ready to be devoured and it tasted cent percent like the way they serve at Chinese restaurants, On the occasion of Mother’s day make this for your mommy and express your love to her.

Directions:
1. In a bowl add some, all purpose Flour, baking powder and  salt. 


DSC00955


DSC00958


DSC00957


2. Add oil and water and knead a soft dough. Let it rest covered for 20 minutes.


DSC00959


DSC00960


DSC00961


3. Divide the dough into half. Roll each dough into 9 inch circle using a roller pin. You may use dry flour to ease rolling.


DSC00962


DSC00963


DSC00964


4. Cut it into thin strips. Make sure the strips are thin otherwise they will puff up and will not be crunchy.

DSC00968

5. Heat the oil in a wok and gently put the stripes to fry on medium low flame. Once they have achieved golden colour remove them on a paper towel to absorb extra oil.


DSC00969


DSC00970


DSC00971


6. For the honey sauce add water and sugar in a sauce pan. Bring it to a boil. 


DSC00973


DSC00974


7. Once the sugar syrup comes to a boil add honey and sesame seeds. Turn the flame off. Do not heat further for the sauce can thicken very fast.


DSC00975


DSC00976


8 . Place the fried noodles on a serving platter and pour the honey sauce over it. Serve with a scoop of Vanilla Ice cream.

You can even enjoy more summer delights like Mango Coconut Milk Pudding. Pista Badam Kulfi.

Darsaan_Featured2[whohit]Darsaan[/whohit]

[yumprint-recipe id=’125′]

My fasts are on and I barely want to cook specially for myself. I guess the joy of cooking comes when you have a company. My husband knows my habit and he often volunteers to eat whatever I cook for myself during Navratras. So I have a company and I wanted to make this phirni with Swang Ke Chawal. Barnyard Millet Saffron Milk Pudding will be a more better of knowing this.

Swang ke chawal is not rice but belongs to millet family. It is know by various names like, Samvat, Sama, Vari, Varai, Samwa, Jhangora, Samo, Morio, Mario, Moraiaya, Bhagar & Kuthirai Vaali. This cereal is gluten free and is usually cultivated on marginal lands where rice doesn’t grow. Making this phirni is super simple all you need is little patience . I have experimented so much with barnyard millet that I call myself a pro 😉 . I have made with this Swang ke chawal ki khichdi and Swang ke chawal ka halwa .

Directions:

1. Soak the millets in water for at least an hour or so.

DSC08042


2. Drain the water and wash the millets till you get clear water.

DSC08046

3. Add Milk in the wok or Heavy bottom Pan. Bring it to a boil and keep simmering it on low till reduced to half. Keep stirring in between.

DSC08047

4. Once the milk is reduced to half add the soaked Millets into the milk.

DSC08049

5. Add Sugar and combine.

DSC08050

6. Heat little milk and saffron strands in it and let it rest for some time.

DSC08051

 7. Mix this saffron milk to the millets in the pan.

DSC08052


8. Add crushed cardamom to the milk.

DSC08053

10. Chop some Cahews or any nuts of your choice and add to the simmering milk.


DSC08054


DSC08055


11. Keep simmering till the milk reaches thick consistency. It should take 3-4 minutes,

DSC08056

12. After the phirni has cooled down a bit, transfer to serving bowls and refrigerate for 2-3 hours before serving. I  like to garnish it with some fresh rose petals, saffron strands, crushed pistachio and love.

Other recipes for fasting you can try are: Healthy Kachalu Aloo ChatTangy Mint PotatoesKhajoor Til Ke LaddooVrat Wale Dahi-Paneer KebabsSwang Ke Chawal Ka HalwaSwang Ke Chawal Ki PhirniTapioca Coconut Milk Pudding with Strawberry PreservePaneer Ki KheerSabudana KheerKaddu Ka Halwa,  Sabudana Khichdi .

[yumprint-recipe id=’110′]

PhalahariCorianderChutney_Featured1

Navratri or Navratras are very special to me. I feel so rejoiced during the entire fasting period. I love to fast, cook and feast. Thanks to my mother for introducing new food every time so every time we have something new to try.

You can eat Sabudana Tikkis, Sabudana Khichdi, Sama k chawal ki Khichdi or simple Aloo Jeera. But everything you eat is accompanied with plain simple curd or in the form of Raita and a chutney to enhance the deliciousness of food. 

Here is one such phalahari chutney which uses minimal ingredients and uses no onion garlic but primarily coriander. My mother has been making this as long as I remember. She also makes another pharahari chutney of Spinach Coriander but thats only if your fasting rules allow eating Spinach.

Directions:

1. Separate the coriander leaves from the thick stem. You can spare the tiny soft stems.

DSC00312

2. Wash the coriander thoroughly under running water.

DSC00314

3. Put the washed coriander leaves in a grinder along with green chilies. I am using one because my husband has a sour throat these days.

DSC00315


4. Add to it sendha namak or rock salt and. little sugar


DSC00317


DSC00316


5. Also add to it roasted cumin powder and chat masala if its allowed as per your fasting rules.


DSC00318


DSC00319


6. Squeeze juice of a lemon.

DSC00321

7. Grind them to form a smooth paste. Check for salt Serve with your favourite food.

You can try other Chutneys and Salsa like Mint Chutney, Coconut Chutney, Chimichurri, Phalahari Spinach Coriander Chutney.

You can try other Navratri Food Like Sama Ke Chawal Ki Khichdi, Kaddu ka Halwa, Rasgulla, Khajoor & Til Laddoo.

PhalahariCorianderChutney_Featured2

[yumprint-recipe id=’107′]